What Do You Call The Place Where Pottery Is Made?
A pottery studio, also known as a ceramics studio or pottery workshop, is a workspace where ceramic artists or potters design, form, decorate, and fire clay to produce pottery. The pottery making process typically involves several key steps:
Clay preparation – Raw clay is wedged or mixed to remove air bubbles and achieve an even consistency. Specific clay types are chosen based on their plasticity, firing temperature, color, etc.
Forming – Potters shape the clay into pottery forms using techniques like wheel throwing, hand building, molding or casting.
Drying – Pottery pieces air dry until they are leather hard. At this stage, potters can trim, carve, or smooth surfaces.
Firing – Bisque firing pottery hardens the clay. Glazes may be applied before a second glaze firing.
Finishing – Final decorative techniques like painting, applying slips, or staining can be done after firing. The pottery is then ready for use.
A pottery studio provides all the necessary equipment, tools, materials, and kilns for potters to create functional, decorative, or sculptural works in clay.
Tools and Equipment
Making pottery requires a variety of specialized tools and equipment. The most essential tools are the potter’s wheel and the kiln.
The potter’s wheel is a circular platform that spins on an axis. As the wheel spins, the potter uses their hands to shape and form the clay. Wheels come in various sizes, with larger wheels used for making bigger pieces. Electric, kick, or treadle wheels provide the spinning motion to shape the clay (Traditional tools used for pottery making).
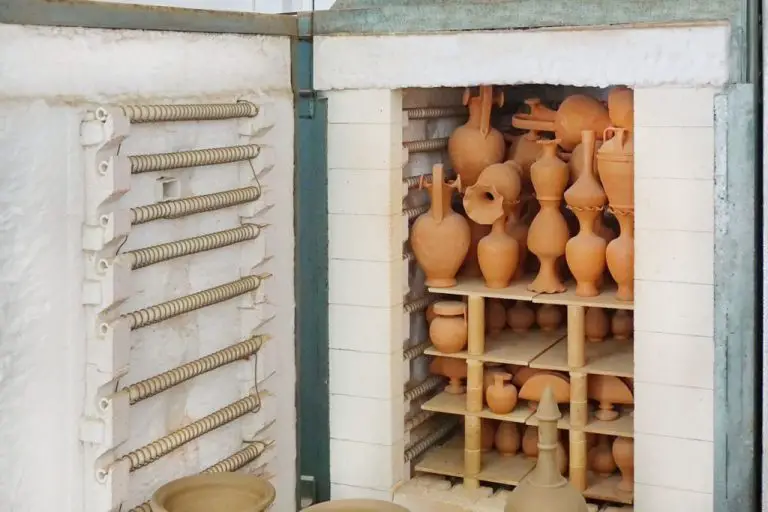
The kiln is an oven designed to fire clay and ceramics at very high temperatures. There are various types of kilns, but most reach over 2,000°F. The intense heat from the kiln hardens and sets the clay. Kilns can run on gas, wood, or electricity. They are essential for transforming soft clay into finished ceramic ware (Pottery making tradition).
Modeling tools like rib bones, loop tools, and sponges help shape and refine the clay. Glazes and stains provide color, shine, and decoration to finished pieces before they go in the kiln for a final firing.
Clay Preparation
Properly preparing clay is an essential first step in pottery making. The potter must select an appropriate clay that suits the type of pottery they want to produce. Clay comes in many varieties, with differing levels of plasticity, shrinkage, porosity, color, and texture. Some common types used in pottery are earthenware, stoneware, and porcelain.
Once an appropriate clay is chosen, the next step is wedging and kneading the clay. This process evenly distributes moisture and removes air pockets from the clay [1]. Wedging entails cutting the clay into chunks, slamming it against a flat surface, and reforming it into a ball shape. The potter repeatedly throws down and reforms the clay until it has a uniform consistency with no cracks or air bubbles. Kneading involves slamming a clay ball against a plaster slab or another hard surface. This also eliminates air pockets and makes the clay pliable. Well-wedged clay is smooth, elastic, and ready for throwing or hand building.
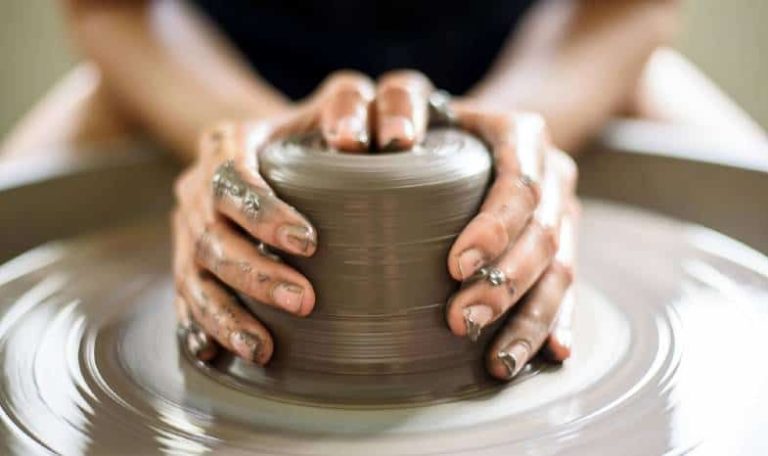
Wheel Throwing
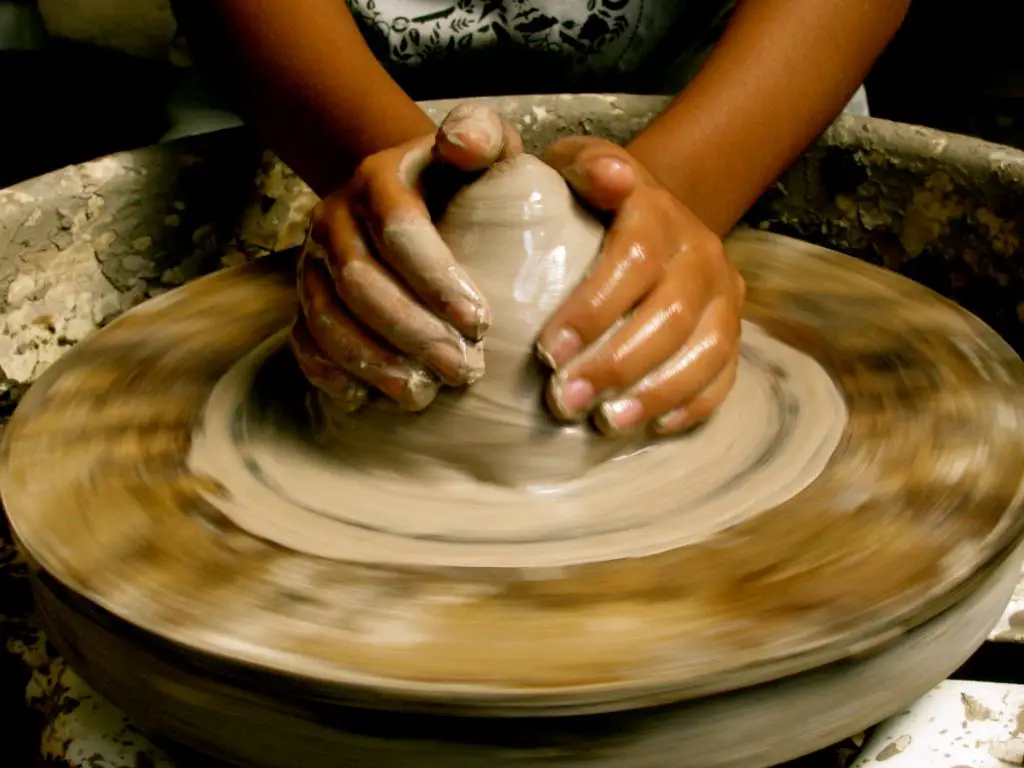
Wheel throwing is a pottery technique that involves shaping clay on a spinning pottery wheel. It takes coordination and practice to center the clay on the wheel and raise it into the desired shape. Here are the main steps in wheel throwing:
Centering the Clay on the Wheel
Centering ensures the clay is securely positioned on the wheel and will not wobble as it spins. The potter applies pressure from both sides and shapes the clay into a cone or dome shape. Centering clay takes focus and a subtle balancing touch.
Opening the Clay
With centered clay, the potter uses their thumbs to press down into the top of the cone shape and open up a well. This opening is stretched and shaped into the basic interior space for the pottery piece.
Raising the Walls
Using gentle pressure from fingers on the inside and outside, the potter lifts and shapes the clay upward to form walls for the pottery piece. An experienced potter works delicately to raise the walls to an even thickness.
Shaping the Pottery
As the wheel spins at a constant rate, the potter uses various tools and hand movements to refine the overall shape. Details like necks, lips, handles and spouts take precision. The potter must maintain an even, symmetrical form.
With dedicated practice on the potter’s wheel, both amateur and professional potters can shape beautiful clay vessels and works of art from a simple lump of clay (https://obby.co.uk/blog/hand-building-vs-wheel-throwing-learn-how-to-make-pottery/).
Hand Building
Hand building is a pottery technique that involves shaping clay by hand rather than using a pottery wheel. There are several hand building techniques that allow potters to create unique ceramic pieces without a wheel. Some common hand building techniques include:
Pinched Pots
Pinched pots are made starting with a ball of clay and pinching and pulling the clay to form the desired shape. According to ClassPop, pinch pots are one of the most basic handbuilding techniques and are great for beginners. To make a pinch pot, roll a ball of clay into an egg shape. Press your thumb into the center of the ball to create the inside of the pot. Then, pinch around theoutside of the pot, rotating as you work to thin the walls.
Coiled Pots
Coil building involves rolling out and stacking coils of clay on top of each other to build up the walls of a pot. As described in this pottery video, to make a coiled pot, roll out “snakes” of clay into long coils. Stack the coils on top of each other, sealing each coil to the one below it by smoothing the clay together from the inside. Coiled pots allow for taller, more intricate shapes than pinch pots.
Slab Built Pots
Slab pots are made by building up flat “slabs” of rolled out clay. According to ClassPop, slab building involves rolling out sheets of clay and cutting shapes that are assembled into a three-dimensional form. Simple slab built pots can be made by cutting a base and walls from clay slabs and joining them together. More complex shapes can be made by cutting custom shapes from the slabs.
Drying and Firing
After throwing or handbuilding a piece, it is vital to allow the clay to dry completely before the initial firing. According to Pottery Firing 101: The Ultimate Guide to Proper Drying Time, most potters recommend allowing pieces to air dry for at least 1-2 weeks. Thicker pieces may require longer. It is important not to rush the drying process, as dried too quickly, cracks and explosions can occur. Once bone dry, the clay is ready for its first firing, known as a bisque firing.
The bisque firing further hardens the clay through a process of vitrification. Clay is heated to approximately 1800-2000°F, causing the molecules to densify. Glazes cannot be applied until after the bisque firing. According to How to Make Large Clay Slab Construction Project Without Cracks, bisque firing is often programmed for a gradual increase over 8-12 hours, sometimes with a period of candling first to thoroughly dry the ware. After bisque firing, glazes can be applied.
The final step is the glaze firing, which melts the glassy coating onto the bisque ware. Glazes mature at various temperatures, typically between 2200-2400°F. The glaze firing schedule must align with the glazes used. Similar to bisque firing, the temperature is gradually increased over 8-12+ hours. The pottery is left to cool slowly inside the kiln before removing. After unloading, the finished pottery pieces are complete.
Applying Glazes
Glazes are an essential part of finishing pottery pieces. They serve both decorative and functional purposes by adding color, texture, and making the clay waterproof. There are many types of glazes to choose from based on the desired effect.
Opaque glazes completely cover the clay body with color. They come in endless colors like blues, greens, browns, and more. Opaque glazes make pottery look smooth and uniform.https://www.thecrucible.org/guides/ceramics/how-to-glaze/
Transparent glazes allow the natural clay color to show through while also adding glossiness. Popular transparent glaze options include celadons, tenmokus, and ash glazes which accentuate the clay’s natural tones.
Textured glazes like crawled, crystalline, and pebbled glazes create interest through varied effects in the glaze surface.https://www.soulceramics.com/pages/glazing-ceramics-basics There are many techniques for applying glazes including dipping, pouring, brushing, and spraying. Dipping allows full glaze coverage by submerging the entire piece. Pouring gives precise control for layered effects. Brushing works well for textured glazes. Spraying is often used for production pottery to quickly and evenly coat.
Proper glaze application takes some practice to learn how different glazes flow and layer together. Testing glaze combinations on test tiles is recommended to achieve the desired finished effects.
Final Touches
After pieces have been fired, there are some final touches that can enhance the look and feel of the finished pottery. Two common techniques used are trimming and burnishing.
Trimming involves using a sharp tool to trim away any excess clay left on the piece after firing. This helps refine the shape and smooth out the edges. Trimmers allow potters to delicately trim away imperfections in the surface of the clay post firing.
Burnishing is a technique where the surface of leather-hard clay is rubbed and polished to create a shiny, glossy finish. According to The Pottery Wheel, burnishing is often described as a “low tech, low fire way of finishing pottery.” It can be done using different tools and materials like stones, wood, bone, metal, plastic or even the potter’s fingers.
The burnishing process compacts the clay particles and seals the surface, making the ware less porous and more water resistant without the need for glaze. When done properly, burnishing can give clay a glass-like finish. It brings out the natural beauty in the clay body through polishing and compression rather than by applying any additional coating or glaze.
Notable Pottery Studios
There are several famous pottery studios around the world that are known for their high-quality ceramic wares. Some examples include:
Avanos in Cappadocia, Turkey is home to many renowned pottery workshops. Ateliers like Hitit Canak, Ikizler Comlek, and Ferhat create beautiful handcrafted pottery using regional clay and ancient Hittite techniques. Their pottery often features earthy tones and geometric or natural designs (source).
Bennington Potters in Vermont, USA has been operating since the 1940s. They are famous for their hand-thrown stoneware mugs, casseroles, and vases glazed in their signature blue hue. Bennington emphasizes simplicity and functional design in their pottery (source).
In England, renowned pottery studios include Leach Pottery, Moorcroft Pottery, and Burleigh Pottery. They helped define the 20th century British studio pottery movement with their masterful shapes, earthy palettes, and decorative styles inspired by the Arts & Crafts era.
Conclusion
Pottery studios serve an important purpose by providing space, equipment, and community for aspiring and experienced ceramic artists. At their core, pottery studios give artists access to essential tools like pottery wheels, kilns, and glazing stations that may be too expensive or impractical to have at home. Beyond physical resources, studios offer invaluable knowledge-sharing and collaboration between artists at all skill levels. They facilitate growth through classes, demonstrations, and critiques. For many, studios are crucial creative havens for practicing pottery as a profession, hobby, or therapeutic activity.
Pottery itself holds an enduring significance as well. The ceramic arts have been a means of creative expression and utility across human history and culture. Working with clay is an accessible way to make functional, decorative, or sculptural works imbued with personal meaning. Experiencing the tactile, messy process of hand-building or wheel-throwing can be satisfying and centering. The unique pieces created, whether mugs, vases, or abstract forms, connect makers to thousands of years of ceramic craftsmanship. Today, pottery studios help sustain this rich heritage while providing space for innovation and contemporary practices.