What Do You Need For Clay Modelling?
Clay modeling is an ancient and beloved art form that allows artists to express their creativity in 3D form. By shaping and molding clay, artists can create sculptures, pottery, figurines, and many other works of art. The goal of this content is to provide an overview of the basic equipment and supplies needed to get started with clay modeling.
Clay modeling requires few supplies, making it an accessible art form for beginners. With clay, a work surface, some simple tools, and a creative spirit, anyone can shape clay into beautiful works of art.
Clay
Clay is the primary material used in modeling and sculpting. There are several types of clay to choose from, each with their own properties and characteristics:
Polymer clay – Made from PVC resin, polymer clay is lightweight and easy to work with. It doesn’t dry out, so you can continue working on a piece over multiple sessions. Polymer clay hardens when baked in a regular oven. Popular brands include Sculpey and Fimo.
Oil-based clay – Also called plasticine, oil-based clay stays soft and pliable. It never hardens, so oil-based clay sculptures don’t maintain their shape over time. Oil-based clay is ideal for practice and non-permanent pieces.
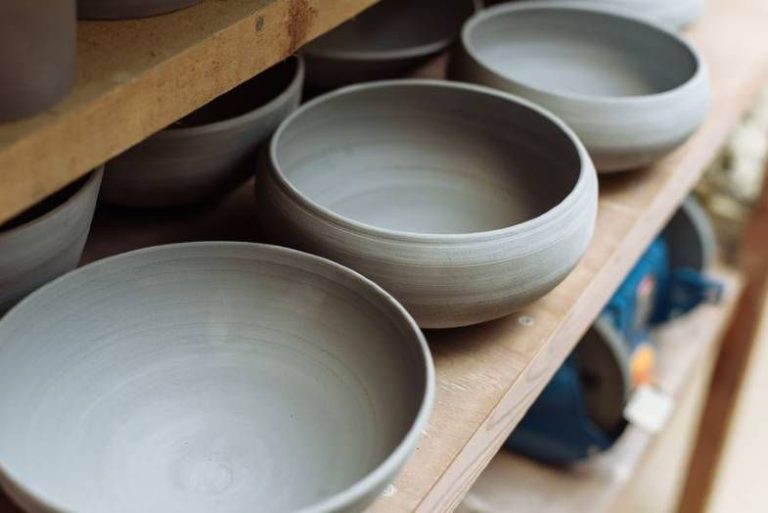
Natural clay – Natural clays like pottery clay are water-based. They can be molded when wet but harden when baked or left to air dry. Natural clays are more difficult to work with compared to polymer or oil-based.
For simple modeling projects, 1-2 pounds of clay is sufficient. For sculpting intricate pieces with fine details, you may need 5 pounds or more. It’s better to have extra clay than to run out before finishing your piece. Prepared clays typically come in 1 lb or 2 lb blocks or bags.
Modeling Tools
Modeling tools are essential for sculpting and shaping clay. Some key tools include:
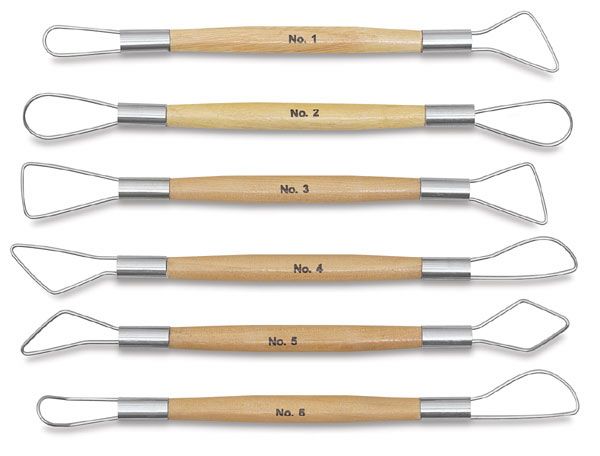
Wire Tools – These thin, metal tools have a wire loop or shape on the end and are used to cut, smooth, and carve clay. The loops can be different sizes and shapes for different effects. Wire tools allow detailed precision work.
Ribs – Ribs are thin, flat pieces of metal, plastic, or wood. They are used to smooth clay, blend edges, compress form, and create textures. Ribs can be flexible or rigid. Flexible ribs conform around curves, while rigid ribs scrape and refine edges.
Loop Tools – Loop tools have a variety of shaped wire or wooden loops on the end. They are used to scrape, carve, blend, smooth, and create grooves and indentations in the clay surface. The shapes allow reaching into concave areas.
Cutting Tools – These include knives, blades, and scrappers with a beveled edge for cutting and slicing clay. From small details to removing large sections, cutting tools are essential for both subtractive sculpting and dividing clay.
Work Surface
Having a dedicated, stable, and smooth workspace is key for successful clay modeling. The ideal work surface is a table or countertop that is non-porous, so the clay does not soak into the material or stick. Formica, acrylic, metal, glass, and some very smooth woods can all work well. Avoid textured surfaces like untreated wood, as they will imprint onto the clay. Make sure the workspace is at a comfortable height for you to work at while either sitting or standing. Having ample space to spread out tools and clay is also helpful. Proper workspace setup will make the modeling process easier and more enjoyable.
Water
Water is an essential supply for clay modeling. It is used for mixing clay and keeping it malleable as you sculpt. The best type of water to use is room temperature tap water. Avoid using extremely cold water, as this can shock the clay and make it difficult to manipulate. Similarly, very warm water can begin to cook the clay.
Have a spray bottle of water handy while sculpting so you can mist the clay to prevent it from drying out. The water helps keep the clay moist and workable. Be careful not to oversaturate the clay or it may become too soft. Monitor the consistency and spray additional water only as needed. A basic spray bottle filled with regular tap water is perfect for this purpose.
For mixing clay, add water gradually and knead it in until you achieve a smooth, pliable dough consistency. The exact amount of water needed will vary based on the type of clay. Follow the manufacturer’s recommendations, starting with less water and adding more as required. Extra water can always be added, but removing excess moisture is difficult once mixed.
Rolling Pin
A rolling pin is an essential tool for conditioning and flattening clay. Using a rolling pin helps make the clay more malleable and smooth out any lumps or imperfections. Most commonly, clay artists use acrylic rolling pins which have the benefits of being lightweight, smooth, and easy to clean. Acrylic rolling pins like the Clear Clay Rolling Pins for Clay, Ceramics, Sculpting are ideal for polymer clay. Rolling pins with texture can also create beautiful patterns when rolled across the surface of clay. Some textured rolling pins made specifically for clay include 4″ Hand Rollers which have designs like pine needles or a stone bridge. When choosing a rolling pin, opt for one that is at least 1/2 inch in diameter to properly flatten the clay without sticking.
Armature
An armature is an internal framework used to support clay as you are sculpting. Armatures help maintain the structure and proportions of a sculpture. The three main options for armature materials are:
- Wire – Wire armatures made from aluminum, steel, or copper are bendable, allowing you to pose and shape your sculpture. Wire allows for intricate detail and is good for smaller sculptures. Some people make their own wire armatures, like this DIY guide: Clay Armature.
- Wood – Wooden armatures provide rigid support for larger sculptures. Basswood is commonly used as it is lightweight and easy to shape. Wood pieces can be cut, glued, and assembled into a custom armature.
- Other – Materials like rolled paper, plastic mesh, fabric, or foam can also be used. Paper armatures are lightweight and cheap. Plastic mesh provides flexibility and structure. Fabrics dipped in plaster or glue help bulk up the form.
The armature acts as the skeleton to support the clay skin over the top. Planning the armature early allows you to determine the final pose and proportions before adding clay.
Textures and Stamps
Textures and stamps are great tools for adding patterns and textures to clay models. There are a wide variety of textures and stamps available including:
- Nature textures – Leaf, bark, flower, etc. patterns (Source)
- Geometric shapes – Circles, squares, triangles, etc. (Source)
- Lettering and numbers – For adding text elements (Source)
- Animal prints – Reptile scales, fish scales, feathers, fur, etc.
- Fabric textures – Weave, knit, crochet, lace patterns
Stamps and texture tools can be pressed into the clay to imprint patterns. Rolling the clay over texture sheets or plates will also impart patterns. Using a variety of textures and patterns makes clay models more visually interesting.
Finishings
Once your clay sculpture is complete, you’ll want to apply some type of finishing to protect it and enhance its appearance. There are a few common options for finishing clay models:
Paint: Acrylic paints work well for finishing clay sculptures. They come in a huge variety of colors and can be applied in thin layers to build up color. Acrylics dry quickly and provide a uniform, opaque finish. You can use acrylic paints straight from the bottle or thin them with water for a more translucent effect. Make sure to use an acrylic primer first for better adhesion. Sources: Y5 Pentecost 2 Half Term Overview, Metallized films and HSN Code 39209999 Exports from …
Glaze: Ceramic glazes provide a glossy, glass-like finish. They come in many colors and effects like metallic, satin, matte, etc. Glazes are applied with a brush and fired in a kiln to harden them into a permanent finish. Using a glaze helps seal and protect the clay sculpture. Sources: World Metal film and HSN Code 39209999 imports
Sealers: Clear acrylic sealers give clay a protective top coat without altering the surface color or texture. They provide a durable, water-resistant barrier that helps clay sculptures withstand handling and environmental exposure. Acrylic sealers dry clear and provide a satin or matte look. Multiple coats can be applied for a thicker protective layer.
Safety Equipment
When working with modeling clay, it’s important to use proper safety equipment to protect your skin and lungs. Some key safety gear includes:
Apron – Wearing an apron keeps clay off your clothes and protects your skin from prolonged exposure. Look for vinyl or plastic aprons that are easy to wipe clean.
Gloves – Gloves prevent clay from drying out your hands. Opt for cotton gloves layered under rubber gloves for comfort and protection.
Ventilation – Clay dust can irritate lungs if inhaled. Work in a well-ventilated area or use a respirator mask. Opening windows or working outside helps improve air circulation.
Keep safety gear on when kneading, sculpting, carving, or sanding modeling clay. Proper protection reduces contact with clay and lessens cleanup later. Stay safe while unleashing your creativity!

