What Do You Need To Make Clay Sculptures?
Types of Clay
There are several main types of clays used for sculpting, each with their own characteristics and uses:
Pottery Clay vs Modeling Clay
Pottery clay, also called ceramic clay, is clay that requires firing in a kiln to harden it. It can be shaped when wet and becomes permanent and durable when fired. Modeling clay remains flexible after drying and does not require firing. It is often used for sculpting figures, detail work, and quick work that does not need to be permanent.[1]
Natural Clay vs Synthetic Clay
Natural clays like stoneware and earthenware are dug directly from the earth. They contain natural minerals that help with workability and durability. Synthetic clays are formulated in factories from industrial mineral powders. They are very consistent in texture and performance. [2]
Air-Dry Clay vs Polymer Clay
Air-dry clays cure and harden in room temperature air. They are very accessible and easy to use. Polymer clays require heat to cure and harden. They allow very fine detail work and hold up well over time.[1], [2]
Pros and Cons
Pottery clays can seem messy at first but allow very durable sculpted items. Modeling clays are great for quickly working out ideas. Natural clays vary in textures which can inspire creativity. Synthetic clays are extremely consistent and reliable. Air-dry clays are inexpensive and accessible while polymer clays allow intricate sculpting work.[1], [2]
Overall, the type of clay depends on the project budget, timeline, permanence needed, and the sculptor’s personal preference.
Clay Tools
There are a variety of specialized clay tools that are useful for sculpting with clay. Some of the most common clay sculpting tools include:
Wire loop tools – These metal tools have a wire loop on the end and come in various sizes. They are useful for smoothing clay surfaces and creating textures. Wire loop tools allow you to refine details and create grooves in the clay.
Clay shapers – Clay shapers have a rubber or silicone tip and come in different shapes and sizes. They help smooth surfaces and blend seams without dragging the clay. Clay shapers are also good for pressing in textures and reaching small crevices.
Cutting tools – Clay cutters, ribbon tools, and various knives allow you to slice into the clay to remove sections or cut shapes. A wire tool can cut through clay without distorting the surrounding area.
Sculpting stands – Sculpting stands or turntables allow you to rotate your piece as you work. This helps access all angles and maintains symmetry. Stands come in various sizes to accommodate small or large sculpts.
There are many types of specialty clay sculpting tools available for different techniques and effects. Most clay tool sets include a range of wire loopers, shapers, cutters, and ribs to support various sculpting needs. Quality tools will have durable construction and comfortable handles for extended use (Source: https://diamondcoretools.com/collections/clay-carvers). Having the right clay sculpting tools makes the artistic process easier and expands what you can create.
Armatures & Support
An armature is a framework that supports a clay sculpture as it is being built. Armatures are important for several reasons:
First, they provide structure and stability to a sculpture so the soft clay doesn’t collapse under its own weight as the piece gets larger. A sturdy armature enables sculptors to create complex shapes and overhangs that would be difficult or impossible to achieve using clay alone (source).
Second, armatures facilitate the sculpting process. By starting with a basic framework, sculptors can efficiently add, remove, and manipulate the clay to achieve the desired form. The armature acts as an internal skeleton that the clay is built around (source).
Third, armatures allow the clay to dry and shrink at an even rate, reducing cracking. As clay dries, it contracts. An armature provides an anchor that clay can shrink around evenly. This helps prevent cracking and breakage (source).
Armatures for clay sculpting can be made from different materials such as wire, wood, foam, mesh, cardboard or found objects. The most popular armature material is pliable wire, which can be bent into shapes and provides good support. Heavier gauge wire is used for larger sculptures. Lighter gauge wire can be used for smaller details (source).
Clay Safety
Working with clay can pose some health hazards, especially related to breathing in clay dust. Proper safety precautions should be taken.
Wearing a dust mask rated N95 or better is important when working with clay dust. The small particles in clay dust can irritate lungs and cause breathing problems over time. A proper dust mask filters out these fine particles (source).
Wearing gloves when handling clay is also recommended. The clay dust can dry out and irritate skin. Gloves also protect hands from overuse injuries that can happen during sculpting (source).
Proper ventilation of the clay working area, whether a studio or classroom, is crucial. Fans, open windows, and ventilation systems can help keep clay dust from accumulating. Kilns also need proper ventilation to the outdoors (source).
Following basic clay safety rules helps ensure a healthy environment for working with this versatile medium.
Clay Storage
Properly storing clay is crucial for keeping it moist and workable over long periods of time. The best way to store clay is to seal it tightly in plastic bags or airtight containers. This prevents the clay from drying out.
According to Pottery Crafters, you should tightly seal clay in thick plastic bags, squeezing out any excess air, and then place the bags in plastic airtight containers or buckets with lids. The plastic bags act as a moisture barrier while the hard containers protect the clay from shifting and deforming.
For optimal storage, clay should be kept in a cool, dark place at a consistent temperature between 60-70°F. Avoid temperature fluctuations and direct sunlight which can cause moisture changes in the clay leading to cracking or drying. Stored properly in thick bags and containers, clay can remain usable for years.
Clay Preparation
Properly preparing clay is an essential first step before beginning any clay sculpture. Here are some key techniques for getting clay ready to work with:
Kneading and wedging are critical for removing air bubbles and evenly distributing moisture throughout the clay. Knead clay with the palms of your hands, pressing into the clay and folding it over itself repeatedly. For wedging, cut the clay in half and slam the two pieces together while squeezing out air pockets. Continue cutting, slamming, and squeezing until the clay has a uniform consistency. Source
Conditioning clay involves letting it rest inside sealed plastic after initial wedging. This allows moisture to distribute evenly through the material. Condition clay for at least 24 hours before using for best results.
During kneading, wedging, and conditioning, focus on eliminating air pockets trapped in the clay. Air bubbles can expand during drying and firing, ruining a sculpture. Cut into clay and fold it over, squeeze pieces together, and pound on the work surface to force out any trapped air or moisture.
Sculpting Techniques
There are various techniques that can be used when sculpting with clay to create different effects and textures in your artwork. Some of the most common sculpting techniques include:
Pinch, Coil, and Slab Methods
The pinch method involves pinching and pulling the clay with your fingers and thumbs to form basic shapes. Pinching clay is great for making small sculptures or individual parts that can be attached together later. Coiling involves rolling out and coiling long ropes or snakes of clay and stacking or attaching them to build up a form. The slab method uses flattened sheets or slabs of clay that can be cut, folded, or draped over shapes to construct a sculpture. Slabs allow you to create smooth flat surfaces and angular shapes (Source: https://www.domestika.org/en/blog/11125-8-must-know-clay-modeling-techniques).
Carving
Carving involves taking away clay from an existing form to refine the shape and add details. Clay carving tools like loop tools, ribs, wooden tools, and even kitchen utensils can be used to carve lines, grooves, and textures into the surface of clay sculptures. Carving is useful for detailing areas like folds in clothing, hair, facial features, feathers, scales, etc. It’s best to carve leather-hard clay so there is some strength but the clay still has some moisture and is not fully dry and brittle.
Adding Textures
There are endless options for adding interesting textures to clay sculptures. You can press molds, stamps, stencils, or found objects into the clay to imprint patterns. Using a variety of mark-making tools like clay shapers, brushes, combs, knives, or improvised household objects can create lines, dots, crosshatching, or other effects. You can also attach items like fabric, rope, or other materials to clay before firing for added texture. Experimenting with different texturing techniques can make clay sculptures more visually dynamic and engaging.
Surface Treatments
Once your clay sculpture is dried or fired, there are various surface treatments you can apply to refine the look. Sanding and smoothing the clay is an important first step before applying other finishes. Start with a coarse sandpaper like 80 grit to take down any major bumps or ridges. Then move to finer grits like 220 to smooth the surface. Avoid oversanding as this can flatten details. You can also use tools like clay shapers and rubber ribs to burnish and compress the clay surface.
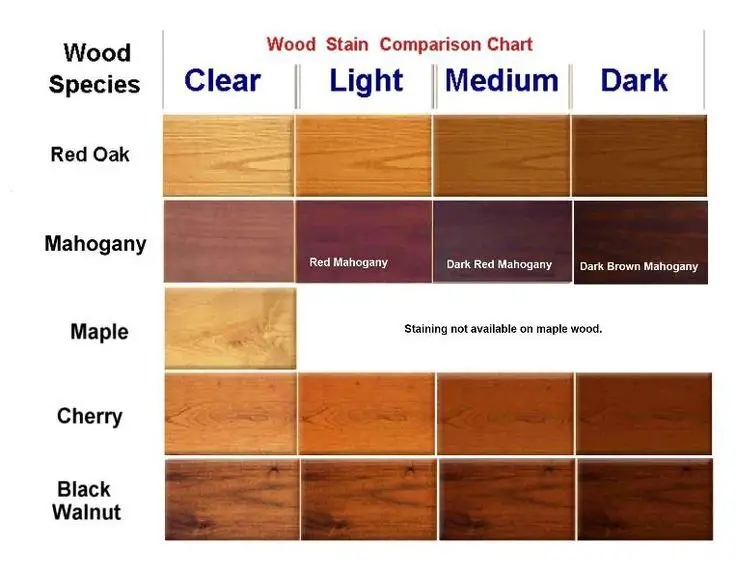
Paint is a common finish for clay. Acrylics work well for both dried and fired clay. Use acrylic mediums to thin paints and improve adhesion. Apply in thin layers, letting dry between coats. Enamel paints will give a glossy look. For food-safe pieces, use food-grade glazes. You can also use wax sealants, varnishes, or stains to alter the clay’s finish and color. Metallic finishes like rub n’ buff add shimmering accents. Consider surface treatments like antiquing washes to emphasize texture and details. Plan finishes during the design process for best results.
Drying & Firing
Proper drying and firing are essential steps for creating strong and durable ceramic sculptures. There are two main methods for drying clay: air-drying and kiln drying.
Air-drying involves letting clay sculptures dry slowly at room temperature over the course of days or weeks. The clay needs to dry evenly to prevent cracking. Placing pieces on plastic sheets and covering with plastic helps trap moisture and control the drying pace. Moving too quickly can cause cracks.
Kiln drying uses an electric or gas kiln to gently heat pieces at a low temperature, usually around 100-150°F. The increased heat accelerates drying from days to hours while minimizing cracking. Kiln drying ensures pieces are fully dried before firing to higher temperatures. According to this source, kiln drying is recommended even for air-dried pieces.
After properly drying the clay, the next step is bisque firing from around 1600-2200°F. Bisque firing further hardens the clay before applying glazes and final firing. Firing too quickly can risk cracks and explosions. Use pyrometric cones to gauge temperature rates and hold times. Allow proper cooling over several hours after firing before handling.
Displaying Clay Art
Properly displaying clay sculptures and pottery requires some planning and care. Depending on where the pieces will be shown, you’ll need to consider factors like lighting, security, and protection from the elements.
Indoor Display Options
Inside the home, fired clay art can be exhibited anywhere other decorative objects are placed. For individual sculptures, acrylic risers help showcase the work in an attractive way. Groupings of pieces look great on coffee tables, bookshelves, mantels, or custom-built displays.1 Lighting is an important factor for indoor displays, so position pieces where they can be illuminated effectively with spotlights or ambient lighting. Rotate pieces periodically to keep fragile areas from getting overexposed to light.
Outdoor Display Considerations
Outdoor displays require weather-resistant materials like sealed terra cotta, stoneware, or porcelain. Avoid displaying delicate pieces outside. Secure sculptures tightly to a flat base or stake to prevent toppling. Place in a covered area like a porch or patio to protect from direct sun and rain. Avoid locations with extreme shifts in sunlight, heat, or humidity.1
Protecting Sculptures
To keep clay art looking its best, handle pieces carefully and keep them dusted. Use furniture wax or glazes to protect porous, unglazed areas. Avoid placing delicate sculptures in high-traffic zones where they can get bumped. Consider covering particularly fragile sculptures with a clear display case. With proper care and display, clay art can remain vibrant for years.


