What Does It Mean To Throw On A Pottery Wheel?
What is a Pottery Wheel?
The potter’s wheel is a device that allows potters to shape round ceramic ware quickly. Evidence shows they originated in Mesopotamia during the Neolithic period around 3500 BCE (wikipedia.org). Early wheels were turned by hand or foot. Modern wheels can be powered by electricity.
There are two main types of pottery wheels: the kick wheel and the electric wheel. Kick wheels are turned by foot power. Potters pump the wheel head with their foot to keep it spinning. Electric wheels have an electric motor to turn the wheel head at a consistent speed.
The main parts of a pottery wheel are:
- Wheel head – the disc the clay sits on while being shaped
- Bat – the removable disc placed on the wheel head to hold clay
- Splash pan – catches water and clay scraps
- Speed control – regulates wheel spinning speed
Preparing the Clay
Properly preparing the clay is an essential first step before throwing on the pottery wheel. The clay must be wedged and kneaded to remove any air bubbles and achieve the desired consistency.
Wedging involves cutting the clay in half, slamming it back together, and repeating. This process removes air pockets, blends ingredients evenly, and makes the clay more plastic and smooth. Kneading clay involves folding, pressing, and compressing the clay repeatedly. Kneading helps remove any remaining air bubbles and makes the clay more uniform (source).
The clay should be a soft, smooth consistency – not too wet where it is sticky, and not too firm where it cracks. The clay should feel cool, firm, and smooth in your hands when it’s ready. Test a piece of clay by squeezing it in your palm. If it sticks and leaves an imprint, it needs more wedging and kneading. The properly prepared clay should keep its shape when pressed gently.
Centering the Clay
Centering the clay on the wheel head is one of the most important steps in throwing pottery. Centering refers to making sure the clay is symmetrical and balanced perfectly in the middle of the wheel head before pulling up the walls of the pottery piece. Properly centered clay is essential for making pottery that has evenly pulled up walls and maintaining control while throwing.
To center the clay, first wedge it thoroughly to remove air bubbles and make it uniform in consistency. Then form it into a ball and place it in the middle of the wheel head. Apply downward pressure with both hands while kicking the wheel to get it spinning at a moderate speed. Slowly pull up with both hands to elongate the clay into a cone shape, applying firm but gentle pressure. Then compress the clay back down into a ball shape. Repeat this process of pulling up into a cone and compressing down several times until the clay is perfectly centered and not wobbling or drifting off-center as the wheel spins.
Well-centered clay allows the walls to be pulled up evenly as the potter begins to raise and shape the form. Clay that is off-center will tend to drift to one side as it is thrown, making it very difficult to maintain control and symmetry. Properly centered clay is also essential for certain throwing techniques like pulling handles and spouts. The time invested to properly center clay in the beginning of the throwing process allows the rest of the steps to be completed with greater ease and success.
Sources:
https://www.thesprucecrafts.com/how-to-center-clay-potters-wheel-2745815
Opening the Clay
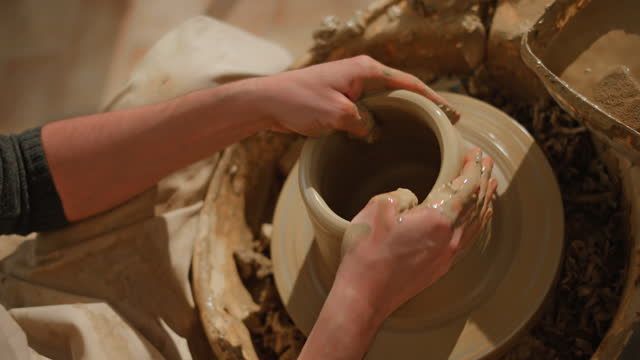
Once the clay is centered on the wheel, the next step is to open up the clay to create the interior space for the pottery piece. This involves using the thumbs to push down into the center of the clay while it spins on the wheel. As described in this tutorial video, the goal is to create an even thickness in the walls all the way down into the bottom of the piece.
It’s important to apply firm but even pressure with the thumbs when opening up the clay. Pushing too hard in one area can cause the walls to be uneven. Going slowly and carefully while visually checking the thickness allows the potter to maintain consistency. The interior space is key, as this is what determines the size and shape possibilities for the final piece. Mastering the skill of evenly opening up clay takes practice but is essential for throwing well-formed pots on the wheel.
Raising the Walls
Once the clay is centered on the wheel, the next step is to raise the walls to the desired height and thickness for the pottery piece. This process is commonly referred to as “pulling” in pottery terminology.
To raise the walls, the potter dips their fingers in water to lubricate the clay. Using the thumb on one hand placed on the inside of the clay and fingers on the outside, the potter gently pulls up the clay while applying pressure outwards. This raises the clay upwards while thinning out the walls.

It’s important to raise the walls evenly so the thickness is consistent all the way around. Going too quickly can cause the walls to be uneven or collapse. The potter must focus on keeping an even pressure and pulling at a steady pace. Most pieces are pulled up into an open cylindrical shape before refining the form further.
The desired height depends on the type of piece being made. Shorter walls are typical for plates and bowls, while taller walls are needed for vases, pots, and pitchers. The appropriate thickness also varies based on the size and purpose of the piece. Thicker walls provide more stability for larger or decorative items. Delicate pieces require thinner walls that are lighter and more fragile after firing.
An experienced potter develops a feel for how fast and how high they can successfully raise the clay walls based on the clay’s properties. Making test pieces to check wall thickness is helpful when trying a new clay body or attempting an unfamiliar form.
Shaping the Clay
Once the walls have been raised to the desired height, it’s time to start shaping the actual form and smoothing out the clay. This is when potters use various tools and plenty of water to refine the shape and form their vision.
Potters will use rounded ribs to smooth the walls and compress the clay particles. Adding water helps lubricate and blend the clay. Loop tools can be used to curve in parts of the rim or walls. Wooden modeling tools help scrape and carve away excess clay to refine shapes. Sponges add texture or soften rough areas. The potter’s hands are also essential tools for feeling and shaping the clay.
It takes practice and skill to smoothly shape clay on a spinning pottery wheel. The clay walls need to be even thickness and curved just right to maintain balance and prevent collapsing. Shaping the pottery while the wheel spins takes coordination. Potters will repeatedly stop the wheel to check proportions and then re-center the clay to continue shaping. It’s an iterative process of using tools and water to mold the clay until the desired form is achieved.
Decorating
After the basic form has been shaped on the wheel, there are many options for decorating the pottery piece to add visual interest and texture. Some common decorating techniques for wheel-thrown pottery include:
Adding handles or spouts – Handles and spouts can be added by hand-modeling clay pieces and attaching them to the wet clay form. Spouts are useful for pouring vessels like pitchers or teapots. Handles provide grip and balance for mugs and vases.
Incising or carving designs – Using metal tools or wood sticks, potters can incise lines, patterns, and textures into the surface of the wet clay. This creates indentations and designs in the finished piece. Geometric patterns like zigzags, waves, spirals and diamond shapes are common [1].
Applying textures – The clay surface can be modified by adding texture using tools, brushes, or by pressing objects into the wet clay. Making impressions with nets, burlap, corrugated cardboard or other textured materials creates unique patterns.
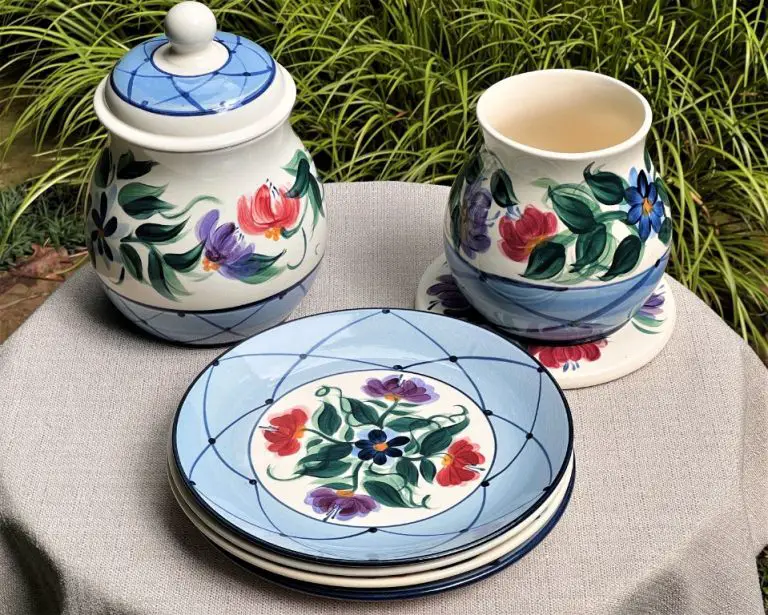
Painting slips or underglazes – After the first bisque firing, colored clay slips or underglazes can be applied to create painted designs before a final glaze firing. Common techniques include brushing, pouring, dripping, and sponging on color.
Decorating the leather-hard clay after it has been thrown on the wheel allows potters to add beautiful embellishments and make each piece unique. The possibilities are endless for personalizing wheel-thrown pottery items with carved surfaces, painted designs, attached handles and spouts, or added texture.
Drying and Firing
After throwing your clay on the pottery wheel, the next steps are drying and firing the piece. Here’s an overview of this process:
Removing the Piece from the Wheel
Once you’ve completed shaping your piece on the wheel, you’ll need to carefully remove it. Wait until the clay has firmed up enough that you can handle it without deforming the shape. Use a wire tool to separate the piece from the bat or wheelhead. Then, gently lift it off and transfer to a drying rack or board.[1]
Letting it Dry
Before firing, clay must be thoroughly dried to remove all moisture. This is a crucial step—dry too quickly and cracking occurs. Dry too slowly and you risk deformation or worse.[2] Ideal conditions are around 70°F with 50% humidity. Place pieces in a protected spot with good airflow. Monitor drying and take steps to slow it if needed, like covering with plastic.[3] Test for dryness by weighing pieces periodically. When weight remains constant for several days, drying is complete.
Bisque Firing
Once bone dry, clay must be fired in a kiln to around 180°F. This bisque firing permanently hardens the clay body in preparation for glazing. Load pieces with adequate airflow and increase temperature slowly. Cool completely before removing. After bisque firing, pieces are ready for surface decoration and glazing.
Glazing
Glazing is the process of applying a glass-like coating to finished pottery pieces. Glazes are made from a mixture of minerals and provide color, gloss, texture and protection to pottery. There are many techniques for applying glazes:
Dipping – The entire piece is dipped into a container of liquid glaze. This fully coats the piece evenly.
Pouring – Glaze is poured directly onto the piece to fully coat it. Excess glaze can be poured off.
Brushing – A brush is used to manually brush glaze onto the piece. This allows more control over where the glaze is applied.
Spraying – Glaze is sprayed onto the piece using a spray gun or spray bottle. This gives an even, consistent coat.
Glazes can be layered and combined to create colorful finishes. Underglazes are applied before firing, then a transparent glaze is added on top. Different effects like crazing and crawling can be achieved by varying glaze thickness and combinations.
Testing glaze samples on test tiles is recommended to achieve the desired colors and textures before applying to finished pieces. Proper glaze fitting ensures a smooth, durable finish.
Final Firing
Final firing is when the pottery and glazes reach their maximum temperature and the clay and glaze materials fuse together. According to The Pottery Wheel, final firing temperatures can reach over 2,300°F (1,260°C). The high temperatures cause chemical and physical changes that harden and finish the pottery.
During final firing, any moisture left in the clay evaporates fully and the clay particles bond together in a process called sintering. The glazes also melt and fuse with the clay body to form a glassy coating. After slowly cooling the kiln, the pottery is left fully fired and hardened. The final firing transforms the pottery from fragile dried clay into a functional and durable ceramic material able to withstand daily use.

