What Is A Pinch Pot?
What is a Pinch Pot?
A pinch pot is a simple type of handmade pottery produced by pinching and shaping clay into a basic container form. The pinching method involves pressing the thumb into a ball of clay and drawing the clay upward to form the walls of a pot or vessel (Wikipedia, 2022).
Pinch pots are one of the most elemental methods of pottery making, dating back thousands of years. They require no wheel throwing or specialized tools, just a ball of clay and one’s fingers. By pinching the clay, potters can create simple bowls, cups, vases and other hollow forms (Free Art Dictionary, 2022).
Compared to wheel thrown pottery, pinch pots have a rustic, handmade look with an irregular and organic shape. They showcase the imprints and textures created by the fingers and hands of the artist. While simple, pinch pots exhibit the fundamental interaction between artist and medium that makes pottery unique.
History and Origin
Evidence shows that pinch pots originated thousands of years ago. The earliest known pinch pots have been found in China and date back over 17,000 years ago to the Neolithic period. These very early pinch pots were created out of necessity as a simple way to make basic cooking and storage vessels without a pottery wheel.
There is evidence that many ancient cultures around the world including Native American tribes, ancient Greeks, Romans, Japanese, and Mesoamerican cultures all created versions of pinch pots. They were an essential vessel for cooking, storing food and water, and carrying items. Pinch pots were made worldwide by many cultures as a useful and convenient pottery form (Source 1).
The simplicity and elegance of pinch pots has allowed them to stand the test of time. Even today, pinch pots are still made by professional potters and ceramic artists, taught to children as an introductory pottery project, and created across cultures. Though no longer essential as a cooking vessel, pinch pots are still appreciated for their timeless, minimalist beauty.
How to Make a Pinch Pot
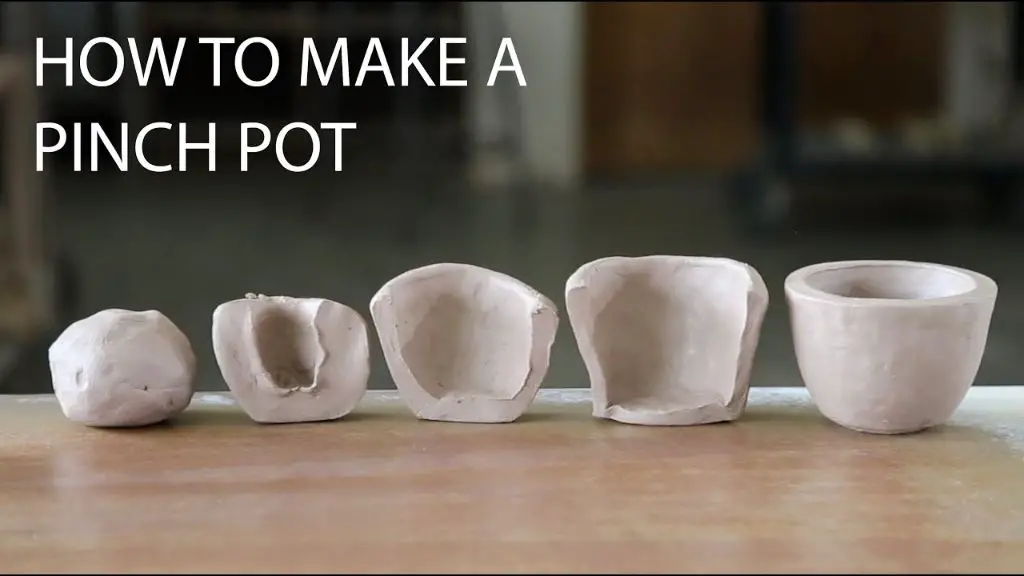
Making a basic pinch pot is a simple process that can be done in just a few steps:
- Start with a ball of clay about the size of a golf ball. Moisten the clay slightly to make it more pliable.
- Use your thumb to press into the center of the clay ball to form an indentation.
- Work the clay between your fingers and thumb, pinching the sides to form a pot shape. Apply gentle but firm pressure as you pinch and rotate the clay.
- Open up the small hole you created by continuing to pinch the clay outward. Form the basic pot shape you desire – round, oval, square etc.
- Use your fingers to smooth any cracks or pleats on the outside of the pinch pot.
- To finish, create a wider opening at the top by gently pushing outward. Make sure the walls are approximately even in width and thickness.
That’s the basics for how to pinch and form a simple pot out of clay! It just takes a few minutes and you can make endless variations by pinching different shapes and sizes.
Pinch Pot Shapes
Pinch pots can be shaped into a variety of forms. The most common shapes are simple bowls, vases, cups, and jars. However, pinched clay is very malleable and allows for more creative and intricate shapes.
Some popular pinch pot shapes include:
- Animals – Simple pinch pot animals like snakes, turtles, mice, and birds are fun for beginners.
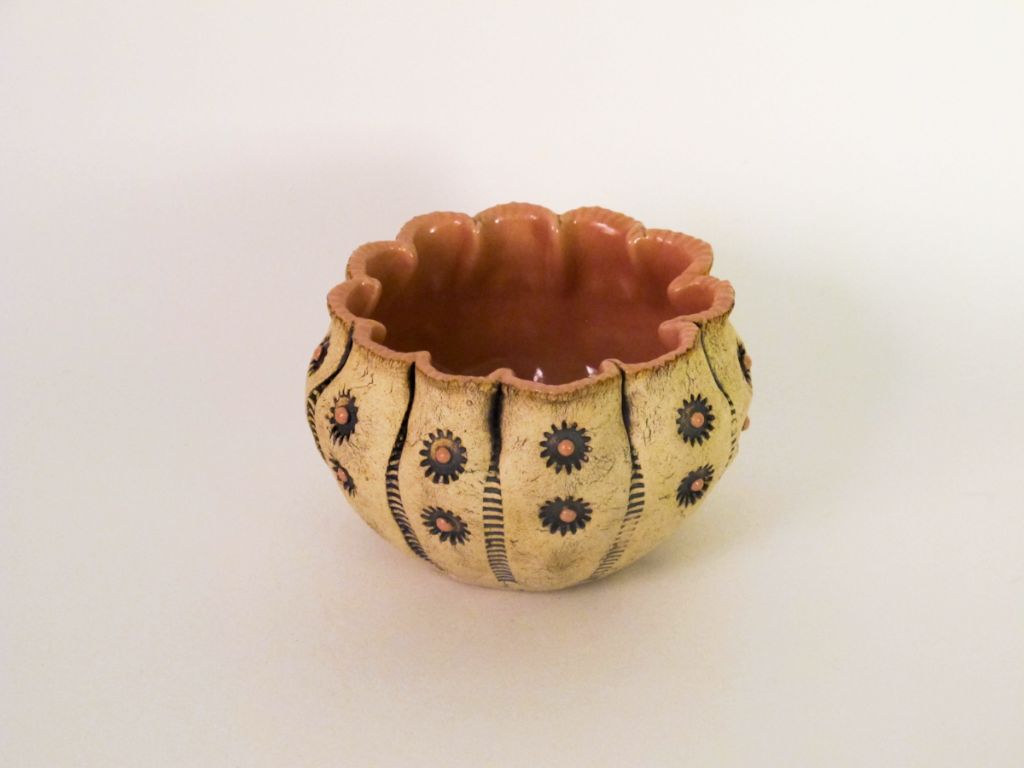
- Flowers – Pinching petals and leaves lets you shape beautiful floral pots.
- Storybook Characters – Bring your favorite fairy tale or nursery rhyme characters to life in clay form.
- Geometric Shapes – Try pinching squares, triangles, cylinders, cones, and more.
- Abstract Sculptures – Create unique freeform, abstract sculptures by pinching and pulling the clay.
- Coiled Pots – Add coils to build height and shape on basic pinch pot forms.
The possibilities are endless when shaping pinch pots. Let your imagination run wild and have fun pinching the clay into whatever forms speak to you. The organic nature of handbuilding allows you to bring any shape imaginable to life.
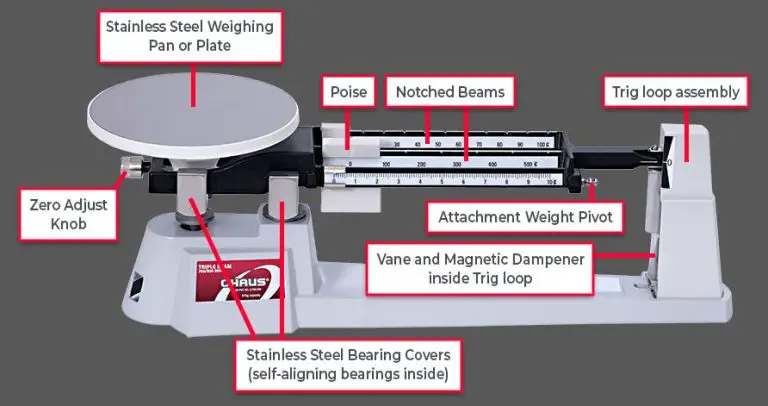
Pinch Pot Tools
The main tool needed to make a pinch pot is your hands. Using your fingers and thumbs to pinch and shape the clay is the fundamental technique that gives pinch pots their name. However, there are some other basic tools that can help in constructing pinch pots:
- A pottery wheel or flat surface to work on
- Clay sculpting tools like loop tools or rib tools to smooth surfaces and blend seams
- Rolling pins, clay shapers, or acrylic blocks to shape flat bottoms and refine sides
- Sponges to moisten and smooth the clay as you work
- Forks or combs can be used to scratch designs into the surface for texture
- Cutting wire to slice off excess clay
- Fettling knives or carving tools to trim seams and cut shapes
While specialized clay tools are useful, many common household items like forks and toothpicks can also be used when making pinch pots. The most essential tool is your own hands to pinch, press, smooth, and shape the clay into your desired pot.
Pinch Pot Clay
The best clays to use for making pinch pots are earthenware and stoneware. Earthenware clay is very soft and pliable, which makes it easy to pinch and shape into pots. It also has natural grog particles that help provide strength to handbuilt pieces. Some good earthenware clays for pinch pots include Laguna B-Mix 5, Highwater Standard Clay, and Continental Pottery Self Hardening Clay according to https://wheelandclay.com/blog/how-to-make-a-pinch-pot/.
Stoneware clays are also great for pinch pots. While not as soft as earthenware, stoneware has good plasticity for pinching and handling. Stoneware clay is very strong when fired to higher temperatures. Some popular stoneware clays for handbuilding and pinch pots are Laguna Speckled Buff, Highwater’s Duff White, and Continental’s Talc Free Stoneware according to https://polymerclay.craftgossip.com/7-ceramic-pinch-pots-that-dont-require-a-kiln/2021/07/15.
It’s best to avoid porcelain clays for pinch pots, as they tend to be brittle when worked by hand. Likewise, low-fire clays are very fragile when pinched compared to mid-range earthenware and stoneware. For beginners, an earthenware clay is recommended for ease of handling when first learning the pinch pot technique.
Decorating Pinch Pots
There are many creative ways to decorate pinch pots to make them unique and add visual interest. Here are some ideas for embellishing basic pinch pots:
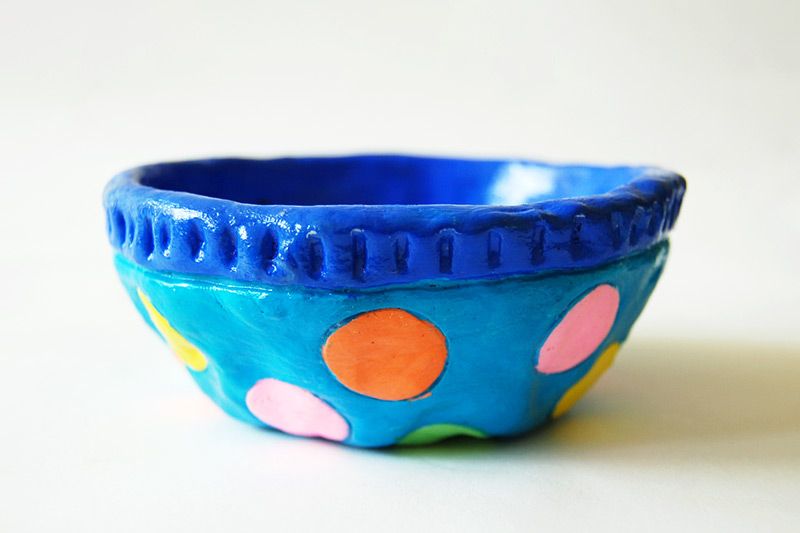
Painting
Once fired, pinch pots provide a blank canvas for all kinds of painting techniques. You can brush on glazes, use sponges or rags for patterns, draw designs with underglazes, or use acrylic paints. Encourage kids to paint scenes, animals, designs, letters, or abstract shapes on their pinch pots.
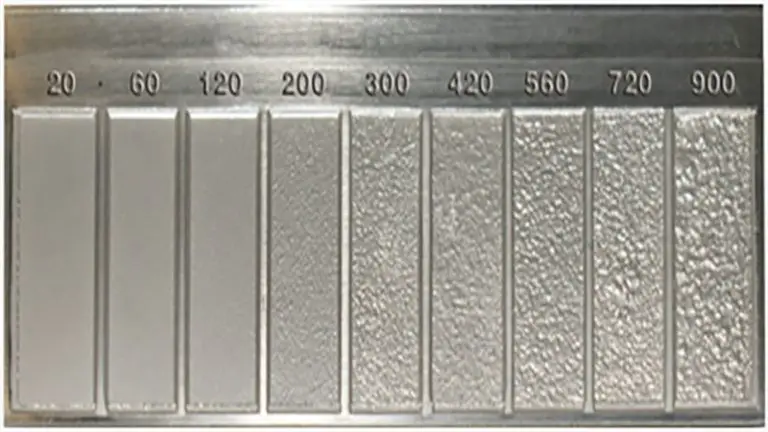
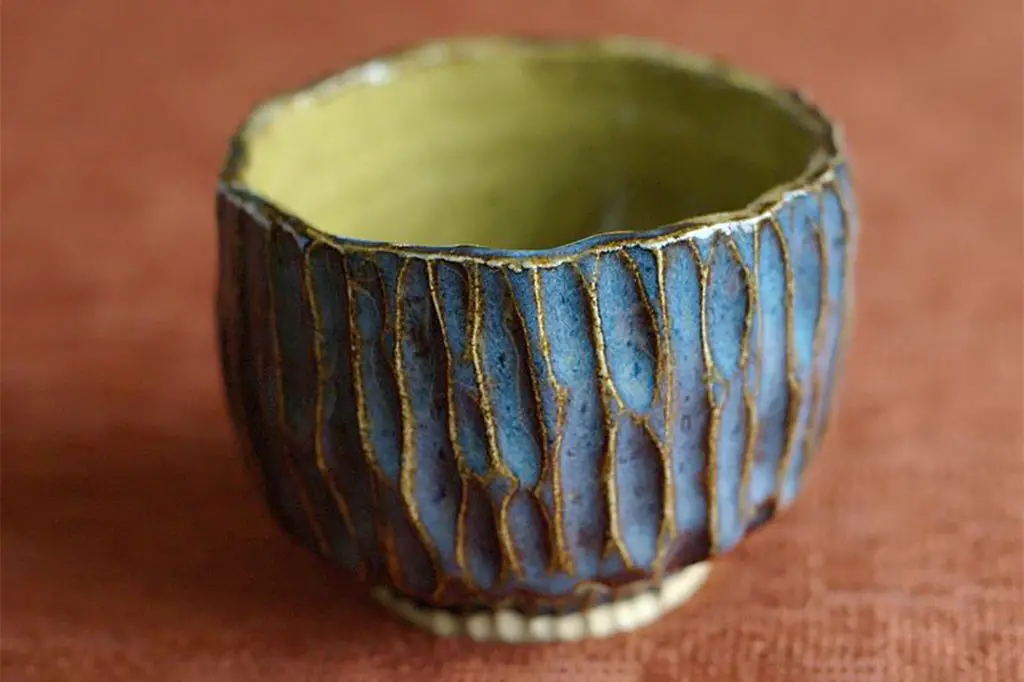
Textures
Add visual and tactile interest by imprinting textures into the surface of the clay. Press in leaves, doilies, buttons, sequins, shells, or any object with an interesting shape. You can also make patterns by scratching lines or press the clay with textured items like combs or mesh.
Collage
Collaging is a fun way to decorate pinch pots. You can gently press small Natural or found objects like seeds, sticks, feathers, beads, pasta, or buttons into the surface of the clay before firing. Collages make each pinch pot unique.
Sculpting
Sculpt clay embellishments like coils, ropes, and shapes and attach them to the pinch pot with slip before firing for 3D designs. Make ears and tails for animal pots or hair, crowns, and accessories on people pots. Let kids’ imaginations run wild.
With so many options, decorating pinch pots provides endless creativity. Simple clay vessels transform into animals, scenes, sculptures, and more with just a little embellishment. Let kids unleash their creativity to make their pinch pots unique.
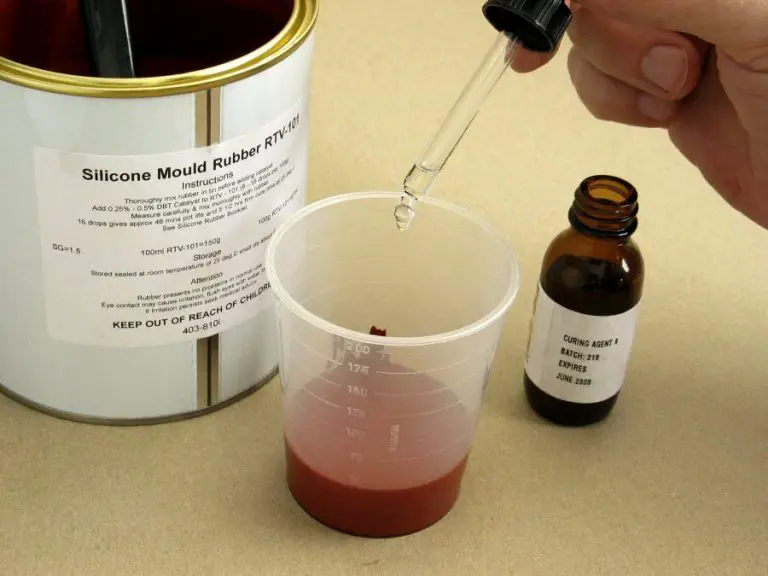
Firing and Glazing
Once a pinch pot is completed and has dried thoroughly, the next step is to fire and glaze it. Firing refers to heating the clay at a high temperature, which causes chemical changes that permanently harden the clay. Glazing provides a decorative, glass-like coating on the outside of the fired clay.
For firing, an electric or gas kiln capable of reaching cone 04-06 temperatures (1945-2165°F) is typically used. The pinch pot must be bone dry before firing to prevent cracking. Place the pots on a kiln shelf with pottery stilts or soft refractory fiber paper to prevent them from sticking. Slowly increase the kiln temperature according to the manufacturer’s instructions, holding at top temperature for the recommended time. Shut off the kiln and allow it to cool completely before removing the pots.
Glazing can be done before or after firing the clay. Common glaze types used on pinch pots include matte, glossy, metallic, and specialty glazes with textures like crackle or pebble. Brushing, dipping, or pouring the liquid glaze over the pot are all effective techniques. Use glaze manufacturers’ instructions for firing glazed pieces. Typically cone 06 temperatures are required for glaze firing. Allow pots to cool completely before handling after glazing.
Some key tips for successful firing and glazing: test new clay bodies and glazes on test tiles before using them on finished pieces, place pots with adequate space between them during firing, use a kiln wash coating on kiln shelves, increase firing time for thicker or larger pots, and don’t overload the kiln.
With proper firing and glazing, pinch pots can become durable pieces that display their handmade quality. The firing and glazing process allows full artistic expression through beautiful colors, textures, and visual depth on the finished pottery. (Source: https://www.porcelainbyantoinette.com/blog-details/pinch-pots-is-it-beginners-pots-or-a-good-place-to-begin)
Pinch Pot Activities
Pinch pots are a fun, creative way for people of all ages to make pottery and engage in art projects. Here are some ideas for using pinch pots for crafts and activities:
Decorating
Once dried and fired, pinch pots make great canvases for decorating. You can paint them with acrylic or ceramic glazes, add textures with ceramic tools, or collage pieces of paper, fabric, beads, buttons, and more. Let kids decorate their own pinch pots for a fun art activity.
Sculptures
Pinch several small pinch pots together to create imaginative sculptures. Sculpt animals, creatures, characters, abstract art pieces, and more. Add details like eyes, noses, and ears using clay. Make a sculpture garden by having each person create their own sculpture.
Magnets
Turn a fired pinch pot into a magnet by gluing a magnet to the back. Kids can make magnets as gifts for family or friends. These homemade magnets can decorate fridges and magnetic boards.
Jewelry
Craft jewelry like beads, pendants, earrings, and rings using pinch pots. Make repeating shapes and patterns for bold statement jewelry. Or sculpt miniature objects like animals and symbols for charm jewelry. Allow fired pieces to fully cure before wearing.
Mini Planters
Plant succulents, air plants, or tiny seedlings into pinch pot planters. Decorate the planters before planting. Give pinch pot planters as gifts to fellow gardeners and nature lovers. Place around the house and patio for a living decoration.
Notable Pinch Pot Artists
Pinch pots have been made for thousands of years as one of the earliest and simplest forms of pottery. But they continue to be used by modern ceramic artists who excel at the pinch pot technique.
Professional pinch pot artists include Ingrid Bathe, a Canadian ceramicist known for her decorative and nature-inspired pots with additive elements like coils and slabs. American artist Vicki Grima also specializes in vividly-colored pinch pots, sometimes with carved or incised details.
Other notable artists working with pinch pots include Lynda Draper, Lindsay Klix, Elspeth Owen, Leanne McClurg Cambric, and Jenny Mendes. Their pottery explores the simplicity and versatility of the pinch pot technique through elegant forms, intricate surface patterns, or bold glaze colors.
By limiting themselves to the fundamental pinch pot method, these artists showcase the creative possibilities within the constraints of the technique.