What Is The Firing Schedule For Crystalline Glaze?
What is Crystalline Glaze?
Crystalline glaze is a type of pottery glaze that forms visible crystals on the surface during the firing process. While regular glazes have a smooth, glassy finish, crystalline glazes exhibit crystal growth that gives the surface an intricate, sparkling texture.
The history of crystalline glaze dates back centuries to the Song Dynasty in ancient China. Potters discovered that certain glaze recipes and firing methods encouraged formation of crystals, though the scientific principles were not understood at the time. Crystalline glazes became more widely used in the 20th century as kiln designs and glaze chemistry advanced.
The key difference between crystalline and regular glazes is the development of crystal structures during firing. Specific minerals like zinc, titanium, and zirconium in the glaze recipe form crystals when heated to high temperatures. As the kiln cools, the crystals grow larger and fuse together, creating the distinct crystalline surface.[1]
While regular glazes melt smoothly into a glassy layer, crystalline glazes undergo crystallization that results in visible crystal growth. The process requires careful control of the kiln firing to encourage crystal formation and growth.
What Causes Crystallization?
Crystallization in crystalline glazes occurs due to the presence of certain flux materials, most notably zinc oxide. As the glaze melts in the kiln, the zinc forms a silicate glass. As the glaze cools, the zinc crystals start to precipitate out of the glaze and form visible crystals.
The cooling process is key – the glaze needs time to cool slowly in order for the crystals to form properly. Fast cooling will not allow the crystals enough time to grow to a visible size. The kiln is programmed to cool at around 100-150°F per hour once it reaches the crystallization temperature of 1400-1500°F. This slow, controlled cooling allows the zinc crystals to form and grow within the glaze.
In addition to zinc, other flux materials like magnesium, lithium, and titanium can encourage crystallization, especially when combined with zinc. But zinc oxide is the primary flux responsible for crystallization in most crystalline glaze recipes (Source: https://digitalfire.com/glossary/crystalline+glazes). The glaze composition and cooling process work together to allow the flux materials to form visible crystals.
Choosing a Clay Body
The clay body is a crucial factor when working with crystalline glazes. The clay must have certain properties to achieve the distinctive crystalline effects.
Porosity is important – crystalline glazes require a clay body that absorbs some moisture. Porcelain clays are often too vitreous and impermeable for the best results. A stoneware clay with moderate porosity is often ideal.
The thermal expansion coefficient of the clay should match the glaze to prevent crazing. Crystalline glazes need a clay body with a lower expansion rate. Standard stoneware bodies around cone 6 often work better than higher expansion porcelain.
In general, moderately porous stoneware clay bodies between cone 6 and cone 8 tend to be good options for crystalline effects. The porosity allows moisture absorption which contributes to crystal growth. Stoneware has a lower expansion rate that fits typical crystalline glazes. While porcelain can produce crystals, it may require testing and adjusting the glaze or clay body.[1]
Creating the Glaze
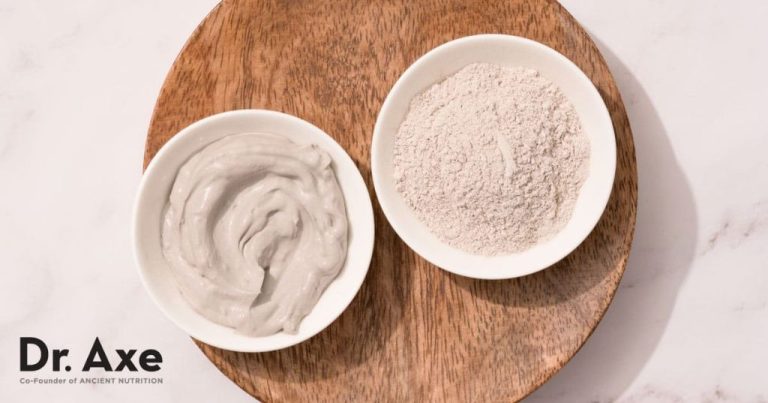
The most important ingredient in a crystalline glaze recipe is zinc oxide. According to oppopots.blogspot.com, zinc oxide typically makes up 50-70% of the glaze recipe. The high percentage of zinc oxide is crucial for promoting crystal growth. Other fluxes like silica, alumina, and kaolin clay make up the remainder of the recipe.
It’s important to carefully test crystalline glaze recipes. Even small variations in the zinc oxide percentage or other ingredients can significantly impact the formation of crystals. Testing is the only way to dial in the perfect recipe with your desired effect. Start with an established recipe, then adjust in small increments until satisfied with the results after firing. Document your tests to refine the recipe over multiple firings.
Applying the Glaze
There are several techniques for applying crystalline glaze to ceramic pieces. The most common methods are dipping, pouring, brushing or spraying.
When dipping a piece in crystalline glaze, it’s important to have an even coating. Submerge the piece completely and lift out smoothly at an even pace. Allow excess glaze to drip back into the container. Dipping often results in a thicker application of glaze.
Pouring the glaze over the surface can also be effective. Tilt and rotate the piece over a bucket to control the flow of the glaze. This gives a thinner, more even coat than dipping. Be careful not to over-pour and create drips or runs.
For targeted glaze application, many artists use a soft brush or spray bottle. Brushing gives precise control for covering specific areas. Spraying is great for an even overall coat. Both methods result in thin layers. Multiple light coats are often needed to get the right thickness.
In general, thinner glaze application around 1/16″ to 1/8″ thick allows for better crystal formation. Too thick of a coating can inhibit crystallization.
The Firing Schedule
The firing schedule for crystalline glazes is crucial for achieving the desired crystallization effect. Crystalline glazes require a specialized firing schedule that involves a slow ramp up to the peak temperature, a soak time at the peak, and then a slow cooling cycle. Here are the key components of a typical firing schedule for cone 6 crystalline glazes:
Low Start – Ramp the kiln up slowly from room temperature to around 1650°F. A rate of 150-200°F per hour works well. This allows the crystals time to form and grow before the glaze melts.
Peak Temperature – For cone 6 crystalline glazes, the target peak temperature is between 2232-2264°F. When the kiln reaches this temperature range, hold it there for the soak time.
Soak Time – The kiln should be held at the peak temperature for 1-4 hours. 2 hours is common. This extended time at the peak allows the crystals to fully develop before cooling.
Cooling Cycle – Cool the kiln at a controlled rate of 100-150°F per hour until it reaches 1500°F. Then allow the kiln to cool naturally down to room temperature with the door closed. Slow cooling is key – a rapid cool will prevent large crystals from forming.
With the proper crystalline glaze and the firing schedule outlined above, stunning crystalline effects can be achieved in the finished pottery pieces.[1]
Tips for Maximizing Crystals
There are a few techniques you can use to promote greater crystallization in your glazes:
Avoid thermal shock – Allow plenty of time for the kiln to cool slowly after firing to prevent thermal shock, which can inhibit crystal formation. A cooling rate of 100°F per hour or slower is recommended. Also, avoid opening the kiln prematurely.
Apply thicker – Applying the glaze thicker, around 1/8 inch, can help produce larger and more abundant crystals. The extra thickness provides more material to facilitate crystallization.
Increase zinc oxide – Increasing the zinc oxide percentage of the glaze recipe promotes crystallization. Aim for at least 20-30% ZnO in the recipe. According to an article on Ceramic Arts Network, more zinc oxide equals more crystals.
Carefully control firing – Maintain consistent firing schedules and optimal kiln temperatures betweenCone 6 and 10 to achieve the desired crystalline effects. Keep logs to replicate results.
Common Problems
Crystalline glazes can be tricky to master. Here are some of the common problems that can occur:
Pinholing
Pinholes are small holes that form in the glaze surface during firing. They are caused by trapped air bubbles in the glaze. To prevent pinholes, make sure to stir the glaze thoroughly before applying to allow bubbles to escape. Slowly pouring the glaze over the pot can also help minimize air bubbles. According to this article, adding a few drops of vinegar to the glaze can help reduce pinholing.
Crawling
Glaze crawling refers to when the glaze pulls away from the clay body, leaving bare spots. This is often caused by incompatible clay and glaze combinations. To fix crawling, try switching to a clay body that is formulated for crystalline glazes, like a porcelain. Slowing down the firing schedule can also help prevent crawling by allowing gases to escape before the glaze melts and fuses to the clay body.
No Crystals
If crystalline glazes are not fired to a high enough temperature, crystals will not form properly. Make sure to follow the recommended firing schedule and reach cone 10-11 for best crystallization. The kiln atmosphere also affects crystal formation – an oxidizing atmosphere produces more crystals. Try adding ventilation holes if crystals are not developing.
Notable Crystalline Glaze Artists
Robert Hessler is one of the most renowned crystalline glaze artists. He developed his own techniques for creating vivid crystalline effects and has authored books like “The Art of Crystalline Glazing” (Goodreads, 2022). His pieces often feature bold, branching crystals in vibrant hues.
Bill Powell is another influential crystalline glaze ceramicist known for his innovative approaches. Described as a “rock star” of crystalline glazing, Powell has pushed the boundaries of the technique to produce incredible crystallization patterns and effects (Marian Williams Pottery, 2014). His crystalline surfaces showcase his mastery.
Peter Smith brings a contemporary edge to crystalline pottery. His minimalist forms contrast beautifully with the complex crystalline textures. Smith focuses on precision and consistency in application and firing to achieve mesmerizing crystalline finishes (Microcrystalline, 2022).
Inspiring Crystalline Glaze Pieces
Crystalline glazed pottery can result in stunning works of art. Here are some standout pieces that showcase the creative potential of this glazing technique:

This gorgeous blue vase exhibits beautiful crystal formations. The electric blue crystals emerge from the deep black background, creating an eye-catching contrast. The artist used a combination of cobalt and copper in the glaze recipe to achieve the vibrant blue color.

This small green bowl is covered in leaf-like crystalline structures. The artist likely used copper in the glaze to produce the green color. The leaf shapes and clusters create an organic feel.

This abstract crystalline sculpture resembles a geode, with colorful crystals radiating from the center. The artist created visual interest by using both warm and cool-toned glazes. The crystallization resulted in varied shapes and textures.

This eye-catching plate has a red crystalline exterior and a yellow crystalline interior. The contrasting colors provide dramatic visual impact. The artist used red iron oxide and titanium dioxide to achieve the vibrant red and yellow colors.