What Is The Process Of Glass Fusion?
What is Glass Fusion?
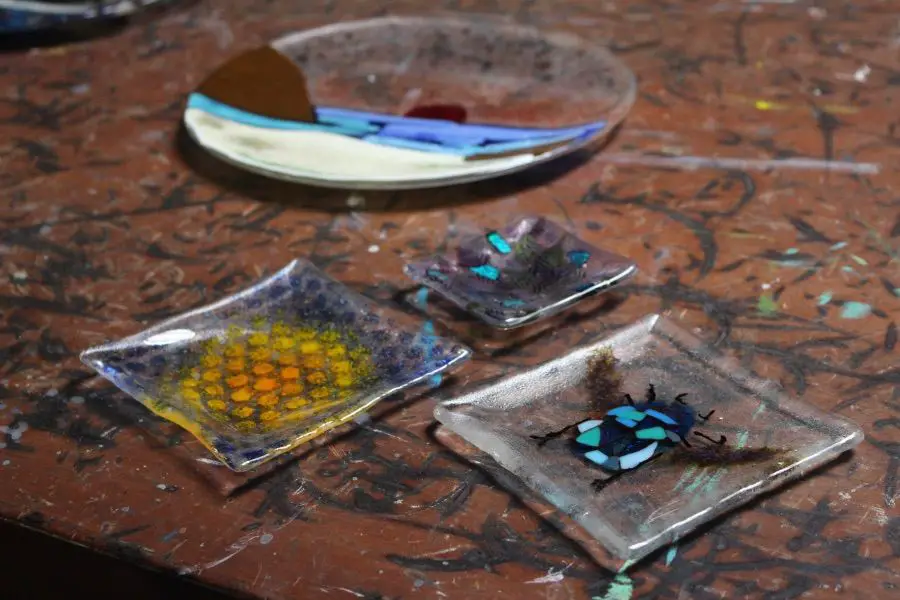
Glass fusion is the process of joining together separate pieces of glass by heating them in a kiln to high temperatures to “fuse” them into a single piece (Serendipity Glass Designs | Glass Fusion Art | The Villages, 2023). The glass is heated until it becomes soft and malleable, allowing the separate pieces to attach and flow together.
The history of glass fusion dates back thousands of years. Archaeological evidence suggests that ancient Egyptians and Romans were creating fused glass artworks as early as 3500 BCE. However, the modern glass fusion movement began in the mid 20th century and has grown in popularity over recent decades as a contemporary art form (What Is Glass Fusion, 2024).
There are several types of glass used in fusing, including soda-lime glass, borosilicate glass, and dichroic glass. Each type has different properties that affect the fusing process and the end result. Soda-lime glass, composed of silica, soda, and lime, is commonly used for its bright colors and smooth surface after fusing. Borosilicate glass contains boron and withstands thermal shock, making it ideal for multiple firings. Dichroic glass has a microscopically thin metallic coating that produces shifting colors (History of Glass, 2023).
Preparing the Glass
The first step in glass fusing is selecting and preparing compatible glasses to fuse together. It’s important to use glasses with similar Coefficient of Expansion (COE) values, usually between 96-104 COE, so they expand and contract at the same rate during the fusing process. Compatible glasses can be fused successfully without cracking or breaking (The Crucible).

Once compatible glasses are selected, they should be thoroughly cleaned before fusing to remove any oil, grease, or dirt. Glass can be cleaned with a 50/50 vinegar and water solution or glass cleaner. It’s also important to wipe down the glass thoroughly with a lint-free cloth (Everything Stained Glass).
After cleaning, the glass must be cut or shaped into the desired design pieces. Glass can be cut with standard glass cutters or glass cutting wheels. Then the edges of the glass pieces should be smoothed with a diamond pad or sandpaper to remove any sharp edges or shards. The glass pieces are now ready to be arranged and fused together.
Design Considerations
When designing a glass fusion project, there are several key factors to consider:
Function of the finished piece – What will be the purpose or use of the final fused glass work? Is it purely decorative, or does it need to be functional in some way like a plate, bowl, or other vessel? The intended function will inform decisions about size, shape, thickness, etc.
Aesthetics – The color palette, textures, patterns, and composition of the design are important aesthetic choices. Fused glass allows for an immense diversity of styles from bold abstract patterns to landscape imagery to minimalist geometric designs. Planning the visual look and feel is a critical step.
Compatibility of glass types – Not all glass is equally suitable for fusing. It’s important to use glass types that are formulated for compatibility at high temperatures. Mixing incompatible glass can result in cracking or breakage. Choosing glass from quality suppliers designed for fusing is recommended. Consulting glass compatibility charts can help guide design plans.[1]
Arranging the Glass
Properly arranging the glass pieces is an important step in glass fusing. The layout and placement of the glass will determine the final design of the fused glass piece.
It’s important to ensure the glass pieces fit together properly with minimal gaps. Small gaps between pieces will fill in during fusing, but large gaps may remain and affect the final product.
Using grozing pliers, glass pieces can be nipped and adjusted to improve the fit. Foils or frit can also be used to fill gaps if needed. Spacers such as fiber paper or refractory materials are useful for creating even spaces between glass for uniform gaps.
The arrangement should have the desired design elements, with considerations for balance, contrast, and flow. Planning the layout ahead of time is recommended through sketches or glass cutting software.
Careful arrangement sets up the glass to fuse together into the desired shape and design. According to Bloomington Creative Glass Center, focusing on properly arranging glass is key for successful flat fusing projects.
The Fusing Process
The actual fusing of the glass together happens inside a specialized oven called a kiln. The kiln heats the glass to very high temperatures, allowing the separate pieces to fuse together into one solid piece.
There are a few different stages of fusing:
- Slumping – Heating glass to 1200-1250°F to soften it enough to drape over a mold. The glass retains its shape when cooled.
- Tack fusing – Heating glass to 1450-1525°F. The glass pieces soften and stick together but do not become one solid piece.
- Full fusing – Heating glass to 1480-1540°F. The glass pieces fully merge into one solid piece of glass.
The kiln is programmed with a specific heating schedule, known as a firing schedule or fuse program. This controls the rate of heating and cooling to prevent cracks and breakage. It is critical to heat and cool glass slowly; this process is called annealing.
A typical firing schedule ramps the temperature up at 200-400°F per hour, holds at the fusing temperature, then drops at 100°F per hour down to 950°F before cooling more quickly down to room temperature. The length of time at the peak temperature depends on the effect desired.
After the Fuse
Once the fused glass piece has cooled completely after being removed from the kiln, it is ready for inspection and any additional cold working. It is important to carefully examine the glass for any cracks, incomplete fusing, unwanted bubbles or other defects. According to The Crucible’s guide, a bright light and magnifying glass can help identify any problem areas.
Grinding, polishing and other cold working techniques may be employed after fusing to refine the shape or surface texture. As explained by The Crucible, common abrasives used are silicon carbide and diamond pads. A grinder, flex shaft or handheld carver can be used to gently smooth sharp edges or sculpt areas of the glass. Polishing further refines the surface.
For larger or more intricate fused glass pieces, lamination may be desired. This involves adhering the glass to another material like glass, metal or wood for structural support. Proper lamination technique ensures a tight bond and prevents cracking. According to Pinterest sources, common laminating materials used are fiberglass mesh and specific high-temperature glues. The glass piece and substrate should be thoroughly cleaned before attempting lamination.
Advanced Techniques
There are many advanced techniques that can take glass fusing to the next level. Some popular advanced techniques include:
Using molds or forms – Molds and forms allow you to shape fused glass into 3D forms. The glass is placed inside or on top of the mold before fusing. Common molds include bowls, plates, and platters. Proper mold preparation and release agents are key for success.
Incorporating metals or foils – Metals like copper, brass, and silver can be incorporated into fused glass to create stunning effects. Metals can be cut into designs or used as solder to join pieces of glass. Foils are extremely thin sheets of metal that create a stained glass look when fused between layers of glass. Foils come in many colors like copper, black, blue and more [1].
Making 3D fusion pieces – Multiple layers of glass can be tack fused together and shaped to create 3D fused sculptures, bowls, vessels, and more. Slumping over molds is commonly used to create 3D shapes. Other techniques like using fiber paper or firing multiple times can also be used to create 3D fused glass pieces.
Troubleshooting
Fusion glass projects don’t always turn out perfectly the first time. Here are some common troubleshooting tips for dealing with imperfect fused glass projects:
Bubbles – Air bubbles in the glass are one of the most frequent problems in fusing. Make sure to tap and vibrate your glass pieces prior to firing to remove bubbles. Avoid placing glass face down during the tack fuse if bubbles are present.
Stress cracks – Rapid temperature changes during firing can cause stress cracks in the glass. Raise kiln temperature slowly and include a hold time before ramping up to the next temperature. Anneal glass properly by cooling the kiln slowly after firing.
Inconsistent colors – Some glass colors may not fuse well together and can create blotchy or inconsistent colored areas. Test compatibility between colors on a small scale first. Layering transparent glass on top can also help blend colors.
Warping – Uneven shelves, thickness variations, or incompatible coefficients of expansion between glass types can cause warping or buckling. Use primer paint on shelves, match thickness between pieces, and choose compatible glass types.
Re-fusing – Small imperfections can sometimes be minimized or removed by re-firing the piece. Sand down any sharp edges first. Keep the re-fuse temperature and time low to avoid excessive melting.
Preventing issues requires careful glass selection, project design, and firing schedule. But imperfect results can often be salvaged by refiring or incorporated into a new design.
Safety Considerations
Working with glass requires taking proper safety precautions. When cutting, grinding, or otherwise handling glass you should wear eye protection, gloves, and a dust mask.
Eye protection like safety glasses or goggles are important when working with glass to prevent injury from flying shards or debris. Thick gloves protect hands from sharp edges and heat. A N95 particulate respirator mask filters out fine glass dust that can be harmful to lungs (https://www.delphiglass.com/fusing-supplies/safety-supplies/).
Always work in a well-ventilated area. Glass grinding and polishing produces fine particles that should not be inhaled. Have a window open or use a dust collection system if working indoors.
Take care when handling broken or sharp glass. Use caution and tools like pliers when needed. Thoroughly clean work surfaces after use to remove glass shards or splinters that could cause injury (https://artistryinglass.on.ca/FUSING/SAFETY-SUPPLIES-EYEWARE-GLOVES-ETC/).
Getting Started
Getting started with glass fusing requires some basic equipment and supplies. According to The Crucible, the essential items you’ll need include:
- A kiln, either a small countertop kiln or a microwave kiln designed for fusing
- Glass compatible with fusing temperatures, such as sheet glass, frit, or rods
- A workspace to arrange your glass, like a graphite shelf or fiber paper
- Safety equipment like kiln gloves and glasses
- Basic glassworking tools like a glass cutter, grozing pliers, and brush
For beginners, it’s best to start with simple projects like coasters, sun catchers, or small plates. Craftsy recommends small pendants as another good introductory project. Kits can also provide all the supplies and instructions needed to complete starter projects.
There are many online resources for learning more about glass fusing:
- The Crucible’s Guide to Glass Fusing
- Video tutorials on sites like YouTube and Craftsy
- Local classes at art centers and studios
- Online communities of fused glass artists like Facebook groups


