What Is The Process Of Making Terracotta Clay?
Terracotta clay is a type of clay used in many crafts and pottery which has a distinct reddish-orange color. The term “terracotta” comes from an Italian word meaning “baked earth”.
Terracotta originated in early civilizations of the Mediterranean such as ancient Greece, Rome, and Egypt. Figurines and pots made from terracotta clay have been found dating back over 4000 years. Its popularity came from its accessibility and versatility – terracotta clay can be easily obtained, molded, and fired to create both functional pottery items and artistic sculptures.
The reddish-orange color comes from iron oxide present in the clay. Terracotta is known for being porous yet fairly strong and durable. When fired at high temperatures, it becomes watertight and fixed in its final form. Common uses for terracotta through history include pottery, tiles, and architectural decorations. More recently, terracotta has been used for plant pots, cookware, and other decorative items.
Raw Materials
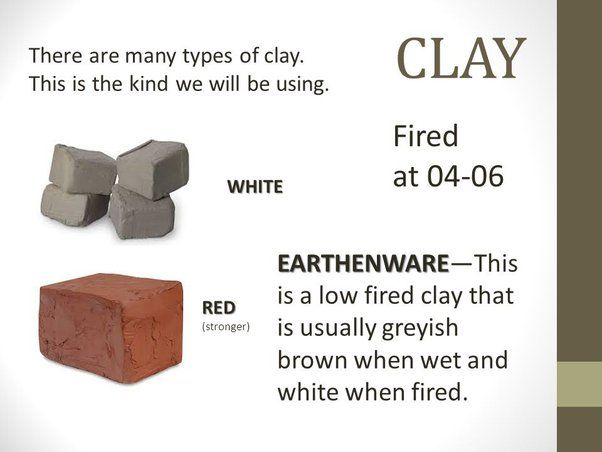
The main raw material that goes into making terracotta clay is various specialized types of clay and earth. The most common types of clay used include:
- Red clay – This natural clay has high amounts of iron oxide, which gives the finished terracotta its distinctive reddish-orange color after firing. Red clay is very porous when fired.
- Earthenware clay – A smooth, easily shaped type of clay that can withstand higher firing temperatures than some other clays. It creates terracotta with an earthy look.
- Stoneware clay – Dense and less porous than other clays. Adding stoneware clay makes terracotta more durable.
In addition to clay, other common additives mixed into terracotta clay include:
- Sand – Added to improve airflow and porosity as the clay shrinks during drying and firing.
- Grog – Crushed terracotta or brick fired at very high temperatures and then mixed into the clay. Grog gives structural strength and prevents cracking.
The right proportions of clay, sand, grog, and any other additives provides the optimal properties for shaping and firing quality terracotta pieces.
Preparing the Clay
The preparation of the clay is a crucial step in making terracotta. Once the clay has been chosen and gathered, usually from clay mines or deposits, some further processing needs to be done before it can be worked with.
One key aspect of preparing the clay is a process known as wedging. Wedging refers to repeatedly cutting, kneading, and reforming the clay. This helps evenly distribute moisture, remove air pockets that could cause cracks or explosions in the kiln, and align the clay particles to improve workability and strength. Wedging is done on a plaster wedging table and usually takes 5-10 minutes for 25lbs of clay. The clay is cut into chunks with a wire tool, stacked, compressed, and kneaded until it reaches the desired smooth, elastic consistency.
Getting the proper moisture content is also essential when preparing the clay. The water content affects the workability of the clay as well as the final strength and color in the fired state. Most clays need 15-25% moisture content to be workable without being too wet and sticky. Moisture can be adjusted by spraying water on stiff clay or letting excessively wet clay dry to evaporate some water. The clay is periodically squeezed in the palm to determine if it has reached the ideal plasticity and moisture level to work with.
Shaping Methods
There are several techniques that can be used to shape terracotta clay into pottery or sculptures:
Handbuilding Techniques
Handbuilding involves shaping the clay by hand without the use of a pottery wheel. Some common handbuilding techniques include:
Coil Method: Long coils of clay are stacked on top of each other and blended together to form the desired shape. The coils can be sculpted further once joined.
Slab Method: Thin slabs or sheets of clay are cut into shapes, layered, and joined to form the structure of the vessel or sculpture.
Handbuilding allows artists to create organic, asymmetrical forms not possible on the wheel.
Wheel Throwing
The pottery wheel allows artists to shape and refine symmetrical, uniform vessels with thinner walls and precise proportions. Pieces of clay are centered on the wheel and then pushed, lifted, squeezed, and otherwise manipulated as the wheel spins. It takes significant skill and practice to properly center and raise clay on the wheel.
Molds
Pouring liquid clay into pre-shaped plaster or ceramic molds allows for consistent, identical forms. The clay is left to dry in the molds before unmolding and finishing. Molds are especially helpful for efficiently producing slipcast pieces like tiles or tableware in commercial production.
Drying the Clay
Once the clay pieces have been shaped into the desired forms, they need to be dried to remove excess moisture before firing. There are two common ways this can be done:
Air Drying
Air drying is the traditional drying method and involves simply leaving the pieces out at room temperature until the clay has become dry to the touch, usually after a few days. The clay needs to dry slowly to avoid warping, cracking, or other defects, so air drying should be done in a room away from direct sun and be shielded from drafts. Pieces can be turned over and rotated during this process to ensure even drying.
Using a Dryer
For faster drying, a low temperature dryer or dehydrator can be used. Dryers apply gentle heat, allowing the moisture to evaporate from the clay in a matter of hours, avoiding many of the issues with quick air drying. The inside of the dryer should not exceed 150°F to carefully control the drying speed. Once the pieces have dried all the way through, they are ready for bisque firing to permanently harden and set the shape.
Bisque Firing
Once the greenware clay pieces have air dried to a leather-hard state, they are ready for bisque firing. This is a low temperature firing around 1500 to 2000 degrees Fahrenheit in order to harden the clay. Bisque firing chemically and permanently alters the clay so that it will not reabsorb atmospheric moisture. It transforms the soft clay into a porous and stable state that is ready to undergo glaze application and subsequent high temperature firing.
A kiln, such as an electric or gas kiln, is used for bisque firing. The greenware pieces are placed in a high temperature-resistant sagger or on a kiln shelf to support them during the firing process. The kiln temperature is slowly raised to the target temperature, held for an appropriate soak time, and then gradually cooled down. Firing too rapidly can cause defects in the bisqueware. The firing schedule varies based on factors such as the clay body composition and the size of ware. Care must be taken to ensure complete water evaporation and stabilization of the ware before it undergoes a second firing with glazes applied.
Glazing
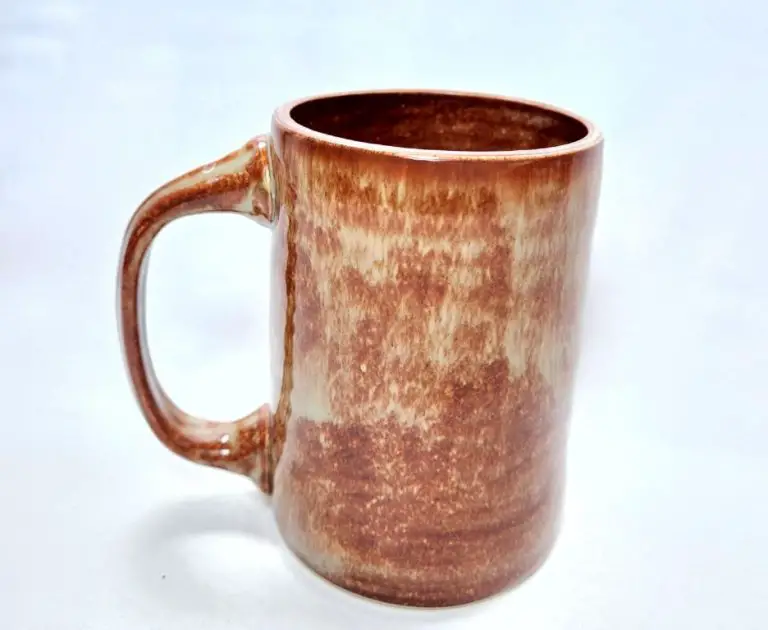
A glaze is a coating applied to ceramic ware to color, decorate or waterproof it. Glazes suspend glass forming minerals in a liquid medium. When fired, the liquid evaporates and the minerals melt, creating a glassy coating that adheres to the clay body. There are several types of glazes used in terracotta pottery:
Low-fire glazes mature and become glass-like between 1723°F and 1935°F. They allow bright colors but tend to be less durable for outdoor use. Typical low-fire glaze ingredients include feldspar, food-safe colorants, silica and clays.
Mid-range glazes mature between 2012°F and 2282°F, yielding more durable coatings that are resistant to scratching. Their formulations have higher amounts of alumina and silica. Mid-range glazes can produce bright colors as well as earth tones.
High-fire glazes reach maturity between 2282°F and 2462°F. They contain the highest percentages of glass formers like silica and alumina, creating an impervious glass surface able to withstand weathering outdoors. High-fire glazes are especially suitable for garden pots and architectural terra cotta.
Glaze application techniques include:
– Dipping – Submerging dried bisqueware into a container of glaze
– Pouring – Allowing glaze to flow over the surface from a pitcher or bucket
– Brushing – Using a soft brush to stroke glaze onto bisqueware
– Spraying – Spraying liquid glaze through an airbrush or spray gun
Glaze Firing
The final step in creating terracotta pottery is glaze firing the bisque ware at high temperatures, typically between 2120-2340°F (1160-1280°C). This extreme heat melts the glass components in glazes, fusing them to the clay body in a process known as vitrification.
The goal of glaze firing is to achieve the desired chemical reactions between the glaze and the clay body. Specific clay and glaze combinations are carefully formulated so that at peak temperatures in the kiln, the glaze viscously flows, bonds to the clay surface, and then fuses into a glassy coating as it cools.
Managing the firing schedule is critical, as fast rising in early stages prevents glazes from blistering or peeling while a gradual cool down at the end enables proper vitrification. Stoking kilns at strategic intervals with fuel maintains even heat distribution and atmosphere for flawless results.
Master potters test and fine-tune clay bodies and glazes over years to perfect their fusion point. The resulting translucent but durable glaze finishes showcase the work’s shape while acting as a decorative accent to the fired terracotta clay.
Final Touches
After the terracotta has been shaped, dried, fired, and glazed, there are often additional steps taken to further decorate or finish the clay. Some common final touches include:
Additional Decorating
Terracotta can be painted with acrylics or oils and distressed to give an antique appearance. Common decoration techniques include:
- Painting designs by hand
- Stenciling patterns
- Sponging on paint for texture
- Sanding edges to distress them
- Rubbing white paint over raised areas to accentuate texture
Sealing and Protective Finishes
Applying a clear sealer or finish will help protect the terracotta and decorations from damage. Some options include:
- Acrylic sealer
- Polyurethane
- Outdoor sealant for pieces used outside
Be sure to select the appropriate sealer for the intended use and follow application instructions carefully.
Conclusion
Terracotta clay has a unique process from raw clay materials to finished ware. The steps involve refining and preparing the specific mixture of clays, molding or shaping the clay body into the desired forms, allowing it to dry to a leather hard state, bisque firing to further harden and stabilize the objects, optional glazing to decorate and create a non-porous surface, a final firing to melt and adhere the glazes, and finishing touches as needed.
The result of this extensive process is terracotta pieces with distinctive porous, earthenware properties. Unlike other clays that vitrify and become non-porous during firing, terracotta maintains its natural red-orange color and slightly coarse texture. These unique attributes allow it to stand out among other pottery while providing creative possibilities for artisans and crafters working with clay.


