What Is The Wheel Technique In Ceramics?
Wheel throwing is a process of shaping clay using a potter’s wheel. It has been used for thousands of years to create pottery, dating back to Ancient Egypt and Mesopotamia. The wheel allows potters to quickly and symmetrically shape clay into uniform shapes and vessels.
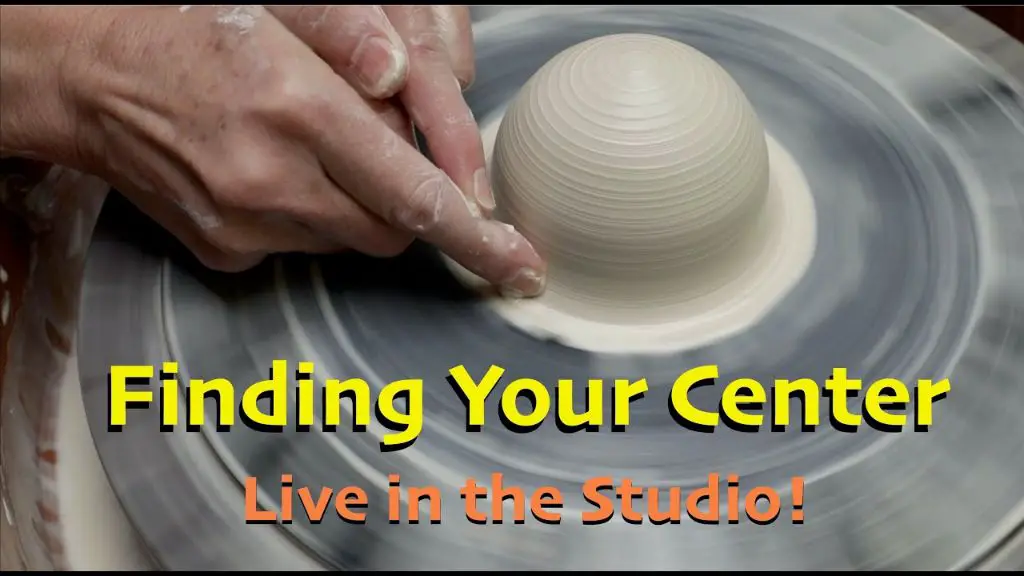
Wheel throwing involves centering a lump of clay on a rotating disk called a wheel head. The momentum of the spinning clay allows the potter to raise the walls evenly as the form is drawn up and shaped with their hands. Water is applied as a lubricant while throwing to prevent the clay from sticking to the potter’s hands as they manipulate the form.
The wheel technique offers several advantages over handbuilding techniques like pinch pots, coils or slabs. The centrifugal force of the spinning clay allows for thinner and more delicate walled forms. The process is also much quicker than handbuilding. Complex shapes like bowls, vases, plates and lidded jars can be made with symmetry, uniform thickness and consistency using the wheel.
However, wheel throwing requires practice to learn proper techniques for centering, opening and raising the clay as well as balancing and handling forces. It can be challenging for beginners to maintain an even thickness and desired shape. But with repetition, making consistent pieces on the wheel is very achievable.
Tools and Equipment
The primary tool for wheel throwing is the potter’s wheel. This spinning horizontal wheel allows the clay to be rotated as it is shaped by the potter’s hands. Potters wheels can be powered by electricity, a foot pedal, or even by hand. Having a variable speed wheel allows for fast centering as well as slow, controlled shaping.
In addition to the wheel, there are several other important tools:
- Clay – The type of clay is crucial, as it must have the right plasticity, strength, and shrinkage rate for throwing on the wheel. Many potters use stoneware or porcelain.
- Bat – A bat is a circular disk that attaches to the wheel head. It provides a smooth, non-stick surface for the clay to sit on while throwing.
- Ribs – These are handheld scraping tools used for compressing and smoothing the clay walls. They come in various shapes and materials like wood, rubber or metal.
- Fettling knife – A steel knife with a flexible thin blade used for trimming excess clay off bases or for slicing clay off the wheel.
- Sponge – Sponges are essential for keeping wheels and bats damp and cleaning up slipped surfaces.
- Cutting wire – Steel wire is used to cut clay off the wheel at the end of the throwing process.
Having the right clay, wheel, and tools makes the wheel throwing process much easier. Investing in quality equipment helps potters master the wheel technique.
Preparing the Clay
Before clay can be centered and shaped on the pottery wheel, it must be properly prepared. This involves wedging and kneading the clay to achieve the desired consistency and moisture content.
Wedging is the process of cutting, folding, and pressing the clay to distribute moisture evenly and remove air pockets. It is usually done on a wedging table or plaster bat. The clay is cut into several pieces, stacked, then compressed by pushing forward with the heels of the hands while the body rotates. This kneads the clay and binds the mass together.Claytalk – let’s talk about clay!
An evenly wedged clay should have a uniform texture and plasticity throughout. Air bubbles are detrimental during throwing as they can cause cracks or explosions. The clay should feel cool and pliable, not sticky or stiff. Using calipers, an optimal throwing consistency is around 8-10% water content.
Under-wedged clay tends to be stiff and prone to cracking whereas over-wedged clay becomes sticky and difficult to center. Finding the right consistency and moisture level takes practice but is essential for successful wheel throwing.
Centering the Clay
Centering the clay is one of the most important steps in using the wheel technique. Properly centered clay is balanced and will be easier to manipulate into the desired shape. To center the clay:

First, apply water to the wheel head to lubricate it and form the clay into a rough ball shape. Then slam the clay down onto the center of the wheel, applying even pressure. Start the wheel spinning at a moderate speed and apply gentle pressure to the sides of the clay. Do not squeeze too hard or you may warp the shape. Let the spinning motion bring the clay together into a consolidated mass.
As the wheel spins, continue to apply light pressure from both hands and use your thumbs to bring the clay towards the center. The goal is to form the clay into a cylinder that will rise evenly as the wheel spins. Keep fingers and palms moist with water. Reposition hands as needed. The clay is centered when it rises straight up without wobbling and walls are uniform thickness.1
Proper centering takes practice but is essential for creating uniform pieces. Uncentered clay will be off-balance and difficult to raise into an even shape. If struggling to center, stop the wheel, re-consolidate the clay into a ball, and try again. Do not leave lopsided clay on the wheel or it will only get more uneven as you shape it.
Opening the Clay
Once the clay is centered on the wheel, the next step is to open up the ball of clay to form the interior space of the piece. This is done through a process called “coning up” the clay. The potter places one hand inside the ball of clay and applies gentle outward pressure, while the other hand supports the outside of the clay. This causes the solid ball to rise up into a cone shape, with walls tapering up towards the center.
It’s important during this stage to compress the clay walls by squeezing them between the fingers and palm of each hand. Compressing strengthens the clay and removes any air pockets that could cause weaknesses or cracks during the drying and firing process. Using metal or wooden ribs can also help compress the walls evenly. The rib tools are held against the exterior and interior walls at an angle and slowly drawn upwards from bottom to top as the clay is further coned upwards. The ribs condense the clay particles together, add stability to the emerging vessel walls, and leave a smooth surface texture.
Opening the clay properly is crucial for forming an even thickness of walls in the final piece. The potter must open up the solid ball into an evenly tapered cone while continually compressing the clay to avoid any weak spots. Mastering coning techniques takes practice but allows potters to successfully raise tall, structurally sound vessels on the wheel.
Raising the Walls
Once the clay is centered and open, you can begin raising the walls. This stage involves slowly pulling the clay upward with even pressure to raise the walls to the target height. There are a few key things to focus on during this stage:
Pulling up walls evenly – As you pull up on the clay, apply an even pressure with your fingers and thumbs all the way around the wall. Don’t pull too hard in one area, which can cause uneven walls. Pull straight up and avoid angling the clay. Rotate the wheel continuously with your other hand as you pull up the walls.
Controlling height – Raise the walls gradually, avoiding pulling too high too quickly. Monitor the height as you shape and aim for your target measurement. Taller pieces will require thicker walls for stability.
Controlling thickness – The thickness of the wall will determine the strength and stability of the final piece. Plan the thickness based on the height and size of your piece. Use your fingers to compress thicker areas and shape the overall form as you raise the walls. Aim for even thickness throughout.
Forming the Base
After raising the walls to the desired height, the next step is forming the base. This involves shaping the foot ring and controlling the base thickness.
The foot ring is the area that connects the bottom of the vessel to the work surface. To shape it, place one hand inside the vessel for support and use the other hand to gently push the clay outwards at the base. Use a rib tool to refine the shape of the foot ring and make it even all the way around.
It’s important to maintain an even wall thickness throughout the piece. To control the base thickness, slow the wheel down and place one hand inside for support. Use the other hand to gently compress the base from the outside, thinning it out. Use calipers or a ruler to check that the walls are an even thickness. The bottom should be slightly thinner than the walls.
Make sure the foot ring is well-defined before moving on. The base should sit flat with no wobbling. If the shape goes off-center, gently nudge it back into alignment before continuing.
Final Shaping
Once the basic form is established, the next step is to refine the shape and smooth the contours. This stage is crucial for achieving the desired aesthetic. The potter uses various tools to compress the clay and eliminate any bumps or irregularities in the surface. Fingers and wooden ribs are commonly used to burnish and condense the clay. A metal kidney tool helps scrape and carve refined contours.
Particular attention is given to refining the rim and lip of the piece. The lip can be shaped to be rounded, tapered, flattened, or rolled for different effects. The walls are also assessed to determine if they should remain vertical or be shaped into more of a curved contour. Curved sides tend to be more graceful whereas straight sides give a more angular impression.
During this process, the rotational speed of the wheel is adjusted as needed. Slower speeds allow for more controlled refinement. The potter must maintain an even pressure and smooth motion when working the clay to achieve the desired uniform surface texture and finessed form.
Trimming and Finishing
Trimming and finishing are the final steps in shaping a piece made on the pottery wheel. Trimming involves cutting off any excess clay and smoothing the bottom, while finishing is adding any embellishments or decorative elements.
To trim the piece, you’ll need a special trimming tool that has a flat metal blade. First, center the piece again on the wheel and get it spinning at a medium speed. Hold the trimming tool in one hand and rest it lightly against the bottom edge. Apply gentle pressure and slowly trim away any excess clay and flatten the base 1. You can also use the trimming tool to refine the shape and smooth any uneven areas. Avoid cutting too much clay away to prevent making the walls too thin.
During finishing, you can add decorative elements like imprints, textures, or colored slips. Attach any appendages like handles or spouts. Additional clay can also be added to the main form. Allow the piece to completely stiffen before removing it from the wheel.
Common Issues and Solutions
There are a few common issues that can arise when throwing pots on the wheel. Here are some of the most frequent problems and tips for troubleshooting:
Wobbling
If your clay wobbles while you’re throwing, it likely means it is not properly centered. Try recentering the clay and making sure it is firmly in place before raising the walls. Check that your wheel head is level and clean. Wobbling can also occur if the clay is too wet. Let the clay firm up slightly before throwing if this is the case.
Warped Shape
The shape of your pot can become warped or distorted. This often happens when raising the walls too quickly before they are strong enough. Build up the sides gradually, and stop to compress the clay regularly. Make sure you are centering the clay well throughout the process. Using calipers to measure can help maintain an even shape.
Cracking
Cracking during throwing or drying can be caused by several issues – clay is too wet, walls are too thin, or drying too quickly. Avoid overly wet clay and thin walls. Dry pots slowly and evenly. Cracking during firing may indicate thermal shock – carefully control kiln temperatures.
With patience and practice, these common issues can be prevented. Don’t be discouraged! Refer to online tutorials such as https://xghbw.foto-motte.de/en/38176.html for more troubleshooting tips.


