What Is Using A Pottery Wheel Called?
A pottery wheel, also known as a potter’s wheel, is a device that allows a potter to shape rounded ceramic wares quickly and with more precision. The wheel head, or bed, rotates while the potter uses their hands, tools, or a stick to shape the clay mounted on the wheel head.
Pottery wheels have been used for thousands of years to produce utilitarian and decorative clay vessels. They originated in ancient Mesopotamia by 3000 BCE and revolutionized pottery production, enabling mass production of uniform pieces. Today, pottery wheels remain essential tools for studio potters and production potteries.
Terminology
The terms “throwing” and “spinning” refer to the process of using a pottery wheel to shape clay. While often used interchangeably, there are some subtle differences between the two terms:
Throwing refers specifically to the process of using centrifugal force to shape clay on a rotating pottery wheel. The potter centers the clay on the wheel head, then uses their hands to manipulate and form the clay as the wheel spins.1 Throwing requires skill and practice to master.
Spinning is a more general term that can refer to simply rotating the pottery wheel, with or without clay attached. However, spinning is also sometimes used synonymously with throwing to mean shaping clay on a moving wheel. In pottery instruction, both terms may be used interchangeably.
In summary, throwing specifically describes the act of forming clay on a wheel, while spinning can mean rotating the wheel with or without attached clay. But in common usage, both throwing and spinning often refer to using a pottery wheel to shape clay vessels.
The Process
Using a pottery wheel involves several key steps:
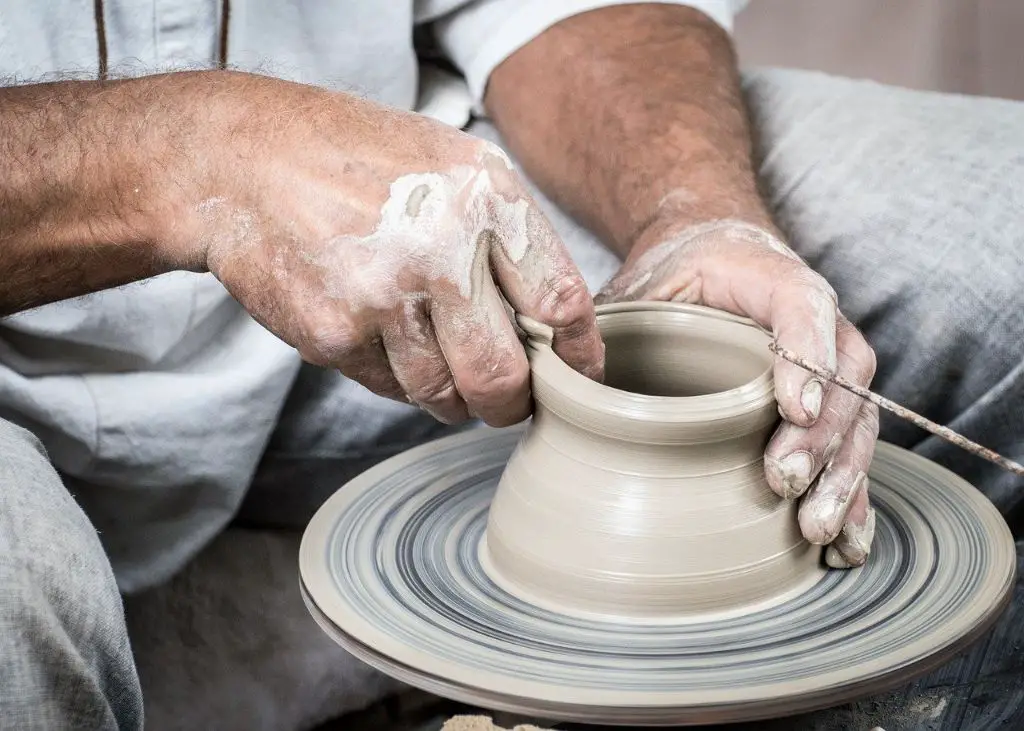
First, the clay must be centered on the wheel. This involves placing a lump of clay in the middle of the wheel and applying pressure to form it into a cone shape while the wheel spins slowly. Centering helps ensure the clay is evenly distributed and balanced for the next steps.
Next, the speed of the wheel is increased to get the clay spinning smoothly. The potter places both hands around the clay, keeping fingers wet, and applies gentle pressure to shape the cone into a cylinder. This process of drawing up the sides is called “opening” the form.
Once a basic cylinder shape is formed, the potter can further refine the shape by techniques like “collaring” where thumbs and fingers compress the rim. More advanced shapes involve careful manipulation of the spinning clay with tools and hands to create curves, indentations, and asymmetric forms.
As the form takes shape, the potter must periodically slow the wheel and use various tools to thin, smooth, and sculpt the clay. A pottery rib can compress clay or create grooves, while a rubber rib smooths surfaces. Pieces can also be trimmed or altered by cutting into the form with wire tools.
When the form is complete, the potter waits for the right firmness, then uses a wire tool to separate the finished piece from the excess clay, a process called “cutting off.” The piece is then set aside to dry before firing.
The full process involves coordination, technique, and practice to center the clay, raise the walls, refine the shape, and cut off the finished form. With experience, potters can create an amazing variety of vessel shapes on the wheel.
Source: https://ceramicaplus.tn/en/use-pottery-wheel-for-beginners/
Speed and Direction
The speed and direction of the pottery wheel is crucial for properly shaping clay. The speed controls how quickly the clay spins, while the direction determines whether the wheel rotates clockwise or counterclockwise.
For beginning potters, a slow to medium speed is recommended. Too fast of a speed can cause the clay to fly off the wheel. The lower speed gives more control and time to center the clay and pull up the walls evenly.
The most common direction for pottery wheels is counterclockwise, with the wheel rotating towards the potter’s dominant hand. However, some potters may use a clockwise direction instead. The key is to be consistent with the direction so your hands learn the muscle memory.
As skills improve, potters can experiment with varying the speed and direction for different effects. Faster speeds are useful for thinning walls, while slower speeds allow carefully carving details. The direction can be reversed temporarily to smooth seams and round out asymmetries.
Mastering both speed and direction control is crucial for creating precisely shaped pieces. An experienced potter will intuitively adjust the wheel based on the demands of the current clay form.
Shaping Techniques
There are several techniques used while shaping clay on the pottery wheel to create different forms and effects. Mastering these techniques takes a lot of practice and skill.
Centering involves getting the clay centered on the wheel head so it can be rotated evenly without wobbling. This involves wedging the clay into a cone shape and carefully placing it on the wheel, then applying pressure while rotating the wheel to center it. Centering is crucial for having control while shaping the clay.
Opening refers to using your thumbs to push down into the centered clay and stretch it upwards into a cylinder or cone shape by applying outward pressure. This creates an open form to then shape further.
Raising involves using your fingers and palms to push up the sides of the clay evenly while rotating the wheel. This is done after opening the clay and makes the form taller.
Collaring is a technique where you place one or both hands on the outside of the form and apply pressure to push the clay out slightly, creating a collar or curved lip around the top. This strengthens and evens the rim of the form.
There are many other specialized techniques like pulling, ribbing, and trimming that take extensive practice on the wheel. Having an understanding of the basics allows you to then learn more advanced shaping methods.[1]
Common Tools
Potters use a variety of specialized tools during the pottery making process. Some of the most common tools include:
Ribs – Ribs are rigid, blunt tools made of wood, metal, or plastic used to shape, smooth, compress, or cut clay. Steel ribs provide rigidity while wooden ribs are more flexible. Ribs help potters thin tall sections and refine shapes when throwing on the wheel. They are an essential tool for potters.
Trimming tools – Trimming tools, including loop tools and sponges, are used during the trimming process when the clay is leather hard. Loop tools have a variety of shaped wire or metal loops on the end that can compress, cut away, and refine the surface. Sponges smooth the surface and absorb excess water.
Loop tools – Loop tools have a handle with a wire or metal loop on the end and come in a variety of shapes like circles, squares, diamonds, etc. They are primarily used for smoothing, shaping, scraping, and refining leather hard clay. The shape of the loop determines its effect on the clay surface.
Sponges – Sponges are used to smooth and refine the clay surface, absorb excess water, and apply slips or glazes. Soft natural sponges work well for smoothing while stiffer synthetic sponges can be cut into shapes to refine details. Sponges should be damp but not dripping wet when working with clay.
Having a good variety of common tools makes throwing and trimming easier and expands what potters can create. Ribs, loop tools, sponges, and trimmers all serve important purposes during the pottery making process.
Troubleshooting
Using a pottery wheel takes practice and skill. As a beginner, you may encounter some common issues like wobbling, cracking, or equipment malfunctions. Being aware of potential problems and how to address them will help you become a confident potter.
One of the most frustrating things is a wobbly wheel head or clay wobbling as you throw. This can be caused by an uneven wheel head, off-center clay, or improper wedging technique. Make sure your wheel is on a sturdy, level surface. Center your clay properly by pounding it into a cone shape. Wedge clay thoroughly so it has an even, uniform consistency. Go slowly at first, until the clay stops wobbling.
Cracking is another common frustration, happening when clay dries too quickly or unevenly. Keep your clay covered with plastic when not in use. While throwing, maintain an even wall thickness and compress clay regularly with your hands. Avoid overworking one area as this can lead to weak spots. Mist clay with water if it dries out. Allow freshly thrown pieces to dry slowly and evenly.
Equipment issues can also disrupt your throwing. A stretched belt or blown fuse may cause the wheel to slow down or lose power. Refer to troubleshooting tips from the manufacturer or pottery craft sites like Pottery Craft Guide and Potter’s Passion for diagnosing and fixing particular problems with your make and model.
Decorating
After a piece is thrown on the pottery wheel and allowed to dry to a leather-hard state, decorators have many options for adding color, texture, and design. Decorating wheel-thrown pottery is an art form in itself. Some common decorating techniques include:
– Glazing – Glazes are mixtures of minerals and chemicals that produce a glassy coating when fired in a kiln. Glazes come in endless colors and effects. Pieces can be dipped, brushed, or sprayed with glaze. Clear glazes allow the natural clay color to show through.
– Underglazes – These colored glazes are painted on leather-hard clay before a final transparent glaze is applied. The underglaze design remains visible. Underglazes come in many colors.
– Slips – These are thinned clay suspensions that can be painted onto ware. Slips provide background color before clear glazing.
– Staining – Stains are concentrated colorants made from metal oxides that permanently color clay bodies after firing. Common stained colors are blues, greens, yellows and rusty oranges.
– Wax resist – Wax is used to “resist” glazes from adhering to certain areas, preserving the bare clay color. The wax melts away during kiln firing.
– Carving or incising – Clay can be etched with blades, rods or tools to create texture and patterns before firing. Intricate designs can be carved into leather-hard clay.
– Terra sigillata – This very fine clay slip is polished with a stone or cloth to burnish areas and give a glossy shine.
The options for creatively decorating pottery wheel pieces are endless. Decorating brings out the best attributes of the form and allows potters to make unique works of art. For inspiration, see the posts at https://www.pinterest.com/potterychik/pottery-wheel-projects/.
Wheel Varieties
There are two main types of pottery wheels: electric and manual kick wheels. Electric pottery wheels are powered by electricity and have a motor that rotates the wheel head. Kick wheels require the potter to kick a foot pedal to provide momentum to spin the wheel head. Some key differences include:
Power Source
Electric wheels use electricity to power the motor and spin the wheel head at a consistent speed. Kick wheels rely on leg power and momentum from kicking the pedal. The speed fluctuates more on a kick wheel.
Speed Control
Electric wheels allow precise speed adjustment with a dial or knob. Kick wheel speed depends on how fast and hard the pedal is kicked.
Cost
Electric wheels are generally more expensive, often $400+ for quality brands. Manual kick wheels can be under $100. However, electric wheels are usually seen as a worthwhile investment for serious potters.
Size and Portability
Kick wheels are smaller and more portable. Electric wheels tend to be bulkier. However, some electric wheels allow the head to be detached for easier transport.
Both types of wheels can produce high quality work. Electric wheels offer more consistent spinning and are easier to use for longer periods. Kick wheels provide a more physical, hands-on experience and allow potters to control the speed. Beginners may want to start with a lower cost kick wheel, while advanced potters generally prefer the advantages of electric.
Getting Started
Getting started with pottery wheel throwing can seem daunting, but with the right guidance, tools, and practice, it’s an achievable goal for any beginner. Here are some tips to help you get set up for success:
Supplies – You’ll need a potter’s wheel, clay, basic tools like ribs and trimming tools, a water bucket, and an apron or smock. Consider an introductory wheel throwing kit that contains essentials. Quality matters, so avoid flimsy hobby store pottery wheels if possible. Check local ceramic studios for wheel and clay recommendations.
Lessons – Even a few professional lessons can teach you proper techniques from the start. Consider a class at a nearby ceramic studio, community college, or recreation center. Online video tutorials from experts are another option.
Safety – Review proper precautions before throwing. Tie back long hair, remove jewelry, and don’t wear loose clothing that could catch. Be mindful of the spinning wheel and proper tool handling. Consider goggles and a mask if desired.
Practice – Throwing takes muscle memory. Don’t get discouraged. Take it slow and plan to practice frequently. Allow time for trial and error. Focus on the basics and making cylinder forms first. Let drying and trimming refine your pieces over time. Enjoy the creative process and satisfaction of a hands-on craft.
For detailed getting started advice, check out this comprehensive beginner’s guide: https://design.udlvirtual.edu.pe/en/beginning-pottery-wheel-techniques.html