What Kind Of Drill Do You Use To Mix Mortar?
Properly mixing mortar is crucial for creating durable and long-lasting masonry structures. Mortar acts as the adhesive between bricks, concrete blocks, stones, and other masonry units. It fills the gaps between them, bonds them together, and helps transfer the load between the individual units.
For high quality and consistent results, mortar must be thoroughly mixed to achieve a uniform consistency before it is applied. The mixing process evenly distributes the cement, lime, sand and water throughout the mortar and activates the bonding properties of the cement. Insufficient mixing can lead to weak spots and flaws in the final structure.
Using a power drill with a mixing paddle attachment is the most effective way to properly mix mortar. Hand mixing does not fully integrate the ingredients and lacks the power to thoroughly break down lumps. A drill provides the speed, torque and mixing action needed to properly blend mortar in the shortest time.
Tools Needed
To properly mix mortar by hand, you will need some basic tools. The most important are:
- Mortar mixer – This can be a wheelbarrow or tub specifically designed for mixing mortar. The tub should be sturdy and rust-resistant. A regular wheelbarrow will work but may allow some of the mortar to leak through.
- Mortar hoe or shovel – You’ll need a sturdy shovel or rectangular hoe to mix the mortar ingredients together. The hoe should have angled sides to help cut into and mix the mortar effectively.
- Mortar box – This provides a contained space for holding the mixed mortar as you work. It sits nearby so you can easily scoop mortar from the mixer into the box.
- Water source – Have a hose or buckets of water on hand to add the proper amount to the mortar mix.
Make sure all tools are clean and ready before starting the mortar mixing process. Avoid using tools with residue or debris left over from past jobs.
Types of Drills
There are three main types of drills commonly used for mixing mortar:
Corded Drills
Corded drills are plugged into an electrical outlet to provide power. They typically have more torque and are better for heavy duty mixing jobs. Corded drills don’t have to worry about battery life, so they can run continuously without stopping to recharge. Just be aware of the cord length so you can safely work near your mixing area.
Cordless Drills
Cordless drills operate on rechargeable batteries, providing more flexibility and range of motion. Cordless drills are convenient for small jobs, allowing you to move around without being tethered to an outlet. However, cordless drills may not have as much power and torque as corded models. Be sure to have fully charged batteries before mixing mortar.
Hammer Drills
Hammer drills have an impacting hammer motion in addition to drill rotation. This pulverizing action provides extra power to bust through tough material like masonry and concrete. The hammering can help fully integrate mortar ingredients, but isn’t strictly necessary for mixing lighter jobs. Hammer drills with an adjustable clutch help control the hammering action.
Corded vs Cordless
When choosing between a corded or cordless drill for mixing mortar, there are a few key differences to consider:
Power
Corded drills are powered by an electrical outlet, so they provide continuous power and do not lose strength over time. This makes them ideal for heavy duty mixing tasks that require maximum torque. Cordless drills run on battery power, so their power and runtime are limited before needing a recharge. However, cordless models provide more flexibility and mobility around the job site.
Battery Life
With cordless drills, you’ll need to monitor the battery level to avoid it dying mid-mix. Most batteries provide enough runtime for occasional mixing tasks, but frequent or extended use will require extra charged batteries on hand. Corded drills provide unlimited runtime when plugged into an outlet.
Mobility
Cordless drills offer complete freedom of movement without being tethered to an outlet. This allows you to mix mortar anywhere within range of the job site. Corded drills restrict your mixing area to the length of the power cord. Extension cords can provide more reach, but require running power to the desired location.
Choosing a Drill
When selecting a drill for mixing mortar, you’ll want to consider power, clutch settings, and variable speed.
Look for a drill with at least 600 watts of power. More power allows you to mix thicker materials and larger batches without overworking the drill. Cordless drills should be 18V or higher (1).
An adjustable clutch is crucial so you can set the resistance and avoid drill bit spinout when mixing. Opt for at least 16 clutch settings for maximum control (2).
Variable speed control gives you flexibility during the mixing process. Start slow to integrate water, then increase speed to fully incorporate materials. Look for a drill with at least 2 speeds (1).
Other features like metal gear housing, paddle switch, and gear case drainage can also help extend the life of your mixing drill.
Drill Features
When selecting a drill for mixing mortar, some key features to consider are the gearbox, clutch, and variable speed settings.
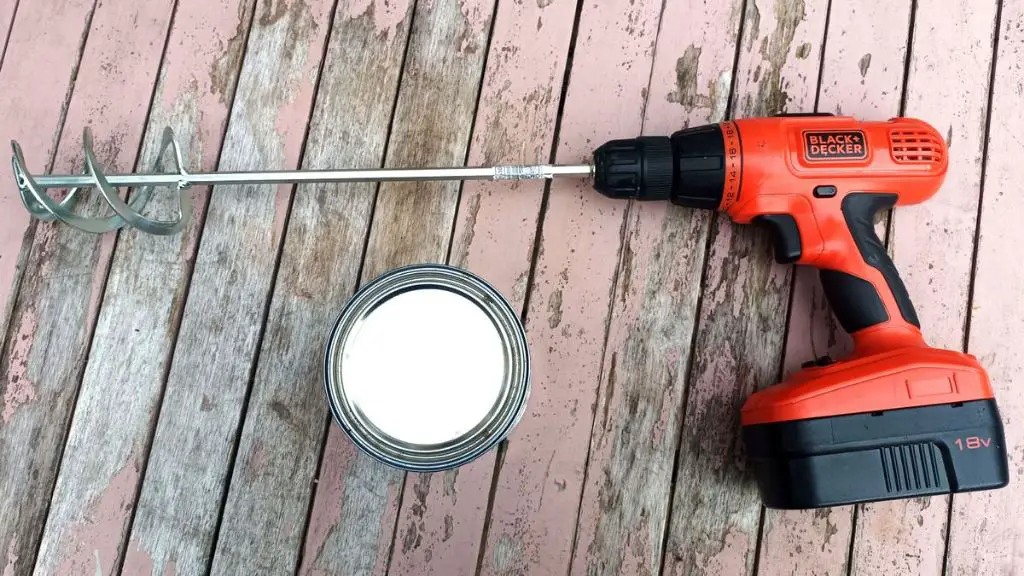
The gearbox affects the drill’s torque and speed. A 2-speed gearbox allows switching between lower speeds with higher torque for mixing, and higher speeds for drilling. This versatility is ideal for mixing mortar.
A clutch allows the chuck to continue spinning while stopping the shaft from turning. This allows mixing mortar without the resistance of the paddle stopping the chuck. Opt for a drill with an adjustable clutch to customize the resistance when mixing.
Variable speed triggers provide enhanced control over the paddle’s spinning speed. Lower speeds are better for mixing mortar thoroughly without spraying it everywhere. Speed settings also enable adjusting the rpm for different consistencies of mortar.
According to TheToolLocker.com, clutches and variable speeds give users more control and optimize mixing mortar [1]. These key features differentiate drills designed for mixing from standard drills.
Mixing Technique
Proper mixing technique is crucial for achieving the ideal consistency and workability of the mortar.
Start by adding about 3/4 of the required water into the mixing container or wheelbarrow. Then gradually add the dry mortar mix, either premixed mortar or separately measured cement, lime, and sand. Mix the dry ingredients into the water little by little, allowing the mortar to fully absorb the water before adding more. This prevents clumping.
Once all the dry mortar is incorporated with water, use the drill and paddle attachment to thoroughly mix for 2-3 minutes. The drill allows you to efficiently achieve a smooth, lump-free consistency compared to hand mixing. Adjust water amounts gradually if needed. The ideal mortar consistency is moist enough to cling to a trowel but not runny.
Test the workability by scooping some mortar onto a trowel. Properly mixed mortar should easily spread under pressure but hold its shape when the trowel is lifted. Mix in additional water or mortar as needed to achieve this consistency before use.
Safety
When using a drill for mixing mortar, proper safety precautions should always be taken to avoid injury. Here are some key safety tips:
Personal Protective Equipment (PPE)
– Wear safety goggles to protect your eyes from flying debris and splashes.
– Use a dust mask or respirator to prevent inhaling dust while mixing dry mortar.
– Wear thick work gloves to protect your hands from abrasions. The vibration from the drill can also cause hand numbness over time.
Electrical Safety
– Never use a corded drill in wet conditions – this poses an electrocution risk.
– Check the cord for frays or damage before use. Don’t use if cord is compromised.
– Make sure extension cord is rated for the amperage of the drill if needed.
Ergonomics
– Keep your wrists straight when holding the drill to avoid injury.
– Take breaks periodically to avoid repetitive stress injuries.
– Don’t overexert yourself – let the drill do the hard work of mixing.
Mixing mortar can be a strenuous task. Following basic safety precautions will help keep you injury-free.
Cleaning and Maintenance
Properly cleaning and maintaining your drill and mortar mixer after each use is crucial for keeping your equipment in good working order. Here are some tips for cleaning and maintenance:
After mixing mortar, empty out any remaining material from the mixer drum and use a damp cloth to wipe down the inside of the drum to remove residue. Use a wire brush or putty knife to scrub any dried material off the paddle attachments and shaft. You can also fill the mixer halfway with water and some gravel, turn it on for a few minutes, then rinse.[1]
For cordless drill mixing attachments, detach the paddle and wipe it down thoroughly with a damp cloth. Soak any hardened material in water first to loosen it. Use a stiff brush or old toothbrush to scrub the crevices clean.[2]
After cleaning, check for any signs of damage or wear. Make repairs if needed. Store equipment in a clean, dry area.[3] Doing regular maintenance and cleaning will help maximize the lifespan of your mixing tools.
Summary
When choosing a drill for mixing mortar, the key considerations are:
- Opt for a corded drill with higher torque rather than a standard cordless drill
- Select a paddle mixer attachment designed specifically for mixing mortar
- Lower RPMs around 300-500 are ideal to properly mix mortar without splashing
- Mix mortar thoroughly but avoid overmixing once it reaches the proper consistency
- Always use safety gear like eye protection when mixing
- Clean the mixing paddle and drill after each use to prevent material buildup
In summary, mixing mortar requires a heavy-duty corded drill and specialized paddle attachment to achieve a smooth, lump-free consistency. Pay attention to mixing technique, safety, and cleaning to get the most efficient and effective use from your mortar mixing drill.

