What Materials Do You Need To Make A Clay Tablet?
Clay tablets have been an important form of written communication for thousands of years. Some of the earliest writing systems in history were impressed onto wet clay and then dried to preserve the marks. Clay tablets allowed ancient civilizations to record everything from day-to-day commerce to great literary works.
Clay tablets are exactly what their name describes – flattened pieces of clay with writing engraved on them. They were made of clay from the banks of rivers mixed with other additives and then molded into a flat tablet shape. While the tablet was still wet, writing was impressed on it with a stylus. Once dried, the writing was preserved.
Clay tablets were the main form of written documentation starting around 3500 BCE in ancient Mesopotamia. They were instrumental for record-keeping, business transactions, and communicating in writing. The Sumerians, Babylonians, Assyrians, Hittites and Mycenaean Greeks all used clay tablets extensively. Many important literary works from antiquity like the Epic of Gilgamesh were first written on clay tablets.
Choosing The Right Clay
The most important ingredient for making clay tablets is the type of clay used. Not all clay is suitable for tablet making. The clay needs to have specific properties in order to be shaped, engraved, and fired into a durable tablet. The clay used for ancient tablets were specially chosen based on the following criteria:
Plasticity – The clay needs to be moldable and pliable enough when wet to be shaped and engraved with the writing. However, it also needs to hold its shape without deforming when drying.
Strength – After firing, the clay must be strong and durable. It cannot be prone to cracking or crumbling which would destroy the tablet.
Firing Temperature – The optimal clays fire into a ceramic at lower temperatures, around 600-900°C. This allows firing to be done in simple kilns.
Color – While not essential, clays that fire into light colors like tan or red allow for better contrast when engraved.
The most common clays used were various mixes containing clays like palygorskite, bentonite, and kaolin. These were typically mixed with materials like sand, crushed potsherds, or ash to optimize the properties. Finding a clay source with the right composition was an important first step in ancient tablet making.
Additives
Some form of additive was usually mixed into the clay to prevent cracking and help hold the engravings. Ancient clay tablets often used straw, hair, or sand as additives. These helped bind the clay particles together and reduced shrinkage and cracks as the clay dried and was fired.
The purpose of additives was to strengthen the clay body so the tablets could better hold their shape during the drying and firing process. The straw, hair, or sand particles provided reinforcement within the clay matrix. This reduced the risk of warping or cracking that could damage the tablet. A tablet with cracks or missing pieces would be unusable for writing.
Straw was the most common additive based on archeological analysis of ancient tablets. It was readily available as a waste product from grain production. Straw consisted of hollow, silica-rich stems that absorbed water and then burned away at high firing temperatures. This improved porosity and prevented cracking. Hair and crushed potsherds were other traditional options, providing silica that improved binding and strength.
Shaping Clay Tablets
Once the clay mixture is prepared, the next step is to shape it into tablets. There are several techniques used for shaping clay tablets:
Slabs
One method is to roll out slabs of clay and then cut rectangles or squares to the desired size. The clay slabs should be rolled to an even thickness, usually 1/4 to 1/2 inches thick. A rolling pin can be used to flatten the clay into slabs.
Coils
Another technique is to roll clay into coils or snakes, then lay the coils next to each other to form a flat tablet surface. The coils are smoothed together using fingers or a flat tool. Coiling is good for controlling the thickness of the tablet.
Wheel Throwing
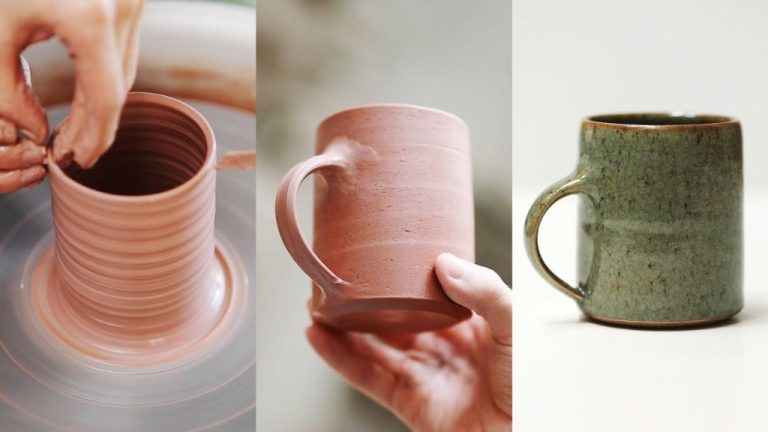
For large quantities of tablets, clay can be thrown on a pottery wheel. A lump of clay is centered on the wheel and opened out to form a flat tablet shape as the wheel spins at high speed. This is an efficient method for shaping many tablets with a consistent size and thickness.
Deciding which technique to use depends on the quantity of tablets needed and the desired shape and size. Tablets made from slabs or coils allow meticulous control over the form. Wheel throwing enables fast shaping once the technique is mastered.
Drying
After the clay tablet has been shaped, it needs to be dried before it can be engraved or fired. There are two main methods for drying clay tablets: air drying and kiln drying.
With air drying, the clay tablets are left out in open air to slowly dry over time. This is the most natural drying method, but it can take weeks for the clay to fully dry if the tablets are thick. Air drying requires careful monitoring to make sure the clay dries evenly and doesn’t crack. Turning the tablets periodically will help them dry smoothly. The environment should not be too humid, or else drying will be slowed.
Kiln drying uses an oven or kiln to quickly dry the clay tablets at higher temperatures. This significantly speeds up the drying time to just a few hours or days. The oven temperature must be kept below 122°F (50°C) however, since higher heat can crack the clay. Kiln drying still requires monitoring moisture levels in the middle of the tablets to prevent uneven drying. The tablets may need to be turned or rotated for uniform drying.
In general, thicker clay tablets will require more drying time, whether air dried or kiln dried. Care must be taken not to rush the drying process, as that risks cracks and breakage. But with proper patience and monitoring, clay tablets can be successfully dried and made ready for the next steps of engraving and firing.
Engraving
Once the clay tablet has dried, the next step is to engrave the writing into the surface. There are a few main tools and techniques used for engraving clay tablets:
Stylus – A stylus is a wedge-shaped tool, usually made of wood, bone, or metal. It was used to impress the shapes of the cuneiform writing system into the wet clay. Styluses came in different shapes and sizes for making different sized wedges and lines.
Roller – A roller is a cylinder-shaped tool that was rolled across the clay to flatten it and prepare it for writing. Rollers helped compress the clay and create a smooth, consistent surface.
Multiple Styluses – Scribes sometimes used multiple styluses tied together to speed up the engraving process. This allowed them to make several wedges at the same time.
Technique – The technique involved holding the stylus at an angle and pressing or dragging it across the clay to form the wedge-shaped impressions. The depth and size of the wedges created the different cuneiform characters. Faster engraving produced shallower marks.
Proper engraving technique took skill and practice to master legible writing. The clay’s moisture content affected the ability to engrave it cleanly and precisely.
Firing the Clay Tablets
Firing is one of the most crucial steps in producing a clay tablet that can withstand the test of time. After the tablets have been shaped and dried, they need to go through a firing process to harden and strengthen the clay.
In ancient Mesopotamia, the firing process took place in a kiln. These kilns were dug into the ground and operated at high temperatures often between 900-1000°C. Controlling the temperature was important as firing the tablets at too low of a temperature would result in weak tablets that could easily break. Firing at too high of a temperature could cause the tablets to warp or melt.
The length of time needed for firing depended on factors like the size and thickness of the tablets. Smaller, thinner tablets may only need an hour of firing whereas larger, thicker ones may need several hours to fully harden. Clay composition also played a role in firing time. Experienced kiln operators had to carefully control the firing temperatures and timing to achieve properly hardened tablets.
Once fired, the clay tablets were extremely durable and protected the writing engraved on them for centuries. The firing process transformed simple clay into a preservation medium that allowed these ancient documents to survive for millennia.
Sealing the Tablet
After the clay tablet has been shaped, engraved, and fired, an important next step is sealing it to protect the surface. Ancient scribes commonly used substances like bitumen or plant resins to coat their clay tablets.
Bitumen was a tar-like substance derived from natural oil seeps. It provided an effective sealant for clay tablets, helping to waterproof the surface and prevent damage or erosion of the writing. Bitumen could be applied by brushing or dipping the tablet into the heated liquid bitumen.
Plant resins were another popular sealant. Resins from trees like pine or cedar provided a glossy, transparent coating. The resin was typically heated to make it more viscous and easier to apply. Resins helped protect clay tablets from moisture and enhanced the long-term legibility of the engraved writing.
Whichever sealing method was used, it provided an essential protective layer for fragile clay tablets. A good seal preserved the tablets and allowed the writing to survive for centuries and millennia after being written.
Writing
Once the clay tablet has been shaped, engraved, and fired, it is ready for writing. The most common writing tool used on clay tablets was a stylus made from a reed. Scribes would press the sharp tip of the stylus into the soft clay to make wedge-shaped indentations called cuneiform writing. This form of writing emerged around 3200 BCE in ancient Mesopotamia and was used for over 3000 years.
Cuneiform was written in columns from left to right. Scribes had to be very precise when engraving the characters into the clay. Cuneiform writing used between 600-1000 characters which were formed from wedges, lines, and angles. It was a very efficient system for recording information related to trade, business transactions, resources, and more.
Scribes were highly skilled and had to go through years of training to learn cuneiform as well as mathematics, literature, and other subjects. Good hand-eye coordination was essential to produce clear and legible writing. The clay tablets allowed scribes to write quickly while the clay was still damp, which enabled the rapid recording of everything from royal decrees to trader inventories.
Conclusion
Clay tablets have played an important role throughout human history as one of the earliest forms of writing. They allowed people to keep records, communicate ideas, and preserve stories in a durable medium. The simple ingredients of clay, water, and additives allowed ancient civilizations to make tablets that could withstand the test of time after being dried and fired.
While clay tablets may seem archaic compared to modern digital storage, they pioneered some of the first methods of writing that shaped human history. Their invention enabled record-keeping, bureaucracy, literature, and more. Without clay tablets, much of our earliest writing and history would have been lost. Though no longer used today, these tablets provide a unique window into the past and remind us of how far writing methods have advanced over millennia.
In summary, clay tablets mark a pivotal innovation that enabled written communication and historical records. Though seemingly simple, these tablets were an important early technology that paved the way for modern information storage and transmission. Their archaeological study continues to teach us about aspects of ancient societies, making clay tablets an enduring and insightful historical artifact.


