What Paint To Use On Ceramic Bisque?
Painting ceramic bisque is a fun hobby that allows you to unleash your creativity on unglazed ceramic figurines, plates, mugs, and more. With the right type of paint and proper preparation, beautiful works of art can be created on bisque.
There are several factors to consider when choosing paint for bisque. Acrylics, oils, enamels, and latex paints all work well, with acrylics being the most popular choice. The porosity of the bisque, desired finished look, and safety considerations should guide your paint selection.
Properly preparing the bisque before painting is also important. Cleaning, lightly sanding, and applying a primer will help the paint adhere properly. With high quality paint and proper prep, you’ll be able to create stunning works of art on ceramic bisque.
Acrylic Paint
Acrylic paint is a great option for painting on bisque ceramics. Some of the benefits of using acrylic paint include:
- Acrylics adhere well to bisque surfaces and create a permanent bond.
- Acrylic paints dry quickly, so you can complete your project faster.
- Acrylics are water-based, making clean up easy with just soap and water.
- Acrylic paint is durable and resistant to chipping or cracking over time.
- Acrylics come in a wide range of vibrant colors perfect for ceramics.
However, there are a few limitations to keep in mind when using acrylic paint on bisque:
- Regular acrylic paint won’t adhere well to glazed surfaces, so it’s best used on unglazed bisque.
- Acrylic paint may chip or scratch off easier on pieces that will be frequently handled or washed.
- Acrylics can appear “plasticky” sometimes and lack the rich luster of other paint types.
When applying acrylic paint to bisque, it’s best to use specialized acrylics made for ceramics. Follow the manufacturer’s instructions carefully. In general, the bisque should be cleaned and lightly sanded first for the paint to properly adhere. Apply in thin layers, allowing each coat to fully dry before adding another layer. Acrylics dry fast, so the piece can be used relatively quickly. Finish by sealing the paint with a clear acrylic sealer once fully cured.
Oil-Based Paint
Oil-based paint, also known as enamel paint, is a popular choice for painting ceramic bisque. The oil allows the paint to adhere smoothly to the bisque surface and provides a glossy finish. Some key advantages of oil-based paint are:
- Creates a durable, high-gloss coating
- Has a smooth, buttery application
- Dries slowly allowing time for blending
- Produces rich, vivid colors
However, oil paint also has some drawbacks to consider:
- Emits strong fumes and odors as it dries
- Requires mineral spirits for cleanup
- Long drying time between coats
- Not dishwasher or microwave safe once cured

When using oil-based paints safety is paramount. Work in a well-ventilated area and use a respirator mask. Avoid skin contact by wearing gloves. Allow ample drying time between coats. Cured pieces should be handled gently and hand-washed only. With proper handling, oil paints produce stunning results on ceramic bisque. But the fumes and cleanup solvents require extra safety steps.[1]
Enamel Paint
Enamel paint is a popular choice for painting ceramic bisque. Enamel is an oil-based paint that provides excellent coverage and vivid colors on unfinished ceramics. Some key advantages of enamel paint include:
- Creates a smooth, glossy finish – The oil base gives enamel paint a porcelain-like gloss when fired in a kiln or oven.
- Wide range of colors – Enamel comes in just about any color, allowing for lots of creativity.
- Adheres well to bisque – Enamel paint bonds tightly to raw, unfired clay.
There are a couple potential drawbacks to consider as well:
- Can chip or fade over time – While durable, enamel can chip or fade with heavy use and cleaning over many years. Proper sealing is important.
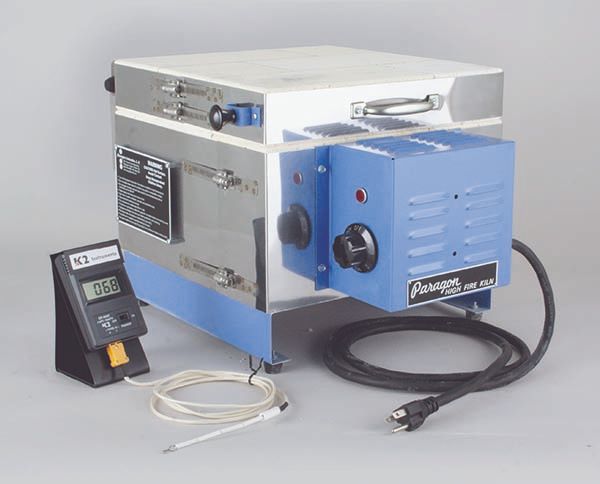
- Requires firing – Enamel paint must be fired in a kiln or oven to set the finish and achieve the signature glossy look.
There are two main types of enamel paint for ceramic bisque:
- Porcelain enamel – Made from colored, powdered glass, porcelain enamel can withstand extremely high firing temperatures above 1,500°F. It creates a smooth, professional-looking finish (source).
- Craft enamel – Craft enamels are formulated for firing at lower temperatures around 325°F. They’re easier to use for beginners. Craft enamel from FolkArt is a top choice for ceramic painting (source).
Enamel paint is an excellent choice for bisqueware, terra cotta, ceramic figurines, plates, and mugs. The vibrant colors and glossy finish make enamel a popular pick for anyone from ceramic painting beginners to experts.
Latex Paint
Latex paint is a water-based paint commonly used for painting ceramics. Some of the pros of using latex paint on bisqueware include:
- Latex paint is easy to apply and clean up with just soap and water.
- It comes in a wide variety of colors and finishes.
- Latex paint adheres well to bisque and greenware.
- It dries quickly and multiple coats can be applied in one session.
However, there are a few cons to consider:
- Latex paint is not as durable as other paints and can chip easily.
- It requires sealing for protection.
- Latex has poor adhesion on glazed ceramics.
Some of the best latex paints for ceramics are Craftsmart Acrylic Latex Paint and FolkArt Enamel Acrylic Latex. These paints are designed specifically for ceramics and come in gloss, satin, and matte finishes. They adhere well to bisqueware and provide good coverage. Be sure to follow the manufacturer’s instructions for best results.
Choosing Paint Colors
Some of the most popular color palettes for painting on bisque include warm neutrals like mushroom, almond, and cafe. Earth tones like terra cotta, sand, and adobe also pair beautifully with the natural tone of bisque. For a pop of color, consider saturated hues like cobalt blue, leafy greens, or tomato red.
When selecting coordinating colors for bisque, it’s best to stick with analogous, monochromatic, or neutral schemes. Contrasting colors may overwhelm the subtle canvas. Focus on soft, blended tones for a soothing look. Accent with metallics like copper or gold for added visual interest. Avoid stark whites and blacks, which can appear too harsh.
Look to nature for color inspiration. Combinations pulled from landscapes, minerals, and flowers complement the organic texture of bisque. Refer to existing palettes that have worked well together, like earth tones, neutrals, and soft pinks. Test swatches directly on the bisque to view real-world results before committing.
Preparing the Bisque
Before painting the ceramic bisque, it is important to properly prepare the surface. This includes cleaning, sanding, and priming the bisque.
First, wash the bisque with warm soapy water to remove any dirt or oil residue. Use a soft cloth or sponge and gently scrub all surfaces of the bisque. Rinse thoroughly and allow to fully dry.
Next, lightly sand the bisque with fine grit sandpaper. This helps the paint adhere better by slightly roughing up the smooth glazed surface. Sand in a circular motion and wipe away any dust with a dry cloth when finished.
Applying a primer or sealer is highly recommended before painting. Primers fill in pores and create a uniform surface for the paint. Sealers provide a protective barrier and prevent paint absorption. Water-based acrylic primers and sealers designed for ceramics work well. Apply with a brush and allow to completely dry per the product instructions before painting.
Properly preparing the ceramic bisque before painting is a key step for achieving the best results. Taking the time to clean, sand, and prime the surface will help the paint adhere properly and create a long-lasting finish.
Applying the Paint
When painting ceramic bisque, you have two main options for applying the paint – using a brush or spray painting. Brush painting allows for more control and is good for adding fine details, but can be time consuming for covering large areas. Spray painting is quicker for covering the bisque evenly, but lacks the precision of a brush.
Recommended techniques when brush painting include:
– Use soft bristle brushes and avoid over-brushing as it can damage the bisque.
– Apply paint in thin layers and allow to dry completely between coats. 2-3 thin coats are better than 1 thick coat.
– Start from the inside and work outwards to avoid smearing.
– Take your time and don’t rush the painting process.
When spray painting, be sure to:
– Work in a well-ventilated area and wear a mask. Spray paint contains harmful fumes.
– Lightly spray 3-4 thin coats rather than 1 heavy coat for best coverage.
– Allow paint to dry fully between coats.
– Position the bisque on a vertical surface using painter’s tape to avoid runs.
– Start spraying off the piece and end each pass off the piece to avoid drips.
Acrylic paints require 24-48 hours drying time between coats, while enamel paints take 5-7 days to cure fully. Allow the recommended drying times before spraying clear finishes or using the painted bisque.
Sealing the Paint
Sealing painted bisque serves multiple important purposes. Applying a protective sealant will help make the paint more durable, prevent chipping or scratching, and protect it from moisture. Sealants also provide a uniform sheen to the paint.
There are a few common options for sealants to use on painted bisque:
- Acrylic spray sealants – These are easy to apply, dry quickly, and provide good protection. Krylon’s acrylic clear coat is a popular choice. (https://talk.dallasmakerspace.org/t/question-about-bisque/9487)
- Polyurethane – This provides a high gloss finish and durable protection. Multiple thin coats are recommended.
- Epoxy resin – Offers a thick, glass-like coating for heavy duty protection.
When selecting a sealant, consider the level of protection needed. For decorative items not being used functionally, an acrylic spray provides adequate sealing. For frequent use wares like mugs or plates, a more heavy-duty option like polyurethane is better. Always check the manufacturer’s instructions for proper application and drying time.
Conclusion
In summary, the key points to keep in mind when painting ceramic bisque are to properly prepare the surface, choose the right type of paint for your needs, use the appropriate brush techniques, and seal the finished piece. Acrylics, oils, enamels and latex paints all have their benefits depending on the look you want to achieve and your skill level. For beginners, acrylics are often the easiest to work with. Preparing the bisque by cleaning and lightly sanding it will help the paint adhere properly. Apply paint in smooth, even strokes using a soft brush. Let each layer dry fully before adding another. Once satisfied with the paint job, seal with a clear acrylic spray paint to protect the finish.
Here are some final tips for successful bisque painting: Work in a well-ventilated area, take your time and don’t rush the process, thoroughly mix paint before use, clean brushes promptly after use, and experiment on test pieces before painting your final bisque item. With proper materials and techniques, you can create beautiful works of art on ceramic bisque. Just be patient, have fun with it, and don’t be afraid to make mistakes – that’s part of the learning process with any new art form.


