What Size Tile Is Best For Herringbone Backsplash?
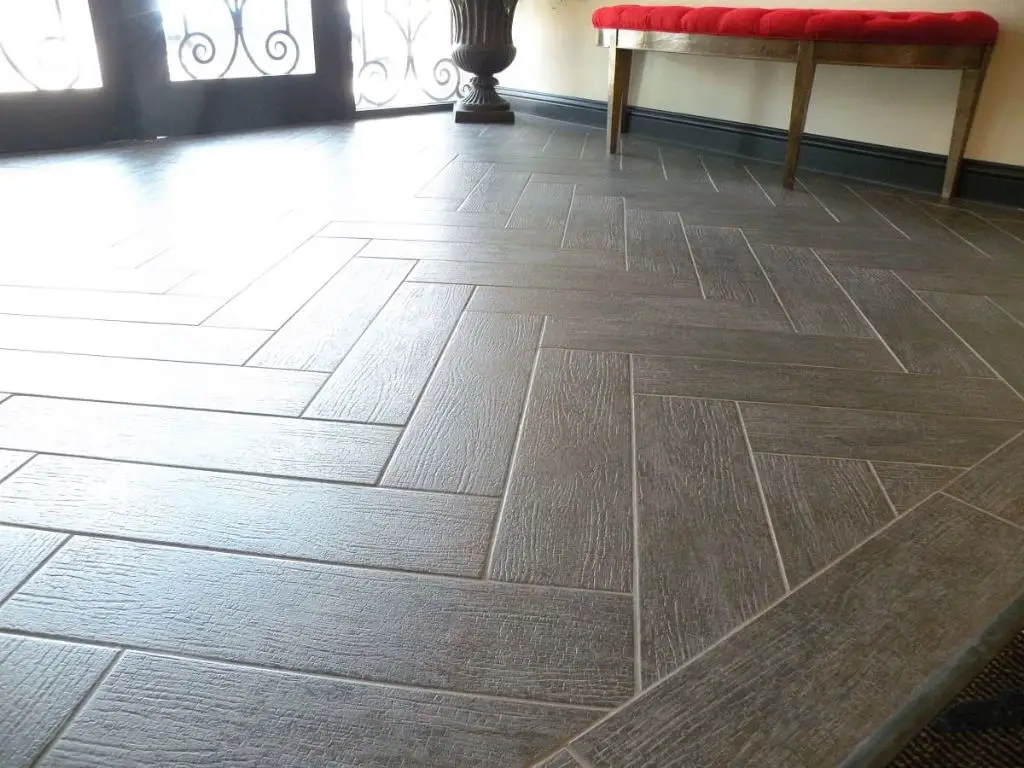
Herringbone backsplash patterns have been popular for quite some time. The staggered tile layout creates visual interest and brings a classic yet modern look to any kitchen. When installing a herringbone backsplash, one of the first decisions to make is what size tile to use. Tile sizes for herringbones generally range from small mosaics to large format tiles 12″ or larger. Each size has its own pros, cons, and design considerations regarding grout lines, installation, pattern continuity, and aesthetics.
This article provides an overview of the factors to weigh when choosing tile size for a herringbone backsplash. It discusses the benefits and downsides of small and large format tiles, recommended sizes, pattern layout, cutting, grout lines, costs, and overall style.
Pros and Cons of Small Tiles
Small tiles, generally defined as those under 4 inches, have some key advantages and disadvantages to consider for a herringbone backsplash:
Pros:
- Easier to cut precisely for the herringbone pattern, especially around outlets and edges where intricate shaping is needed. Smaller tiles have less margin of error when cutting.
- More grout lines create visual interest and texture. The many grout joints make the herringbone pattern more defined.
Cons:
- Requires more grout, which can be prone to discoloration and needs regular sealing/maintenance.
- Takes longer to install since there are more tiles to cut and set.
As cited on https://www.lemon8-app.com/discover/pros%20and%20cons%20of%20small%20tiles%20for%20backsplash?region=sg, smaller tiles have clear tradeoffs to weigh when planning a backsplash.
Pros and Cons of Large Tiles
Large format tiles, generally defined as tiles that are 12″x24″ or larger, have become increasingly popular for backsplashes and other applications. According to Floors for Living, one of the biggest advantages of large tiles is that they have fewer grout lines since each tile covers more surface area (https://www.floorsforliving.com/tile/pros-and-cons-of-large-format-tiles/). The wider spacing between grout lines can create a cleaner, more modern look. Large tiles can also help small spaces appear bigger by limiting the number of grout lines which can make a space feel chopped up.
However, large format tiles also have some drawbacks. As Tiles.co.nz points out, larger tiles are more difficult to cut and install, often requiring two people to carry each tile and a skilled installer to properly cut and apply them (https://tiles.co.nz/tile-blog/large-vs-small-tiles/). The Gallery 77 Stone article notes that large tiles have a higher risk of cracking or chipping during installation or over time due to their size and weight. This can lead to more waste and higher costs for repairs or replacement down the line.
Standard Tile Sizes
Tiles come in a standard set of sizes, with some of the most common being:
- 4×4 inches – These small square tiles have a clean, classic look. The small size allows for tighter grout lines and more intricate patterns.
- 6×6 inches – Slightly larger than 4×4 tiles, these add more impact and visibility. The grout lines are still fairly tight.
- 12×12 inches – A medium tile size that offers a good balance between grout line visibility and ease of installation compared to large tiles.
- 12×24 inches – Rectangular tiles that are longer than they are wide. The longer shape creates a sense of depth.
- 16×16 inches – A larger tile size with more open grout lines. Fewer tiles are needed overall, speeding up installation.
- 20×20 inches – These very large tiles have wide grout lines and make a bold statement. They are quicker to install but require a flat substrate.
Considering these standard sizes can help narrow down the ideal tile dimensions for your herringbone backsplash goals.
Cutting Considerations
When installing a herringbone tile pattern, cutting the border and edge tiles to fit can be tricky. Smaller tiles usually require more detailed cuts along the perimeter. Larger format tiles are easier to cut straight edges and mitered corners. With intricate herringbone designs, cutting irregular shapes that interlock precisely is essential for pattern continuity. The smaller the tile, the more difficult and time-consuming this process becomes.

Using smaller tiles like 4×4 inches or mosaics under 3×3 inches means cutting many tiny slivers to complete the herringbone edges. Each small cut must be meticulously measured to fit the pattern. The margin of error decreases significantly with tiny tiles. Even skilled professionals will spend more time planning and cutting each minute tile fragment. Larger tiles require fewer cuts overall, and each one is less intricate.
For DIY installations, opt for a medium tile size from 4×4 inches up to 8×8 inches. This simplifies the cutting process for herringbone backsplashes. Choose a uniform tile format like square or rectangle rather than intricate shapes. Skillfully cutting the detailed herringbone pattern is achievable with some basic tools and patience. Going too small is tedious, while oversized tiles lose the classic herringbone look.
Grout Line Visibility
The size of the grout lines will be more noticeable and prominent with small tiles compared to large tiles. With a herringbone pattern, the directional lines created by the grout will stand out more with a small tile size like 1″x1″ or 2″x2″ tiles. The grout lines will appear finer and less obvious with a larger tile size like 6″x6″ or 12″x12″.
According to Houzz, the width of the grout lines also impacts visibility – 1/16″ grout lines will be more subtle than 1/8″ grout lines with small tiles. However, the Houzz article points out that 1/16″ grout lines require very precise tile installation and are more prone to cracking over time.
Pattern Continuity
When installing a herringbone tile pattern, maintaining the continuity of the zigzag design with uneven tile cuts can be challenging. As the tiles reach the edges and corners of the installation area, they will likely need to be cut to size to properly fill the space. Cutting the tiles unevenly could disrupt the uniform look of the herringbone pattern.
To maintain pattern continuity, planning is key. Before installation, map out the tile layout and identify which tiles will need to be cut. Calculate the angle and size of the cuts needed to keep the pattern lines straight. Cut a few tiles at a time as you go, checking that the new pieces align correctly.
When cutting tiles, make sure the top and bottom edges are cut parallel to each other to keep the zigzag lines even. Some installers recommend cutting the tiles with a wet saw in place rather than removing and cutting them separately to ensure proper fit.
It is also important to pay close attention to grout line thickness. Consistent grout lines are crucial for pattern continuity in a herringbone design. Consider using tile spacers to keep grout lines uniform. With careful planning and precision, the herringbone pattern can continue beautifully all the way to the edges.
Cost Comparison
The price per square foot is a key factor when comparing tile sizes. Smaller tiles like 1″ x 1″ mosaics can cost $5-$10 per square foot according to HomeAdvisor. Medium size tiles in the 4″ x 4″ range are more affordable at $2-$5 per square foot. Popular standard sizes like 12″ x 24″ rectangular tiles cost around $2-$7 per square foot.
Larger format tiles like 24″ x 48″ tend to be on the pricier end, ranging from $4-$12 per square foot according to HomeGuide. Although more expensive per tile, larger sizes require fewer tiles overall for a given area. The labor savings can balance out the higher material cost.
An important calculation is price per square foot multiplied by the number of tiles needed. Smaller tiles require more pieces and more grout, driving up total costs. Larger tiles maximize coverage with fewer pieces. Comparing total project cost for different sizes can determine the most budget-friendly option.
Aesthetic Preferences
The visual appeal of herringbone patterns can vary greatly depending on the tile size used. Smaller tiles tend to create a more intricate, delicate look. The smaller the tile, the tighter and more angular the herringbone pattern will appear. This can create a very stylish appearance, especially in contemporary designs. However, very small tiles may start to look busy or fragmented if the space is large. According to Granada Tile, large tiles don’t flow as well in a herringbone pattern and may make the space feel choppy and disjointed.
Larger tiles result in a bolder, more dramatic herringbone pattern. The zigzag appears more open and elongated, creating a striking visual statement. This can be ideal for making a design impact in a larger space. However, in a small space, overly large tiles may overwhelm and feel out of scale. The trick is finding the right balance of tile size for the dimensions of the space. Medium sized tiles, such as 4×12 subway tiles, often hit the sweet spot, providing visual interest while maintaining a cohesive look.
Recommended Tile Sizes
When selecting a tile size for a herringbone backsplash, there are a few key factors to consider:
Smaller tiles, like 2×4 inches or 3×6 inches, are often recommended for herringbone patterns. As this source mentions, small tiles allow for a more intricate, traditional herringbone look. The smaller grout lines also make the pattern stand out more. However, more tiles are required overall, which can increase material costs and installation time.
Larger tiles, such as 4×12 inches or 6×12 inches, create a more modern, bold statement. As this Houzz thread discusses, the drawback is that fewer grout lines can make the herringbone pattern less defined. Oversized tiles also tend to have more material waste.
The optimum size depends on your design goals and budget. If aiming for a classic herringbone motif, 2×4 or 3×6 inch tiles are recommended. For a contemporary style, 4×12 or 6×12 inch tiles will make more of an impact. Just be prepared for potentially higher waste. In all cases, it’s ideal to choose a standard tile size that’s readily available.


