What Temperature Should Raku Be Fired At?
Raku is a low-fired pottery technique that originated in Japan during the 16th century. According to the Art Institute of Chicago [1], the Raku technique was developed by a Japanese potter named Sasaki Chōjirō. Chōjirō worked under the patronage of the local warlord Toyotomi Hideyoshi, who unified Japan during the Momoyama period. Inspired by Chinese pottery techniques like sancai, Chōjirō developed a fast-firing pottery process that allowed him to produce tea bowls quickly for use in Japanese tea ceremonies.
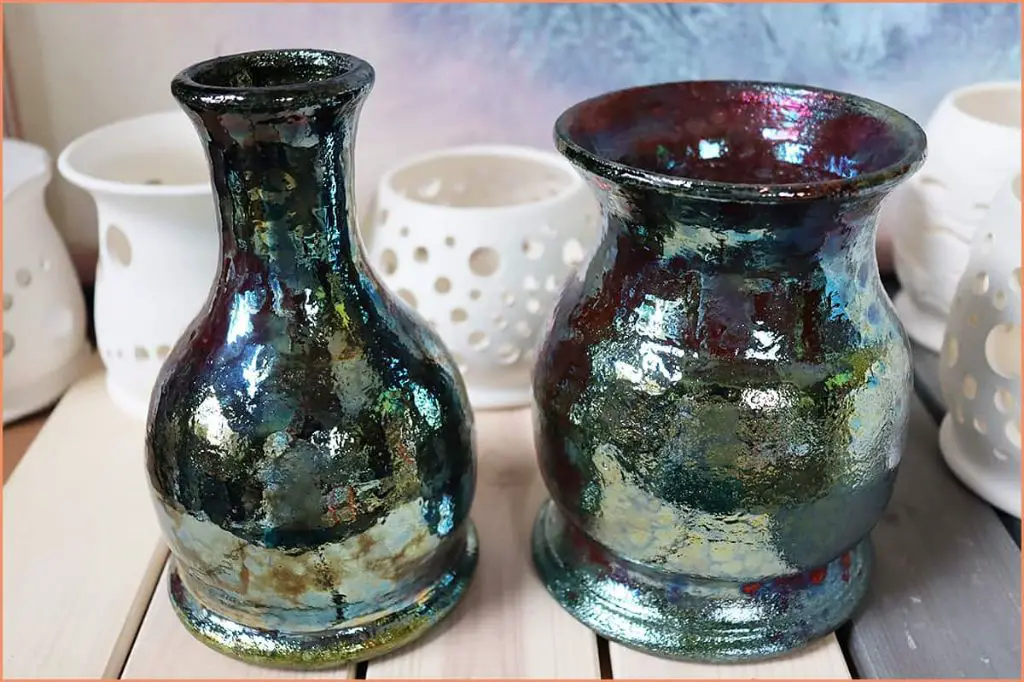
The name “Raku” comes from the name of Hideyoshi’s Jurakudai palace where Chōjirō originally worked. Raku ware involves removing pottery from the kiln while still glowing hot and placing it into containers with combustible materials like sawdust or leaves. This smokes and cools the pottery, giving it a characteristic crackled glaze. Traditional Raku wares were simple and rustic-looking, though the technique has evolved over centuries. Today, Raku remains a popular pottery technique around the world appreciated for its spontaneity and serendipitous results.
Ideal Raku Firing Temperatures
The typical range for raku firing temperatures is between 1470-1830°F (800-1000°C) depending on the clay body and desired effects[1][2]. Most potters fire between 1652-1832°F (900-1000°C) which allows the clay to vitrify properly while still achieving unique raku cracking and coloring effects. Lower temperature firings around 1470-1652°F (800-900°C) can work for less vitrified clay bodies but may not develop the full range of raku characteristics.

For beginners, a good target is around 1652-1832°F (900-1000°C) which provides a large margin for error while still achieving proper vitrification and raku effects. As you gain more experience with your clay body, kiln, and post-firing techniques, you can fine tune the ideal temperature to produce your desired artistic results.
Factors That Affect Firing Temperature
There are several key factors that determine the ideal firing temperature for raku ware:
The thickness of the vessels is one consideration. Thicker pieces require higher temperatures to fully melt the glaze and achieve the desired effects. Thin pieces can be fired at lower temperatures, in the range of 1472-1652°F (800-900°C). Thick raku pieces often require temperatures from 1832-2012°F (1000-1100°C) for the glaze to properly melt and react [1].
The type of clay body also affects the ideal firing temperature. Most raku clays are formulated to vitrify at lower temperatures, around 1832°F (1000°C). Standard stoneware clays require higher temperatures. The makeup of the clay determines its maturation temperature [2].
Finally, the desired raku effects impact the target firing temperature. Lower temperatures like 1482°F (800°C) create crackle glaze effects. Temperatures around 1832°F (1000°C) cause more glaze melting for metallic raku. Higher temperatures up to 2012°F (1100°C) lead to greater glaze movement and more dynamic crackle effects [3].
Starting the Raku Firing Process
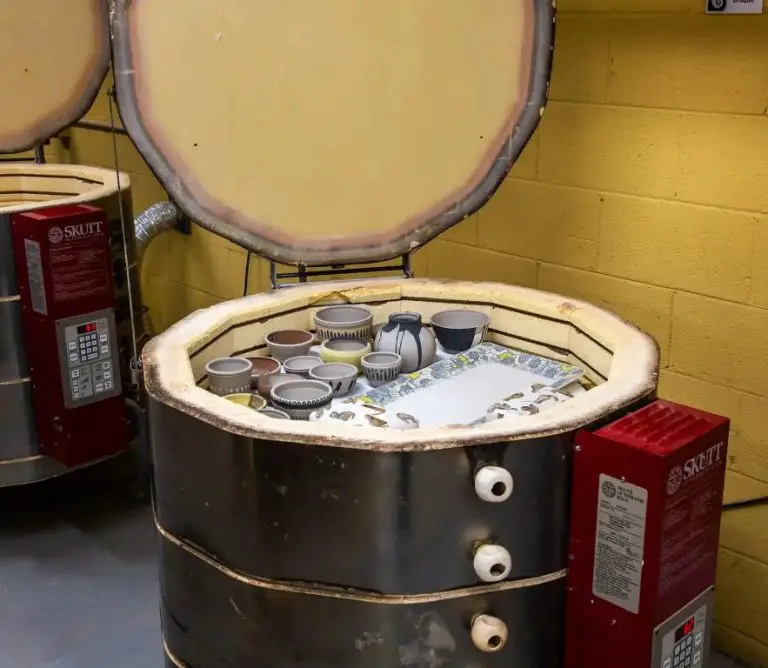
The first step in raku firing is to slowly bring the kiln up to the desired firing temperature. This is typically done over several hours. It’s important not to rush the firing process too quickly, as this can cause pots to crack or explode from thermal shock. The kiln should be gradually heated to around 1700-1800°F (925-980°C) for raku firing 1.
Before firing, the raku pots must be fully dried to remove any moisture. Pots should sit for several days after being formed to dry thoroughly. Moisture in the clay can cause dangerous steam explosions if heated too quickly. It’s also important that pots are loaded securely in the kiln to prevent them from falling over during firing.
Many raku artists slow the temperature climb in the early stages of firing. Heating at around 200°F per hour from 1000-1400°F helps prevent cracking and allows any residual moisture to evaporate safely. Firing too fast through this critical phase can damage pots. Once above 1400°F, the temperature can be increased more rapidly up to the final raku temperature.
Make sure to carefully monitor temperatures throughout the firing. Use pyrometric cones placed inside the kiln that will bend and melt at specific temperatures. These help indicate when the ideal firing temperature has been reached. Now the pots will be ready for the fun raku post-firing steps!
Bringing the Kiln to the Right Temperature
When raku firing, it’s important to bring the kiln up to the proper temperature range to achieve the desired effects. The target temperature is typically between 1470-1830°F (800-1000°C), though often around 1832°F (1000°C) is ideal for most raku glazes and clays (Source 1). However, monitoring and controlling temperature can be tricky with raku kilns.
Since raku kilns are often small and fast-firing, temperatures can climb rapidly and be difficult to control. Using pyrometric cones is one good way to gauge temperature. Place a cone rated for your target temperature in the kiln and watch for it to bend when fired. You can also use kiln sitter devices or digital pyrometers. However, these may need frequent calibrating in a raku kiln (Source 2).
Observing the glaze effects on test pieces is another method. Check for signs like glaze melting, quartz inversion, or carbon trapping to estimate temperature. Raku glazes and slips provide visual cues at different phases of firing. While inexact, over time you can learn when your kiln reaches the right heat.
The key is frequent observation and making adjustments. Have a plan but be ready to adapt. Keep good notes each firing and adjust air intake, timing, or even switch shelving positions. Well-controlled heating and cooling cycles are vital for achieving the desired raku finishes.
Reduction and Cooling
Once the kiln has reached the ideal temperature for raku firing, typically between 1740-1830°F (950-1000°C), it’s time to start the reduction and cooling process (Source). This process involves carefully removing the pots from the extremely hot kiln and placing them in a metal garbage can or other metal container for post-firing reduction.
It’s crucial to remove the pots at peak temperature, as the raku glazes need this heat to melt and produce unique effects. Using long metal tongs, carefully transfer one pot at a time from the kiln to the reduction chamber. Work quickly but cautiously to avoid thermal shock. The pot should be glowing red hot when it comes out of the kiln (Source).
In the reduction chamber, combustible materials like sawdust, newspaper or leaves are added. As these materials burn off, they create smoke that reacts with the super-heated pottery. This reduction process causes interesting crackle effects and metallic sheens on the bisque ware. Pots are left in reduction for 3-10 minutes depending on the effects desired.
Finally, the pottery must be cooled quickly to set the glazes and colors. Typically this is done by placing the smoking hot pots into a bin of combustible materials, which may include leaves, sawdust or shredded paper. The organic materials immediately burst into flames upon contact, which quickly draws heat from the pottery. Within a minute or two, the pots are cool enough to handle.
Tips for Achieving Different Raku Effects
Raku firing can produce a wide range of interesting surface effects on pottery depending on the glaze, firing temperature, and cooling methods used. Here are some tips for achieving popular raku effects:
For a crackled effect, use a thermal shock crackle glaze and fire rapidly to a high temperature of 1850-1900°F. When glowing hot, remove pieces quickly and submerge in cold water or allow rapid air cooling. The extreme temperature changes cause the glaze to crack apart. Sources: https://ceramicartsnetwork.org/daily/article/Successful-Tips-and-Techniques-for-Raku-Firing, https://www.soulceramics.com/pages/raku-firing
For glossy finishes, fire to a lower temperature of 1600-1650°F. After removing from the kiln, allow pieces to cool slowly in ambient air rather than quenching in water. The slower cooling preserves the glassy surface of the glaze. Source: https://ceramicartsnetwork.org/daily/article/Successful-Tips-and-Techniques-for-Raku-Firing
For matte textures, fire to a medium temperature of 1700-1800°F. Remove pieces while glowing hot and place in containers of combustible materials like sawdust, leaves, or paper. This smothers the pottery and causes carbon to be deposited on the surface as the pieces cool, creating a matte effect. Source: https://www.soulceramics.com/pages/raku-firing
Common Problems and Troubleshooting
Raku firing involves removing pots from the kiln at peak temperature and rapidly cooling them. This extreme temperature change increases the chances of problems occurring. Here are some common issues and how to troubleshoot them:
Under-firing – This happens when the kiln does not reach the ideal temperature for raku. Signs of under-firing include pots that are not fully vitrified with rough, sandy textures. To fix, increase the temperature and hold time during firing. Raku glazes and clay typically fire between 1500-1800°F. Refer to manufacturer instructions.
Over-firing – If the temperature exceeds the melting point of the glaze, it can become molten and distort the pot shape. It can also cause glaze to run off the pot. Reduce the firing temperature and hold time. Do test strips to determine the ideal heatwork.
Cracking – Thermal shock from quick cooling can cause cracking in the clay body or glaze. To prevent, preheat pieces in the kiln during warm-up to reduce thermal shock. Cracking can also occur from under-firing. Review firing temperature and procedure.
Glaze issues – Pinholing, crazing, or glaze crawling off the piece during firing. Adjust glaze chemistry or firing procedure. Test compatibility between clay body and glaze. Raku glazes must withstand quick temperature changes. See this source for more tips.
Always monitor and adjust the firing schedule based on results. Perform test strips with new clays and glazes. Problems can often be fixed by modifying the time, temperature, and firing approach.
Safety Considerations
Raku firing involves some inherent risks due to the high temperatures and open flames involved. However, raku can be practiced safely by taking the proper precautions.
Always wear protective equipment like heat-resistant gloves, an apron, closed toe shoes, and safety glasses when handling hot raku pieces. Avoid wearing synthetic fabrics that can melt or combust when exposed to extreme heat (Source 1).
Raku kilns should never be fired indoors, as the smoke and fumes can be hazardous. Outdoor firing is required for proper ventilation (Source 2). Avoid firing on windy days when gusts could blow embers around.
When removing glowing hot vessels from the kiln, do so carefully and never look directly into the kiln. Have a clear path prepared ahead of time to quickly transfer pieces to the reduction chamber. Work near a water source like a garden hose in case of any fires.
Always keep a fire extinguisher on hand in case of accidental ignition of materials. Never leave a raku kiln unattended once firing is underway. Raku requires calm and attentive monitoring for maximum safety.
Conclusion
Raku firing involves heating the pottery to between 1600-1800°F very quickly and then cooling it rapidly to produce unique crackled and metallic finishes. The ideal temperature range depends on the clay body, glaze ingredients, and desired effects. Typically, a temperature between 1650-1750°F works well for most raku firing. Higher temperatures in the 1700-1800°F range tend to produce more vibrant crackle patterns and metallic sheens on lustrous glazes. Lower temperatures around 1600°F result in more subtle effects. Regardless of the target temperature, it’s essential to carefully control the kiln during heating, reduction, and cooling to achieve the distinctive raku look. With practice using your particular clay and glazes, you’ll determine the perfect temperatures that produce stunning raku finishes.


