What To Make At A Beginners Pottery Class?
Making pottery can be an incredibly rewarding hobby for beginners to learn. With some basic knowledge of techniques, tools, and materials, even those who have never touched clay can start creating beautiful, functional ceramic pieces.
This guide will provide an overview of what to expect and make in a beginner’s pottery class. We’ll cover everything from the types of clay you’ll use to decorating finished pieces. With the proper introduction, making pottery can become an enjoyable and creative outlet for anyone.
Types of Clay
When starting pottery as a beginner, it’s important to choose the right type of clay. The main options are earthenware, stoneware, porcelain, and terra-cotta clay. Each has different properties that impact the finished product.
Earthenware is very soft and porous, making it easy to work with but prone to chipping and cracking. It can only be fired at lower temperatures. Stoneware is denser and less porous than earthenware, and can be fired at much higher temperatures to make it more durable. It’s a good all-purpose clay for beginners. According to The Pottery Wheel, stoneware with a fine grog is ideal for beginners as it is cooperative and does what the potter wants.
Porcelain is very fine and dense with very low porosity, requiring extremely high firing temperatures. It’s more challenging for beginners to work with. Terra-cotta is an earthenware clay made from reddish natural clay. It’s porous but durable, commonly used for flower pots and garden ornaments.
Essential Tools
When getting started in pottery, there are a few essential tools you’ll need to begin working with clay and creating pieces. The most basic tools include:
- Potter’s wheel – This spinning wheel allows you to center and shape clay into symmetrical forms. Electric, kick, or treadle wheels are common options.[Basic Pottery Tools for Beginners](https://fowlersclayworks.com/basic-pottery-tools-for-beginners/)
- Kiln – After shaping clay, you must fire it in a high-heat kiln to harden and finish the piece. Electric kilns are most common for home use.
- Clay cutting wire – This thin, taut wire slices cleanly through clay. Essential for trimming excess clay off bases or separating pieces.
- Ribs – these smooth, rounded tools are useful for shaping, smoothing, compressing, and supporting clay forms as you work
- Fettling knife – for slicing and cutting clay
- Sponge – for smoothing, shaping, cleaning surfaces
- Needle tool – for incising designs
There are endless other sculpting, carving, decorating, and finishing tools to explore. But these basics will get any beginner started working with clay.
Starting with Basic Shapes
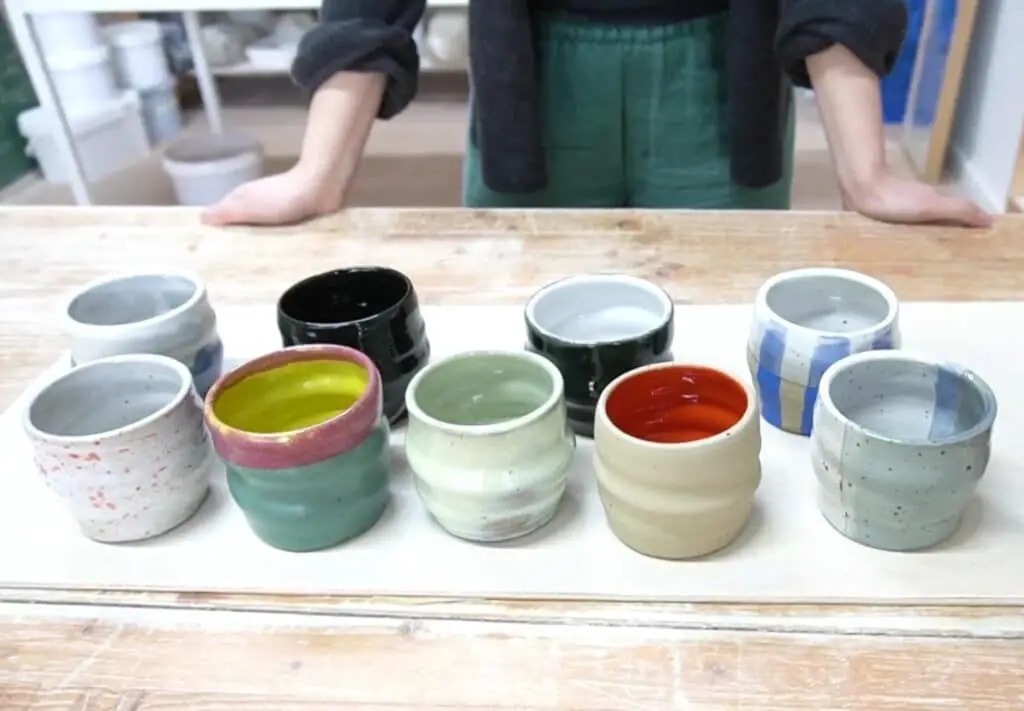
For beginners, it’s important to start with some fundamental pottery shapes like bowls, mugs, and vases. Mastering basic forms allows you to understand how clay moves and responds. It also builds essential techniques like centering, pulling, and smoothing the clay. Once you perfect the basics, you can move on to more complex and creative designs.
Some basic handbuilding projects to try first include:
- Pinch pots – the most basic pottery shape made by pinching clay into a simple pot
- Coil pots – building up the form using rolled coils of clay
- Slab bowls or boxes – cutting slabs of clay and joining them together
- Simple vase forms like cylinders and bowls
- Basic mugs and cups
For ideas on starter vessels to make by hand, see this pinboard: https://www.pinterest.com/gailnayes/pottery-ideas-for-beginners/
When working on the pottery wheel, essential beginner forms include:
- Bowl shapes
- Cylindrical vases
- Basic mugs and cups
- Bottle forms
Focus on centering your clay well and keeping an even wall thickness when throwing basic vessels. Master these starter shapes and it will give you the skills to advance to more exciting projects. For a helpful guide on beginner wheel shapes, see this article: https://wheelandclay.com/blog/pottery-ideas-for-beginners/

Decorating Techniques
There are many fun ways to decorate pottery pieces. Some of the most popular techniques for beginners include:
Glazing – Glazes are glass-like coatings that are applied to bisqueware pottery before firing. Glazes come in endless colors and finishes like glossy, satin, or matte. Popular glaze decorating techniques include dipping, pouring, brushing, and sponging on designs. According to The Pottery Wheel, underglazing is a fun way to add colorful designs before applying a clear glaze on top.
Carving – Using basic carving tools, you can incise lines, patterns, and textures into the surface of leather-hard clay. Carving gives a handmade, organic look and allows you to add unique designs. As noted by Pottery Making Info, carved lines can be left unglazed or enhanced with underglazes.
Staining – Ceramic stains come in liquid form and can be painted onto bisqueware clay before firing. Stains soak into the clay body to tint the surface. According to Pottery Making Info, stains are often mixed into clear glazes to create custom colors and effects.
Safety Tips
Working with clay and pottery equipment can be dangerous if proper precautions are not taken. Here are some key tips for staying safe in a pottery studio, especially for beginners:
Wear a dust mask when working with dry clay or glazes to avoid inhaling particles. Silica dust from clay can cause lung damage over time (see ceramic.school/pottery-studio-safety/).
Use slip liquid instead of powder when possible. If using powdered clay or glazes, mix them in a ventilated area to avoid dust.
Learn to properly use equipment like the pottery wheel and kiln. Get training on speed settings, balance, and how to avoid getting body parts caught.
Tie back long hair and avoid loose clothing that could get caught in equipment.
Wear closed toe shoes and an apron to protect skin and clothes from stains.
Clean tools, equipment, and surfaces regularly to avoid buildup of dried clay and glazes.
Never eat or drink in pottery work areas to prevent ingesting chemicals (southtexascollege.edu/safety-ceramics).
Take breaks to stretch wrists and hands. Pottery work can strain muscles and joints.
Learn proper storage methods for clay, tools, glazes, and chemicals. Keep hazardous materials sealed and labeled.
Report any fumes, skin irritation, dizziness or other symptoms to the instructor. Stay alert to any signs of exposure or sensitivity.
Cleaning and Care
Proper cleaning and care of your tools, equipment, and workspace is essential for an enjoyable and safe pottery-making experience. After a pottery class, be sure to thoroughly clean all tools used during the session. Clay residue left on tools can dry out and become difficult to remove. It’s best to clean tools immediately after use.
Start by gently scraping off any wet clay stuck to tools. Use a damp sponge or cloth to wipe away remaining clay. For stubborn dried clay, soak the tools in water to soften the clay first. Avoid using soap or harsh chemicals, as this can damage some materials like wood or leather. Plain water is usually sufficient.
Diamond-tipped tools like pottery wheels or sculpting tools can be gently scrubbed with a damp cloth to remove clay debris from the metal blades, according to diamondcoretools.com. Pay special attention to any crevices or engraved areas where clay can build up. Allow tools to air dry completely before storing.
For workspace surfaces like tables, use a damp mop or cloth to wipe away clay residue, dust, and debris, recommends ceramic.school. Avoid using excess water that can pool. Let surfaces fully dry before storage. A quick daily or weekly mopping helps prevent extensive built-up mess.
Proper cleaning right after use makes pottery equipment last longer and prevents clay buildup issues. With the right gentle cleaning techniques, tools and workspace will stay in top shape for future creative pottery endeavors.
Troubleshooting Issues
Beginners inevitably run into some common issues when first starting out on the pottery wheel. Here are some of the most frequent problems and solutions to troubleshoot them:
Centering clay – If your clay wobbles or moves off-center when opening, try wedging it again to remove air pockets. Use both hands to firmly press the clay downward while it spins. Go slowly and don’t open too wide too fast.
Clay is too wet or too dry – For clay that’s too wet, let it sit uncovered for a few minutes to let some moisture evaporate. If too dry, add water sparingly and knead it in. The clay should feel cool, smooth, and pliable like firm playdough when properly conditioned.
Clay sticks to hands – Try rubbing a bit of water on your hands to lubricate them or throwing a bit drier. Avoid overworking wet clay that gets sticky.
Cracks and tears – Slow wheel speed, don’t open walls too thin, and compress clay well by pinching and smoothing cracks closed.
Slumping walls – Open thicker, compress clay more firmly, and maintain an even wall thickness as you pull up.
For more tips, see this helpful guide: https://potterycrafters.com/pottery-wheel-mistakes-and-how-to-fix-them/
Further Learning
After taking an introductory pottery class and getting familiar with basic techniques, many beginners are eager to continue developing their skills. Here are some recommended next steps to help you progress on your pottery journey:
Take another class. Look for pottery classes that build on beginner skills, like intermediate wheel throwing, handbuilding, or glazing. Returning to a structured learning environment will allow you to expand your knowledge and get expert feedback.
Join a studio. Many local pottery studios offer membership options that give you access to studio space, equipment, and firing services. Working independently will let you practice at your own pace.
Watch tutorials. There are many helpful Youtube channels and online tutorials to learn pottery techniques. Try searching for videos on specific skills you want to improve like “throwing taller cylinders” or “smoothing clay surfaces.”
Read books and magazines. Look for pottery books focused on techniques and tips. Magazines like Ceramics Monthly and Pottery Making Illustrated provide a wealth of information.
Attend workshops. Many professional potters offer 1-2 day intensive workshops. This can be a great way to quickly advance a specific skill like throwing large pots or creating botanical motifs.
Join a pottery club. Being part of a local pottery association provides community support as well as chances to learn from fellow potters through demos and workshops.
Consider private lessons. Working one-on-one with an instructor allows for tailored guidance to meet your specific learning goals.
Set up a home studio. When you’re ready to get serious, outfit a home studio with the essential equipment – wheel, kiln, worktables, storage, and tools. This will enable you to create on your own schedule.
Conclusion
Pottery making for beginners can seem daunting, but with the right expectations and attitude, your first pottery class can open up a world of creative expression. The key is to go in with an open mind, a willingness to learn, and an eagerness to get messy and make mistakes. Approach each step in the process as an opportunity to develop a new skill and appreciate the journey. With some basic techniques, simple projects, and helpful tips under your belt, you’ll gain confidence to let your inner artist flourish on the potter’s wheel. The finished products may not be perfect, but they’ll be infused with your personal touch.
In summary, here are some final tips to help you make the most of your introductory pottery class experience:
- Follow all safety guidelines provided by the instructor.
- Don’t be afraid to ask for help when needed.
- Focus on foundational techniques like centering and pulling up walls.
- Start with basic cylinder and bowl shapes before attempting more complex forms.
- Embrace imperfections as part of the creative process.
- Have fun experimenting with decorating methods like carving, painting, and glazing.
- Be patient with yourself as you develop new skills over time.
- Share your creations and get feedback from classmates.
- Continually challenge yourself to improve.
With a sense of adventure, creativity, and perseverance, your beginner pottery class will open up new ways to get your hands dirty and express yourself through this classic art form.


