25+ Unique Wine Bottle Craft Ideas For Your Garden
As you gaze at empty wine bottles, have you ever wondered how to repurpose them? The world is embracing sustainable practices by turning old items into new creations. Upcycling not only reduces waste but also has a positive impact on the environment. Using wine bottles for garden decor is an innovative and eco-friendly approach that adds beauty and personal touch to outdoor spaces.
This article explores creative ways to reuse wine bottles, showcasing how style and sustainability can harmonize, transforming your garden into a reflection of eco-friendly living.
Preparing Your Wine Bottles for Crafting
To successfully incorporate wine bottles into your outdoor gardening project, it’s crucial to thoroughly prepare them beforehand. By following a simple step-by-step process, you’ll ensure the bottles are stable, safe, and primed for creative expression. Start by preparing your wine bottles with these essential steps.
Essential Steps to Clean and Prepare Wine Bottles
Before you start your wine collection, it’s essential to prepare your bottles thoroughly. To begin, remove any labels and glue residue by soaking the bottles in warm soapy water for a few hours or overnight. This makes the label peeling process much easier. For stubborn adhesive patches, mix baking soda with cooking oil and gently scrub the area before rinsing off with water. After removing the labels and glue, give the bottles a thorough rinse to ensure no soap residue remains.
Then, dry them completely using air drying or wiping down with a clean cloth to speed up the process. Finally, inspect each bottle carefully for any signs of damage such as cracks or chips, ensuring only intact bottles are used to avoid injury.
Safety Tips for Handling and Modifying Glass Bottles
When working with glass, it’s essential to prioritize safety to avoid accidents. To achieve this, consider the following guidelines:Firstly, don’t forget about the importance of personal protective equipment (PPE). This includes gloves that protect your hands from sharp edges and cuts, as well as safety glasses that shield your eyes from potential shards. Another crucial aspect is ensuring you’re working in a well-ventilated area.
When cutting or drilling glass, tiny particles can become airborne, posing health risks if inhaled. Therefore, maintaining a well-ventilated space is vital to prevent breathing in these particles. In addition to PPE and ventilation, it’s also essential to utilize the right tools for the job. This means using tools specifically designed for cutting or drilling glass, as they are capable of handling the material’s hardness and preventing breakage. Finally, remember to work at a comfortable pace.
Rushing through a task can cause the glass to crack or break unexpectedly, which is not only frustrating but also potentially dangerous. By taking your time and moving at a steady pace, you’ll be better equipped to handle any unexpected situations that may arise.
Simple Wine Bottle Craft Ideas for the Garden
When it comes to merging gardening and crafting, one unexpected yet brilliant combination is repurposing wine bottles as unique creative vessels. One such example is transforming a standard wine bottle into an endearing bird feeder. By exploring the possibilities of upcycling these containers, you can create a whimsical addition to your outdoor space that will delight both you and the feathered visitors.
Wine Bottle Bird Feeders
Transforming wine bottles into bird feeders is an innovative way to combine aesthetics with functionality in your garden. This section will guide you through the process of creating a hanging bird feeder from a wine bottle, including valuable tips on placement and the best types of bird seed to use. To start, gather the necessary materials: a clean and dry wine bottle, a feeder tube (available at pet stores), some wire, and a wire cutter.
Follow these steps:Gather Materials: Begin by collecting the required materials. Attach Feeder Tube: Carefully insert the feeder tube into the bottle’s neck, ensuring it fits snugly to prevent bird seed spillage. Secure with Wire: Use the wire to create a hanger for the bottle. Wrap the wire around the neck of the bottle, secure it, and then make a loop at the top for hanging. Fill with Bird Seed: Choose a bird seed mix that attracts the types of birds you wish to see in your garden.
Fill the bottle with the seed, then invert it so the seeds can flow into the feeder tube. When it comes to placement and bird seed selection, there are a few key considerations. Choosing the right spot to hang your wine bottle bird feeder and selecting the appropriate bird seed are crucial for attracting birds. Placement Options: Hang your feeder in a location where birds feel safe from predators. Near trees or shrubs is ideal, as it offers birds a quick escape route.
Ensure the spot is visible from your house so you can enjoy watching the birds. Bird Seed Selection: The type of bird seed you choose should depend on the native birds in your area. Sunflower seeds are a great all-rounder, attracting a wide variety of birds. For more specialized feeders, thistle seeds attract finches, while mixed seeds can cater to sparrows and doves.
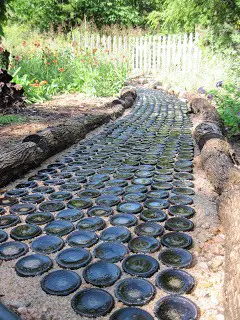
Garden Edging with Wine Bottles
Transforming your garden beds or paths into a visually stunning space is now easier than ever. One creative way to achieve this is by repurposing wine bottles as colorful edges. Not only does this approach breathe new life into discarded containers, but it also adds an exclusive charm to your outdoor sanctuary. This comprehensive guide will walk you through the process of using wine bottles as a unique edging solution and provide valuable insights on how to ensure their durability.
Intermediate Garden Projects
Transforming wine bottles into garden planters is an innovative approach that harmoniously combines practicality and aesthetic appeal. Rather than discarding these vessels after a special occasion, you can repurpose them as mini-greenhouses for succulents or herbs. This creative endeavor not only adds a touch of personality to your outdoor space but also provides valuable insights on choosing the ideal soil and plant companions.
Wine Bottle Planters
Transforming wine bottles into unique planters is a creative way to breathe new life into discarded containers. These mini gardens are perfect for showcasing small plants like succulents and herbs. To create your own, follow these steps:Start by gathering the necessary tools: a glass cutter, safety gloves, protective eyewear, and a candle flame or heat gun. Scoring the bottle is crucial for a clean break – use the glass cutter to draw a line around the bottle where you want to cut it.
Next, apply heat to the scored line using your chosen method (candle flame or heat gun) and then immediately submerge the bottle in cold water. The sudden temperature change will cause the glass to break along the scored line, resulting in two clean pieces. Finally, use sandpaper to smooth out the edges of both pieces to ensure they’re safe for handling. When it comes to selecting soil and plants for your wine bottle planters, a few key factors come into play.
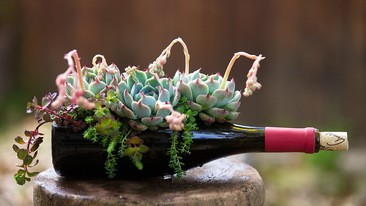
Here are some guidelines:For succulents, choose sandy, well-draining soil and provide plenty of sunlight. Water sparingly – these plants don’t need much moisture. Herbs require organic, moisture-retentive soil to thrive. Provide regular watering and ensure good air circulation to prevent fungal diseases. Succulents are a natural fit for wine bottle planters due to their low water requirements and love for sunlight. Their shallow roots make them perfect for the limited space of a bottle.
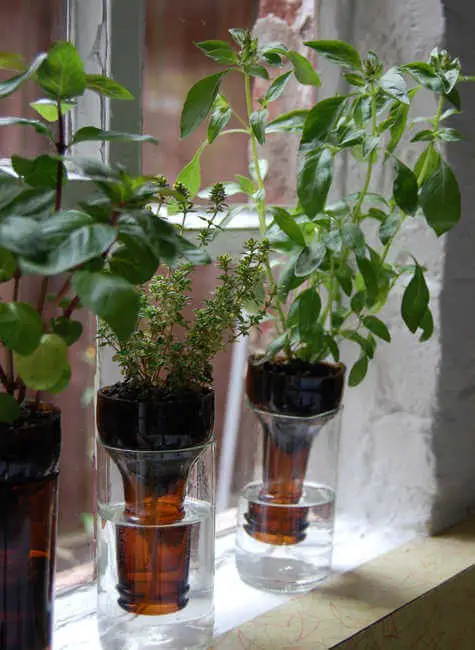
Herbs like basil, mint, and thyme can also thrive in bottle planters if given enough light and regular watering. Just be sure to provide nutrient-rich soil by adding organic matter or compost – it’s a game-changer!
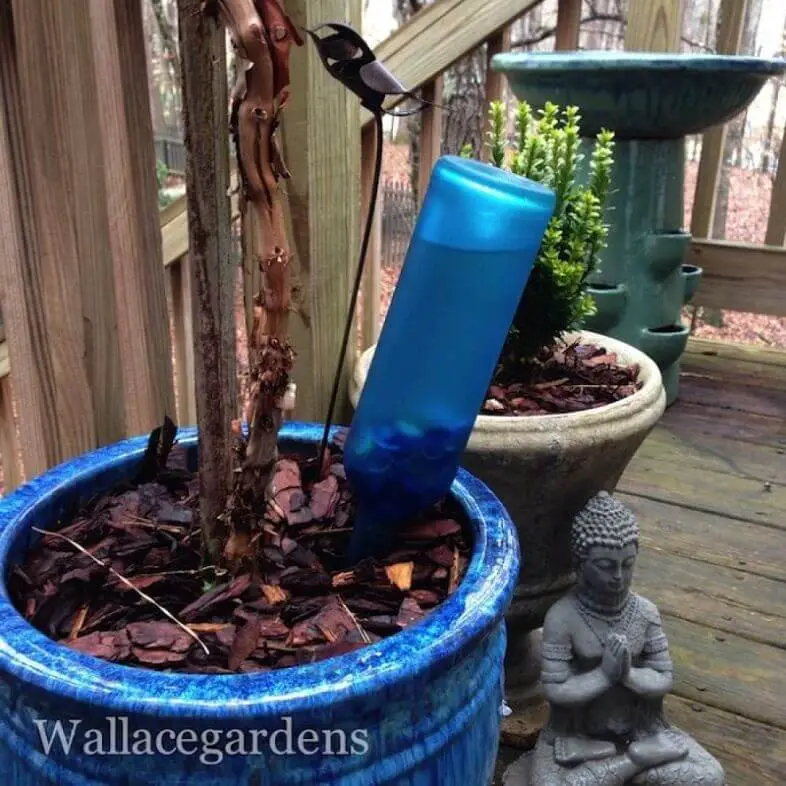
Wine Bottle Watering Globes
Elevate your plant care by transforming wine bottles into self-watering globes, perfect for maintaining optimal moisture levels even when you’re away from home. This innovative approach not only ensures your plants receive the right amount of hydration but also adds a touch of elegance to your space.
In this section, we’ll delve into the process of creating these clever watering globes and explore how utilizing colored bottles can enhance their functionality while adding a pop of color to your decor.
How to Make Self-Watering Globes from Wine Bottles
Transforming an old wine bottle into a self-watering system is a creative and eco-friendly way to keep your plants hydrated. Here’s how it works:First, thoroughly clean the bottle by removing any labels and glue residue. This will ensure a smooth surface for your plant’s roots. Next, fill the bottle with water and add a water-soluble fertilizer if you want to provide extra nutrients to your plants.
Before inserting the bottle into the soil, create a small hole to avoid compacting the soil and harming the plant’s roots. Finally, place the bottle upside down in the soil near the base of your plant. Ensure it’s stable and won’t topple over. While using colored wine bottles may add an aesthetic touch to your garden or indoor plant display, they also have practical benefits. Colored bottles can be more effective than clear ones at preventing algae growth by limiting light penetration.
This is particularly useful for outdoor plants exposed to direct sunlight. Furthermore, the colors of the bottles can complement the surrounding environment and enhance the visual appeal of your garden or home. Blue and green bottles blend seamlessly with nature, while amber or red bottles add a pop of color and warmth.
Advanced Wine Bottle Creations for the Garden
Elevating your outdoor decor requires more complex projects that harmoniously merge creativity with functionality. One such endeavor is the creation of a Wine Bottle Outdoor Chandelier, which not only provides ambient illumination but also serves as a visually striking centerpiece for your garden pergolas or patios. This unique piece has the ability to transform a mundane outdoor space into a warm and inviting oasis, perfect for relaxation and social gatherings.
Wine Bottle Outdoor Chandelier
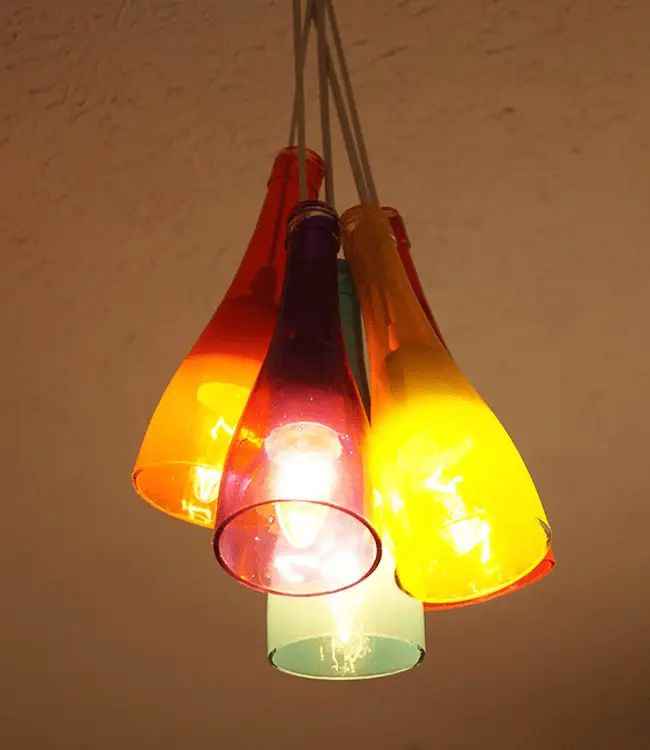
Transforming wine bottles into a stunning chandelier is an innovative project that harmoniously combines recycling with sophistication. To embark on this creative journey, follow these steps:Begin by gathering various wine bottles, ensuring they are spotlessly clean and label-free. You may opt for uniformity in bottle color to achieve a cohesive look or blend colors for a more eclectic style. Next, utilize a glass cutter and a steady hand to carefully remove the bottoms from each bottle.
It’s essential to don safety gear to shield yourself from potential shards. For the frame, either construct one using metal or purchase a pre-made design that will support the wine bottles. The level of complexity is entirely up to your skill level and desired aesthetic. Secure each bottle to the frame by employing wire or crafting custom fittings for a refined appearance. Finally, install weatherproof LED lights within the bottles.
These can be solar-powered or connected to your home’s electrical system, depending on your preferences and capabilities.
Electrical Safety and Weatherproofing Tips
To create a stunning wine bottle outdoor chandelier that’s both functional and durable, it’s essential to prioritize electrical safety and weatherproofing considerations. When designing your chandelier, focus on using only outdoor-rated electrical components and ensure all connections are securely enclosed to prevent accidents. Additionally, seal the tops of bottles to keep water out and utilize weather-resistant materials for the frame to protect against the elements.
In terms of installation, it’s crucial to secure the chandelier to a sturdy support structure that can withstand wind and other environmental factors. This will ensure your creation remains stable and long-lasting. If your chandelier incorporates electrical lights, consult with an electrician to guarantee all installations meet safety standards.
By combining these tips with careful planning and attention to detail, you’ll be able to create a beautiful wine bottle outdoor chandelier that not only enhances your garden’s ambiance but also stands the test of time. This project is a testament to the power of upcycling and personalized garden decor.
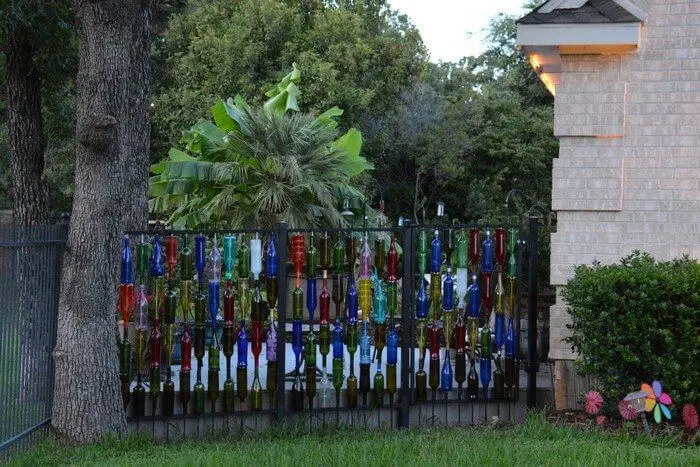
Wine Bottle Garden Wall
A unique and functional addition to any garden, a wine bottle garden wall offers both visual appeal and practicality. This innovative structure provides a stunning focal point while also serving as a natural barrier for privacy. To bring this project to life, follow these step-by-step instructions and keep the following key factors in mind. The process of building a wine bottle garden wall involves careful planning, resource gathering, and execution.
Here’s a simplified guide to get you started:Start by conceptualizing your design, considering the size, shape, and layout of your wall. Sketching out your ideas will help you visualize the final product and calculate the number of bottles required. Next, start collecting wine bottles. Depending on the scale of your project, you may need a substantial quantity. Consider enlisting the help of friends, family, or local restaurants to save bottles for you.
Once you have your bottles, prepare the foundation by digging a trench and filling it with a layer of gravel followed by concrete. This will provide a stable base for your bottle wall. To assemble the wall, mix mortar to use as adhesive between the bottles. Start laying your bottles in the desired pattern, applying mortar around their bodies to secure them in place. Be sure to leave space between the bottles if you plan to grout them later.
Finally, once the mortar has dried, you can apply grout between the bottles if desired, or simply clean up any excess mortar for a finished look. In addition to these instructions, there are two essential factors to consider when building your wine bottle garden wall: structure support and sunlight effects. Structure Support: To ensure the stability and longevity of your wall, incorporate elements like rebar or wire mesh into its construction.
This will provide added strength and resistance to weathering and pressure. Sunlight Effects: The way sunlight interacts with your wall can be breathtaking. Colored wine bottles will cast beautiful shadows and create a mosaic of light, adding an extra dimension to your garden. Consider the wall’s orientation relative to the sun to maximize these effects.
By following these steps and considerations, you can build a structure that not only adds beauty and privacy to your garden but also showcases your commitment to sustainable crafting.
Seasonal Decorations with Wine Bottles
Transforming your garden with creative flair, incorporating seasonal decorations made from repurposed wine bottles is a unique way to commemorate the ever-changing landscape of holidays and seasons. This comprehensive guide will walk you through the process of converting wine bottles into festive lights and adapting planters for dynamic displays that seamlessly blend with your outdoor space.
Holiday-Themed Garden Lights
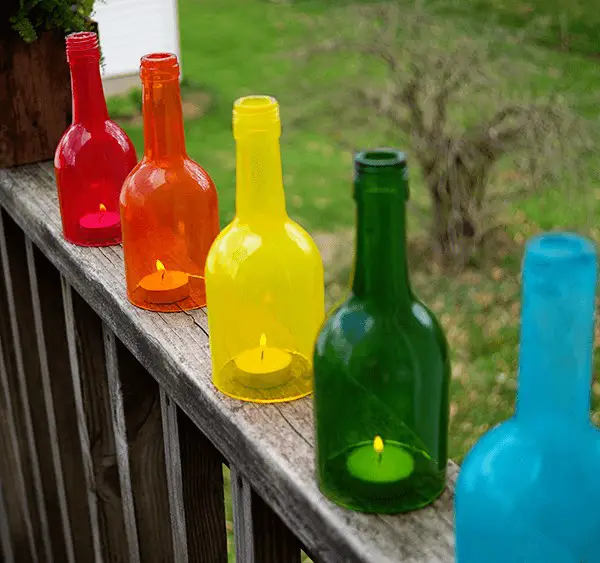
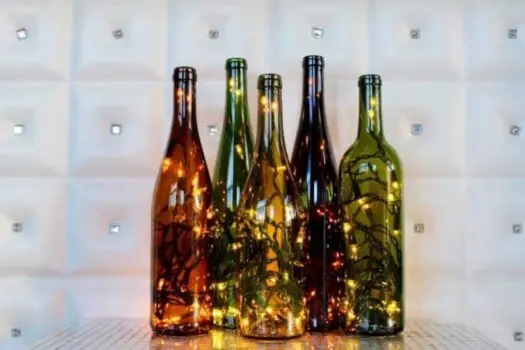
Transform your outdoor space into a festive haven by decorating wine bottles with lights. This unique display is perfect for celebrating holidays throughout the year. To get started, follow these steps:Choose Your Colors: Select wine bottles in hues that match your desired holiday theme. For Christmas, opt for red and green, while orange is ideal for Halloween, and pastel shades work well for Easter. Prepare the Bottles: Thoroughly clean each bottle to remove any dirt or residue.
Remove existing labels and consider painting or decorating the bottles with holiday-themed stickers or decals for an added touch. Light Up Your Bottles: Insert a string of LED lights into each bottle, using battery-operated lights that don’t require an outdoor power source. Ensure the battery pack is easily accessible so you can turn the lights on and off as needed.
Create Your Display: Arrange your lighted bottles throughout your garden, placing them on tables, along pathways, or hanging them from tree branches. The soft glow will create a magical holiday atmosphere that’s sure to impress.
Seasonal Planters
Transform your wine bottle planters into a reflection of the current season or holiday by incorporating seasonal plants, decorations, and thoughtful arrangements. Start by selecting plants that are synonymous with the time of year. For spring, consider vibrant flowers like tulips and daffodils, while autumnal mums and ornamental kale are perfect for fall.
Next, customize your bottles with seasonal decorations, such as bold colors and patterns for spring or warm hues and harvest motifs for autumn. Arrange your planters thoughtfully to maximize their visual impact, grouping them together for a more dramatic display. By incorporating these ideas into your garden, you can celebrate the beauty of each season and holiday in an eco-friendly and creative way.
Wine bottles offer endless possibilities for customization, allowing you to express your unique style while elevating your garden’s aesthetic appeal.
Enhancing Your Garden’s Nighttime Appeal
Transforming your garden into a nighttime wonderland is a delightful endeavor. With the help of solar-powered wine bottle lights and glow-in-the-dark painted bottles, you can create an enchanting ambiance that will leave you and your guests in awe. This section will guide you through the process of crafting these unique lighting solutions, adding a touch of magic to your evening garden.
One way to illuminate your garden is by integrating solar lights into wine bottles.
This eco-friendly approach not only reduces energy consumption but also adds a personal touch to your outdoor space. To create these solar-powered wonders, you’ll need clear or lightly tinted wine bottles, small solar-powered LED lights designed for bottle necks, and some clear adhesive.
First, select the perfect wine bottles by choosing those with clean surfaces free of labels. Next, gather your solar lights and assemble them by inserting the light into the mouth of the bottle.
If needed, secure it in place using a small amount of clear adhesive. Finally, position your solar-powered wine bottle lights in a sunny spot during the day to charge them. At night, they will emit a captivating glow.
Another creative solution is to apply glow-in-the-dark paint to wine bottles. This magical effect can add an extra layer of enchantment to your garden.
To achieve this look, you’ll need wine bottles with smooth surfaces, high-quality glow-in-the-dark paint, and a brush or sponge for application.
Start by preparing your bottles by cleaning them thoroughly and ensuring they are dry before painting. Next, select the perfect glow paint color to match your garden theme and apply it using a brush or sponge. For an intense glow, apply multiple layers, allowing each layer to dry completely before adding the next.
Finally, place the painted bottles in direct sunlight or under a strong artificial light to ‘charge’ them. At night, they will emit a soft, glowing light.
Materials Needed:
Solar-Powered Lights: Solar LED lights, wine bottles
Glow-in-the-Dark Bottles: Glow paint, wine bottles
Placement Tips:
Solar-Powered Lights: Sunlit areas for charging
Glow-in-the-Dark Bottles: Sunlit or brightly lit areas for charging
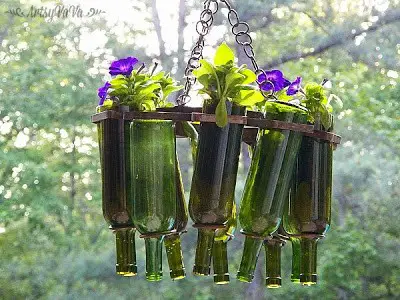
Wine Bottle Hanging Basket
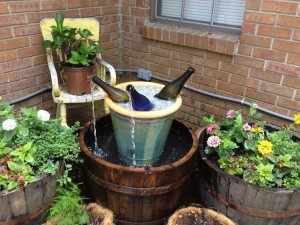
Wine Bottle Fountain
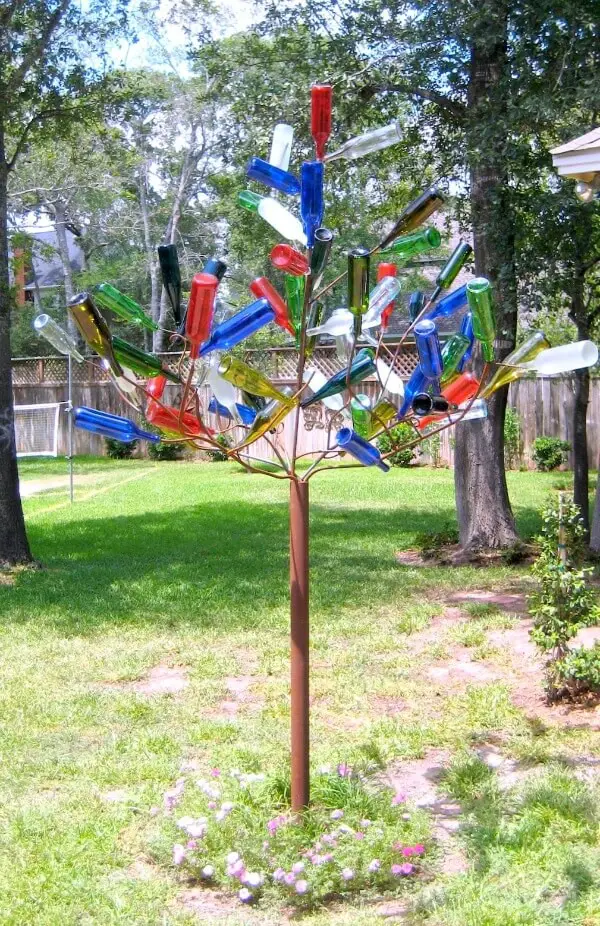
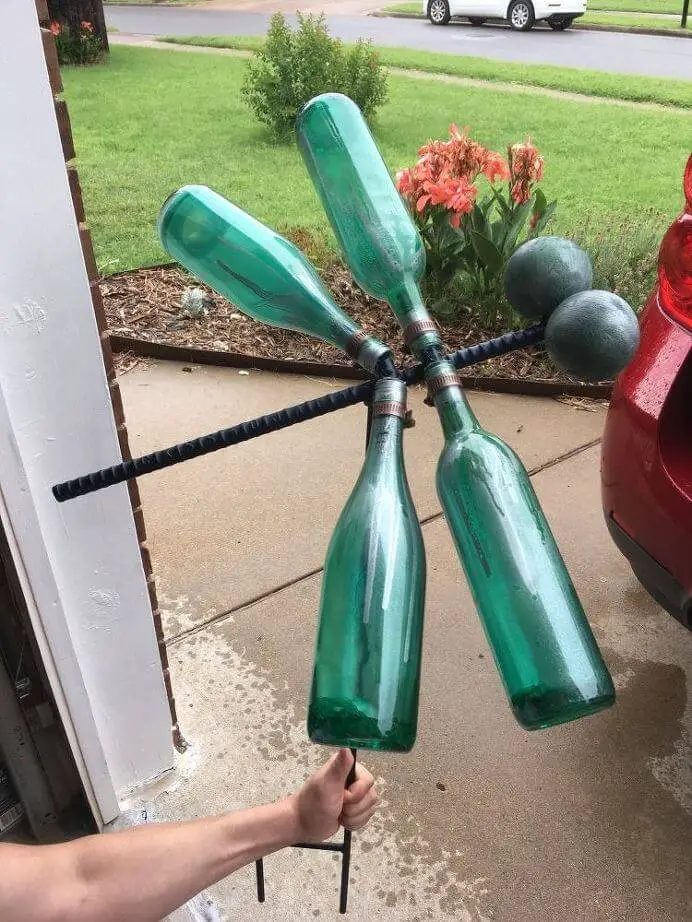
DIY Bottle Tree
Wine Bottle Garden Edging

Wine Bottle Watering Device With Copper Tubing for Container Gardens
Wine Bottle Path
DIY Wine Bottle Bird-Feeder

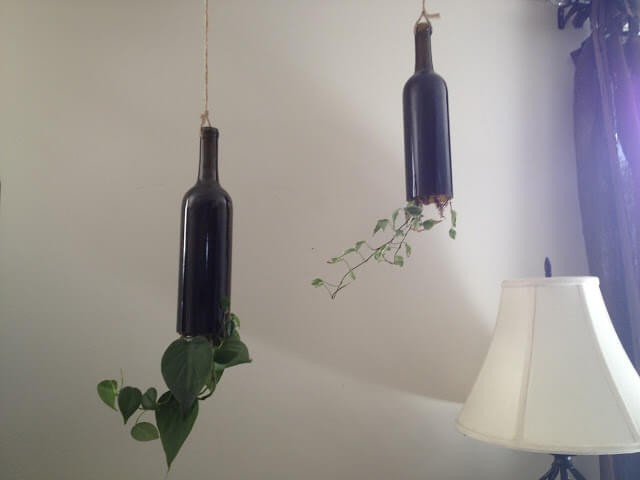
Upside Down Wine Bottle Planter
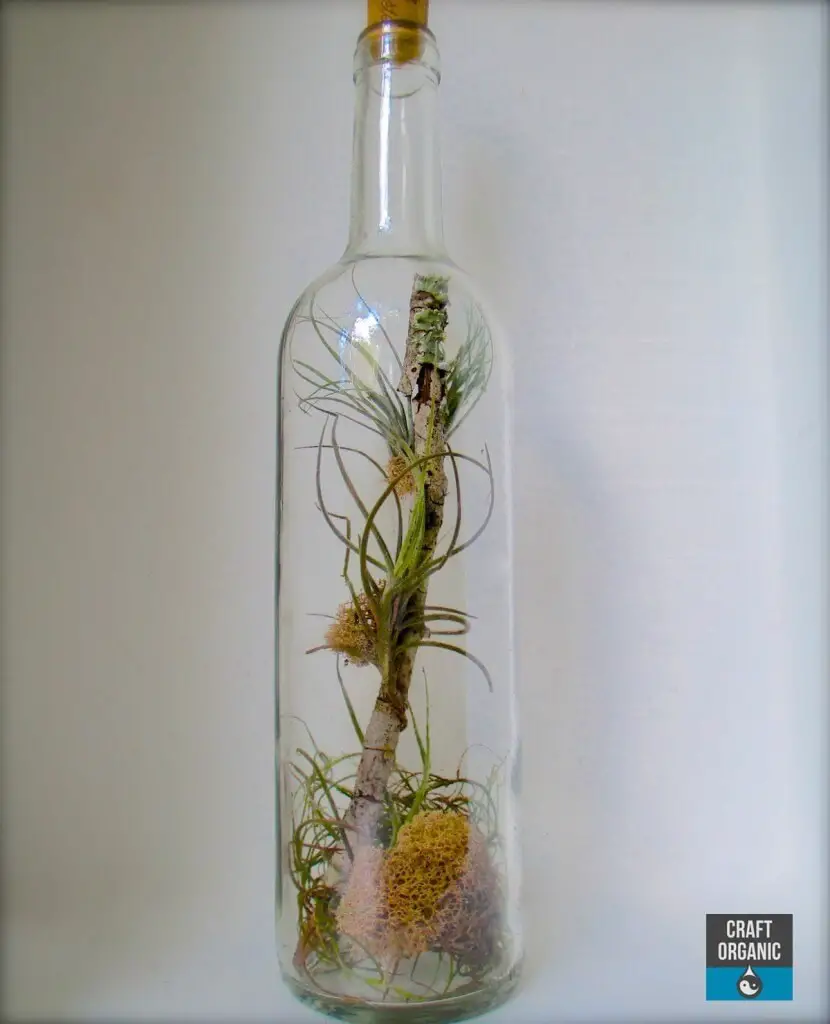
Tillandsia Terrarium In A Wine Bottle
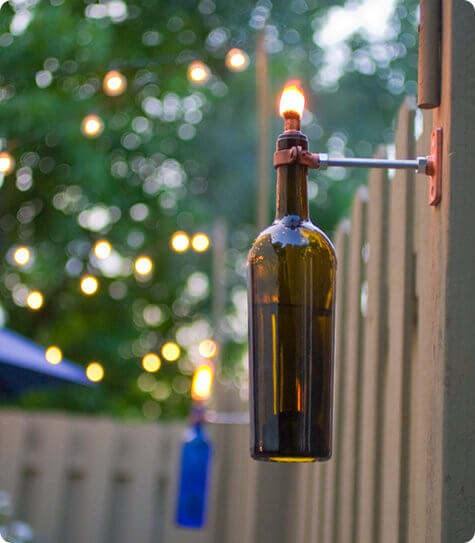
Recycled Wine Bottle Torch
DIY Self-Watering Wine Bottle Herb Garden
Wine Bottle Wind Chimes
Succulent Wine Bottle Planter
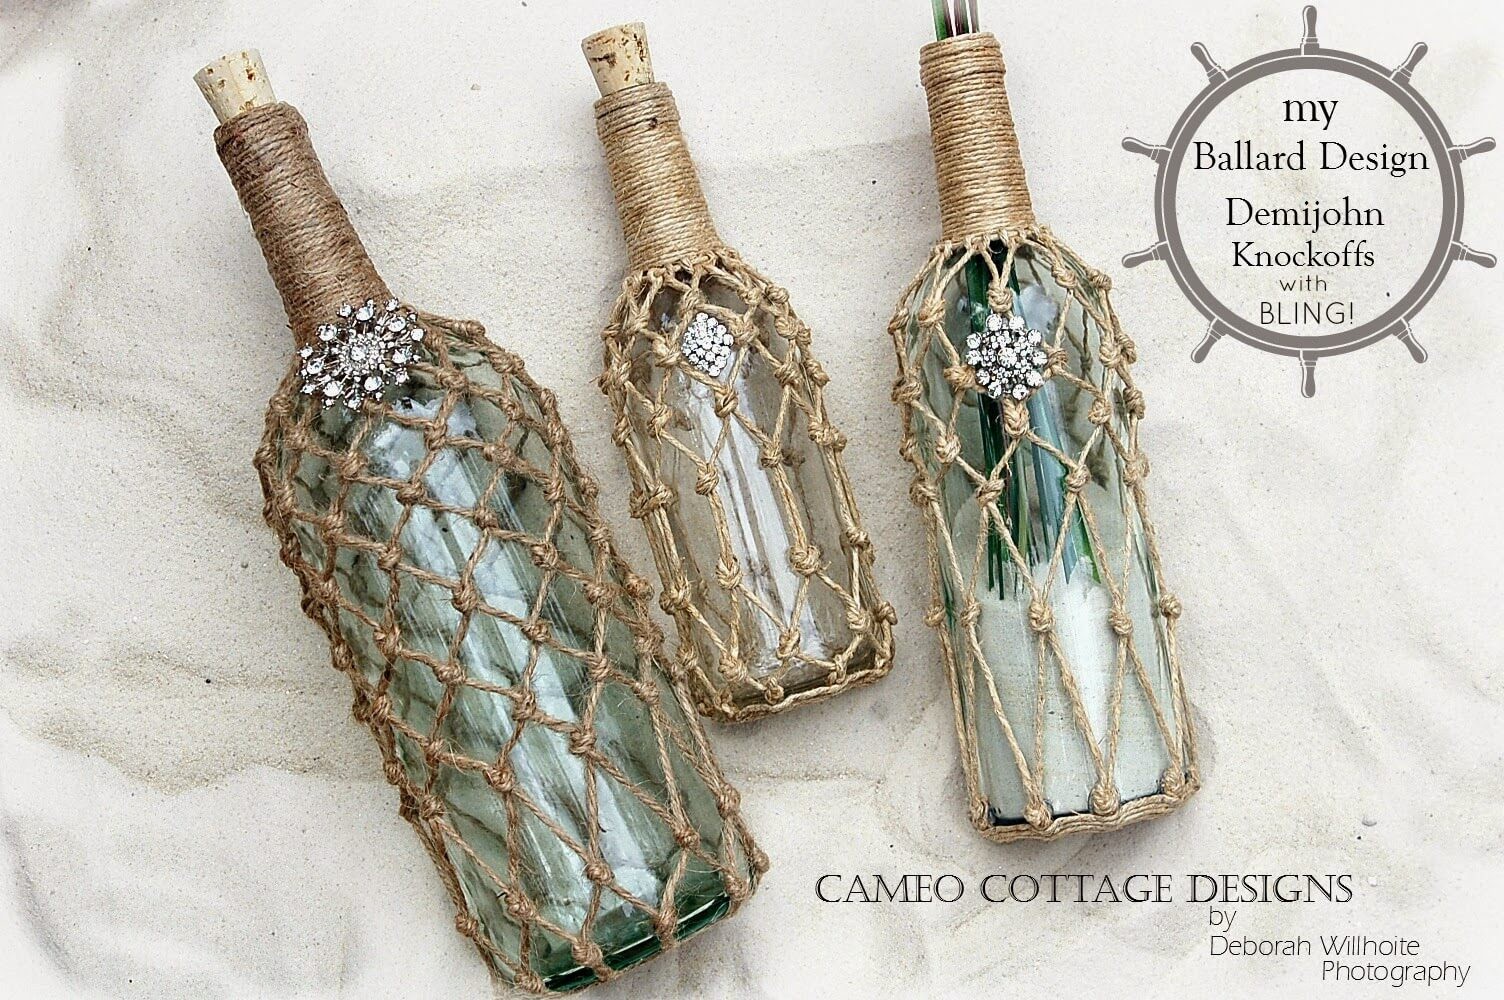
Knotted Jute Net Wine Bottles For Garden Decoration
DIY Wine Bottle Craft Rainbow Lanterns
Recycled Wine Bottle Light
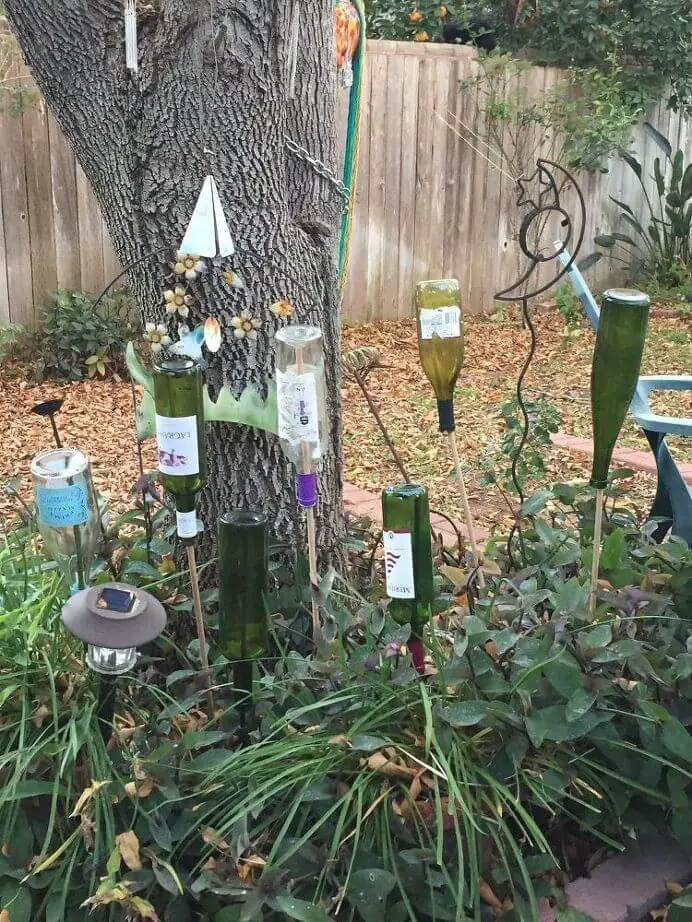
Colored Wine Bottles In A Tree

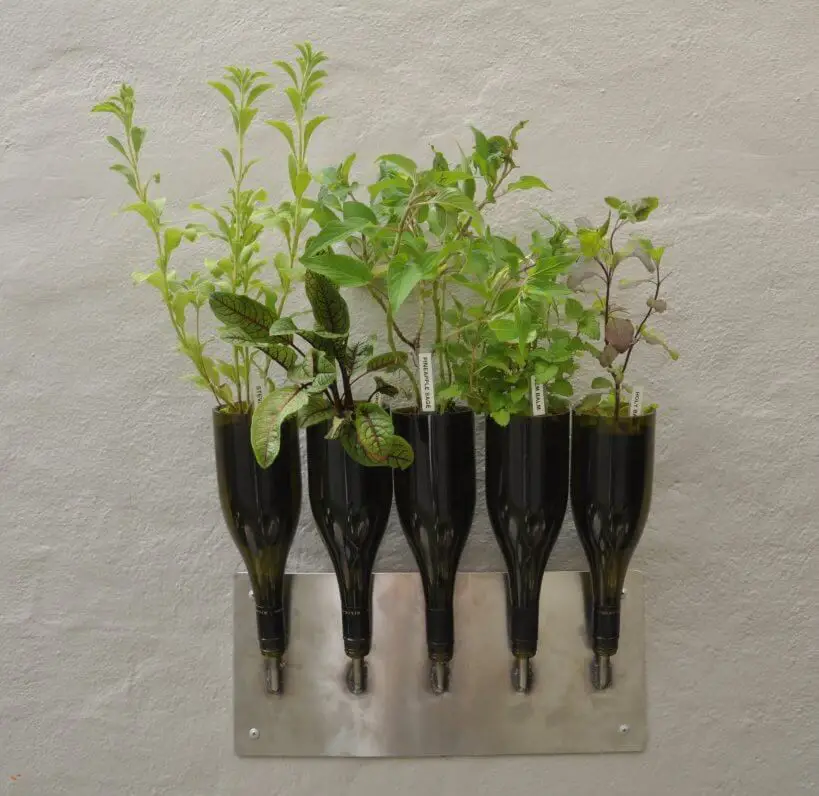
Wine Bottle Vertical Garden
Wine Bottle Colorful Pendant Light To Light Up Your Garden
Candelabra Wine Bottle Topper For Garden Dinner
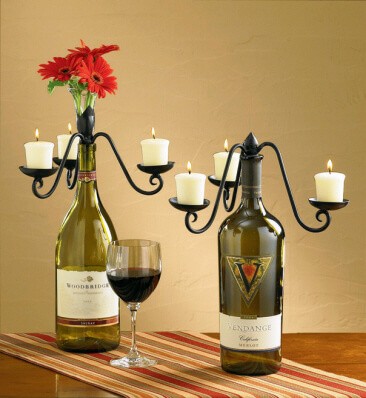
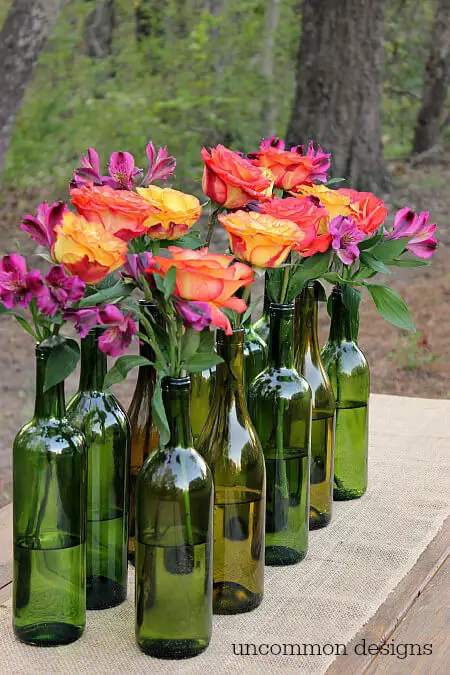
Easy and Elegant Wine Bottle Centerpiece
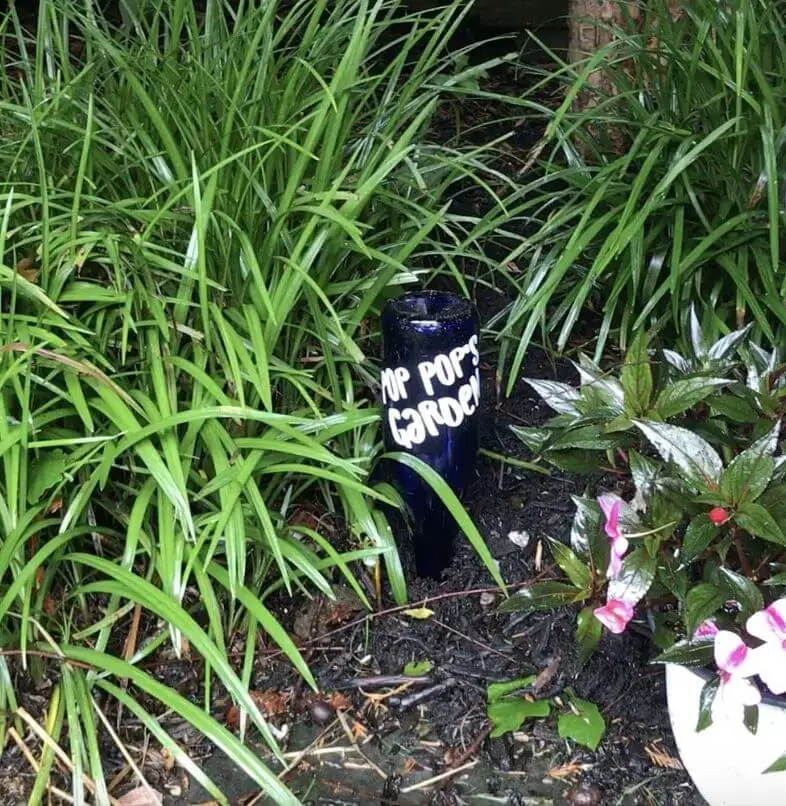
Garden Marker
Wine Bottle Privacy Screen
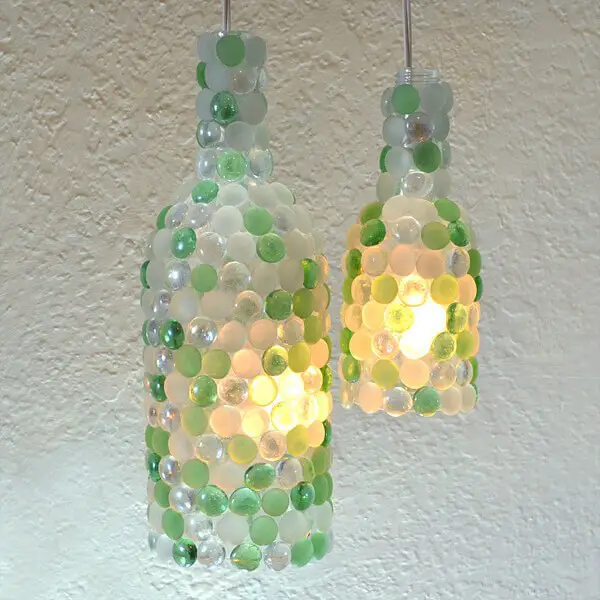
Glass Pebble Wine Bottle Pendant Lamps
Painting Clear Wine Bottles For Garden Sculptures
Wine Bottle Pumpkin For Fall Garden Decoration

Wine Bottle Garden
Tips for Long-Lasting Wine Bottle Crafts in the Garden
Transforming wine bottles into garden decorations is a creative way to upcycle and beautify your outdoor space. This eco-friendly craft not only adds visual appeal but also promotes sustainability. To guarantee the longevity of these decorative pieces, it’s essential to employ weather-resistant finishes and implement effective maintenance strategies to safeguard against the elements.
Advice on Selecting and Applying Weather-Resistant Finishes
To ensure your wine bottle crafts remain in prime condition for years to come, it’s crucial to safeguard them against environmental factors. When selecting and applying finishes, prioritize products with weather-resistant or outdoor labels. This can include varnishes, sealants, and UV-resistant sprays designed to shield the glass and any paint or decorations from fading and water damage. Always follow product instructions carefully, ensuring a clean surface before application.
A multiple-coat approach may be necessary, allowing for adequate drying time between each layer. Furthermore, anticipate reapplication every 12 months or as needed to maintain the finish’s protective qualities.
Strategies for Maintaining and Protecting Wine Bottle Crafts from the Elements
To maintain the beauty and longevity of your wine bottle crafts, employ these three strategies: Proper Placement, Regular Cleaning, and Inspection and Repair. By doing so, you’ll be able to minimize wear and tear caused by environmental factors and prevent damage that can dull their appearance over time. Proper Placement involves situating your crafts in areas where they’re partially shielded from harsh weather conditions, such as under a tree or patio cover.
This will help reduce exposure to direct sunlight and heavy rain, which can cause significant wear. Regular Cleaning is essential for removing dirt, debris, and other materials that can accumulate on the surface of your wine bottle crafts. A gentle soapy water wipe-down can keep them looking their best and prevent damage that can occur from neglecting regular maintenance. Finally, Inspection and Repair are crucial steps in maintaining the integrity of your wine bottle crafts.
Take time at least once a season to inspect your creations for signs of wear or damage, such as cracks in bottles or peeling paint. Addressing these issues promptly will not only extend the life of your craft but also prevent small problems from becoming bigger and more costly to repair.
Conclusion
Now that we’ve explored the endless possibilities of transforming wine bottles into stunning decorations for your garden and home, it’s time to unleash your own creativity! Take the ideas we’ve shared and make them uniquely yours by experimenting with new techniques or combining different methods. As you craft, remember that each piece not only adds a touch of elegance to your space but also reflects your commitment to sustainability and innovation.
So, gather those wine bottles and get started – your next treasured decor piece is just a project away!