16+ Best Wood Walls Add Warmth To Your House
The buzz surrounding DIY wood wall ideas is palpable, but it’s not just about slapping some planks on your wall. It’s about creating a unique and character-filled space that you can’t help but boast about. DIY wood walls have become a top trend in home décor for good reason. They bring a warm, rustic charm to a room that modern paints and wallpapers struggle to replicate.
This is more than just aesthetics – these walls also provide excellent insulation, are sturdy, and can even boost your property value. From sprucing up a dull room to adding a cozy atmosphere, wood walls are the ultimate game-changer. And the best part? They’re not just about looks; they’re also incredibly practical. With the right materials and some hands-on crafting, you’ll be amazed at what you can achieve.
In this article, we’ll delve into the world of DIY wood walls, covering everything from choosing the perfect materials to rolling up your sleeves for some creative crafting. By the end, you’ll be itching to start your own project, guaranteed.
Heavy Metal Divider Wood Wall
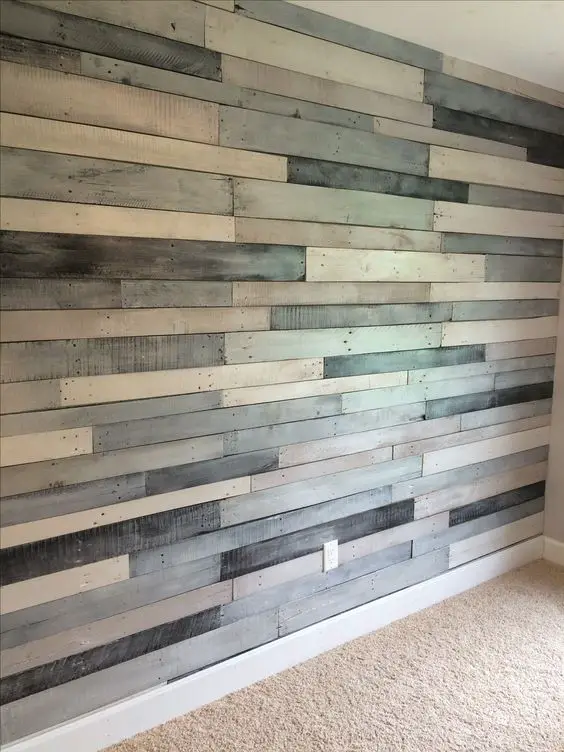
Pallet wood wall using Benjamin Moore Metallic paint -silver and charcoal
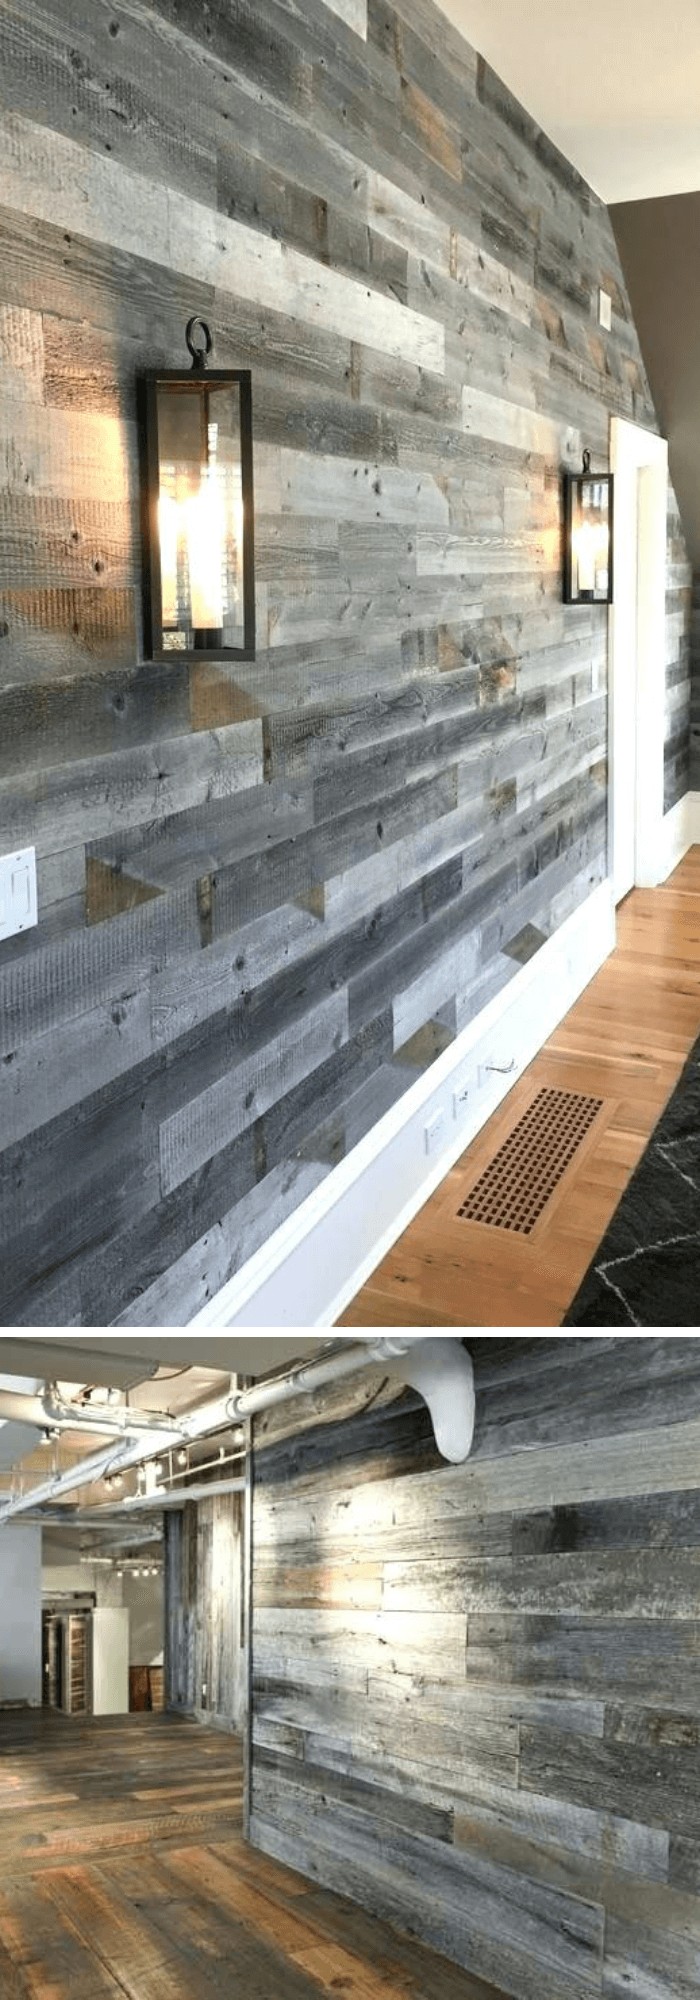
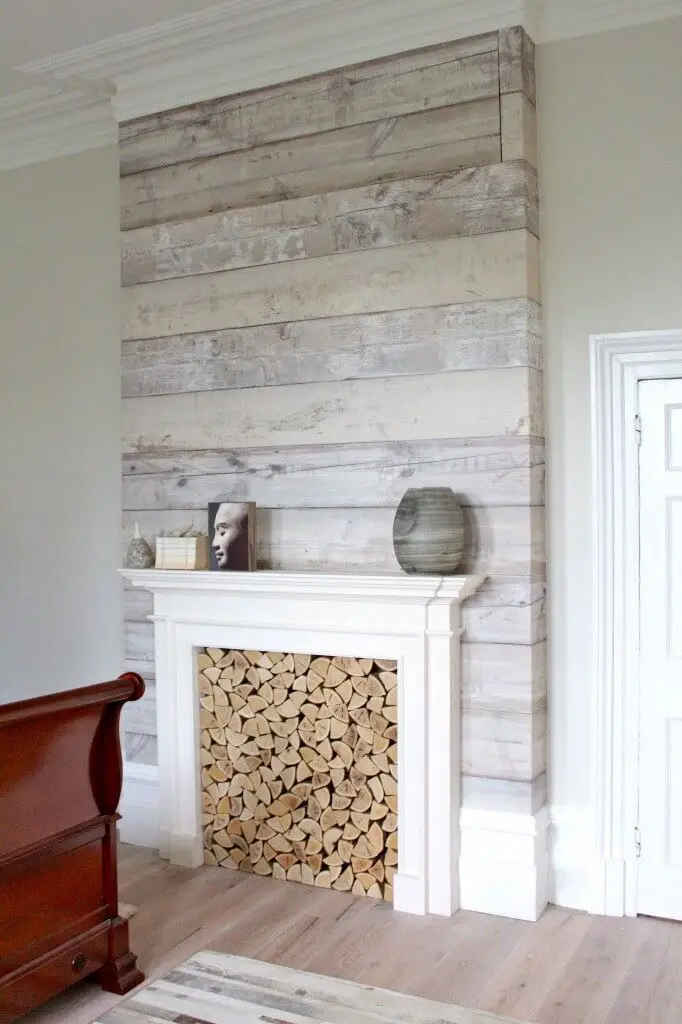
Rustic Reclaimed Wood Wall
Transform the ambiance of your home into a warm, inviting space by embracing the rustic charm of reclaimed wood. By utilizing vintage, weathered lumber, you can craft a unique feature wall that exudes a rich sense of history and nostalgia. With its earthy appeal and cost-effective approach, this style is an ideal way to infuse character into any room without breaking the bank.
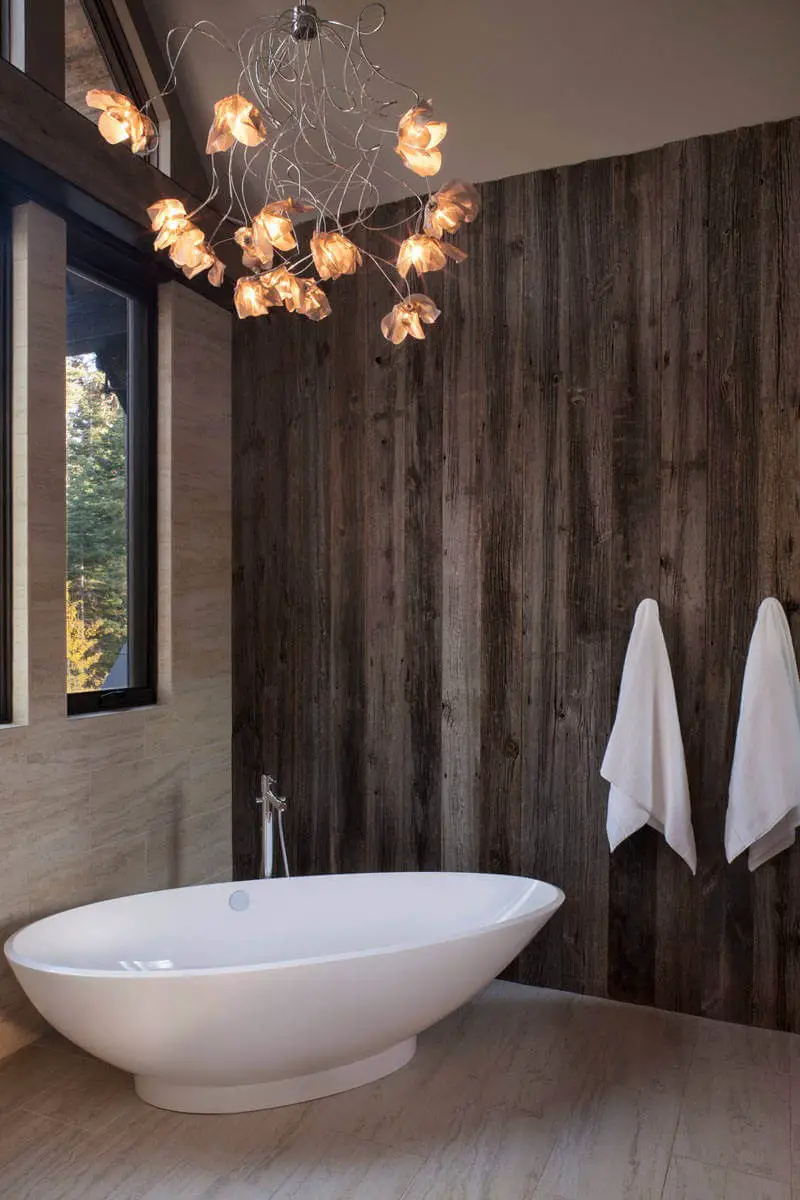
Dark Stained Wood Wall
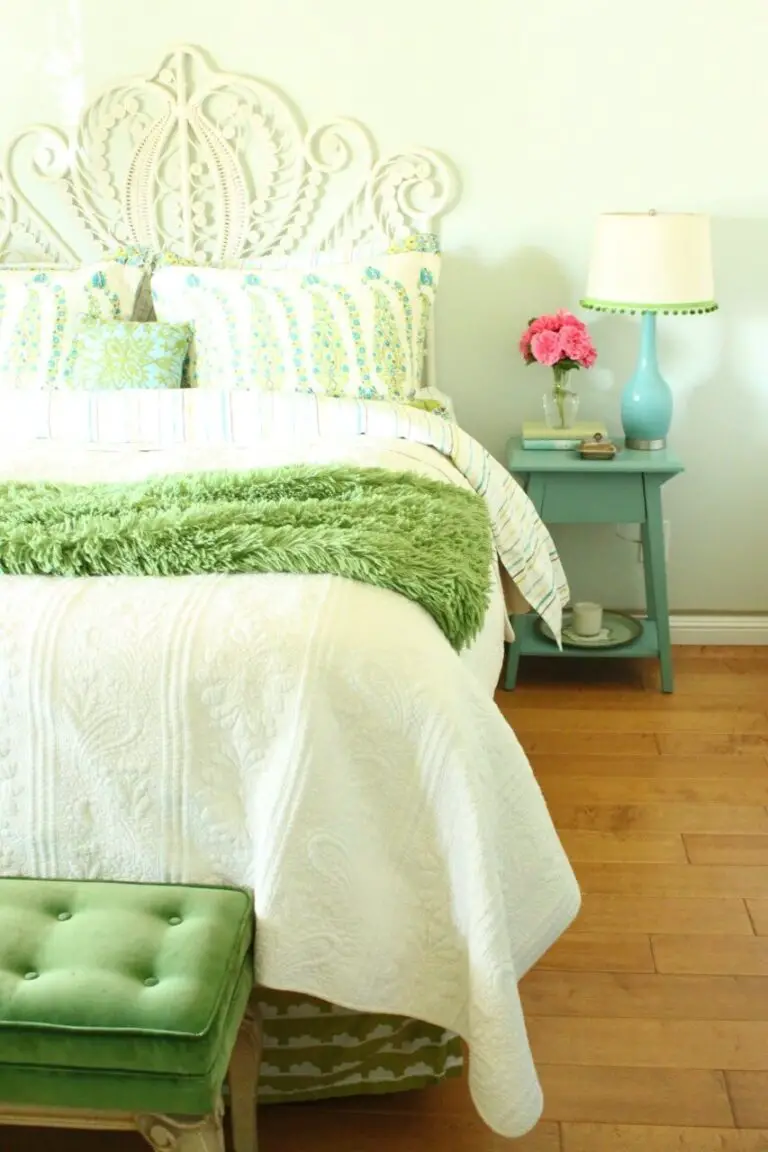
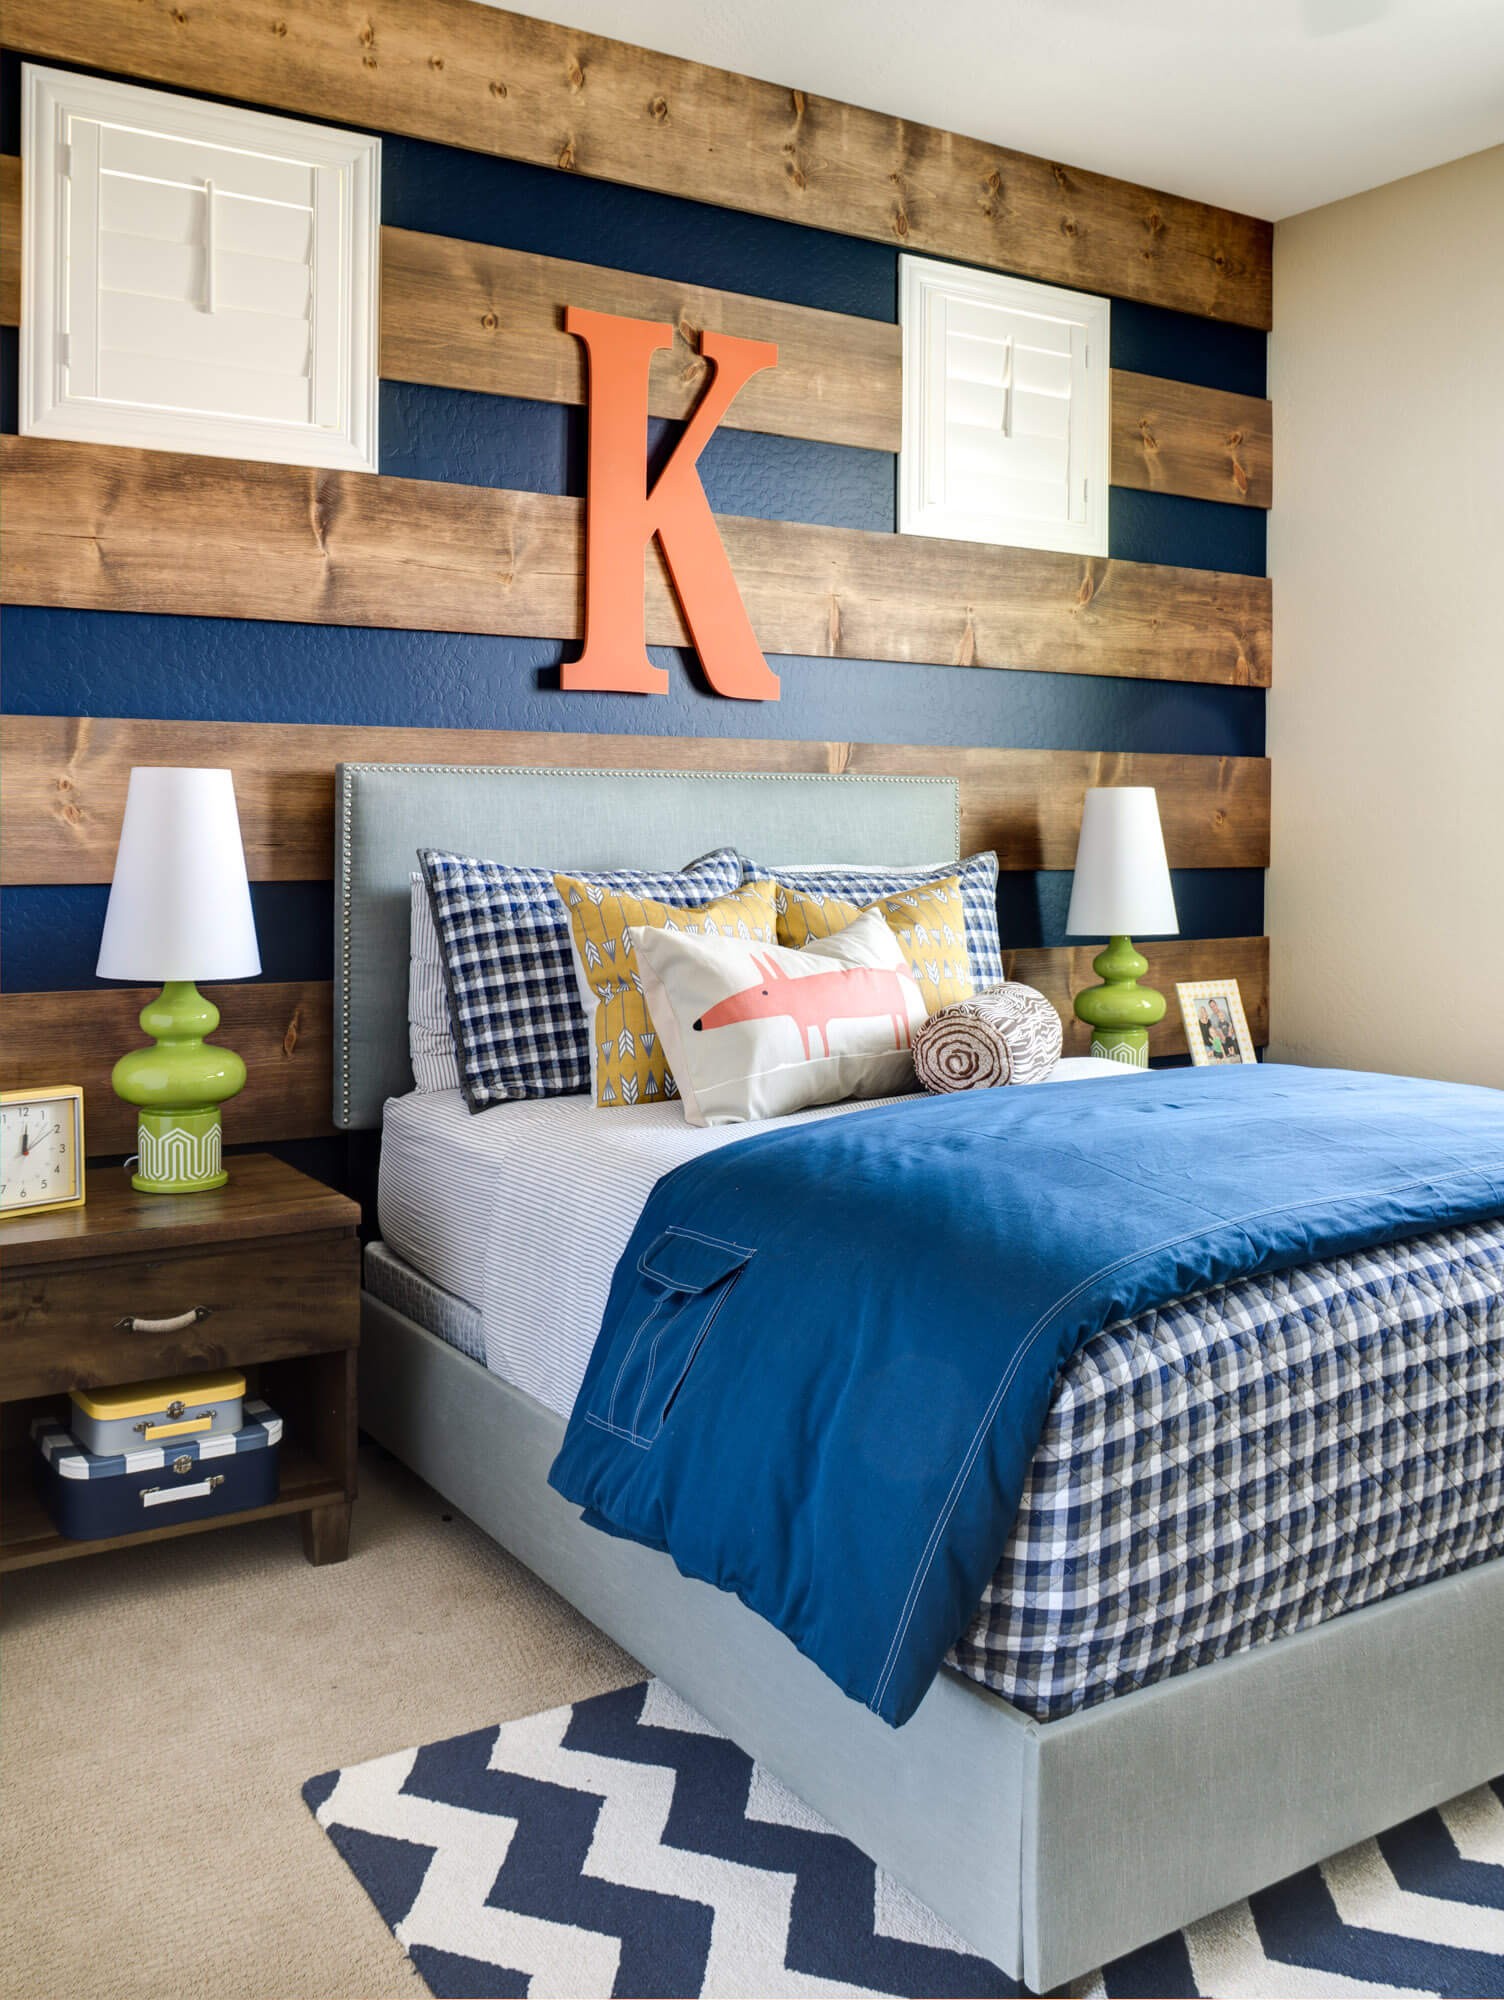
Color Splash on Wood
Transform traditional wooden surfaces into a masterpiece by painting them in bold, bright colors. This unconventional approach allows you to unleash your creativity and add a playful touch to spaces that need an injection of vibrancy, such as children’s bedrooms. The result is a unique and lively atmosphere that reflects your personality.
Gray Wood Wall
Large stained boards over a navy blue wall
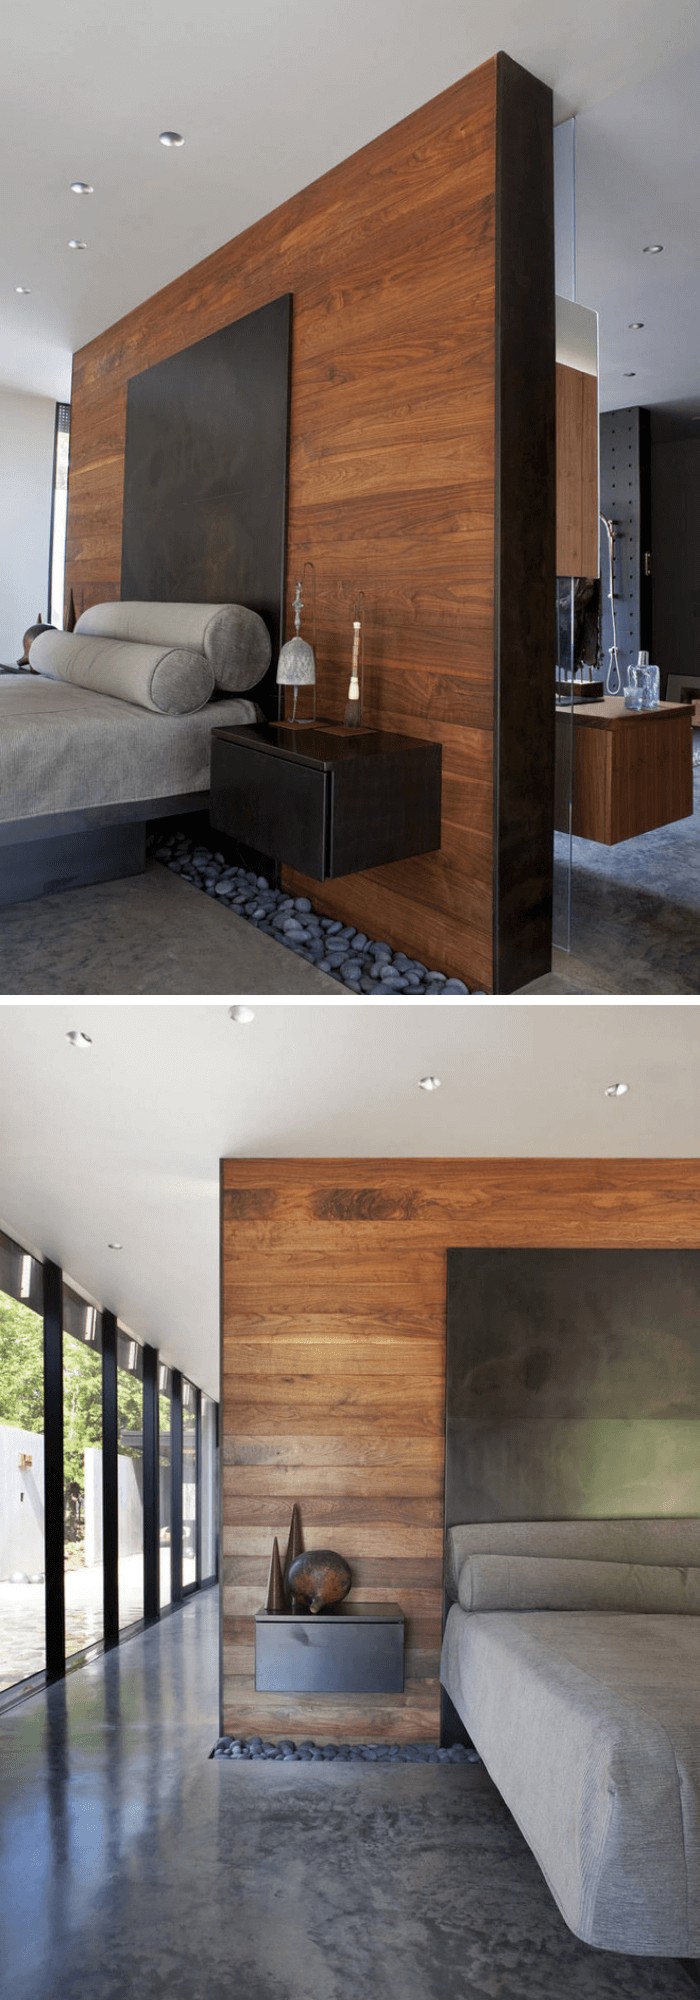
Modern Wood Panel Elegance

Elevate the ambiance in your home or workspace by incorporating modern wood panels into your design. The sleek, polished finish of these planks exudes a sense of refinement and style, making them an ideal choice for living rooms, offices, and other areas where you want to create a sophisticated atmosphere that commands attention.
Pallet Wood Artistry
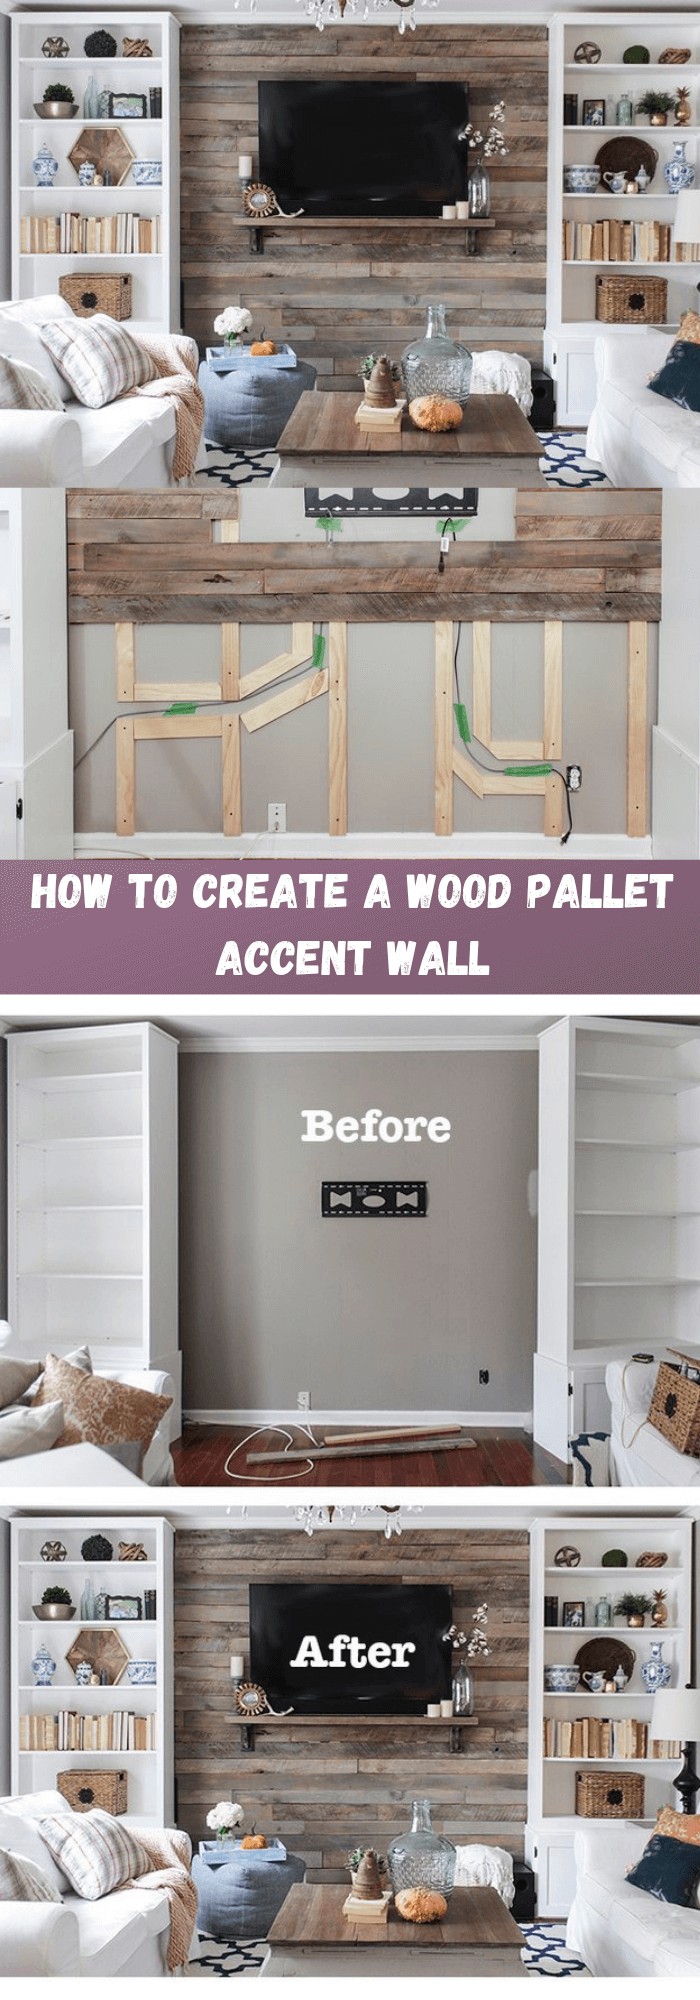
Elevate your space with a one-of-a-kind pallet wood accent wall, crafted from repurposed materials. This creative solution not only saves you money but also adds an industrial touch, making it a perfect project for DIY enthusiasts seeking to breathe new life into their homes.
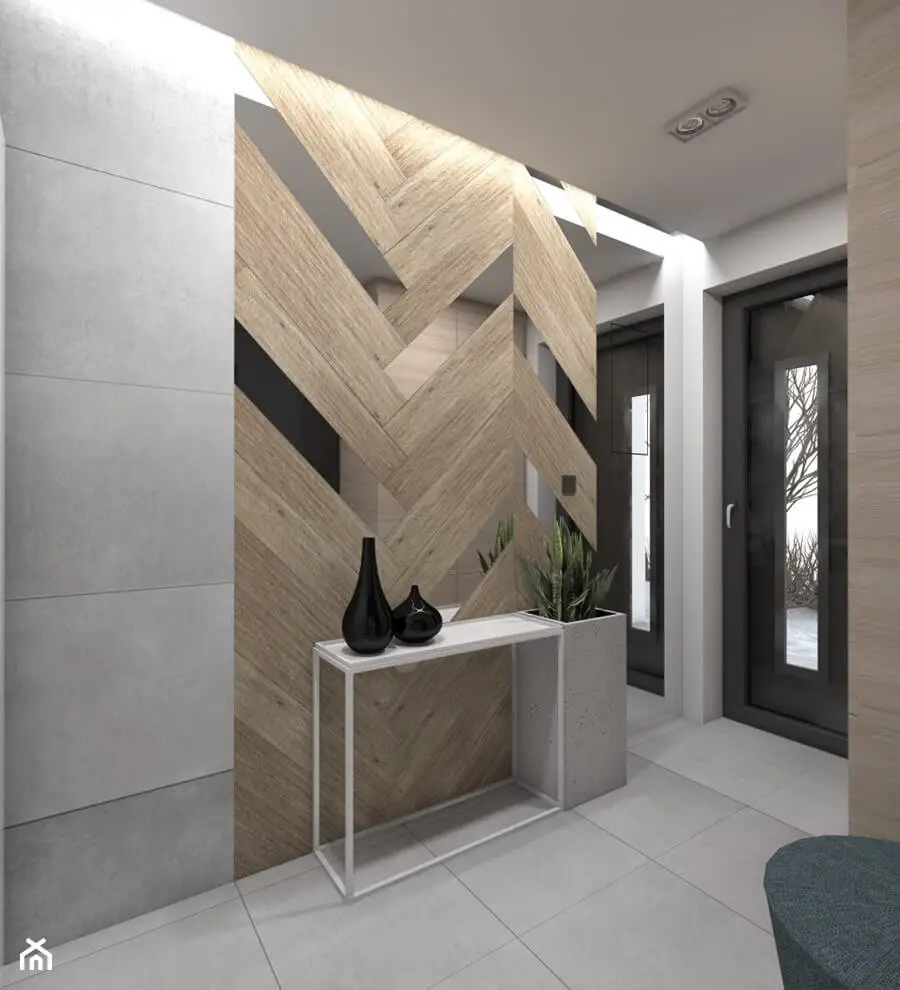
Mixed Wood Medley

Elevate the aesthetic of your space by incorporating a show-stopping mixed wood wall. By combining multiple types and hues of wood, you can craft a one-of-a-kind feature that exudes personality and sets the tone for the entire room. This creative approach offers endless possibilities, guaranteeing your design will be truly unforgettable.
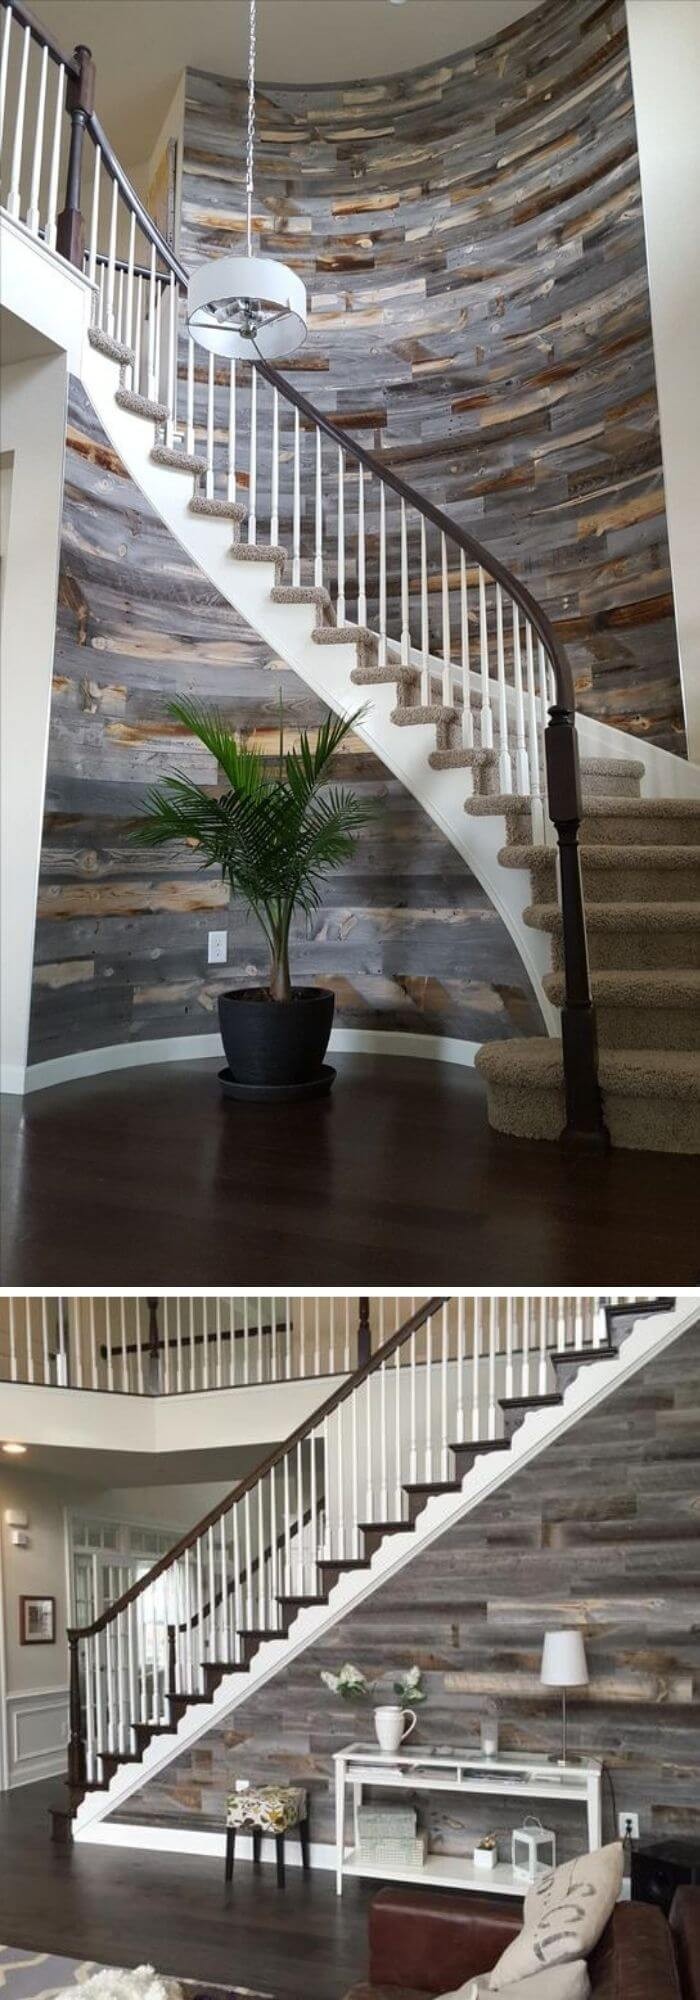
Gray hallway
Vertical Shiplap Statements
Create the illusion of greater verticality in your room by incorporating vertical shiplap panels into your design. This clever trick can make a significant difference in perceived height, instantly elevating the space’s aesthetic appeal. By mounting wooden panels vertically, you’re able to visually expand the room’s ceiling line, effortlessly modernizing its interior and transforming it into a more inviting atmosphere.
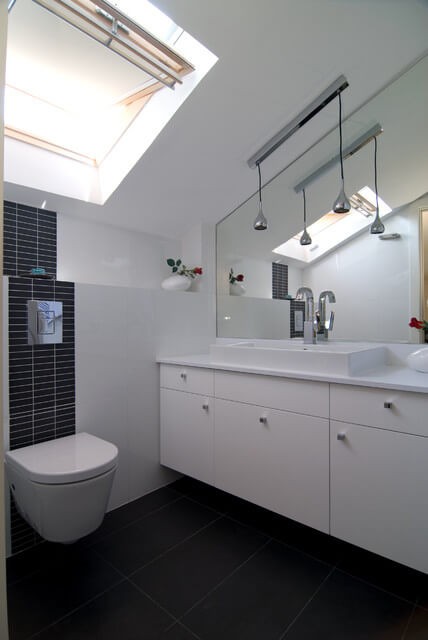
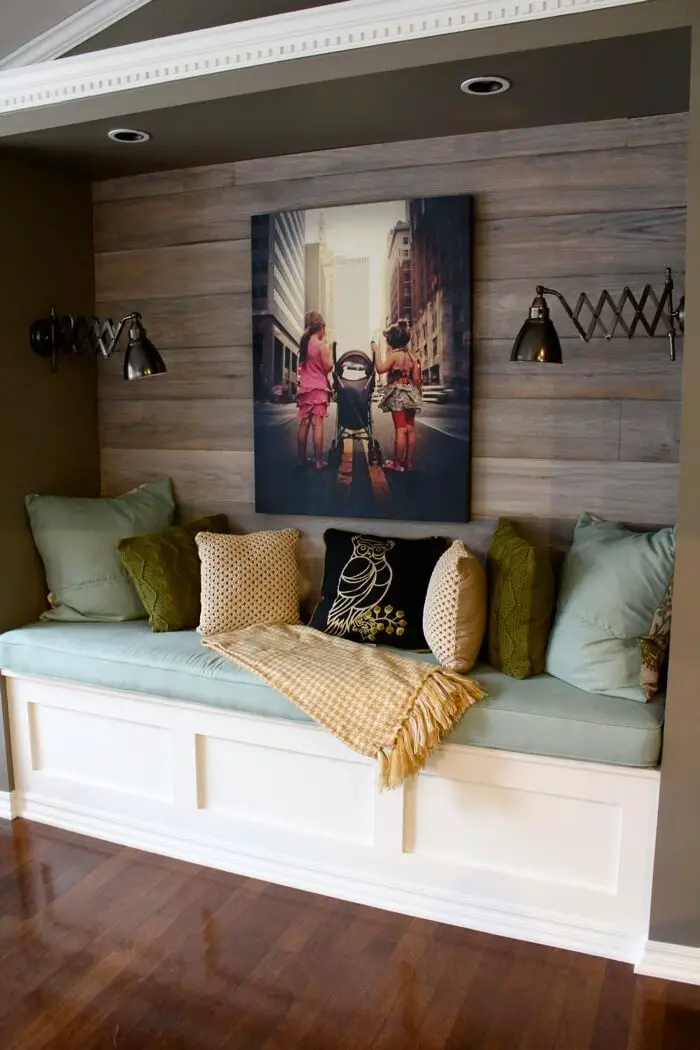
Accent Wood Plant Wall
Faux wood wall
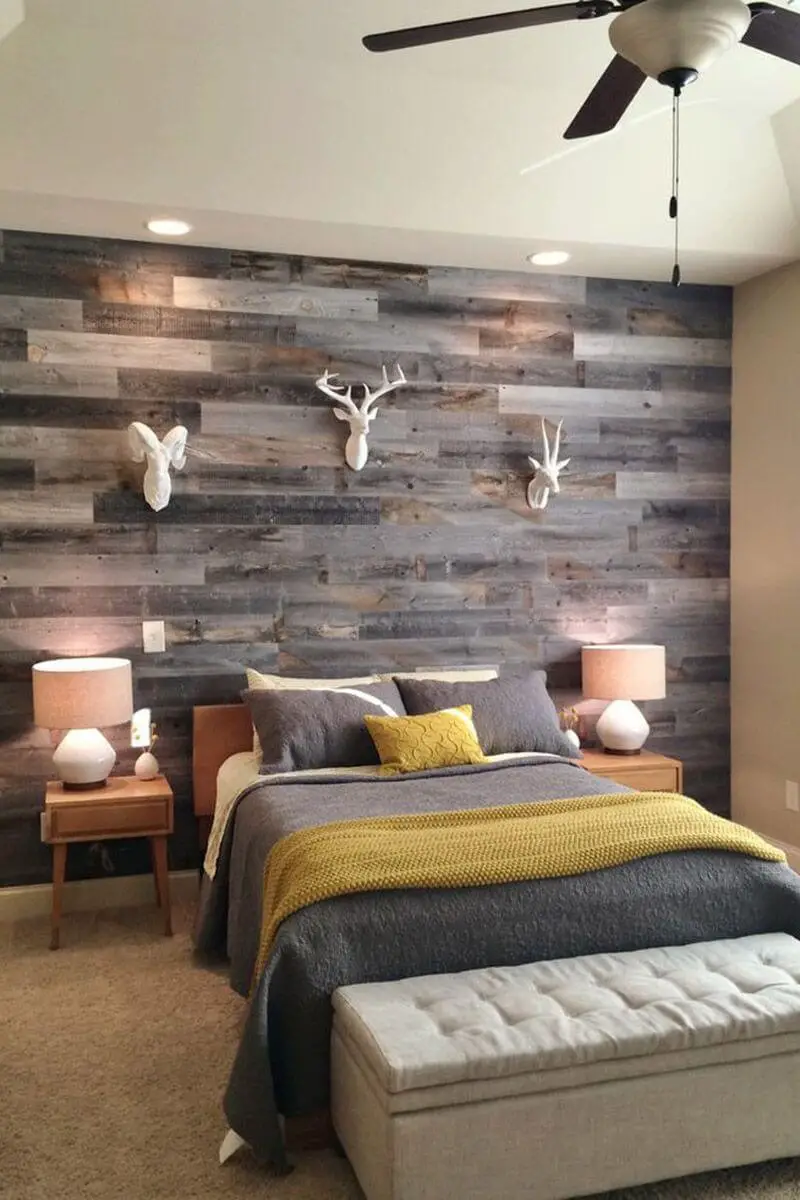
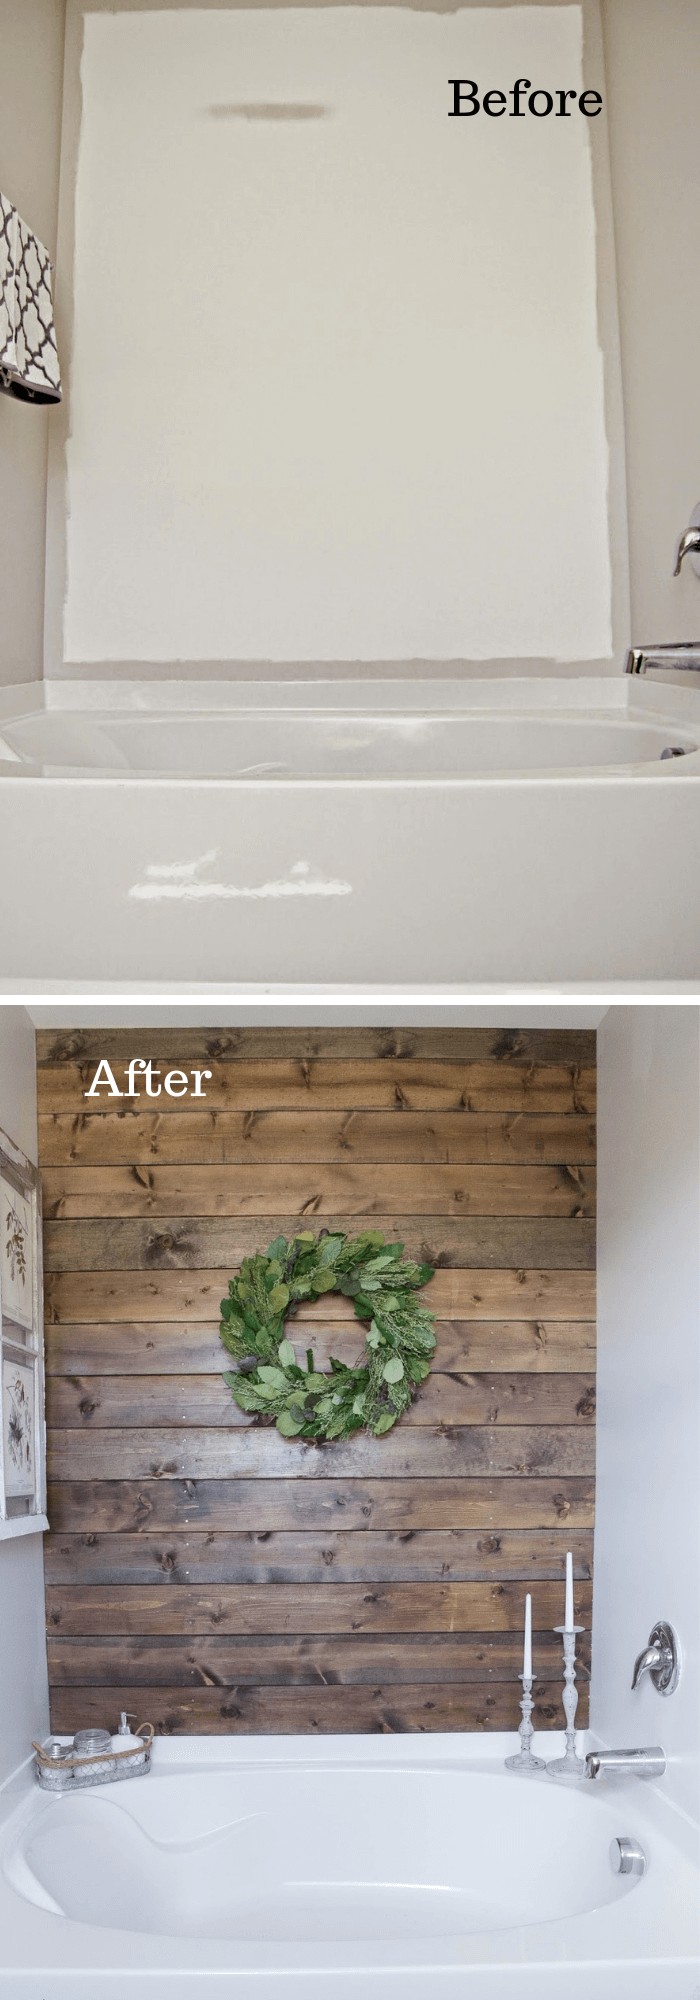
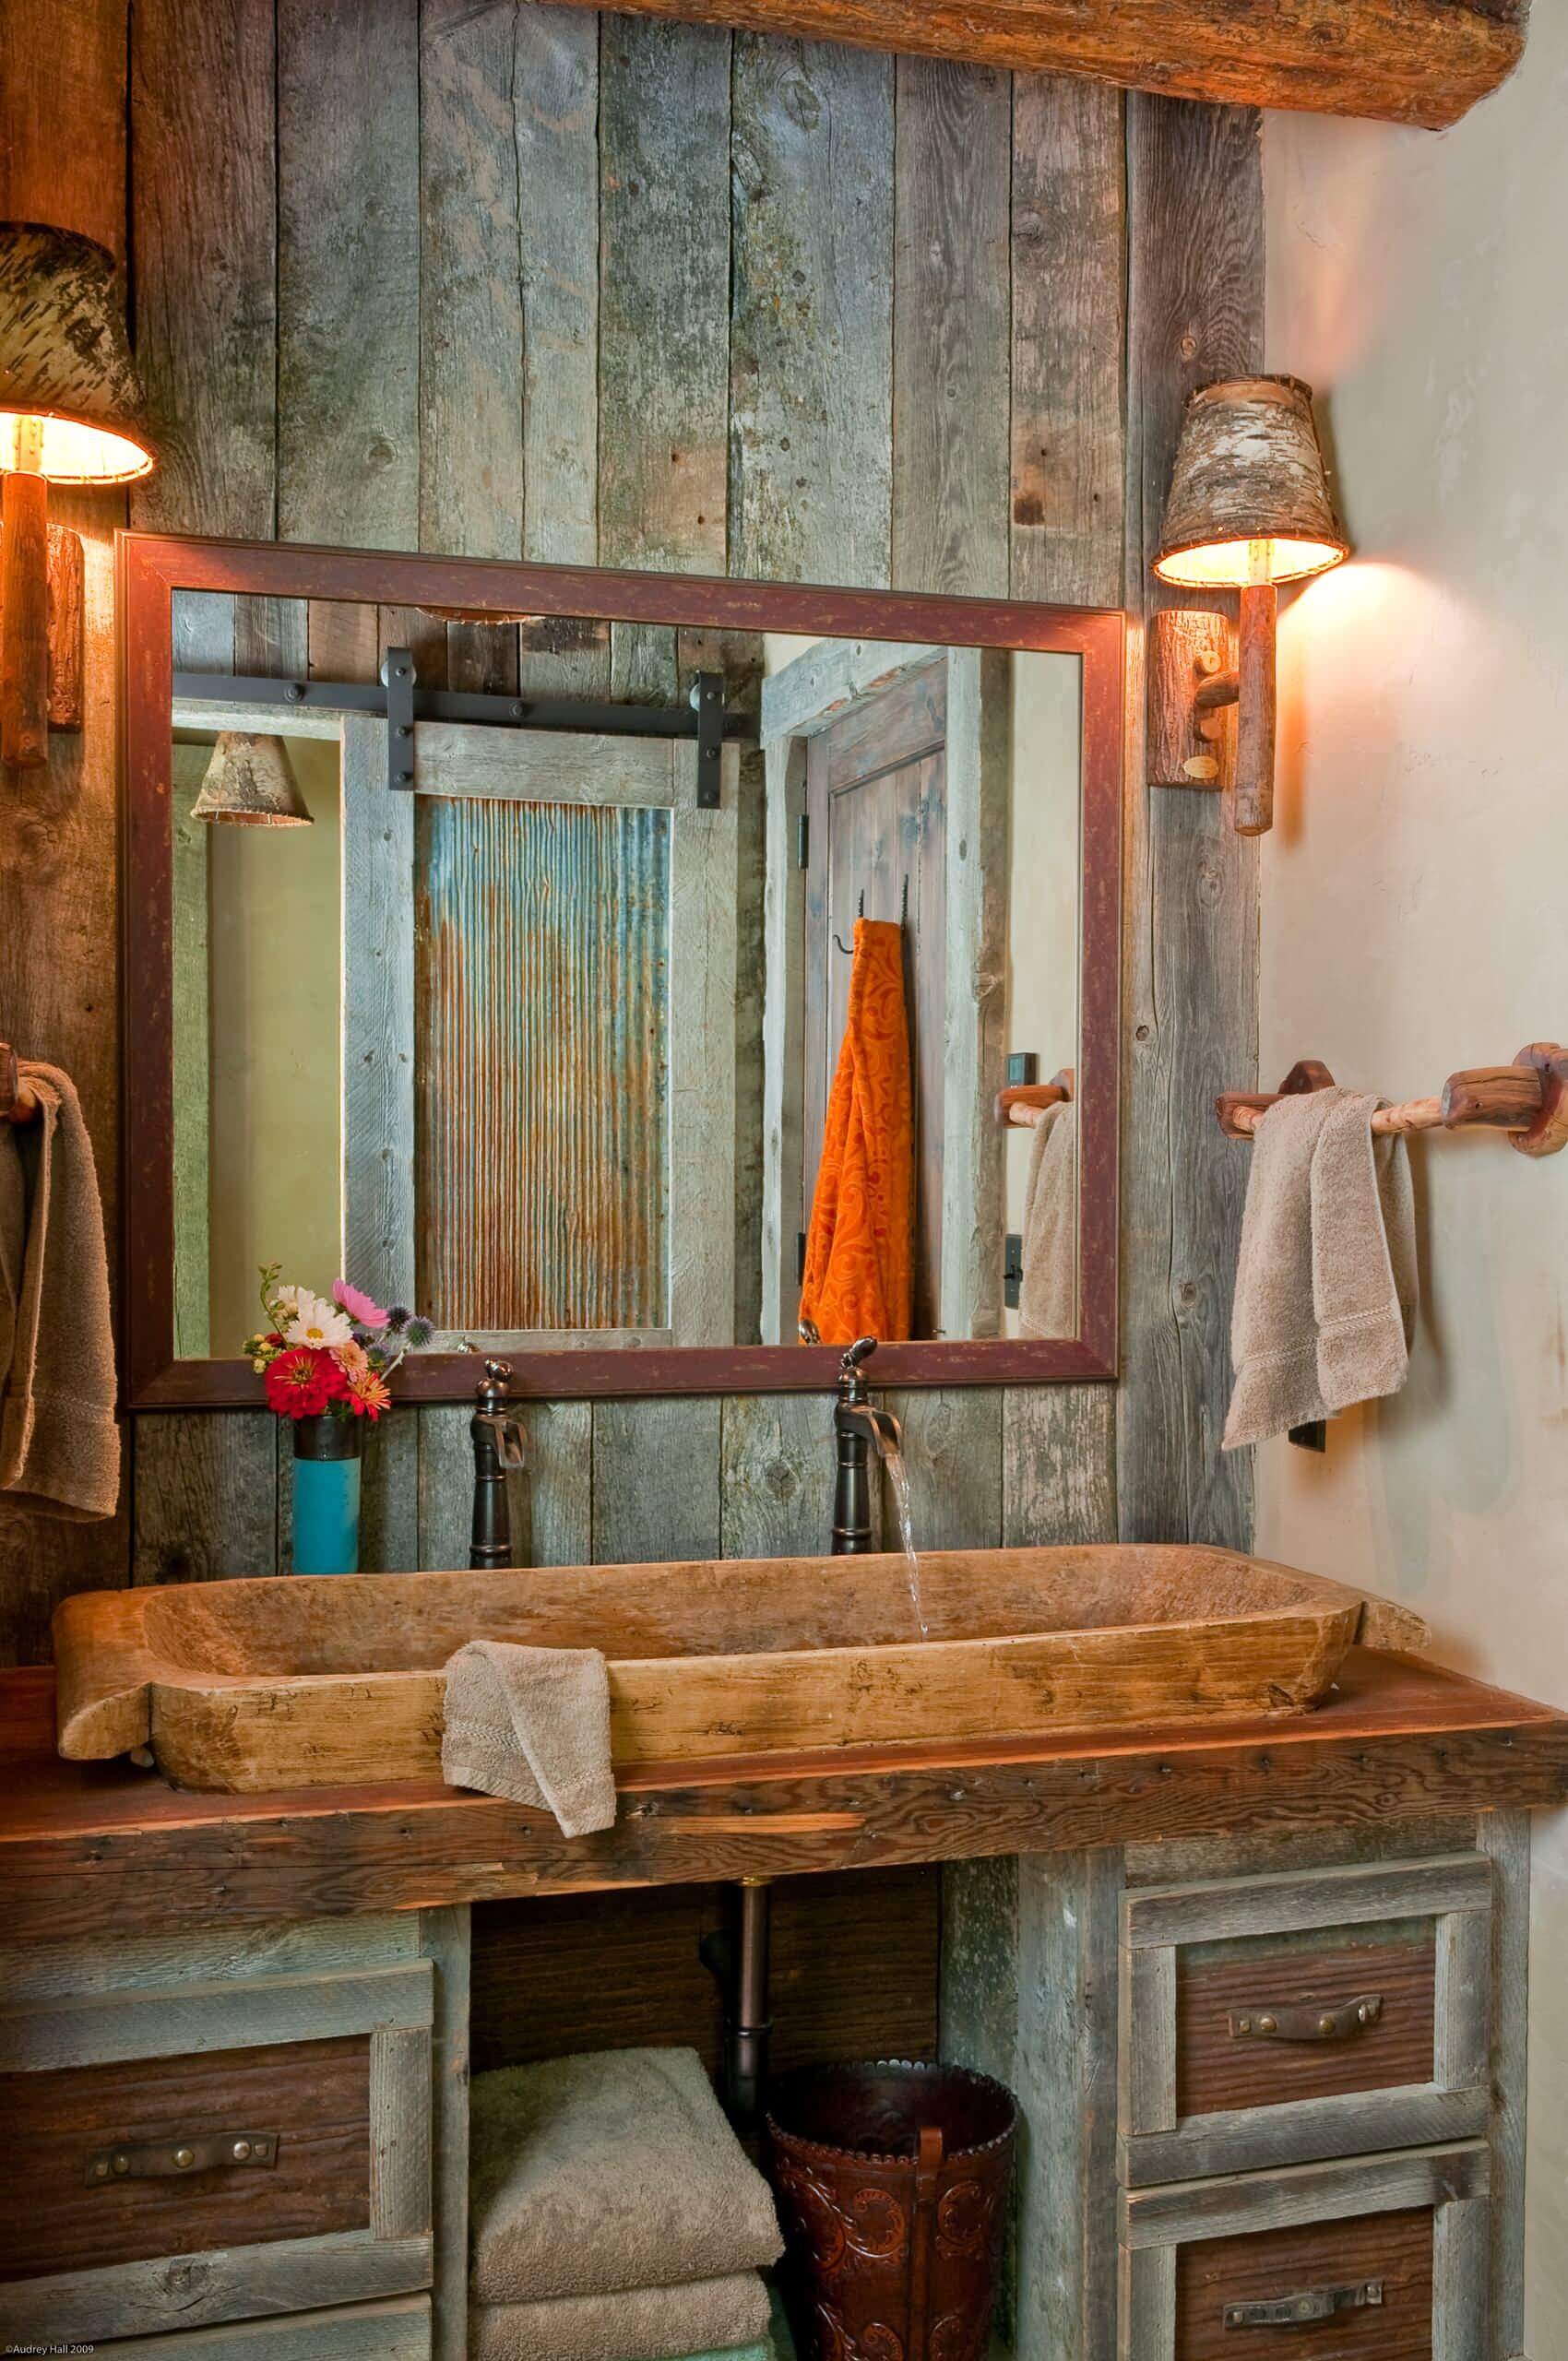
Vintage Wood Wall
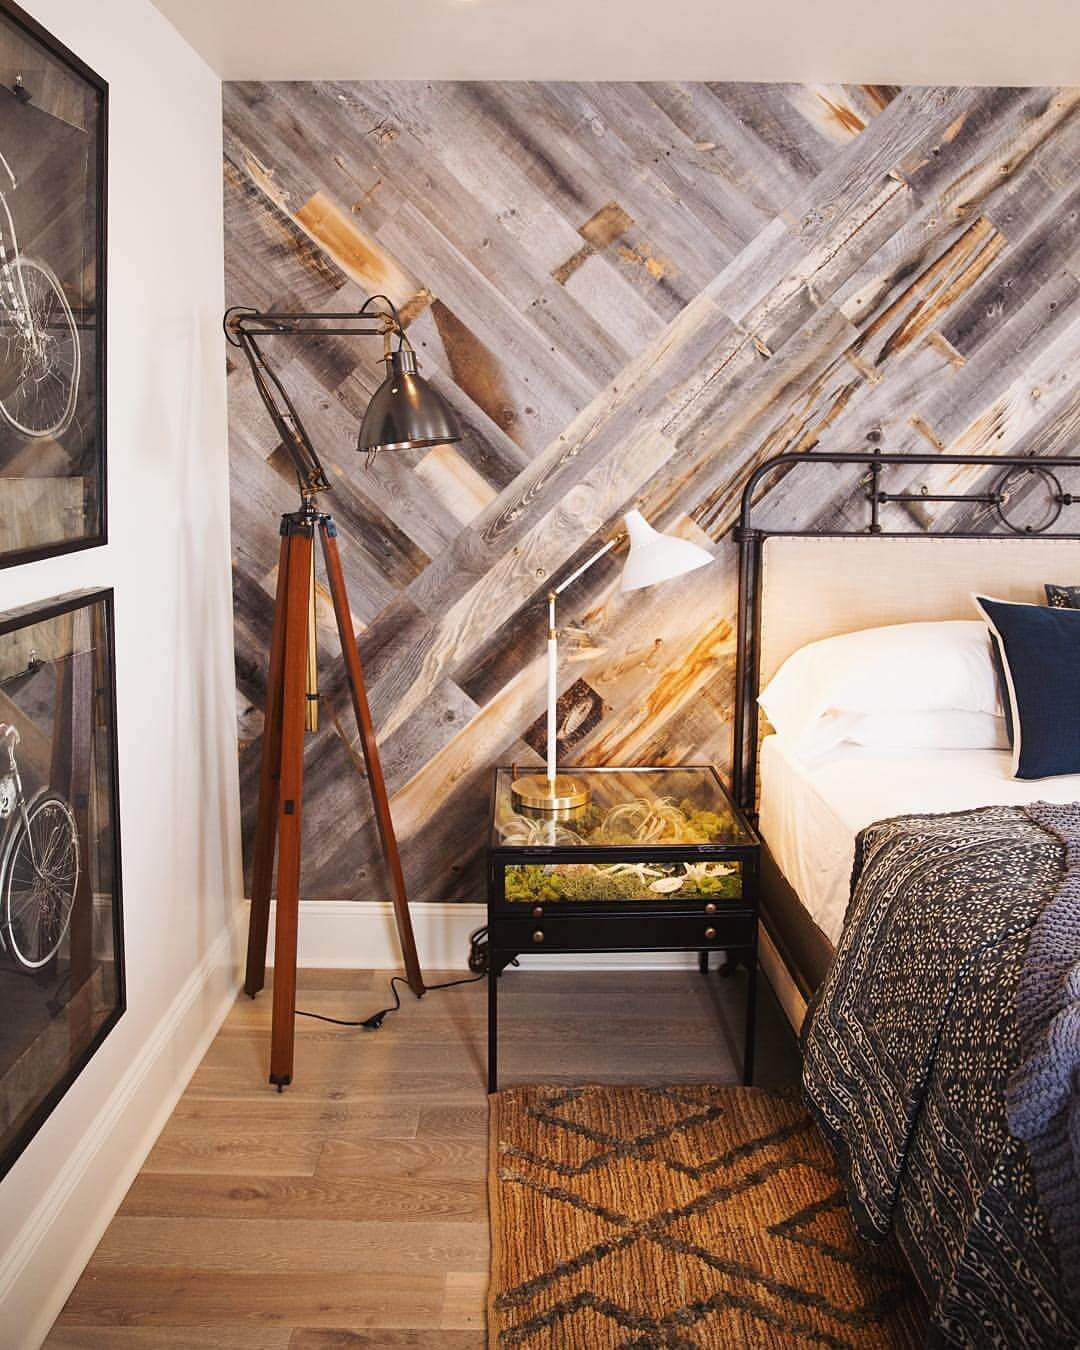
Chevron Chic
Elevate the aesthetic of your home with a striking chevron wood wall design. By artfully arranging wooden planks in a V-shape, you can craft a visually compelling feature that radiates dynamic energy. Perfect for making a memorable impression, this creative installation is sure to captivate and energize any room.
Materials Needed for DIY Wood Walls
Types of Wood
When embarking on a DIY wood wall project, selecting the right type of wood is crucial. You have three primary options to consider: reclaimed wood, new wood, or specific species. Each choice presents unique advantages, from eco-friendliness to durability, that can greatly impact the overall aesthetic and functionality of your project.
Reclaimed wood offers a rustic, vintage appeal, making it ideal for those seeking a distressed look.
Its distinctive textures and colors add character, while also being an environmentally responsible option.
For a cleaner, more modern appearance, new wood is the way to go. You can stain or paint it to match your desired style, allowing for a high degree of customization.
Finally, specific species like pine, oak, or cedar bring their own distinct characteristics and properties to the table.
Pine, for instance, is soft and easy to work with, while oak is harder and more durable, making it suitable for areas that require greater strength.
Tools and Supplies
To embark on a DIY wood wall project, you’ll need to gather the following fundamental tools and supplies: The essentials include nails and screws for securing the wooden planks to the wall. A hammer and screwdriver are also necessary for nailing and screwing the planks into place. A saw – either a hand saw or power saw – will be required to cut the wood to the desired size. Additionally, you’ll need an adhesive, such as wood glue or construction adhesive, to help secure the planks.
To ensure your project is executed with precision and accuracy, you’ll also need a level and measuring tape. These tools will help you achieve straight and properly aligned wood planks. Finally, sandpaper is necessary for smoothing out rough edges and surfaces.
Safety Gear
When embarking on a DIY project, prioritizing safety is crucial. To ensure a hazard-free experience, make sure you have the following essential gear at hand:
Gloves: A must-have for protecting your hands from potentially sharp splinters and rough edges that can cause discomfort or injury.
Goggles: These will shield your eyes from dust and debris while cutting and sanding wood, preventing any potential eye strain or irritation.
Dust Mask: Don’t forget to wear a dust mask to avoid inhaling sawdust, which can be harmful to your lungs. By taking these precautions, you’ll be well-equipped to tackle your DIY project with confidence.
Preparation Steps
Measuring and Planning the Space
To ensure a seamless DIY experience, it’s essential to measure and plan your space thoroughly. This straightforward step may seem tedious, but it’s crucial in avoiding costly mistakes and ensuring accurate results. Start by meticulously measuring the height and width of the wall, jotting down these numbers as you go. Use this data to calculate the total area in square feet, a calculation that will serve as the foundation for your project.
By doing so, you’ll be able to determine exactly how much wood is required, thereby eliminating the need for wasteful overages or underestimates. Additionally, taking the time to plan out your layout on paper beforehand can significantly reduce stress and frustration down the line.
Preparing the Wood
When it comes to preparing the wood, whether you’re working with reclaimed or new planks, this stage is vital. To start, give the wood a thorough cleaning to remove any dirt, grime, or debris that may be present. If you’re using reclaimed wood, take an extra moment to inspect for any stray nails or screws that might be poking out. Once the wood is clean, use sandpaper to smooth out any rough edges or surfaces, ensuring both safety and a professional-looking finish.
Finally, use a saw to cut the wood to your desired lengths, double-checking your measurements beforehand to avoid any costly mistakes.
Tips for Arranging Your Workspace
A well-organized workspace is crucial for the success of your DIY wood wall project. To ensure a seamless process, set up a clean, flat, and well-lit area where you can lay out your materials and tools without any hindrances. Keep your instruments within arm’s reach to avoid unnecessary interruptions and have a designated trash bin nearby to dispose of scraps and waste efficiently.
If you’re working indoors, it’s essential to cover the floor with a tarp or drop cloth to protect it from sawdust and spills. By maintaining a tidy workspace, you’ll save time and ensure your safety throughout the project.
Step-by-Step DIY Guides
Basic Wood Wall
To infuse warmth and texture into your space, creating a basic wood wall is an uncomplicated process. Here’s how to do it:
First, prepare your wall by ensuring it’s clean and dry. Remove any existing wallpaper or paint if necessary.
Next, measure the height and width of the wall, then cut your wood planks to fit, leaving a small gap at the bottom for expansion.
Start at the bottom: Place the first plank along the floor, making sure it’s level and secure it with nails or adhesive.
Then, work your way up, adding planks above the first one, ensuring each is level before securing it. To achieve a natural look, stagger the joints between planks.
Finally, once all planks are in place, sand any rough edges to smooth them out and apply a sealant to protect the wood.
Accent Wall
To create a striking accent wall, follow these steps:First, identify a wall that naturally demands attention, such as one behind your bed or sofa. This will help draw the eye towards your newly designed feature. Next, decide on a pattern for your wood planks. You can opt for a classic herringbone design, or go for something more modern like chevron. Alternatively, you could choose a simple horizontal layout to add some visual interest.
Before you start installing the wood, make sure the surface is clean and smooth. If you want a specific color to show through the gaps between the planks, apply a base coat of paint first. To install the wood, start from the center of the wall and work your way outwards. Place each plank according to your chosen pattern, using nails or adhesive to secure it in place. Finally, add some finishing touches by trimming the edges and corners with molding for a polished finish.
Sand and seal the wood to enhance its appearance and durability.
Full Room Installation
To transform an entire room with wood, start by measuring all walls you plan to cover and calculate the total amount of wood needed, factoring in extra material for mistakes and cuts. Prepare your wood planks by cleaning, sanding, and cutting them to size, grouping similar pieces together for easier installation. Begin with the main wall, ensuring each plank is level and secure, just as you would with a basic wood wall.
Once complete, move on to adjacent walls, paying attention to corners and transitions to maintain a seamless look. Finally, finish the room by lightly sanding the entire surface to smooth out any rough spots, followed by application of a finish or sealant to protect the wood and enhance its appearance.
Finishing Touches
Sealing and Protecting the Wood
When your DIY wood wall installation is complete, a crucial next step is to seal and protect the wood to guarantee its longevity. To safeguard against moisture, stains, and daily wear and tear, apply a clear sealant. You’ll have the option of choosing from matte, satin, or glossy finishes, depending on the aesthetic you’re aiming for. It’s essential to apply the sealant evenly and allow it to dry completely.
This not only protects the wood but also accentuates its natural beauty, making it an attractive addition to any room.
Adding Trim and Other Decorative Elements
Transforming your wood wall into a polished masterpiece is as simple as incorporating trim and decorative elements. Trim serves as a finishing touch, concealing the seams where planks meet the wall or ceiling, resulting in a crisp and professional appearance. Opt for baseboards, crown molding, or straightforward wooden strips to achieve this look. But that’s not all – take it up a notch by adding functional and stylish embellishments like shelves or hooks.
These thoughtful touches can elevate your wood wall from plain to personalized, making it a true showstopper.
Maintenance Tips to Keep the Wood Looking Great
To ensure your wood wall remains in pristine condition, it’s crucial to perform regular upkeep. A simple yet effective step is to regularly dust the surface to prevent dirt accumulation. For more thorough cleaning, employ a damp cloth alongside a mild wood cleaner. It’s essential to steer clear of harsh chemicals that could irreparably harm the wood. Furthermore, conduct periodic inspections for signs of wear and tear, and address any sealant or trim issues as needed.
By following these simple yet vital steps, you’ll be able to preserve your wood wall’s stunning appearance for years to come.
Cost Analysis and Budgeting Tips
Estimating the Cost of Materials
Before embarking on your DIY wood wall project, it’s essential to establish a budget by calculating the cost of materials. Start by determining how much wood you’ll need based on the total square footage of the area you’re covering. Next, research the price per square foot for the specific type of wood you’ve chosen. Don’t overlook additional expenses such as nails, screws, adhesive, and any finishing products like paint or sealant.
To avoid running out of materials mid-project, it’s a good idea to factor in a small buffer, purchasing a little extra wood to account for mistakes or cuts.
Advice on Where to Find Affordable Materials
When it comes to staying within budget on your project, exploring affordable materials is crucial. Start by visiting local hardware stores, keeping an eye out for sales or discounts on wood and supplies. Online marketplaces are also worth investigating, as they often provide competitive pricing and a broader selection of options. Don’t overlook the potential of reclaimed wood yards and second-hand stores; these can offer unique and cost-effective materials that might just fit your needs.
By being flexible with your material choices and willing to consider what’s available at a lower price, you may be surprised by just how much you can save.
DIY Versus Professional Installation Costs
When it comes to deciding between a do-it-yourself (DIY) installation and hiring a professional, budget and confidence in one’s skills play a significant role. While DIY can be a cost-effective option since you’re not paying for labor, it often requires a considerable investment of time and effort. Additionally, you may need to purchase specific tools if you don’t already have them on hand.
On the other hand, professional installation, although more expensive, typically guarantees a high-quality finish and eliminates the hassle associated with a DIY project. To make an informed decision, consider obtaining quotes from contractors and comparing them to your estimated DIY costs. In some cases, the added peace of mind that comes with hiring a professional may be well worth the extra expense.
Common Challenges and Troubleshooting
Dealing with Uneven Walls
When embarking on a DIY wood wall project, one of the most significant challenges is often the unevenness of the walls themselves. If the surface isn’t flat, the wood planks won’t lie properly, resulting in gaps and misalignment issues that can be frustrating to deal with. To overcome this hurdle, you can use furring strips to create a level base for your installation. Start by attaching these strips horizontally across the wall, spacing them evenly and ensuring they’re perfectly level.
Once this is done, you can then nail or screw your wood planks into place, resulting in a smooth and even finish that will leave your DIY project looking professional and polished.
Handling Wood Expansion and Contraction
Wood, as a natural material, exhibits unique properties that require special consideration. One of its most notable characteristics is its ability to expand and contract in response to temperature and humidity fluctuations. This inherent flexibility can lead to gaps or buckling issues over time, particularly when installed as part of a wood wall system. To mitigate these effects, it’s essential to leave a small gap (approximately 1/8 inch) between each plank during installation.
This deliberate spacing allows the wood to move freely without causing damage. Furthermore, it’s crucial to carefully evaluate the environmental conditions in which you plan to install your wood walls. Areas with extreme moisture levels, such as bathrooms or basements, can pose significant challenges. To address these concerns, consider using specially treated wood products designed to withstand harsh environments and minimize the risk of damage.
Solutions for Common Installation Mistakes
When undertaking DIY projects, it’s not uncommon for mistakes to occur. However, with some simple solutions, these errors can be easily rectified. One common issue is uneven planking, which can be addressed by regularly checking each row with a level and making adjustments as necessary before securing the planks in place. Another frequent mistake is leaving gaps between the wood pieces, which can be filled using wood filler or caulk that matches the color of the surrounding material.
For larger gaps, consider adding trim or molding to cover them up seamlessly. Furthermore, splitting wood is a common problem that can be prevented by pre-drilling holes for nails or screws, particularly near the edges of the planks. By taking these precautions, DIY enthusiasts can ensure a professional-looking finish and avoid costly rework.