How Do You Make A Clay Calla Lily?
Calla lilies are a beautiful flower that originated in South Africa. The scientific name for calla lilies is Zantedeschia. They are characterized by their trumpet-shaped blooms that grow on tall, slender stems. The blooms come in a range of colors from white to pink, yellow, orange and purple. Calla lilies are a very elegant flower that are popular in floral arrangements and bouquets. They also make lovely potted plants. Crafting calla lilies out of polymer clay allows you to create realistic looking flowers in whatever color you’d like.
Gather Materials
To make a clay calla lily, you will need the following supplies:
-
Air dry clay – White polymer clay or air dry clay works best. You will need enough clay to make the flower, leaves and stem.
-
Calla lily petal cutters – These are shaped clay cutters used to cut out the flower petals. Get a set with small, medium and large sizes.
-
Clay sculpting tools – Things like silicone tipped clay shapers, loop tools, dotting tools, etc. These help shape and add details to the petals.
-
Acrylic paints – For adding color to the flower. Get white, yellow, green and brown acrylic paint.
Before starting, make sure your work surface is protected and you have plenty of space. Now you’re ready to begin shaping your calla lily!
Shape the Petals
After gathering your materials, it’s time to shape the individual petals for your calla lily. Start by taking a portion of your clay and rolling it out to about 1/4 inch thickness on a flat work surface. You want the clay to be thin enough to cut shapes out of, but not so thin that it becomes too delicate to work with.
Next, use a petal shaped cutter, or cut freehand petal shapes out of the rolled clay. A calla lily has 6 petals, so you’ll want to cut out 6 petal shapes total. Try to vary the size and shape of the petals slightly for a more natural look. Cut larger petals for the outer petals, and slightly smaller petals for the inner petals closest to the center of the flower.
As you cut out each petal shape, lay it on a clean work surface and use your fingers to smooth the edges. Be gentle so you don’t distort the shape. You now have your clay petals ready to assemble into a flower!
Assemble the Flower
To assemble the flower, you will need to attach the petals around a cone shape to form the spadix. Start by rolling a small cone out of clay for the spadix. Make the base of the cone wide enough to attach all of the petals to.
Gently press the base of each petal onto the spadix, overlapping them slightly. Place the petals all around the spadix, covering it completely. Try to distribute the petals evenly for a realistic and symmetrical look.
The petals should stand upright, curved slightly outwards. If needed, use a dull tool to refine the shape of the petals. Be careful not to press too hard or the petals may flatten. Work slowly and gently when assembling the delicate petals into the complete flower shape.
Add Details
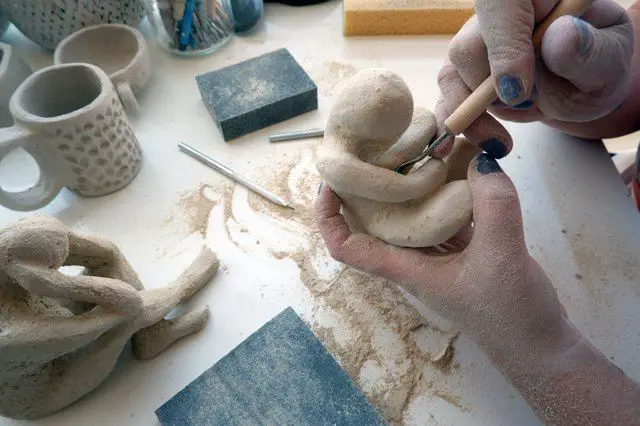
When sculpting calla lilies, adding subtle details like veins and ridges can really bring your creation to life. Here are some tips for adding realistic details:
Use a dull sculpting tool like a rounded chopstick or the back of a paintbrush to etch in veins along the length of the flower petals. Gently drag and indent along the surface to create natural-looking ridges and lines. Focus on the center thick part of petal, adding a central vein and smaller branching veins along the sides.
Also use your sculpting tool to add some shallow ridges along the edges of the petals. This will help make them look less flat and more naturally ruffled.
Consider adding some shallow grooves or lines radiating out from the base of the flower. This resembles the subtle ridges seen where petals emerge from the stem in real lilies.
Finally, use a soft brush, sponge, or your fingertips to stipple and compress the clay lightly all over the flower. This helps create an organic, less smooth texture, mimicking the subtle grain seen on real flower petals.
By taking the time to add delicate details like veins and natural textures, you can really elevate your clay calla lily sculpture to the next level.
Create the Leaves
Once your calla lily flower is assembled, it’s time to create the leaves. For the leaves you’ll want to cut leaf shapes out of green colored polymer clay. Make the leaves different sizes for visual interest. Use acrylic paint to add green veins to the leaves.
To cut the leaf shapes, roll out your green clay to about 1/8-inch thickness. Use cookie cutters in leaf shapes or freehand cut leaf shapes with a craft blade or Xacto knife. Make leaves in small, medium and large sizes.
After your leaf shapes are cut out, use a paint brush and acrylic paint to paint on the green veins. Look at reference photos of calla lily leaves to see the pattern of veins. Paint the veins on both sides of each leaf for a realistic effect.
Set the finished leaves aside and allow them to firm up before assembly.
Attach the Stem
The stem is what anchors the calla lily flower to its display. To make the stem, roll out a snake shape from your clay. Make it roughly 1/4 inch thick. The length will depend on the overall size of your flower, but 5-6 inches is typical. Use a toothpick or skewer to poke a hole in the bottom of the flower where you want the stem to be inserted. Apply a dab of water to the end of the stem and push it into the hole. The water will act as glue to hold the stem in place. Make sure the stem is secured well so your flower doesn’t flop over. You can add curves or bends to the stem for a more natural look. Let any excess moisture dry before moving on to the next steps.
Paint the Flower
Once the clay has dried completely, it’s time to add color to your calla lily. Acrylic paints work very well for painting polymer clay. Be sure to use acrylics labeled as non-toxic and safe for clay projects.
Start by painting the flower in white. Use a small brush and paint smooth, even coats over all the petals and trumpet. Allow the white paint to dry fully before moving on.
Next, mix some greens to paint the tips and undersides of the petals. Calla lilies have a beautiful gradient from white on the upper petals to light green on the lower sections. Mix a range of light greens and paint thin layers onto the petals to achieve a subtle color transition.
Add some yellow greens to the trumpet as well. Blend the colors smoothly for a natural look. Allow all the paint to dry fully before moving to the final sealing stage.
Seal and Finish
Once your clay calla lily is assembled and detailed, you’ll want to seal and finish it to enhance the look and preserve your creation. The key steps for sealing and finishing are applying a glaze and allowing ample drying time.
Pick out a glaze color that complements your flower. A semi-gloss glaze tends to work well to seal the clay and give a smooth finished look. Use a paintbrush to apply a thin, even coat of glaze over the entire surface of the flower, leaves, and stem. Make sure to get into all the crevices and underside areas.
After glazing, allow the clay to fully dry before handling. Drying time will depend on the thickness of the clay, but can take 1-2 days. Ensure all moisture has evaporated before displaying or using your clay calla lily. The glaze seals the clay and creates a protective barrier to prevent damage over time.
Once completely dry, your creative clay calla lily will have a glossy, finished look and be ready for decorating your space!
Display Your Calla Lily Creation
Once your clay calla lily is completely dry and sealed, it’s ready to be displayed for all to enjoy! Here are some tips for showing off your handmade flower art:
Stand it in a small vase or floral foam to keep the flower upright. Glass, ceramic, or plastic vases work well. Cut a piece of foam to fit snugly in the vase and insert the calla lily’s stem into it. The foam helps support the flower.
Place your creation on a shelf, table, or other surface where it can be prominently displayed. Turn and angle the flower to show off the detailed petals and leaves.
Group your calla lily with other faux floral arrangements or natural elements like stones, wood branches, or candles to create a lovely nature-inspired display. The simplicity of the calla lily makes a striking focal point.
Give your clay flower as a handmade gift to a loved one. Include it in a bouquet for birthdays, Mother’s Day, weddings, or other special occasions. The recipient will appreciate the time and care you put into crafting it.
However you choose to present your clay calla lily, you can feel proud of creating a beautiful work of art with your own two hands!

