How Long Do You Leave Air Dry Clay To Dry?
What is Air Dry Clay?
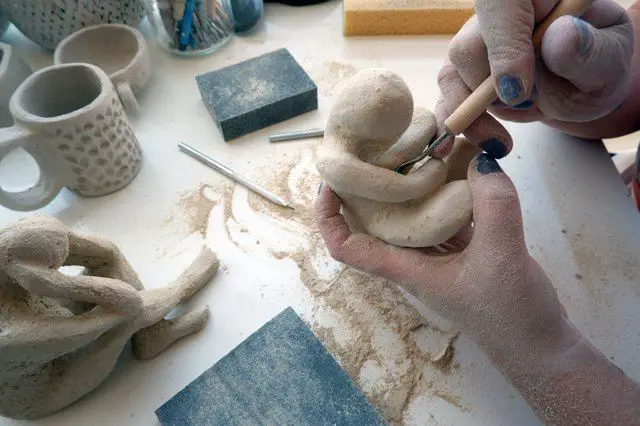
Air dry clay, also known as modeling clay, is a type of clay that does not require baking or firing to harden and set. It cures through evaporation as the water content in the clay dries up when exposed to air over time (Source).
The main ingredients in air dry clay are water and natural clay minerals such as calcium carbonate, silica, feldspar, and kaolin. PVA glue is often added as a binder. Other ingredients like cornstarch, boric acid, and mineral oil can also be included (Source).
There are two major types of air dry clay:
- Non-toxic clay – Made from natural clay minerals and non-toxic ingredients. Safe for kids.
- Polymer-based clay – Includes polymers like PVA for added flexibility and strength. Produces more detailed models.
Pros of air dry clay:
- Does not require firing, baking, or special tools
- Quick and easy to use
- Affordable and accessible
- Multiple colors and textures available
Cons:
- Weaker and less durable than clays that require firing
- Can slowly dry out and crack over time
- Limited fine detail compared to polymer clay
- Painting and sealing required for color and protection
Drying Time for Air Dry Clay
The amount of time needed for air dry clay to fully dry depends on several factors:
Thickness – Thicker pieces take longer to dry. Aim for 1/4 inch thickness or less for faster drying. Thin sheets can dry in under 24 hours, while large sculptures may take 72 hours or more (1).
Climate/Temperature – Warmer temperatures speed up drying time. In hot summer conditions, drying may only take 6-12 hours, while cold winters can extend the time to 2-3 days (2).
Humidity – High humidity slows drying. Low humidity allows moisture to evaporate faster. Try drying clay in a room with good airflow if the climate is humid (1).
Air Circulation – Moving air accelerates drying. Set a small fan nearby or open windows to keep air circulating around the clay (2).
In ideal warm, dry, breezy conditions, flat pieces 1/4 inch thick may dry fully in 12-24 hours. Cool, stagnant air can increase drying to 48 hours or more. Thick clay pieces may take 72+ hours regardless of climate.
Typical Drying Times
The drying time for air dry clay depends on the thickness of the item you are making. Here are some general guidelines:
For items 1/4″ thick:
- Most brands will dry in 1-3 hours
- Fimo Air Basic dries in just 30-60 minutes for thin items
For items 1/2″ thick:
- Expect drying times of 6-12 hours
- Creative Paperclay items may dry in 5-6 hours
For items 1″ thick or more:
- Drying could take 24 hours or longer
- Let Staedtler Fimo Air dry for 24-48 hours for thick sculptures
Keep in mind that drying times are just estimates and can vary based on temperature, humidity, ventilation, and size/shape of the item.
Speeding Up Drying
There are several methods you can use to speed up the drying time for air dry clay:
Roll the clay thinner. Thinner pieces of clay will dry much faster than thicker pieces. Aim for 1/4 inch thickness or less for quick drying times. According to Sculpey, thinner pieces may only need 20 minutes in the oven.
Bake the clay in the oven. Place air dry clay in a 225°F oven for 15-20 minutes to speed up drying time. The low temperature helps remove moisture gently without over-hardening the clay. Monitor closely to avoid cracking or burning. Let cool completely before handling.
Use a hair dryer. Blow room temperature air on the clay intermittently, allowing the clay to rest in between drying sessions. Avoid prolonged high heat, which can cause cracks. Keep the dryer 6 inches away and moving constantly.
Use a dehumidifier. Lowering the ambient humidity will help wick moisture out of the clay more quickly. Place the clay in a room with a dehumidifier for faster controlled drying.
Use a fan. Direct a fan towards drying clay pieces to accelerate drying time. Rotate the pieces occasionally for even drying. Keep the fan on a low to medium setting to avoid cracking.
Storing Unfinished Air Dry Clay Pieces
Properly storing unfinished clay pieces is important to prevent them from drying out or becoming contaminated before you are ready to work on them again. The key is sealing the clay in an airtight container or bag.
According to https://www.susiebenes.com/blogs/airdryclayart/storing-air-dry-clay, you should only remove small, workable amounts of clay from the package at a time. With the remaining clay, reseal the original packaging. This prevents the bulk amount of unused clay from being exposed to air and drying out.
For unfinished pieces, https://www.gatheringbeauty.com/blog/how-to-store-air-dry-clay recommends wrapping them tightly in plastic wrap or placing them in resealable plastic bags. Tupperware or another airtight plastic container also works well. The goal is to seal off the clay from air contact until you are ready to work on it again.
Stored properly in an airtight environment, unfinished clay pieces can be preserved for extended periods of time without drying out or becoming contaminated.
Testing if Clay is Dry
There are a few simple tests you can do to check if your air dry clay is fully dry and ready for painting or additional detailing:
Look, Feel, and Sound Test
Look at the clay closely and check for any wet or shiny spots, which indicate it still contains moisture. Fully dried clay will have an even, matte look all over its surface. Feel the clay – dried clay should be hard while clay that still contains moisture will feel cool and slightly flexible. Tap on the clay and listen for a clear ringing sound versus a dull thud if it’s still wet.
Weight Test
Pick up your clay piece and see if it feels lighter in weight than when you first formed it. As the moisture evaporates, the clay loses weight and becomes lighter. Heavier pieces likely still contain water inside.
Imprint Test
Use your fingernail or a tool to gently press into an inconspicuous area of the clay. If it leaves an imprint, indentation or attaches onto your nail, it needs more time to dry. Fully dried clay will be hard and resist imprints.
Working with Dried Clay
Once your air dry clay has fully dried, there are a number of techniques you can use to refine and decorate your clay pieces:
Sanding
Using fine grit sandpaper, you can smooth out any imperfections left on the surface of dried clay. Start with a 220 grit sandpaper and work your way up to 600-800 grit for an ultra-smooth finish. Sand in small circular motions. Be sure to wipe away any clay dust after sanding.
Drilling
You can drill holes in dried clay using standard drill bits. This allows you to add dowels for stability or string for hanging clay pieces. Start by marking the area to drill with a pen or pencil. Drill slowly at first by hand, then increase speed once the hole is started. Lubricate the drill bit with water or oil for smoother drilling.
Carving
Using clay carving tools, you can incise designs, carve textures, or cut shapes out of dried clay. Allow your imagination to guide you. Clay carving sets provide a variety of loop, knife, and dotting tools to experiment with.
Treating Surface Before Painting
Before painting dried clay, seal it with a thin layer of PVA glue, acrylic medium, or varnish. This helps paint adhere better. Sand any areas that will be painted first for proper paint adhesion. Wipe with a damp cloth after sealing to remove dust.
Painting
Acrylic craft paints work well on dried clay. Thin coats prevent cracking or flaking. Let layers dry fully between coats. Finish with a sealant like watered-down PVA glue or acrylic varnish for protection.
Common Problems
When working with air dry clay, there are a few common problems that can occur during the drying process:
Cracking
Cracking is one of the most frequent issues when drying air dry clay. Adding too much water can cause cracking as the clay dries [1]. To prevent cracking, avoid over-saturating the clay and let it dry slowly at room temperature. Cracking can also happen if the clay dries too quickly or unevenly. Maintaining an even, gradual drying process is key.
Stickiness
If air dry clay is not fully dried, it may remain sticky or tacky to the touch. Be patient and allow projects to dry for the recommended time, usually 24-48 hours [2]. Stickiness usually means the clay needs more time to dry fully. Cool temperatures or high humidity can also prevent the clay from drying properly.
Dents and Imprints
Air dry clay can dent or imprint easily, especially when still drying. Avoid touching projects repeatedly or handling them too soon. Clay should be fully hardened before sanding or manipulating to avoid marks. Work gently and handle with care while drying is in progress.
Safety Tips
When working with air dry clay, it’s important to follow some basic safety tips:
Avoid breathing in dust when sanding. According to this Quora post, the dust from air dry clay is not as dangerous as ceramic clay dust, but you should still take precautions to avoid inhaling large amounts.
While air dry clay is non-toxic, avoid ingesting it according to Montmarte. Do not use air dry clay for food or drinks. Wash hands after use and keep clay work surfaces clean.
Work in a well-ventilated area and wear a dust mask when sanding clay creations. Keep clay dust from accumulating and dispose of dust carefully.
Store clay in an airtight container and keep out of reach of small children and pets. Supervise children when using air dry clay.
Final Takeaways
After reviewing the key drying times, proper storage, and results-focused tips, here are the final takeaways:
Air dry clay takes 24-48 hours to dry fully at room temperature. Drying times can be sped up by using fans, heaters, or dehydrators. Store unfinished pieces in air-tight containers to prevent drying out.
Proper storage is crucial – keep clay moist and workable in airtight containers if not finishing within 1-2 days. Allow thicker pieces 6 or more days to dry fully before painting.
For best results, work in thin layers, allow proper drying times, use fans/heaters to speed drying, and test dryness before painting or varnishing. Take care not to over-dry air dry clay.
Following these simple tips will ensure your air dry clay projects turn out their very best.