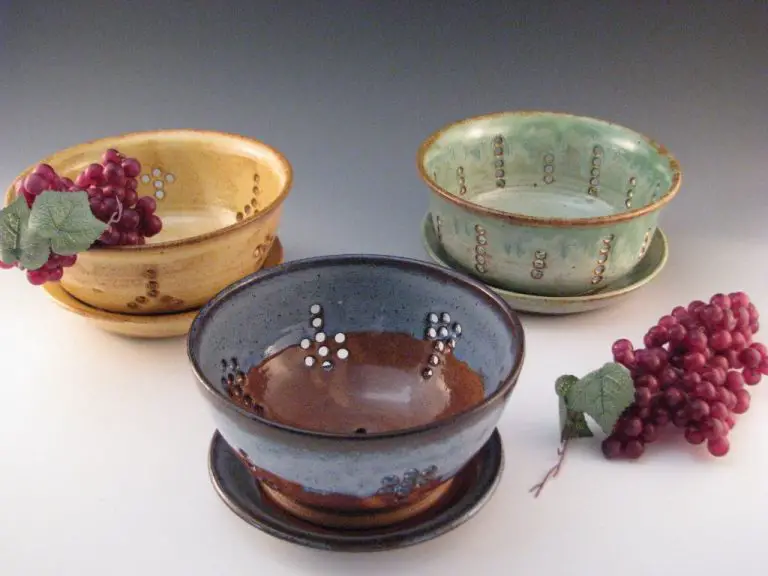
Can I Make A Plant Pot With Air Dry Clay?
What is Air Dry Clay?
Air dry clay is a modeling material that dries naturally and does not require firing in a kiln. It is made from clay and other materials shaped into a dough-like form. Unlike traditional ceramic clays that need high heat to cure, air dry clay hardens as it dries through evaporation.
Air dry clay has both advantages and disadvantages compared to traditional clays:
Pros:
- Does not require a kiln or oven to harden
- Easy to use and readily available
- Produces items more quickly
- Lower cost than firing clay
- Good for beginners and hobby crafts
Cons:
- Not as durable as fired clay
- Can break or crack easier
- Less options for sealing and glazing
- Not recommended for items for food or long-term use
- Limited selection of colors and textures
While air dry clay lacks some of the strength and versatility of kiln-fired ceramics, it offers a quick, easy, and affordable way to make clay crafts and pottery without any special tools.
Supplies Needed
To make an air dry clay plant pot, you will need a few basic supplies:
- Clay – Air dry clay can be purchased at most craft stores. Make sure you buy an appropriate amount for the size of the pot you want to make.
- Mold or container to shape clay if not hand sculpting – You can shape the pot completely by hand or use an existing container like a bowl or cup to mold the shape. Plastic containers work well as they are easy to remove once dried.
- Decorative items (paint, sequins, etc) – Acrylic paints work best on dried clay. You can also decorate with glitter, sequins, beads, or other embellishments. Make sure any additions are secured well.
- Sealant – Once decorated, you’ll need a sealant like varnish, glaze, or polyurethane to fully seal and protect the finished pot.
Shaping the Clay
When making an air dry clay plant pot, you have a few options for shaping the clay. The most direct method is hand sculpting. To hand sculpt your plant pot, start by kneading and softening a ball of clay, then flatten it into a round or square slab for the base. Pinch the sides up gradually to form the pot shape you want. As you work, use your fingers and some water to smooth seams and soften edges.
You can also press the clay into plastic molds to achieve specific shapes like cylinders, bowls, or vases. Lightly coat the mold interior with cooking oil or cornstarch first so the clay doesn’t stick. After shaping in a mold, you’ll still need to tidy up the seams and do some hand sculpting to finish the piece.
No matter which technique you use, work slowly and gently to avoid ripping or puncturing the clay. Let gravity help stretch the clay downward as you shape it. Use wooden sculpting tools to refine edges and create clean lines. As you work, frequently dip your fingers in water and smooth over the clay to blend seams and create a cohesive surface.
Drying the Clay
One of the most important steps when working with air dry clay is allowing adequate drying time. The drying process enables the water in the clay to evaporate, leaving the solid clay material behind. Rushing the drying can lead to cracking or weak spots in your clay pot.
Air dry clay dries from the outside in, so you’ll want to allow 1-7 days for thorough drying depending on the size and thickness of your pot. Thinner pots made with light clay can dry in as little as 24 hours. Larger, thicker pots may require 3-4 days minimum when dried at room temperature. You can quicken drying by placing your pot in a warm, dry environment. Avoid direct heat sources like radiators or sunlight which may over-dry the surface.
To prevent cracking, dry your pot slowly and evenly. If one section dries faster than another, it can lead to stress fractures. Dry in an area with good air circulation so moisture can dissipate. Turn your pot over about halfway through drying so both sides dry evenly. You can also place the pot on a rack or suspend it slightly to allow air flow all around.
Check your pot periodically as it dries. If you notice small cracks starting to form, you may be able to repair them by smoothing a small amount of fresh clay into the area before they spread. When completely dry, your clay will have a matte finish and be cool to the touch.
Applying Decorations
Once your air dry clay pot has fully dried and hardened, it’s time for the fun part – decorating! There are many creative ways to decorate your clay pot to make it unique.
Paint is one of the most popular decorating techniques. Acrylic craft paint works best on clay as it adheres well and is made for crafting. You can paint your entire pot with a solid coat of color, do a ombre effect, or get creative with patterns, textures and designs. Use paint pens for accents and details. Make sure any paint is fully dry before sealing or applying other decorations.
Embellishments like beads, buttons, shells, stones, gems, sequins, and more can be glued onto the surface of the pot with a strong adhesive like E6000 glue. These types of decorations add beautiful texture and interest. Arrange decorations in patterns or designs before gluing in place.
Sealing is an important final step for decorated clay pots. An acrylic sealer spray will protect any painted designs and keep embellishments securely attached. Multiple coats of sealer ensure decorations are fully sealed and waterproofed. This prevents chipping, fading or peeling over time.
Sealing the Clay
Sealing your air dry clay creation is a crucial step before using it as a functional plant pot. Sealing creates a protective barrier that waterproofs your pot, preventing moisture damage that could warp or dissolve unsealed clay. It also helps lock in paints and finishes, preventing chipping or fading over time.
You have several good sealing options for air dry clay pots:
- Polyurethane spray – Clear gloss or matte spray polyurethane is commonly used. Make sure to apply in a well-ventilated area.
- Mod Podge – Brush on decoupage sealer like Mod Podge. It dries clear and provides good protection.
- Epoxy resin – For a thick glossy coating, pour or brush on a layer of epoxy resin. It provides the most durable seal.
- Varnish – Use an acrylic craft varnish for a flexible, water-resistant finish.
When applying sealant, cover the entire pot – inside and out – with 2-3 thin, even coats. Allow each coat to fully dry before adding the next. Follow the product instructions for proper drying times. Gently sand any drips or rough spots between coats. Apply using disposable brushes, foam brushes, or aerosol spray. Work in a well-ventilated area and avoid breathing vapors. With proper sealing, your creative clay pot will withstand regular use and make a lovely home for plants!
Making a Plant Pot
Making a functional and attractive plant pot with air dry clay is easy with a few simple steps. The key considerations are properly shaping the clay, adding drainage holes, and sizing the pot appropriately for the intended plant.
When shaping clay pots, it’s important to create sturdy sides that are thick enough to hold the shape and weight of a plant and soil. Aim for walls that are approximately 1/4 to 1/2 inch thick. Smooth and blend the clay between your hands to eliminate any cracks or weak points.
Drainage is critical for a thriving plant. Before letting the clay dry, use a chopstick or skewer to poke holes in the bottom of the pot. Add 2-3 holes spaced evenly across the base. The holes should be large enough for excess water to easily drain out of the soil, about 1/4 inch in diameter.
Size the pot according to the mature plant’s root system. Generally, the pot’s diameter should be approximately 2 inches larger than the plant’s root ball. The pot must be deep enough for the plant’s roots but not overly tall or top heavy when filled with soil. For starter plants, a 3-4 inch pot is usually suitable. Larger pots in the 6-8 inch range work well for established plants.
Using Your Clay Pot
Once your homemade clay pot is fully dried and sealed, it’s ready to be used for plants! Here are some tips for getting the most out of your clay pot creation:
Caring for Clay Pots
Clay is porous, so water will evaporate through the sides of the pot. Check the soil moisture frequently and water more often than with a plastic pot. Let excess water drain fully to prevent root rot. Wipe mineral deposits off the pot’s exterior periodically with a wet cloth.
Repotting Plants
When it’s time to repot a plant into your clay creation, water the plant well and let it drain beforehand. Knock loose and trim any circled roots before placing into the new pot. Fill with fresh potting mix, tapping down to remove air pockets around the roots. Keep the soil level a little below the pot’s rim.
Displaying Clay Pots
Decorative clay pots make great accents around the home and garden. Group pots together on shelves, windowsills, or outdoor tables. Add risers under pots to raise plants to eye level. Use saucers under pots to protect surfaces from moisture rings. Rotate pots seasonally to keep plant displays looking fresh.
Troubleshooting Issues
Air dry clay is prone to some common issues that can happen during the creation or use of your homemade plant pots. Being aware of these potential problems and how to prevent them will help ensure your clay pots last.
Cracking
As clay dries it shrinks, which can cause cracking. To prevent too much cracking, avoid making the clay too thick in any single area, especially handles or bases. Allow the clay to dry slowly, away from direct sun. And consider using a sealer like varnish or acrylic paint to add strength once fully dry.
Paint Not Sticking
Clay needs a slightly porous, gritty texture for paint to properly adhere. Make sure to lightly sand the surface before painting, and apply a primer coat. Acrylic craft paints typically work best. Avoid using too much water when painting, as it will dilute the paint.
Mold Growth
Being natural clay, air dry plant pots can develop mold if left outside and exposed to moisture. Choose a sealer like varnish, acrylic paint, or polyurethane to add waterproof protection. Bring pots indoors during cold or wet weather. And don’t plant edible herbs or vegetables in unsealed clay pots.
Inspiring Clay Pot Ideas
Air dry clay offers endless possibilities for making unique and creative plant pots. Here are some inspiring ideas for shapes, designs, and embellishments to make your clay pot stand out:
Get creative with the shape and size of your pot. Make a tiny pot for a succulent or small cactus, or an oversized one for a large houseplant. Craft squiggly, curved pots or angular geometric ones. Stack pots together in a tower or make connecting pots for multiple plants.
Paint fun designs on your pots before or after they dry. Try geometric patterns, animal prints, polka dots, ombré fades, stripes – anything that matches your style. Paint the inside or outside of the pot or both. Use acrylic craft paints and seal with a clear glaze.
Embellish your pots with mixed media additions. Add texture with burlap, lace, or raffia wrapped around the outside. Affix decorations like buttons, beads, sea glass, or miniature figurines with glue before sealing. Attach hangers or feet to the bottom to give your pot extra flair.
Let your imagination run wild when making clay pots. The possibilities are endless for making your pot match your personal style and complement your plants perfectly.