How Do You Make A Garden Gnome Statue?
Garden gnomes have been a beloved part of European gardens for centuries. Originating in Germany in the 1800s, the first gnome statues were inspired by folklore and local mythology surrounding forest sprites and guardians of mineral wealth that lived underground. Though largely seen as symbols of luck and prosperity, the quirky and charming garden gnome grew to become a classic adornment and focal point among gardens and landscapes worldwide.
Creating your own custom garden gnome statue is a rewarding DIY project for any gardening or crafting enthusiast. The process involves designing the gnome, sculpting an original model, making a plaster mold, casting the final statue using concrete or resin, painting, and sealing. With some creativity and patience, you can add a unique handmade gnomenclature to your garden that reflects your personal style.
Materials Needed
To make a garden gnome statue, you’ll need a few key materials:
For the statue itself, you’ll need a material that can be molded and shaped, then hardened to hold its form. The most common choices are:
- Cement – Cement mixed with water allows sculpting when wet, then hardens into a durable concrete statue.
- Plaster – Plaster also hardens when mixed with water, creating a lightweight and smooth statue material.
- Clay – Air-dry or polymer clay can be sculpted when soft, then allowed to dry and harden into a finished gnome.
- Resin – Two-part resins can be mixed, poured into a mold, and allowed to cure into a tough resin statue.
You’ll also need sculpting tools and materials:
- Mold – A two-part mold will let you cast multiple concrete or resin statues.
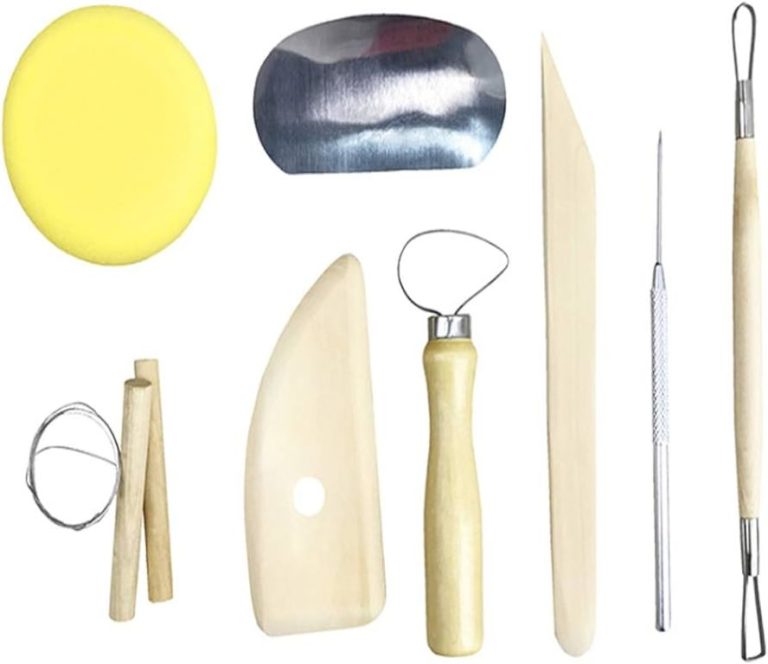
- Sculpting tools – Clay sculpting tools like loop tools allow detail work when hand-sculpting.
Finally, you’ll need paints and finishes:
- Primer/sealer – A coating to prepare the surface for paint.
- Acrylic paints – Vibrant acrylics work well for coloring gnome statues.
- Clear sealer – A waterproof sealant to protect the finished paint job.
Design the Gnome
The first step in designing your garden gnome statue is deciding on the pose and proportions you want. Gnomes are typically depicted as short, stocky figures wearing pointy hats and earth-toned clothing. Think about whether you want your gnome to have a friendly, welcoming posture or a more stern, guarding stance. Consider if you want it standing, sitting, or leaning on an object.
Once you’ve settled on a pose, sketch it out from multiple angles. Focus on keeping the proportions consistent – a gnome’s head is usually about 1/3 the size of its body. The arms and legs should be short and thick. Refine your sketches until you have a design you’re happy with.
Some people find it helpful to create a small 3D model out of clay or another material when designing a gnome statue. This allows you to visualize how the figure will look in full 360 degrees. Experiment with different poses using the model and take pictures of the ones you like best to refer to later.
Having a complete concept of what you want your finished gnome to look like makes the rest of the statue-making process much easier. Take your time playing with different designs and poses in the planning stage before moving onto creating the actual mold and casting. The effort put into designing an appealing gnome will pay off in the end result.
Make the Mold
To make your garden gnome statue, you’ll need to create a two-part mold. This allows you to cast the front and back of the statue, then join them together. Here are the steps for making the mold:
Start by creating your gnome design out of clay, foam, or another sculpting material. Make sure to sculpt the front and back seperately. Then, build a base and walls around the sculpted pieces using clay or Lego blocks.
Next, create a mold box by lining the base and walls with plastic sheeting or rubbish bags secured with tape. Make sure the plastic covers the base and walls completely.
Spray the sculpted pieces with mold release spray. This will ensure the concrete does not stick to the original sculpture.
Mix silicone mold rubber and pour it over the front half of the sculpture to create one half of the mold. Allow it to fully cure. Then repeat for the back half of the sculpture.
Once cured, carefully remove the silicone molds. You now have a two part mold ready for casting the concrete statue!
Cast the Statue
Casting the gnome statue involves carefully preparing the casting material, pouring it into the mold, and allowing time for curing. Proper casting technique will ensure your finished gnome has a clean, detailed appearance.
First, prepare your casting material according to package directions. Common casting materials like concrete or plaster should be mixed to a smooth, liquid consistency without lumps. Slowly add water and stir thoroughly until the material is fully blended.
Next, pour a small amount of casting material into the mold to coat the interior surface. Rotate and tilt the mold to spread it evenly. Then, pour the remaining material in gradually, in layers 1-2 inches thick. Tap the sides of the mold with a rubber mallet to release any air bubbles. Allow each layer to set up partially before adding the next.
After the final layer, allow the casting material to fully cure according to package directions. This may take 24 hours or more. Do not disturb or demold until completely set up and hardened.
Demold and Refine
Once the casting material has fully cured, you can carefully demold your gnome statue. Slowly separate the mold halves and gently remove the statue. Be patient and take care not to bend or warp any extremities in the process.
Examine the statue for any defects like air bubbles or seam lines. Use a utility knife to trim off any excess material from the mold seams. Then sand the entire statue with increasingly finer grit sandpaper, starting with a coarse grit and working up to a fine grit. Sand until the surface is smooth and even. Pay close attention to smoothing any visible seam lines.
You can also use small files or rotary tools for detailed sanding and trimming, especially in hard to reach spots. Take your time in this refinement process to achieve a clean, polished finish.
Detailing
Once the main gnome statue is cast and removed from the mold, it’s time to add all the fun details that will bring it to life. This is where you can get creative and give your gnome a unique personality and flair. Here are some tips for detailing your gnome statue:
Add texture and dimension to clothing items like the hat, shirt, pants, shoes and jacket. You can do this by sculpting folds, wrinkles, buttons, pockets and seams using additional clay or epoxy putty. Attach the clothing items to the gnome. Make sure the hat fits snugly and the shoes are secure.
Sculpt the beard and hair out of epoxy putty or air dry clay. Give your gnome some wild fuzzy eyebrows too. Attach the beard and hair securely to the face.
Add some whimsical details like a walking staff, basket of flowers, mushroom or fishing pole. You can also give your gnome fun accessories like reading glasses, a pipe, lantern or wheelbarrow.
Create a scenic base or environment for your gnome to live in. This could be a little village scene, a mushroom ring, garden setting or tree stump. The base can help bring your gnome statue to life.
Once you’ve detailed your gnome with clothing, hair, accessories and scene elements, inspect your statue closely. Fill any gaps, holes or seams with putty so the surface is smooth. Add final touches so your gnome has maximum personality and character.
Prime and Paint
After your gnome sculpture has dried completely, it’s time to prime and paint it. Start by applying a thin coat of primer or sealer with a brush. Acrylic gesso works well for priming plaster and concrete sculptures. Let the primer fully dry.
Next, paint your gnome statue with acrylic or enamel paints. Acrylics are good for indoor use, while enamels work well for outdoor gnomes. Basecoat the entire sculpture in the main color you want for the gnome. Allow to dry fully before adding details.
Use smaller brushes to paint the face, beard, clothes, hat, and other accents. Add shading and highlighting to make details stand out. Darker shades under the brim of the hat and in recessed areas will add depth. Highlight facial features, the tip of the nose, and textures like beard hair. Work slowly and carefully. Seal your paint between layers to prevent smearing.
Seal and Protect
After your gnome is painted, you’ll want to seal and protect it so the paint doesn’t chip or fade over time. Apply 2-3 thin coats of a clear acrylic sealer or varnish. This will form a protective barrier over the paint.
For gnomes that will live outdoors, make sure to use an exterior-grade sealer rated for outdoor use. These are more durable and provide better protection against moisture, sun damage, temperature changes, etc. Apply several coats to ensure full coverage.
Let each coat fully dry before adding the next. Lightly sand with fine grit sandpaper between coats for a smooth finish. Multiple thin coats are better than one thick coat.
Sealing is a critical final step for any painted gnome statue, indoors or out. Taking the time to properly seal your handmade gnome will help the colors stay vibrant for many years.
Display your Gnome
Once your gnome statue is finished, it’s time to find it the perfect home in your outdoor space. Consider placing it in your garden amongst the flowers and greenery, on your front porch to greet guests, or in your backyard where you can enjoy it daily.
When selecting where to display your gnome, think about the vantage points from windows and doors as well as foot traffic flow. You’ll want it situated where you and others can fully appreciate your handiwork. Position it on a pedestal or plant stand if needed so it can be clearly seen.
For extra charm, install landscape lighting or solar lights to give your gnome a magical glow at night. You can also surround it with small flower pots, gardening tools, a watering can or other fun accessories to complete the tableau. Let your creativity run wild!
Your custom garden gnome is sure to bring a smile to your face and become a beloved part of your outdoor living space. Take pride in your creation and enjoy this whimsical addition for years to come!


