Clay Art Techniques: Inspirational Projects For Artists
Clay is one of the oldest and most versatile artistic mediums, with evidence of clay pottery dating back over 20,000 years. Clay’s rich history stems from its accessibility and malleability, making it an ideal material for creating both functional and decorative objects across cultures. According to Clay and Pottery Brief History, some of the earliest known clay artifacts include Venus figurines and pottery fragments found in central Europe from 29,000–25,000 BCE.
Over centuries, civilizations worldwide developed techniques for working with clay that evolved according to their needs and artistic sensibilities. Key innovations included kiln technology that allowed firing clay at high temperatures to produce ceramic, glazing techniques, and the pottery wheel. Clay continued gaining popularity through the ancient Greek, Roman, Chinese, and Mediterranean civilizations and into Medieval and Renaissance Europe.
Today, clay remains a versatile, accessible, and creative medium embraced by hobbyists and professional artists alike. With countless techniques and applications, clay provides an opportunity for artistic expression, experimentation, and connection with one of humanity’s oldest creative traditions.
Types of Clay
There are three main types of clay used in clay art and ceramics: earthenware, stoneware, and porcelain. Each type has its own properties, strengths and weaknesses.
Earthenware is a low-fire clay that matures at lower temperatures, typically between 1000-1200°F. It’s very porous and absorbs water easily. Earthenware clays are quite flexible and easy to work with, making them good choices for handbuilding and sculpting. However, pieces made with earthenware are more fragile. Some common earthenware clays are redart clay and terracotta. (https://www.sculptureatelier.com/blog/what-clay-should-i-use-to-start-sculpting)
Stoneware clays mature at higher temperatures, typically between 2200-2400°F. They are less porous than earthenware, more durable and hold their shape well when fired. Stoneware has good plasticity and can be used to create pottery as well as sculptures. However, stoneware requires more specialized equipment to reach its high firing range. Common stoneware clays are speckled buff and laguna b-mix.
Porcelain is a high-fire clay that matures around 2300-2600°F. It’s white, translucent and very smooth. Porcelain is stronger, harder and more durable than stoneware and earthenware. It has excellent plasticity for sculpting intricate details. However, porcelain can be more challenging to work with and prone to cracking and warping. Porcelain clays are ideal for creating delicate pottery pieces and figurines.
Clay Preparation
Proper clay preparation is crucial for creating high quality pottery and ceramic sculptures. The three main steps are wedging, kneading, and proper storage. Wedging involves rolling and compressing the clay to remove air bubbles and evenly distribute moisture. This is done by pushing the clay away from you and rolling it back while applying body weight (Source). Kneading also removes air pockets by working the clay with your hands. Clay should be stored in an airtight container to prevent moisture loss and wrapped in plastic when not being used (Source). Properly preparing the clay leads to fewer cracking and breakage issues during the sculpting, decorating, and firing stages.
Handbuilding Techniques
Handbuilding refers to forming pottery without the use of a potter’s wheel. There are three main handbuilding techniques: pinching, coiling, and slab construction. Each technique allows artists to create unique forms and textures in clay.
Pinching is likely the oldest and simplest handbuilding technique. It involves squeezing the clay between the fingers and thumb to pull up walls and shape the overall form. Pinch pots have an organic, handmade appearance and work well for making small bowls, cups, and vases. According to The Crucible, pinching is great for beginners and yields charming irregularities.
Coil building involves rolling out “snakes” or coils of clay and stacking them on top of each other to build up the walls of a piece. The coils can be blended together using a variety of tools and techniques. Coiling allows artists to create larger and taller pieces than possible with other handbuilding methods. The technique also lends itself to creating elegant curves and contours. As noted by Ceramic Arts Network, the rhythm of coiling can be meditative for many artists.
Slab construction entails rolling out flat “slabs” or sheets of clay and joining them to construct a form. The slabs can be cut into shapes and given texture. The seams between slabs may be smoothed over or left visibly joined. Slab building is ideal for making flat surfaces and geometric shapes. It offers great freedom and control in both form and decoration.
Sculpting
Sculpting involves shaping clay to create three-dimensional forms and figures. It utilizes both additive and subtractive techniques. With additive sculpting, the artist gradually builds up the form by adding more clay. Common additive techniques include coiling, in which rope-like coils of clay are stacked and merged together, and slab construction, which uses flat clay slabs assembled into forms. Subtractive sculpting involves carving away excess clay to reveal the final sculpture inside a clay block. The artist chips, cuts, scrapes and sculpts the clay body to create shapes. Subtractive sculpting offers great freedom and spontaneity. Some sculptors combine both additive and subtractive approaches in their work.
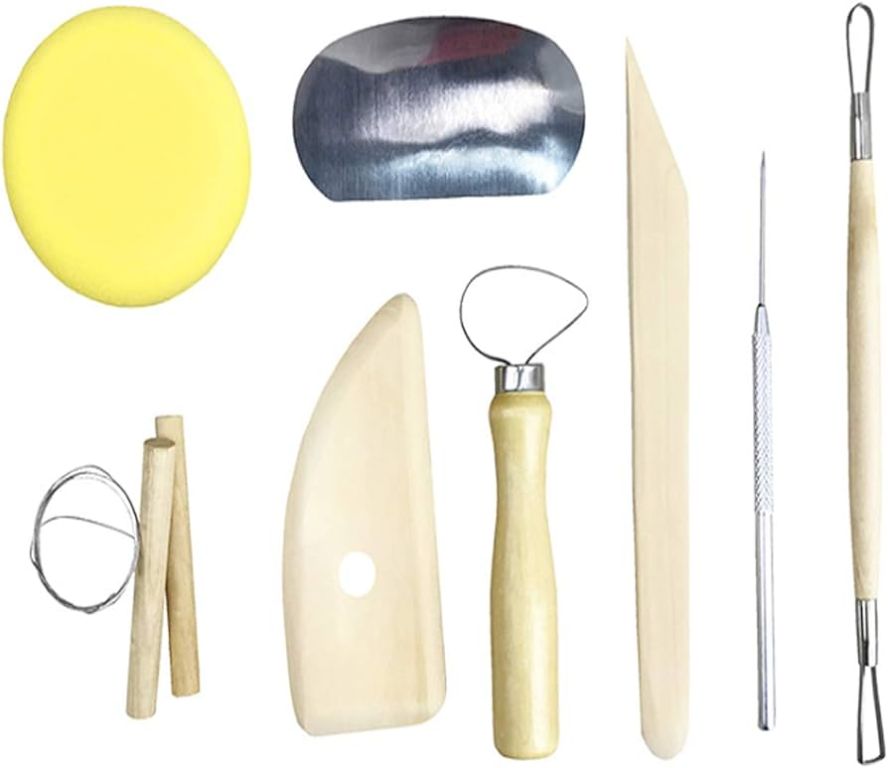
When sculpting, it’s important to use the right tools. Metal sculpting loops, ribbon tools, wooden modeling sticks and wire loops allow the artist to smoothly shape curves and details. Knives, gouges, saws and rasps help remove clay in subtractive sculpting. Special armatures or frames can provide internal support for large or complex sculptures. Having a turntable allows the piece to be rotated while sculpting. Proper sculpting technique is also key – avoiding overly thin areas prone to collapse and using scoring, slip and attachments to join clay sections firmly.
With practice and care, clay sculpting allows complete creative freedom and artistic expression through three-dimensional form.
Decorating & Glazing
Decorating clay pieces can really bring them to life. Here are some of the most popular techniques for adding color, texture, and design to greenware before firing:
Slip
Slip is a mixture of clay and water to the consistency of heavy cream. It can be used to fully cover a piece to alter the base color and texture before firing. Colored slips come pre-mixed, or you can blend your own using clay, oxides, and stains. Apply slips with a brush, sponge, or pouring. Ceramic Arts Network
Sgraffito
Sgraffito involves scratching through a slipped surface to reveal the clay color underneath. Use tools like wooden skewers, nails, or stiff brushes to scratch fine lines or bold patterns. Allow the slip to dry leather-hard first so it doesn’t smear.
Mishima
Mishima is an inlay technique where you incise lines into the clay surface and fill with colored slip. Allow the slip to partially dry before wiping away the excess and revealing the contrasting inlaid lines.
Inlay
Clay inlay involves pressing pieces of colored clay into the surface to create patterns and designs. Attach thinly rolled pieces onto moist clay, allowing them to fuse together in the firing. Clay inlays can be geometric shapes, textures, or free-form patterns.
Stamps
Rubber stamps, wood blocks, and other shaped tools can quickly imprint repeating patterns onto soft clay. Try geometric shapes, animals, leaves, numbers/letters, and more. Roll a thin sheet of clay and apply multiple stamps before cutting out shapes.
Glazes
Glazes provide a glass-like coating after firing. Common glaze types include transparent, opaque, crystalline, underglazes, overglazes and commercial vs. homemade mixes. Multiple layers and colors can be used on a piece. Test compatibility and firing results before applying glazes to a finished piece.
Firing & Post-Firing
Proper firing is essential for creating durable ceramic work. There are several types of firings that serve different purposes in the ceramic process:
Bisque Firing
The initial bisque firing converts the raw clay into a permanent ceramic material by heating to approximately cone 04-06 (1922°F-2012°F). Bisque firing chemically and physically alters the clay body, driving out any moisture and making it less porous. It prepares the clay for decorating and glazing. Bisque firing is done in an electric, gas, wood, or raku kiln (Firing Clay: Ten Basics of Firing Electric Kilns).
Final Firing
The final firing melts ceramic glazes onto the bisque ware to create a glassy coating. Final firing is done between cones 04-10 (1922°F-2345°F) depending on the materials used. Clay and glazes mature at specific temperatures, so it’s important to match them accordingly and follow the manufacturer’s instructions. The final firing process can take 8-12 hours in an electric kiln (10 Tips for Firing Clay in an Electric Kiln).
Raku Firing
Raku is a specialized low-fire technique originated centuries ago in Japan. The ware is quickly fired to around cone 018 (1780°F) then removed from the hot kiln and cooled rapidly to produce unique crackled and metallic glaze effects. Raku firings use small gas or propane kilns and take 1-2 hours.
Pit Firing
Pit firing involves placing pots in a pit dug into the ground and covering them with flammable materials like sawdust, leaves, or newspaper. The materials burn for several hours, naturally producing effects from smoke and ash. Pit firing is an ancient, organic method that requires less equipment.
After firing, finished ceramic pieces may require light sanding or sharpening edges before use. Always allow adequate cooling time before handling fired clay. With proper preparation, firing, and care, fired clay can produce stunning, lasting works of art.
Tools & Studio Setup
Having the proper tools and equipment is essential for any pottery or clay studio. Here are some of the most important items every ceramic artist needs:
Essential Tools
Basic hand tools like ribs, loop tools, sponges, cutting wires, and trimming tools are a must-have for any potter. According to The Ceramic Shop, tools like needle tools, ribs, and loop tools “aid in refinement of forms and surface decoration” (The Ceramic Shop). Other useful tools include sculpting knives for detail work, calipers for measuring, and a potter’s wheel for throwing.
Kiln
A kiln is essential for properly firing clay work. Kilns come in various sizes and power capacities. Select a kiln that fits space requirements and can reach the high temperatures needed for stoneware and porcelain. Top manufacturers include Skutt, Olympic, and Brent.
Work Surfaces
Dedicated work tables or counters provide space for wedging clay, assembling sculptures, and detailing. Surfaces must withstand water and high impact. High quality adjustable tables with heavy-duty steel frames are ideal.
Proper studio tools allow potters to effectively and efficiently create their vision. Investing in quality equipment from reputable brands ensures safety and durability for years of ceramic art creation.
Inspiring Projects
Clay art offers endless possibilities for creative projects. Here are some inspirational ideas for artists of all skill levels:
Beginner
For those just starting out with clay, simple projects like coil pots, pinch pots, and slab constructions can teach the fundamentals. Some ideas include:
- Coil pots – Roll ropes of clay into coils, then stack them to build the walls of a pot. Smooth the coils together.
- Pinch pots – Begin with a ball of clay and press thumbs into the center while pinching the sides up and out to form a basic pot shape.
- Slab boxes – Roll out flat slabs of clay and join them to construct a box or other shapes.
- Faux food – Sculpt fruits, vegetables or other foods out of clay. Let kids create their own faux feasts.
- Magnets – Make memorable keepsakes by sculpting clay into magnets with messages.
Focusing on solid clay construction skills will prepare beginners for more advanced projects down the road. Refer to https://www.pinterest.com/activaproducts/project-ideas-air-dry-clay/ for more ideas.
Intermediate
Once comfortable with clay fundamentals, intermediate artists can try adding more detail, texture and scale. Intermediate projects include:
- Relief tiles – Roll out slabs and carve designs to create decorative wall tiles.
- Figurines – Sculpt imaginative characters, animals or objects in detail.
- Patterned bowls – Throw bowls on a pottery wheel, then carve or stamp intricate patterns into the leather-hard clay.
- Masks – Mold clay over purchased mask forms to create faces with unique expressions.
- Faux food trays – Make realistic-looking cakes, pies and other foods to display together.
Focus on enhancing sculpting skills while also exploring new techniques at this level.
Advanced
More experienced clay artists can bring concepts to life through complex and large-scale sculptures. Advanced projects include:
- Figurative sculpture – Depict detailed human or animal forms by carefully sculpting anatomy and expression.
- Abstract sculpture – Let the clay take shape through more intuitive, free-form techniques for one-of-a-kind designs.
- Life casts – Cast body parts or faces using plaster molds and clay press molds for personalized sculptures.
- Large installations – Construct monumental sculptures or feature walls from clay; reinforce with internal armatures.
Mastering anatomical sculpture, abstract expression, and large-scale clay construction will expand skills for advanced artists. Let the clay, tools and imagination guide the process.
Additional Resources
There are many great books, websites, organizations and events for clay artists to explore. Here are some top recommendations:
Books:
- The Ceramics Bible by Louisa Taylor – covers all the basics of working with clay and has excellent tutorials (Crown Publishing, 2021)
- Mastering the Potter’s Wheel by Ben Carter – focuses on throwing techniques with step-by-step instructions (Quarry Books, 2010)
- Handbuilt Ceramics by Kathy Triplett – guide to handbuilding methods like pinch, coil and slab construction (Lark Crafts, 2015)
Websites:
- Ceramic Arts Network – articles, tips, product reviews and more for ceramic artists
- ClayArts – online community with discussion forums, images and resources
- Ceramics Field Guide – extensive information on clay, glazes, kilns and firing
Organizations:
- National Council on Education for the Ceramic Arts (NCECA) – leading nonprofit for ceramic arts education and engagement
- The Potters Council – part of the American Ceramic Society, dedicated to advancing pottery
- Local ceramic arts centers, guilds or studios – check for classes, workshops and community in your area
Events:
- NCECA’s annual conference – multi-day event with demonstrations, lectures, exhibits and more
- Local ceramic studio sales, pottery crawls or art walks – opportunities to see and buy functional and decorative ceramic work
- Ceramic festivals and fairs – often feature pottery markets, hands-on activities and live demos