Clay Sculpting For Kids: Simple And Engaging Projects
Clay sculpting is a fun, creative, and educational activity for children of all ages. Working with clay engages a child’s senses and supports their cognitive, emotional, social, and physical development in many ways. This guide will provide an overview of the benefits of clay sculpting for kids, as well as outline six engaging clay projects suitable for children.
Clay is an open-ended art material that allows children to freely explore their imagination and create unique sculptures. The tactile experience of squishing, rolling, pounding, and smoothing clay stimulates young minds and promotes sensory development. Clay also helps develop fine motor skills, hand-eye coordination, and strength in little hands and fingers. On a cognitive level, clay play encourages problem solving as children figure out how to construct their desired creations. Emotionally, it provides a calming, therapeutic outlet for expression. Socially, collaborative clay projects let kids learn to share materials and work together. With myriad benefits for child development and education, clay sculpting is an activity parents will want to foster in their children.
This guide will provide step-by-step instructions for six clay sculpting projects suitable for kids of all ages. From coil pots to animal sculptures, imprint designs to human figures, children will have fun sculpting clay while reaping developmental benefits. The projects progress from simple to more complex, allowing children to build their skills. Let’s get started on some clay sculpting fun!
Needed Supplies
When choosing clay for kids, opt for an air-dry clay, polymer clay, or homemade clay. Air-dry clays like Crayola Model Magic are easy to use, non-toxic, and don’t require baking. Polymer clays like Sculpey offer bright colors and more durability, but require baking in the oven. Homemade clays like salt dough are inexpensive, but may be messy.
Look for clay that is soft and pliable so it’s easy for little hands to sculpt. Standard colors like white, tan or gray allow kids to paint their finished sculptures. For tools, stock up on clay sculpting stands, plastic sculpting tools, rolling pins, and acrylic paints and brushes. Avoid real metal sculpting tools and opt for plastic or wooden tools instead. Set up an area with a plastic tablecloth for containment and easy cleanup.
Safety Tips
When working with clay, it’s important to follow some basic safety guidelines. Supervision is key – children should always have adult supervision when working with clay. Make sure kids wash their hands thoroughly before and after working with clay. Clay can contain harmful materials like silica that can irritate skin and lungs if proper precautions aren’t taken. Work surfaces should be protected with newspaper, plastic tablecloths or wax paper to prevent messes and make clean-up easier. Make sure to designate a clay-only work area away from food surfaces.
According to the Polymer Clay Safety Tips article, one key tip is to “[b]e careful with sharp objects. Knives, scalpels, and blades used for slicing, cutting, and carving polymer clay are required to be sharp, so handle them with care and store safely when not in use.”
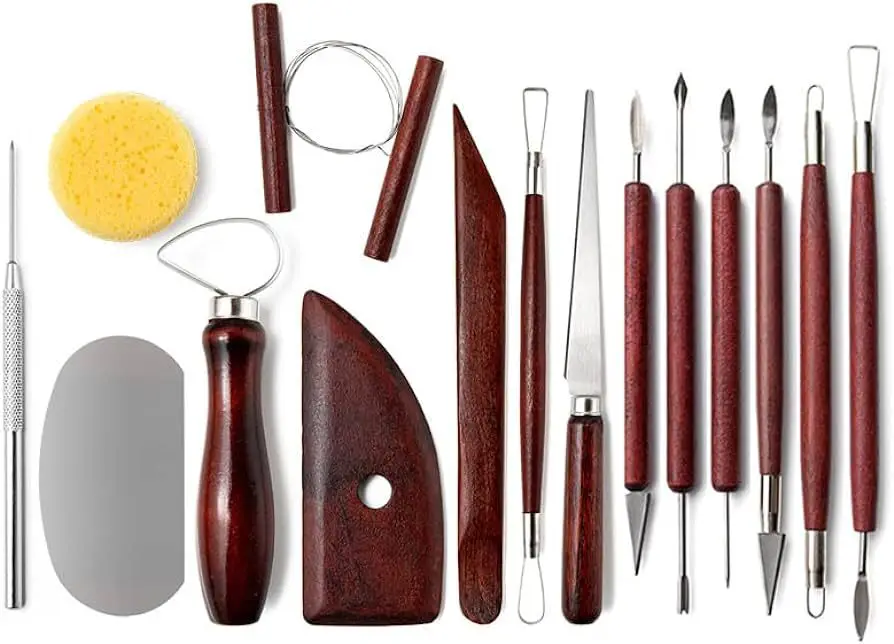
Proper ventilation is also important when working with clay. Open windows, use fans or exhaust systems if possible. Avoid contaminating food or touching eyes, nose or mouth when working with clay. Always supervise kids closely and teach them proper hand washing techniques after working with clay.
First Project: Coil Pots
Coil pots are a great beginner clay project for kids to start with. They help teach important techniques like rolling coils, attaching coils, and pinch pots. Here are step-by-step instructions for making a basic coil pot:
Instructions
To make a coil pot you will need:
- Clay
- A work surface like a table covered in plastic or cloth
- Basic clay sculpting tools
Follow these steps:
- Start by pinching off a ball of clay about the size of a plum and shape it into a smooth ball by rolling it in your palms. This will be the base of your pot.
- Use your thumb to press the ball of clay down onto your work surface to form a hollow in the center. This will be the inside of your pot.
- Pinch around the edges to thin out the clay and begin forming the basic pot shape.
- Roll clay coils by rolling a piece of clay between your palms. Make the coils approximately 1/4 inch thick.
- Attach the coil to the rim of the pot by gently pressing. Use the end of a paintbrush or other clay tool to smooth the join.
- Continue attaching coils around the rim, smoothing each join before adding the next coil.
- As you add height, gently pinch the coils upward from the inside to refine the pot shape.
- Add as many coils as desired to reach your preferred height.
- Refine the shape by gently scraping the outside with a clay tool. Allow it to dry completely before firing.
Make sure coils are securely attached. Go slowly and make smooth coils for the best results. Let kids get creative with shapes and sizes!
Source: https://ancientpottery.how/how-to-make-a-coil-pot/
Second Project: Animal Sculptures
Sculpting animals and creatures out of clay can be a fun and creative project for kids. Here are some tips for sculpting various animals and creatures:
Start with basic shapes like balls and coils to form the body. For example, roll balls of clay for the head and body of an owl, then use coils for feet and wings. Use your fingers to pinch and blend the clay pieces together.
Pay attention to proportions when sculpting animals. For example, mice and frogs have large heads and bodies compared to their limbs. Study photos or models of the real animals.
Add details like eyes, ears, tails, scales, feathers, etc. to bring your creature to life. Balls of clay can make great eyeballs. Pointed coils work well for tails.
Use tools like plastic knives, popsicle sticks, toothpicks, and clay sculpting tools to add texture, patterns, and fine details like fur or scales.
Make your creatures 3D by sculpting different thicknesses and building up some parts like paws or snouts. Don’t worry about getting both sides perfectly symmetrical.
Allow your finished sculptures to air dry completely, which could take a few days. You may wish to varnish or paint them when dry.
Let kids’ imaginations run wild with mythical creatures like dragons and unicorns! Combine features from real animals to design unique fantasy beasts.
Sculpting clay animals engages kids’ creativity and fine motor skills. Keep it simple for younger kids or try challenging projects for older ones. Allowing mistakes and imperfection leads to better learning. Have fun!
Source: https://teachingideas.ca/2018/08/26/clay-animals/
Third Project: Imprint Sculptures
One fun way to add texture and patterns to clay sculptures is through imprinting. For this project, kids can use found objects around the house to imprint designs into their clay. Some common household items that work great for imprinting include:
- Leaves
- Bottle caps
- Coins
- Keys
- Forks
- Rubber stamps
- Sponges
- Bubble wrap
To imprint designs:
- Roll out a slab of clay to about 1/4 inch thickness.
- Press the object firmly into the clay to create an imprint of the design.
- Continue imprinting the clay slab with different objects to create patterns.
- Cut the imprinted clay into shapes or leave whole as a tile.
- Allow imprinted clay creations to air dry fully before baking.
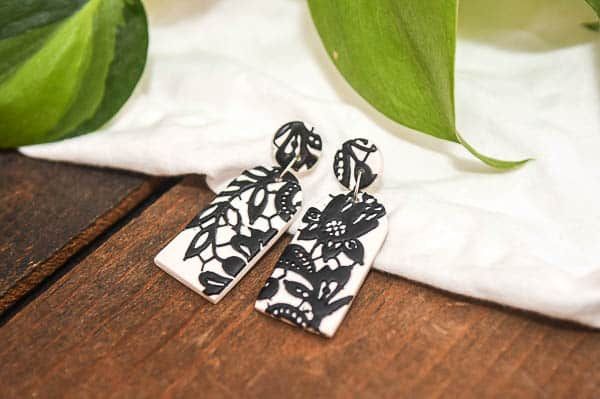
Imprinting clay allows kids to unleash their creativity and make one-of-a-kind sculptures. The patterns and textures add visual interest to any clay project. Kids can imprint clay jewelry, ornaments, magnets, coasters and more. Found object imprinting is an open-ended art technique that encourages imagination and improvisation. Let the kids raid the junk drawer or take a nature walk to find imprint tools!
For more imprinting inspiration, see this roundup: https://www.pinterest.com/modernmakerstamps/stamped-clay/
Fourth Project: Relief Sculptures
Relief sculpture is a great way for beginners to start exploring sculpting in clay. Relief sculptures are designed to be viewed from one angle, with figures and shapes projected from a flat background. Low reliefs specifically have shallow depth and subtly raised surfaces. Here are some basics for sculpting simple, low relief clay projects with kids:
Choose an easy design – Consider having kids make imprints of leaves, flowers, shells, or other natural items to create outlines for the relief. Simple geometric shapes, letters, or animals are also good starter options.
Roll flat slabs – Roll out air-dried clay to about 1/4-1/2 inch thickness. Cut shapes as needed or use the full slab as the background.
Add shallow depth – Use modeling tools, pencils, or fingers to gently push and sculpt simple shapes and details that stand out slightly from the background. Remind kids not to dig too deep.
Refine details – Add finer features and textures with smaller tools and toothpicks. Consider stamping patterns or engraving lines for more interest.
Let sculptures dry fully before painting – Low reliefs need ample time to dry solid so they don’t crack or warp. Gently set aside projects to air dry for 48-72 hours before adding any paint or sealer.
Simple low relief projects allow kids to explore sculpting techniques on a smaller scale before tackling more complex 3D forms. The shallow depth is ideal for small hands and focused attention on intricate details. With creativity and patience, beginners can craft amazing clay artworks that need only slight depth to stand out beautifully.
Fifth Project: Human Figures
Sculpting the human form is a fun way for kids to explore anatomy and proportions. Start with a basic head shape and build up the features. Use clay sculpting tools to add eyes, nose, mouth, ears, and hair. Attach a cylindrical neck and oval torso. For arms and legs, roll snakes of clay into tapered tubes. Bend the limbs into different positions. Add hands and feet using pinch pots flattened into paddles. Play with expressing emotion through the face and body language. Let kids create self-portraits, family members, or imaginary characters. The possibilities are endless when sculpting people out of clay!
Sixth Project: Fantasy Creatures
Kids will have a blast sculpting mythical creatures like dragons, mermaids, and monsters! This project taps into children’s imagination and lets them create their favorite fantasy characters. To sculpt fantasy creatures, start with basic shapes like balls or coils for the body and add details like wings, tails, scales, etc.
Dragons are an especially fun choice for this project. Use a large oval coil for the body and attach four legs. Add forked coils for horns on the head and spikes down the back and tail. Don’t forget the wings! Flatten and cut out wing shapes and attach to the sides.
For mermaids, roll a single large coil for the tail and flatten the top half for a fin shape. Use a ball of clay for the head and upper body, adding long curving coils for flowing hair. Kids can embellish their mermaids with shells, sea stars or other ocean details.
Monsters and creatures from mythology like Bigfoot or the Loch Ness Monster are also great fantasy themes. Encourage kids to make scary features like claws, tentacles, and sharp teeth. Remind them to score and cut lines into the clay for textures like fur, scales, or slime.
With this project, kids have the freedom to sculpt whatever strange and mythical creatures their imaginations dream up! Fantasy themes inspire creativity and storytelling. And sculpting their favorite imaginary characters will delight kids and boost artistic confidence.
Some good online sources for fantasy creature sculpting project ideas include:
https://www.newriverartandfiber.com/product/creativity-for-kids-mythical-creatures/1119
Final Tips
When baking and painting clay sculptures with kids, keep these final tips in mind:
Choose an oven-bake clay that does not require high heat. Sculpey and other polymer clays only require baking at 250°F, which is safe for kids. Make sure sculptures are baked all the way through by checking for hardness after baking. Let sculptures cool completely before painting. Acrylic paint works well for decorating baked clay. Add a sealant spray after painting to help preserve the colors.
Troubleshoot cracking or breakage issues by making sure the clay is conditioned thoroughly and not handled excessively. Use a baking tray lined with parchment paper or foil when baking. Avoid making very thin or narrow sections that may be fragile. Handle sculptures gently after baking while the clay is still cooling and contracting.
Storing unfinished clay in an airtight container will help prevent drying out between projects. Clean hands, work surfaces, and tools after each session. Supervise use of oven, paints, and sealants. Focus on the fun of sculpting together, not aiming for perfect results.

