Clay Art Explorations: Ideas For Your Next Masterpiece
“Clay is the most sensitive of all materials that can reproduce love.” – Carl Andre, Minimalist artist
Clay has been used to create art and objects for thousands of years across many cultures around the world. From prehistoric Venus figurines to ancient Greek pottery, to contemporary ceramic sculpture, clay allows artists to sculpt and model artistic creations with their hands. The unique tactile qualities and visual effects possible with clay make it a captivating artistic medium.
This guide will provide an overview of clay art, including the history, materials, techniques, tools, and inspiring artists working in clay. You’ll find project ideas to help make your own clay art creations, from practical decorative objects to imaginative sculptural works. Let’s discover the endless creative possibilities of this natural yet versatile material!
History of Clay Art
Clay art has existed for thousands of years across many cultures. Some of the earliest known clay art includes Venus figurines made over 20,000 years ago during the Paleolithic era, as well as ceramic pots and figurines made in China dating back to 18,000 BCE (Source). Ancient Egyptians developed glazed ceramic tiles around 4000 BCE, while the oldest known pottery vessels were discovered in Japan and date back to around 14,500 BCE according to recent archaeological evidence.
In ancient Greece, pottery was a major art form, with distinctive red and black figure styles emerging around 530 BCE. The ancient Romans also made extensive use of pottery for trade and daily life. In Medieval Europe, artisans continued creating functional earthenware as well as more decorative faience pieces. The development of porcelain in China around the 9th century CE revolutionized ceramic materials with its delicate translucency.
Industrialization in Europe and America drove further innovations in ceramic production and style. The Arts and Crafts movement at the turn of the 20th century reinvigorated handcrafted pottery and ceramic sculpture as an art form. Today, ceramic arts encompass a diverse range of approaches from traditional techniques to contemporary conceptual practices.
Types of Clay
There are several different types of clay that are commonly used for sculpting and clay art. The main types include:
Polymer Clay
Polymer clay is made from polyvinyl chloride (PVC). It is a malleable plasticine-like modeling compound that hardens when baked in a regular oven or toaster oven. Polymer clay remains flexible and durable after being cured. Popular brands of polymer clay include Sculpey and Fimo. Polymer clay is great for detailed sculptures and jewelry making. 1
Oil-Based Clays
Oil-based clays are made from oils, waxes and fillers. They stay soft and pliable at room temperature. Oil-based clays do not dry or harden on their own. They are used for sculpting and to make molds. Some popular brands include Chavant NSP, Monster Clay, Van Aken Plastalina and Roma Plastilina. 1
Water-Based Clay
Water-based clays use water as a plasticizer. They remain soft and wet. Water-based clay can be air dried or fired. When fired, the clay hardens permanently. Some examples are pottery clay and ceramic clay like stoneware and porcelain. 1
Clay Sculpting
Clay sculpting involves shaping clay into a three-dimensional artwork. There are many different techniques that can be used when sculpting with clay.
One common technique is adding or removing clay to build up the desired shape. This involves starting with a basic shape like a coil or ball of clay and then gradually refining the form by adding more clay where needed and removing excess clay. Smooth sculpting tools like metal ribs can be used to blend the clay and create smooth surfaces (Clay Sculpture Techniques and Tips).
Another technique is carving into a solid clay form to reveal shapes and details. Clay carving tools like loops, ribs, and wooden sculpting sticks allow artists to carve into the surface and create texture and definition. Subtractive techniques like carving remove clay rather than adding it (8 Must-Know clay modeling techniques).
Molds and armatures can also aid in clay sculpture. Using an internal or external armature provides support and shape. Clay can be added onto the armature to build up the form. Molds like plaster forms can be used to create identical clay shapes or as a base to sculpt on top of.
Understanding the sculpting process from start to finish allows clay artists to create their imagined forms. Mastering techniques like adding and removing clay, smoothing surfaces, carving detail, and using armatures opens up many creative possibilities.
Handbuilding with Clay
Handbuilding refers to clay forming techniques that do not require a pottery wheel. Instead, hands and simple tools are used to construct ceramic pieces. There are several handbuilding methods that offer artists great flexibility and control during the creative process.
One common handbuilding technique is coil building. This involves rolling out and stacking coils of clay on top of each other to build up the form. The coils can be blended together using slip and a paddle or serrated rib tool. Vases, bowls, and sculptural forms can all be made with coil building. According to Ceramic Arts Network, the technique dates back over 10,000 years.
Slab construction is another handbuilding approach. Flat slabs or sheets of clay are cut into shapes and joined to construct the piece. Slabs can be draped or folded over molds to create curved surfaces. Cutouts in slabs also allow intricate surface designs. Slab building has been used for millennia to produce large vessels and architectural decorations.
Pinching is likely the most basic handbuilding method. A ball of clay is pinched and pulled upward between the fingers and thumb to form a simple pot or sculptural shape. Pinch pots can then be further modified with tools. The direct contact of fingers with the clay creates a very hands-on, intuitive building process.
In addition to these techniques, handbuilding allows appending and subtracting clay, incising and impressing designs, as well as molding over forms. With practice and creativity, handbuilding offers limitless potential for clay art explorations.
Wheel Throwing
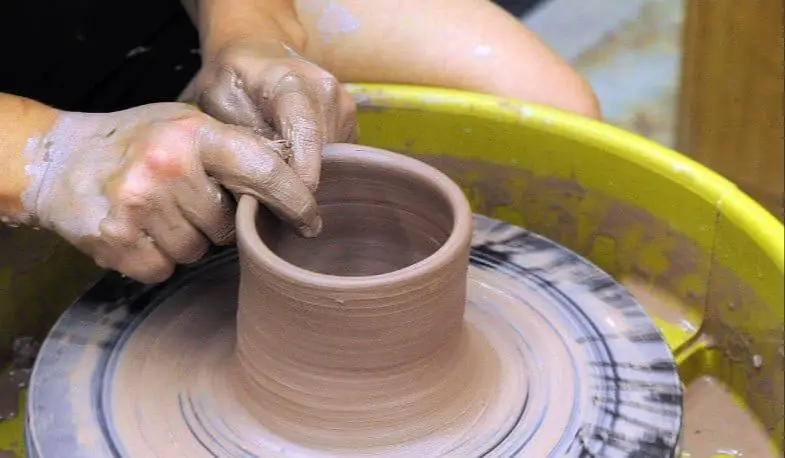
Wheel throwing is a process of shaping clay on a potter’s wheel. It takes practice to master, but following a step-by-step method can help beginners learn the basics of centering, opening, pulling, and finishing a thrown piece.
Here are the key steps for throwing clay on a wheel:
- Prepare the clay by wedging it to remove air pockets. Form a ball of clay and press it onto the center of the spinning wheel.
- Center the clay by gently pressing down and in with the palms of both hands. Apply even, firm pressure as the wheel spins.
- Open up the ball of clay by pushing the thumbs down into the center while keeping the sides supported. Create an even-walled cylinder.
- Pull the walls up higher by placing one hand inside the cylinder and one on the outside. Apply pressure between the two hands and lift up slowly.
- Shape the thrown form as desired, using various techniques like tightening the walls, collaring in the rim, or altering the contours.
- Cut excess clay off the base with wire when the desired height is reached. Refine the foot or base as needed.
- Allow the piece to stiffen slightly before removing it off the wheel with a wire tool. Trim excess clay off the base when leather hard.
It takes practice to center the clay properly and pull up even walls when throwing. Going slowly, applying the right pressure, and maintaining centering are all key to mastering the wheel. Consistency develops over time through repetition and making adjustments.
Source: https://potterycrafters.com/how-to-throw-clay-on-the-pottery-wheel/
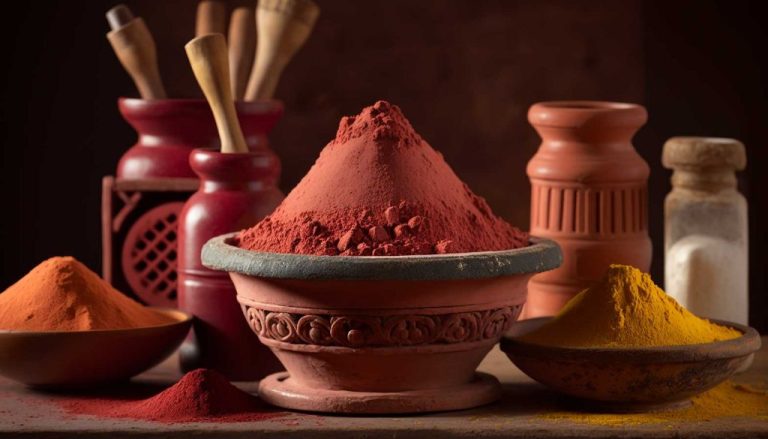
Glazing and Firing
Glazing and firing are essential steps in finishing clay artwork. Glazes are mixtures of minerals and materials that are applied to bisqueware clay before firing. Glazes can create different colors, textures, and effects on the clay surface. There are many types of glazes to explore, including underglazes, overglazes, commercial glazes, and homemade recipes. Glazes should be applied carefully using brushes, sponges, or pouring to achieve an even coating. The thickness and number of coats impact the final results.
Once the clay artwork is glazed, it is ready for the firing process. Firing cures glazes and hardens the clay through exposing it to high temperatures in a kiln. There are various types of kilns used for pottery including electric, gas, raku, and wood-fired kilns. The kiln is heated gradually up to a peak temperature, held for a period of time, then cooled. Typical peak temperatures range from cone 04 (1945°F) for low-fire glazes up to cone 10 (2381°F) for high-fire glazes. Understanding the required firing schedule for specific glazes is important. With proper glazing and firing techniques, clay artworks can achieve beautiful finished results.
For more details on glazing and firing techniques, see this in-depth guide: https://www.thecrucible.org/guides/ceramics/how-to-glaze/
Clay Art Tools
Having the right tools is essential for any clay artist to create detailed sculptures and intricate pottery pieces. Some of the most common and useful clay art tools include:
Clay carving tools like loops, ribs, sponges, and knives help shape, smooth, and add texture to clay. Carving tools allow artists to sculpt designs, carve lines, and remove clay easily from their pieces.
Modeling tools like paddles and ribs are great for smoothing and shaping soft clay. Dotting tools and styluses allow applying patterns and textures. Cutting wires slice cleanly through clay for removing pieces or dividing sections.
Extruders, rollers, and slab machines aid in preparing and rolling out even sheets of clay. Molds provide forms to drape, press or pour clay into for consistent shapes. Stamps and rollers imprint designs and patterns.
A pottery wheel spins clay to throw and form vessels symmetrically. Decorating tools like brushes, sponges, and rubber tips attach finishing details. Kilns fire and harden clay at high temperatures to complete the ceramic process.
Having a range of clay hand tools allows artists to craft anything they envision. Quality tools combined with creativity result in stunning clay masterpieces.
Inspiring Clay Artists
Clay artists have been creating stunning works for centuries. Here are some of the most renowned clay artists that have shaped the field:
Edmund de Waal is a contemporary British ceramic artist best known for his porcelain installations. His work often explores themes of memory and loss. De Waal’s most famous work is the installation Signs & Wonders, which features over 2,000 porcelain vessels displayed on shelves. He has exhibited internationally and his work is held in museum collections such as the Victoria and Albert Museum. (Source)
Peter Voulkos was an American ceramic sculptor considered the father of the abstract expressionist ceramics movement. He pioneered a new way of thinking about and working with clay, pushing the boundaries of traditional pottery. Voulkos experimented with enormous, rugged slabs of clay, punching holes in it and reassembling the parts into fantastic sculptural forms. His dynamic and improvisational approach influenced generations of ceramic artists. (Source)
Yee Sookyung is a South Korean ceramic artist known for her conceptual sculpture and installations made from thousands of fragments of broken celadon pottery. Colorful shards are arranged to resemble clouds, curtains, or torrents of rain. Sookyung’s work references the history of traditional Korean ceramics while giving these relics new life. She has exhibited internationally, including representing South Korea at the Venice Biennale in 1995. (Source)
Clay Art Project Ideas
Clay is an incredibly versatile and fun medium for creating art projects. From simple to complex, here are some creative clay art project ideas for beginners to advanced artists.
For beginners, making coil pots is a classic clay project. Simply roll out “snakes” of clay and coil them up into any shape you’d like. Texture the coils by pressing designs into them. Let dry and paint. See step-by-step instructions at https://artfulparent.com/15-amazing-crayola-air-dry-clay-art-projects-for-kids/.
Slightly more advanced is handbuilding clay sculptures. Make animals, imaginary creatures, geometric shapes, or abstract sculptures. Add texture and patterns with clay tools. Let dry, fire, and paint. Get handbuilding tips at https://www.pinterest.com/lezleehustad/clay-projects-for-kids/.
For a fun group project, create clay relief tiles with textures and designs pressed into the surface. Cut out shapes, letters or objects using cookie cutters and join together on a base tile. Paint with acrylics and seal. See ideas at https://artfulparent.com/15-amazing-crayola-air-dry-clay-art-projects-for-kids/.
Advanced ceramic artists can throw functional pottery on the wheel – mugs, bowls, vases. Add handles and spouts for more unique creations. Feel free to experiment with glazes, painting, and mixed media embellishments. Get wheel throwing tips at https://www.pinterest.com/lezleehustad/clay-projects-for-kids/.
Let your imagination run wild and get messy with clay! With the right techniques and a bit of practice, clay can become your favorite artistic medium for bringing any creation to life.