How Do You Make Clay Texture Stamps?
Clay texture stamps are a fun way to add realistic textures to your clay projects. With just some simple materials, you can make custom stamps that will allow you to imprint wood, stone, grass, and other textures into soft clay. These stamps are useful for adding natural-looking details to pieces like decorative bowls, jewelry, figurines, and more without having to sculpt each texture by hand.
Handmade texture stamps save time and allow you to easily replicate patterns. They also give you total control over the size, scale, and design of the textures you want for your clay projects. Experimenting with different textures like pebbles, bark, leaves, etc. can really enhance your claywork. So if you want to add some custom textures to your polymer clay, air dry clay, or ceramic greenware, making your own texture stamps is the perfect solution.
Gather Materials
The main material you will need for making clay texture stamps is clay. Choose an air-dry polymer clay that will harden at room temperature without needing to be baked. Sculpey and Fimo are two popular brands. You will need about 1-2 blocks of clay to start.
In addition, gather some cardboard, foam, or other rigid material to use as the base for your stamp. Cereal boxes, foam sheets, and thick cardstock all work well. Cut the cardboard into squares or rectangles approximately 3-4 inches wide.
Finally, assemble any sculpting and cutting tools you will use to shape the clay texture. These can include an X-Acto knife, clay roller, clay shapers, toothpicks, needles, modeling tools, cookie cutters, etc. Have a variety on hand to create different effects.
Choose Your Desired Texture Pattern
When making clay texture stamps, one of the most important decisions is choosing the actual texture pattern you want to create. There are two main categories of patterns to consider: geometric and organic.
Geometric patterns involve straight lines, perfect circles, squares, triangles and other mathematical shapes. These rigid and orderly designs can create really interesting stamps, but require precision when sculpting the pattern. Geometric stamps work especially well for borders, edges, and repeating elements.
Organic patterns are free-flowing, natural looking shapes inspired by things like leaves, bark, waves, wood grain, etc. These curvy and asymmetric textures add an earthy, rustic feel to stamped designs. Organic stamps can beautifully emulate patterns found in nature.
In addition to geometric vs. organic, also decide if you want a simple single texture vs. a more complex multi-layered look. Simple textures like polka dots are beginner friendly. Multiple textures like swirls, lines and shapes combined require more skill but deliver stunning results.
Consider the finished look you want and your sculpting ability when choosing the texture pattern for your custom clay stamp.
Cut the Base
The base for your clay texture stamp can be made from cardboard, foam, or other thick but easy to cut materials. Ideally, choose a material that is around 1/4 – 1/2 inch thick so it is sturdy enough to press into clay without bending or warping.
Consider what size and shape you want for your finished stamp. Simple geometric shapes like circles, squares or rectangles work well. For more organic textures, consider freehand shapes. Cut the base material several inches larger than you need so you have extra space when sculpting the texture. It’s easier to trim off excess material at the end.
Use a utility knife and metal ruler to cut smooth straight lines if desired. Cut slowly and deliberately for the cleanest edges. You can also use scissors for curvier shapes. If the base material frays when cut, use a bit of glue or tape around the edges to reinforce it.
Sculpt the Texture
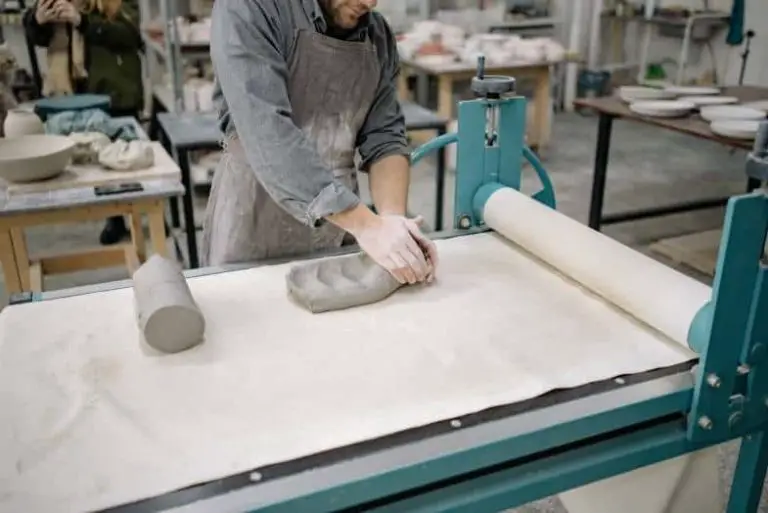
After choosing your desired texture pattern and creating the base, it’s time to sculpt the actual texture. Start by rolling out your clay to your desired thickness, usually 1/4 to 1/2 inch is a good thickness. Use a rolling pin on a flat surface to evenly roll out the clay.
Once rolled out, use a cookie cutter, template or freehand a shape to cut your clay base to the size you want. Make sure to use enough clay so you can sculpt the full texture.
Now the fun begins! Use various sculpting tools like loop tools, clay shapers, silicone brushes, toothpicks or anything handy to sculpt the desired texture pattern into the clay. Work slowly and carefully, sculpting all the nooks and crannies of your texture. Let the texture gradually build up for best results.
Pay close attention to your inspiration image or object to accurately recreate the texture. Sculpt all sides if it will be a standalone stamp. Get creative and make your own patterns too!
## Add Handling
Once your texture stamp is sculpted, you’ll want to add some handling to make it easier to press into clay.
First, use a clay tool or knife to cut away any excess clay around the edges of the stamp. Try to taper the edges so they don’t create sharp edges in the stamped clay. Regularly run your finger around the edges to smooth them out.
Next, consider if your stamp needs a handle. This is especially helpful for larger stamps or stamps with fine details that require extra pressure. To add a handle, attach a piece of clay to the back of the stamp, shaping it into a thick handle you can easily grasp. Blend the seams between the handle and stamp so they don’t transfer into the clay impression.
The handle should protrude above the stamp’s sculpted texture. Make sure it feels comfortable in your hand when you practice pressing the stamp into a clay test piece. Adjust the size and shape as needed before curing.
Dry and Cure
Allow the texture stamps to air dry fully before curing them in the oven. Avoid exposing them to direct sunlight or excessive heat while drying as this can cause cracking. Place the stamps in a warm, dry area with good airflow for at least 24-48 hours. Test the back of the stamp by touching it lightly, if it still feels cool or damp, allow more drying time.
Once completely air dried, the stamps need to be cured in the oven to harden and finalize the clay. Curing removes any remaining moisture and makes the clay sturdier. Preheat the oven to 275°F and place stamps on a baking sheet lined with parchment paper or a silicone baking mat. Bake for 30 minutes per 1/4 inch of thickness. Allow the stamps to cool fully before handling or using.
Test It Out
Once your clay texture stamp has dried and cured, it’s time to test it out. This is an important step to ensure your stamp will make clean, crisp impressions.
Start by taking a small piece of clay and kneading it until soft and pliable. Gently press your stamp into the surface, being careful not to push too hard. You want to apply even, light pressure.
After lifting the stamp up, examine the impression closely. Check that the pattern has transferred well without distortion or dragging. Ensure the edges are clean with no clay sticking to the stamp.
If needed, you can make small adjustments to get a better impression. Let the stamp fully dry again after changes. Test on another clay sample until satisfied with the result.
Getting a good test imprint will confirm your texture stamp is ready for all your clay projects. Enjoy pressing your custom pattern into clay jewelry, sculptures, tiles and more.
Make Adjustments
Once your texture stamp is complete, you’ll want to test it out and make any needed adjustments. Press your stamp gently into a sample of clay and examine the impression left behind. If the texture is too shallow, you may need to build up the design so it leaves a deeper imprint.
Take a close look at each part of the stamped texture. Sand down any rough or uneven spots using fine grit sandpaper. Pay extra attention to the edges and corners where clay can chip off more easily. You want the stamp to press cleanly into the clay.
If certain areas lack detail or aren’t transferring well, consider adding more texture to those spots. You can glue on additional clay pieces, build up texture with slip, or carve more definition. Let any added texture fully dry and cure before using the stamp again.
Test out your adjustments by pressing the stamp into clay once more. Make any final tweaks needed until you achieve a crisp, detailed impression. The beauty of making your own stamps is you can customize them until the texture is just right.
Apply and Store Texture Stamps
Once your custom texture stamps are fully dry and cured, you’re ready to press them into your clay creations to add unique textures and designs. Make sure your clay is conditioned well and roll it out to an even thickness before pressing the stamp in. You can experiment with different amounts of pressure to control how deep the imprint goes.
To get crisp edges, cut around the stamped areas with a craft knife. Let the stamped clay continue drying and curing fully before baking. If desired, you can brush on liquid clay to the stamped areas to accentuate the textures.
After use, clean any excess clay off the stamps using warm water and mild soap. Allow them to dry completely before storing. Place texture stamps in resealable plastic bags or containers to keep them free of dust and debris when not in use. Proper storage will help preserve your handmade stamps so they can continue adding beautiful textures to clay projects over time.


