How To Do Clay Modelling Step By Step?
Clay modeling is a rewarding and creative art form that allows you to bring imaginative designs and figures to life with your own two hands. With a simple lump of clay and a few sculpting tools, you can craft elegant vases, whimsical characters, decorative bowls, detailed jewelry, and so much more. The possibilities are endless when you work with this versatile medium.
The beauty of clay modeling is that it can be enjoyed by artists of all ages and skill levels. Even as a beginner, you’ll be able to shape basic forms and figures with a little practice. As you gain more experience, you’ll learn techniques for adding intricate patterns, textures, and realistic details to your sculptures. Clay modeling is a wonderful outlet for exercising your creativity and bringing your artistic visions to tangible form.
In this beginner’s guide, you’ll learn fundamental clay modeling skills step-by-step. We’ll cover everything from choosing the right clay and preparing it for sculpting, to molding basic shapes, crafting reliefs, sculpting figures, adding details, and finishing your pieces. You’ll gain practical knowledge to start creating your own impressive clay models with confidence. Let’s get started!
Needed Supplies
When getting started with clay modeling, you’ll need to gather some basic supplies. The most important is choosing the type of clay. The two main options are polymer clay and natural clay.
Polymer clay is made from PVC, minerals, and pigments. It doesn’t harden until you bake it in an oven. Polymer clay is great for detailed sculptures, jewelry making, and items that don’t need to be super durable. It comes in many colors and is easy to work with. However, it can be more expensive than natural clay.
Natural clays are materials like potter’s clay, air-dry clay, and homemade clay from dirt or paper. Natural clays air dry or need to be fired in a high-heat kiln. They are better for large sculptures, pottery, and heavy-duty pieces. Natural clay can be cheaper but requires more equipment and space.
In addition to clay, you’ll need basic sculpting tools like loop tools, clay shapers, craft knives, cutting wires, Sculpey clay cutters, and acrylic roller tools. Have a work surface like a canvas, wood board, or Sculpey workstation mat. Good lighting and storage containers for unused clay are also useful.
Clay Preparation
Properly preparing your clay is an important first step before beginning any sculpting project. Here are some tips for conditioning and kneading techniques, achieving the right clay consistency, and storing unused clay:
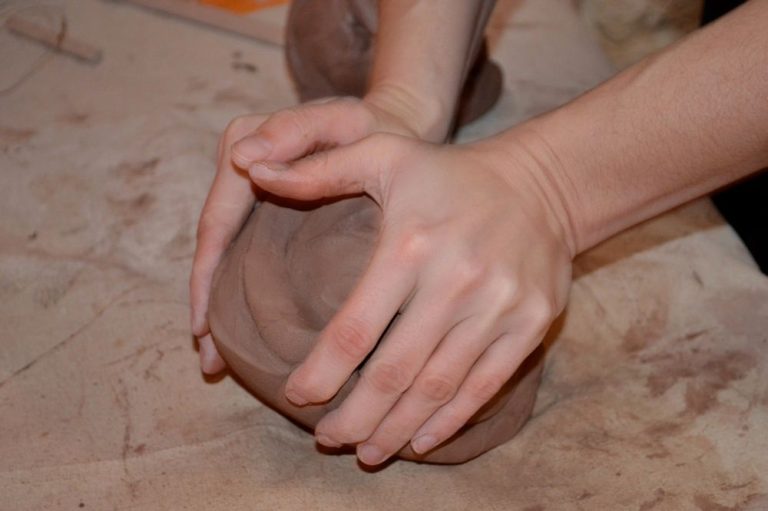
Kneading clay helps eliminate any air bubbles and allows you to achieve an even, smooth consistency throughout. Start by cutting off a workable amount of clay from your block. Knead it for 5-10 minutes, pressing down and pushing the clay out with the palms of your hands. Fold the clay over itself and repeat kneading until the texture is completely smooth.
As you knead, you’ll notice the clay becomes more pliable as it warms up. If your clay is too stiff, add a few drops of water and continue kneading to absorb the moisture. If it becomes sticky, dust your hands lightly in flour. Find the consistency that allows you to easily shape and mold forms.
For storage, wrap unused clay tightly in plastic wrap or place in a sealed container. This prevents air exposure and drying out. Store clay in a cool, dry place away from direct sun. Before using again, knead stored clay to regain a workable texture.
Basic Shapes
When first starting out with clay modelling, it’s helpful to practice forming basic shapes like spheres, cones, and cubes. This allows you to get a feel for the clay and develop fundamental techniques.
Begin by rolling small balls of clay between your palms to form smooth spheres. Apply even pressure and rotate the clay continuously to achieve an even, rounded shape. You can then use sphere shapes as a starting point to create forms like eggs or berries.
For cones, roll the clay into a ball, then use your fingers to pull and taper one end into a point. Cones can form hats, beaks, fruits, and more. Start with a wide base and gradually taper the clay. Pinch the tip for sharpness or leave rounded.
Cubes and rectangular prisms require flattening the clay into slabs and cutting straight edges. Roll out flat sheets of clay and use a ruler or guide to cut uniform squares and rectangles. Carefully join and smooth the edges. This teaches you to create straight lines and 90 degree angles.
Having references helps ensure properly proportioned shapes. Look at photos or real objects when forming basic shapes to see how spheres, cones, and cubes combine in different ways. Pay attention to texture too – try making some areas smoother and others rough.
Mastering these fundamental forms establishes critical techniques and dexterity. With practice, you’ll be able to shape the clay into anything you can imagine.
Relief Sculpting
Relief sculpting involves creating artwork that projects slightly from a flat background surface. This technique allows you to create the illusion of depth and dimension without completely sculpting a 3D figure. There are two main types of relief sculpting:
Low Relief
Low relief sculpture projects just slightly off the background, usually no more than a couple inches. The depth is subtle but allows some contours and details to emerge. Low relief is great for beginners looking to create simple shapes and experiment with textures.
High Relief
High relief sculpture projects more significantly off the background surface, with some parts of the artwork detaching completely. This allows for much more depth and dimension in the sculpting. Undercuts and overhangs can help accentuate the 3D forms.
Basics
Start relief sculpting by rolling out a slab of clay and smoothing the surface. Consider the background as much as the design itself. Simple geometric shapes like circles, squares and triangles are great for starting compositions.
Use basic sculpting tools like loops, ribs, wires and knives to cut shapes, add contours and refine details. Building up the depth gradually helps maintain structural integrity. Let the clay firm up slightly between adding layers.
Pay attention to edges and transitions between the background and raised elements. Blending and smoothing these areas creates a seamless scene.
Relief sculpture allows you to play with depth, perspective and shadows in an approachable way before tackling more complex 3D sculpting.
Figure Sculpting
Sculpting the human or animal figure in clay requires understanding of proportions, anatomy, and capturing expression. When starting a figure sculpture, first consider the pose and flow of the body. Sketch the basic outline of the figure to plan the general proportions before adding clay.
Pay attention to anatomy, making sure the relationships between body parts look natural. Reference anatomy books or diagrams to check the sizes of the head, torso, limbs, hands and feet. Accurate anatomy will make the figure look realistic.
Consider the flow of muscles under the skin to add a sense of movement and life to the sculpture. Show changes in muscle shape and tension based on the figure’s pose.
Facial expressions are crucial for conveying emotion and bringing the sculpture to life. Study facial muscles to understand how they move for different expressions. Pay close attention to subtle details around the eyes, eyebrows, nose, lips and jawline to capture a specific emotion.
Work patiently on the fine details, and remember that even small changes can dramatically impact the feeling and realism of the sculpture. With practice and observation of the human form, your clay figures will become more dynamic and true to life.
Adding Detail
Adding finer details to a sculpture brings it to life. There are a few techniques to focus on for precision work:
Using Clay Tools
Dedicated clay tools allow you to etch lines, add texture, and carve intricate patterns. Loop tools are useful for scraping in curved lines, while needle tools create finer details. Clay shapers smooth and blend softer areas. Use various heads on modeling tools to imprint patterns.
Employing Wet Tools
Wet tools like paintbrushes, sponges, and toothpicks can add softer textures. Dampen the sculpture first. Then use various brushes to stipple, dab, or stroke patterns. Q-tips and toothpicks etch fine lines. You can also use water to smooth rough areas.
Focusing on Focal Points
Determine the focal points that will draw the viewer’s eye and make the sculpture pop. The eyes, nose, and mouth on a face are critical, as are the hands and feet on a figure. Refine these areas first with more definition. Add expressiveness to faces through eyes, eyebrows, and mouths. Hands and feet convey a sense of motion.
With practice and the right tools, adding finer details can elevate your sculpture to the next level.
Textures and Patterns
Textures and patterns add visual interest and realism to clay sculptures. There are many techniques to create textures in clay:
Creating Realistic Textures
To recreate textures found in nature, use tools to imprint them into the clay. Press leaves, bark, shells, rocks, or other objects into the wet clay to leave behind their imprint. You can also use texture mats, rolling pins, or stamps with texture designs to achieve effects like scales, wood grain, etc.
Abstract Textures
Abstract textures add visual dynamics without imitating a specific material. Score clay with the edge of a tool, poke holes, drag tools through it, or press crumpled tin foil into the surface. Layer contrasting textures like smooth and rough to create visual interest.
Repeating Patterns
Use stamps, molds, or rollers with patterned designs to imprint repeating motifs into clay. Geometric patterns like bricks, tiles, and lattice work well. Press rope, lace, or other materials with patterns into the clay. Cut patterned pieces out of clay and apply them repetitively.
Textures make clay sculptures more dynamic and realistic. Experiment with different techniques to find the textures and patterns that enhance your work.
Finishing and Presentation
Once your sculpture is complete, you’ll want to spend some time refining and finishing it before presentation. Here are some tips for finishing clay sculptures:
Smoothing and Polishing
Use silicone sculpting tools, water, rubbing alcohol, or sandpaper to smooth fingerprints, uneven textures, and rough areas on your sculpture. Start with coarser materials like sandpaper to remove bigger irregularities, then move to finer materials like rubber sculpting tools to polish the surface.
Avoid over-smoothing as you may lose desirable detail and texture. Go slowly and check often so as not to remove too much clay.
Protective Finishes
There are several options for sealing and protecting your finished clay sculpture:
- Acrylic spray – Provides a matte, protective coating that seals in paint and prevents chipping/cracking.
- Polyurethane – Gives a glossy finish and harder protection from damage.
- Wax coatings – Provide a soft luster while keeping clay porous if needed. Buff with a cloth for sheen.
Apply the finish in a ventilated area according to manufacturer instructions. Let dry fully before handling.
Basing
For presentation, you can leave your sculpture freestanding, mount it directly on a base, or affix it to a simple stand. Wood, acrylic, marble, and metal make attractive bases. For stability, ensure the base is heavy enough to counterbalance your sculpture’s weight.
You can also create an integral base by leaving extra clay when modeling your piece. Blend the sculpture and base together for a unified look.
Next Steps
Once you’ve learned the basics of clay modeling, there are many ways to continue growing your skills and pursuing new creative challenges:
- Keep practicing the techniques on a regular basis. Repetition will help refine your sculpting abilities.
- Try sculpting different subjects, like people, animals, natural objects, abstract shapes, miniatures, or large-scale pieces.
- Experiment with sculpting in new styles, such as realistic, caricature, anime, geometric, or conceptual.
- Push yourself by attempting more complex compositions, poses, textures, and details.
- Consider joining a local clay sculpting class or studio to learn from other artists.
- Join online clay sculpting communities to share your work and get feedback and inspiration.
- Read books, watch videos, or take workshops from expert sculptors to build your skills.
- Set new clay modeling goals for yourself, like learning a new technique or creating a series.
An artistic pursuit like clay sculpting has limitless potential for growth. With regular practice and exploration, you can continuously improve and enjoy the creative process.

