How Do You Cut Ceramic Tile By Hand?
Cutting ceramic tile by hand can be an effective and economical way to customize your tile project without needing expensive power tools. Hand-cutting techniques allow you to make precision cuts and intricate shapes. Reasons to cut tile by hand rather than using power tools include lower cost, greater portability, and quieter operation.
Safety Tips
When cutting tile by hand, it’s important to take safety precautions to avoid injury. Here are some key tips:
Wear safety goggles to protect your eyes from flying shards and dust. Eye injuries are common when cutting tile, so be sure to wear ANSI-approved goggles (Cutting Tile: How to Avoid Safety Hazards).
Work in a well-ventilated area since cutting tile produces silica dust, which can be harmful if inhaled. Open windows, use a fan, or work outdoors to allow fresh air circulation (Important Safety Tips when Using Tile Cutters or Saws). Wearing an N95 respirator mask is also recommended.
Wear gloves to protect your hands from sharp tile edges and tools. Leather gloves work well.
Keep your work area clear of clutter and make sure you have stable footing. This will help prevent slips or falls while working.
Unplug power tools when changing blades or bits. Accidental start ups can cause severe lacerations.
Follow all manufacturer safety recommendations for the specific tools you are using.
Tools Needed
Cutting tile by hand requires just a few specialized tools. The main tools you’ll need include:
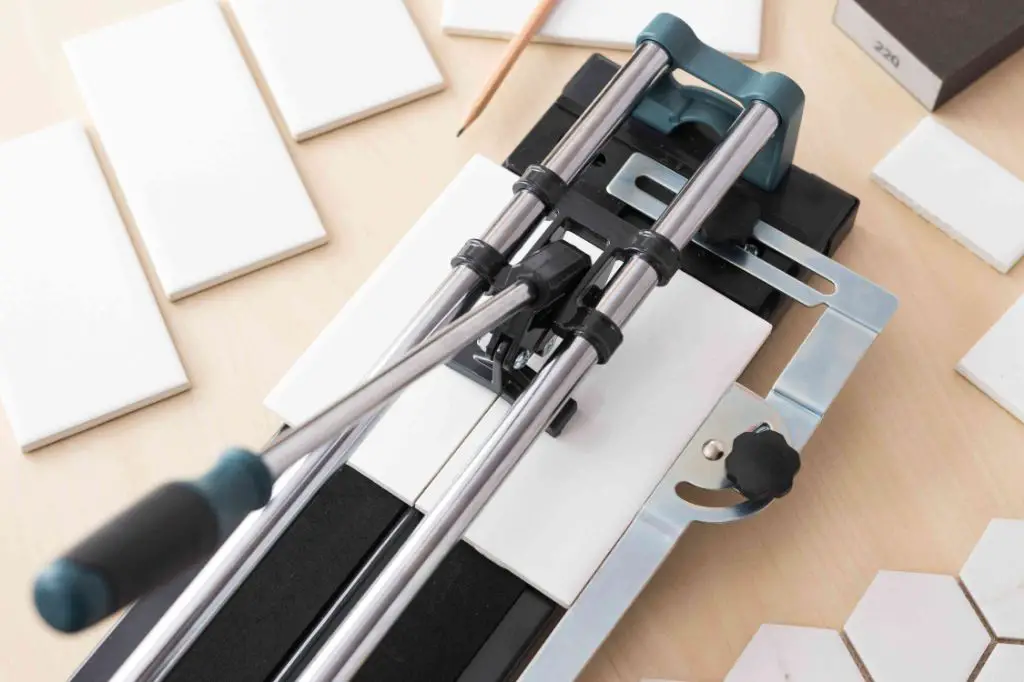
- Tile cutter – A manual tile cutter has a scoring wheel and a handle you press down to score the tile. You then snap the tile along the scored line. This is good for straight cuts.
- Tile nippers – Tile nippers are plier-like tools with a jaws that allow you to nibble away small pieces of tile. You use them to shape curves or angles that can’t be scored with a tile cutter.
- Grout saw – A specialty saw with a diamond grit edge for cutting ceramic tiles. Use this for detailed cuts the tile nippers can’t handle.
- Ruler/straight edge – Needed for measuring and marking straight cuts before scoring with the tile cutter.
Having these basic tools on hand will allow you to make all the cuts necessary when installing a ceramic tile backsplash, floor, or wall.
Measuring and Marking
The first step in cutting ceramic tile by hand is to carefully measure and mark the tiles. It’s important to measure the space you are tiling as well as the tiles themselves to ensure proper fit. Here are some tips for measuring and marking tile:
Use a tape measure to measure the length and width of the area you are tiling. For walls, measure from the floor to the ceiling. For floors, measure wall to wall. Make sure to account for any irregularities in the walls or floor when taking measurements.
Measure the tiles you will be installing. Most floor tiles are 12 x 12 inches but wall tiles come in many sizes. Knowing the exact size of your tiles is key for proper measuring and cutting.
Transfer your measurements to the tile using an appropriate marking tool like a pencil, permanent marker, or tile marking pencil. Mark cutting lines where needed for outlet holes, edges, etc.
When marking diagonal cuts, use a 3-4-5 triangle method to ensure accuracy. Measure and mark a multiple of the tile’s dimensions from the corner to create a right angle.
For patterned tile, make sure cuts are made in the center of the pattern. Align the pattern when transferring measurements.
Measure twice and mark once to avoid costly measuring mistakes. Proper tile measuring and marking leads to successful cuts.
Using a Tile Cutter
The most common and effective way to cut ceramic tiles by hand is to use a manual tile cutter. Here are the steps to use a tile cutter properly:
First, secure the tile cutter on a flat, stable surface. Make sure the cutting wheel is facing upwards. Then, place the tile face up into the cutting tray, aligning the mark where you want to cut with the cutting wheel.

Next, apply firm downward pressure as you push the tile and cutting tray together, dragging the tile through the cutter. Let the cutting wheel score the glaze. Repeat this motion 3-4 times until the tile cuts cleanly.
Apply steady even pressure when scoring for best results. Don’t push too hard or too lightly. Use full cutting strokes from edge to edge.1
When done scoring, simply snap the two halves of the tile apart. Place another tile in the cutter and continue cutting all the pieces needed. Make sure to use a wet tile saw to cut extremely hard tiles like porcelain.
Using Tile Nippers
Tile nippers are a handy tool for cleanly breaking tiles along a scored line. According to https://tiletools.com/blogs/news/how-to-use-tile-nippers, tile nippers work by applying pressure along the scored line to break the tile. Here are some tips for properly using tile nippers:
First, position the tile nippers along the scored line on the tile. Open the nippers so the two carbide wheels line up on either side of the scored mark. Apply even pressure as you squeeze the nipper handles together. The wheels will pinch the tile along the weakened scored line.
Next, holding the tile and nippers firmly, tap the upper handle of the nippers with a light hammer. Apply several light taps while maintaining pressure on the nipper handles. This will cause the tile to split cleanly along the scored line.
Be patient and don’t try to break the tile with one hard hit. Multiple lighter taps allow the nippers to gradually split the tile for a precise cut. With practice, tile nippers become an invaluable tool for detailed ceramic tile cutting.
Cutting Curves and Holes
Cutting curves and holes in ceramic tile allows you to fit the tile around obstacles like pipes and outlets. Here are some tips for cutting curves and holes by hand:
First, mark the shape you want to cut on the tile using a pencil or marker. Trace along the outline of the obstacle if you are cutting around it. For custom curves, use a template made of cardboard or wood.
Next, use a grout removal saw or rotary tool with a diamond blade to cut along the lines. Cut just outside the pencil line so you have some room for adjustments. Make several shallow passes rather than trying to cut all the way through in one pass.
As you get close to finishing the cut, use tile nippers to snip off small pieces until the curve or hole is complete. Nippers allow for more precision than the saw. Use a rubbing stone or sandpaper to smooth any rough edges.
When cutting curves, work slowly and make minor adjustments as you go. Test the fit often to ensure a smooth curve. For holes, mark and cut out the shape slightly smaller than the obstacle, then use nippers and an abrasive stone to expand the hole to the right size.
Be patient and take your time, since rushed cuts are more likely to break the tile or turn out uneven. With care and the right tools, you can create professional-looking curves and holes when cutting tile by hand.
Smoothing Edges
After cutting, ceramic tile edges will likely have small nicks or uneven sections. It’s important to smooth any rough edges to prevent injury from sharp corners and create a clean finished look.
There are two main ways to smooth cut tile edges:
File Rough Edges
Use a medium grit hand file or rub stone to carefully file down any protruding or uneven areas along the cut edge. Apply even pressure and stroke the file at a 45 degree angle to the edge. Too much pressure can cause chipping, so use a light touch. File gently and slowly until the edge feels smooth.
Use Sandpaper or Rubbing Stone
For light smoothing, wet/dry sandpaper around 150 grit can finish the edge nicely. Move the sandpaper back and forth along the edge to smooth and round it off. Be consistent with sanding direction and pressure. For best results, wrap the sandpaper around a wood block or use a rubbing stone.
Rinse the sanded edge with water to remove debris. Check for any lingering roughness and repeat sanding if needed. The edge should have a uniform, smooth finish.
Tips and Tricks
When cutting tiles by hand, follow these tips and tricks for best results:
Let tile cool after cutting to prevent cracking. Ceramic and porcelain tiles retain heat after cutting. Allow the newly cut tiles to cool completely before handling to prevent cracks from forming along the cut edge. Give tiles at least 15-30 minutes to return to room temperature before picking them up or manipulating the shape.
Cut tiles upside down. Many manual cutting tools like nippers work best when the tile is placed face down on the cutting surface. The underside of the tile is usually flatter and provides stability. Cutting the backside also helps prevent damaging the visible tile face with the cutting tool.
Conclusion
Cutting ceramic tile by hand can seem daunting, but with the right tools and techniques, you can get professional-looking results. The key steps are:
- Measure precisely and mark your cuts.
- Score the tiles with a tile cutter or glass cutter.
- Use tile nippers to nibble away excess tile.
- Smooth the edges with a rubbing stone.
The main benefits of cutting tile by hand rather than using a wet saw are that it’s inexpensive, quiet, and does not require electricity. With some practice, you can make accurate cuts and customize tiles to fit your space perfectly. Cutting by hand takes more time and effort than machine cutting, but can be extremely rewarding for DIY projects. Follow the techniques outlined here and you’ll be able to cut ceramic and porcelain tiles like a pro.


