What Can I Use If I Don’T Have A Countersink Bit?
A countersink bit is a specialized drill bit used to create a conical depression around the surface of a hole. As defined by Merriam-Webster, a countersink is “a conical hole made with a countersink to allow the head of a screw or bolt to lie flush with or below the surface”.
The purpose of a countersink bit is to allow the head of a screw or bolt to sit flush within a material’s surface, rather than protruding above the surface. This creates a smooth, even surface and prevents the fastener from catching on other objects. Countersinking also allows two materials to sit flush against each other without an uneven gap where the fastener head meets the surface.
Countersink bits come in a range of sizes to match different screw head diameters. They typically have a pilot drill at the tip to guide the countersink centrally over the hole. The angled sides of the cone shape provide the countersinking action to create a tapered depression around the hole. This allows the screw head to nestle within the tapered space beneath the material’s surface.
When You Might Need a Countersink Bit
A countersink bit is most commonly used when drilling screw holes in wood. The bit drills a conical shape around the hole so that the screw head can sit flush with the surface of the wood. Some situations where you would need a countersink bit for woodworking include:
- Installing screws into a wood surface that will be finished and stained. A countersunk hole allows the screw head to sit flush.
- Joining two pieces of wood together with screws. Countersinking the holes allows the joint to close completely flush.
- Fastening hinges into a wood door or cabinet. A countersunk hole hides the screw head for a sleek look.
- Drilling pilot holes for wood screws. Countersinking allows the screw to sit flush with the surface.
- Attaching brackets, handles, or other hardware to wood surfaces with screws.
Without countersinking, screw heads would stick out from the wood surface. This can interfere with finishing and staining, snag on materials, or simply look unsightly. The angled hole from a countersink bit allows the screw head to sit flush for a smooth finished surface.
For more tips, see this guide on how to use a countersink bit.
Alternatives If You Don’t Have a Countersink Bit
If you don’t have a dedicated countersink bit, there are a few alternatives you can try to create a countersunk hole:
Using a Standard Drill Bit at an Angle
One option is to use a standard drill bit at an angled approach to create a countersunk effect. Set your drill press or drill angle to around 30-45 degrees and drill your hole normally. The angled approach will create a tapered edge to the hole [1].
The downside is you have less control than with a real countersink bit and the results may be inconsistent. But in a pinch, this can work.
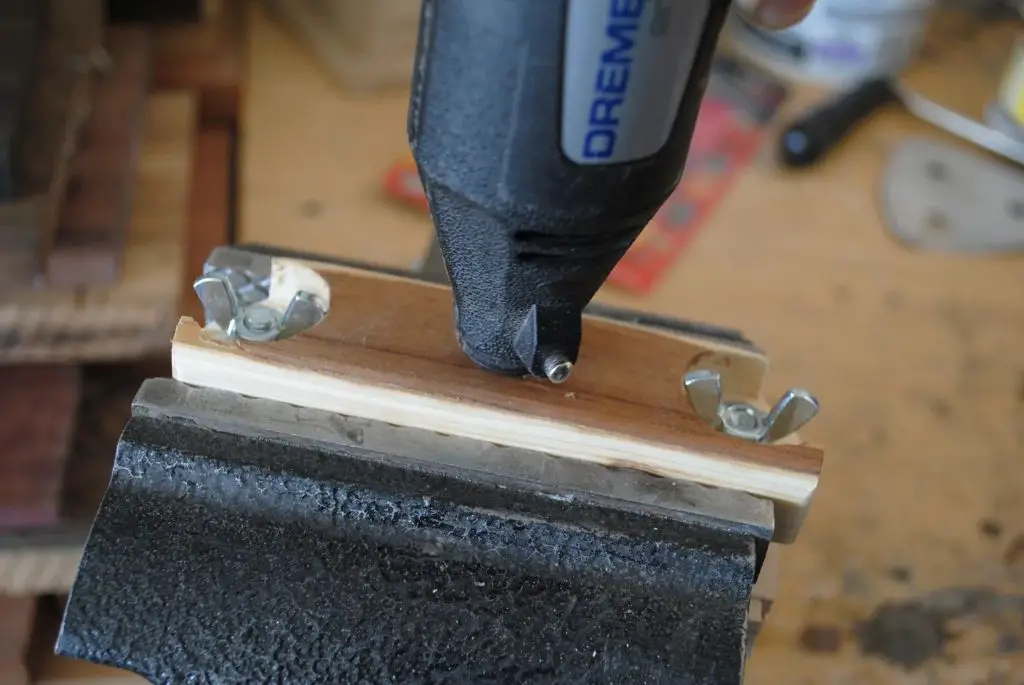
Using a Dremel or Rotary Tool
A Dremel or other rotary tool with a grinding stone attachment can be used to grind a taper into an existing hole. Run the grinding stone carefully around the top rim of the hole at an angle to create a beveled edge [1].
This gives you more control than drilling at an angle, but takes more time and effort. Use gentle pressure and smooth motions to get a clean bevel.
Filing the Hole by Hand
For metal work, a hand file can be used to file down the edge of a drilled hole into a tapered countersink. Use a smooth fine file and work around the entire edge, filing at an angle inward [1].

This takes time and elbow grease, but can create a precise countersink in metal if you don’t have the right bit. Be patient and file evenly for best results.
Using a Standard Drill Bit at an Angle
One simple alternative to a dedicated countersink bit is to use a standard drill bit at an angled orientation. To do this, you will drill the initial hole perpendicular to the workpiece as usual. Then, re-insert the same drill bit into the pre-drilled hole at the desired countersink angle, typically between 82-90 degrees [1]. Apply light pressure and rotate the drill to shave away the top edge of the hole into a beveled countersink.
The main advantage of this technique is that it doesn’t require any specialty tools beyond a basic drill bit that you likely already own. It also gives you flexibility in choosing the countersink angle instead of being limited by a fixed angle countersink bit. However, there are some significant drawbacks. It can be difficult to maintain a consistent angle freehand, leading to uneven or imprecise results. The standard drill flutes are also not optimized for cutting countersinks, so cutting will be slower and prone to tearing out more material. Overall this is a decent improvised solution but doesn’t match the quality of using a true countersink [2].
Using a Dremel or Rotary Tool
A Dremel or other rotary tool like a die grinder can be used to countersink holes if you have the right attachments. Some good bits to use include the Dremel 560 countersink and deburring bit, or a pointed grinding stone attachment. The benefit of using a Dremel is that it allows precise control and can be used for small holes that are hard to reach.
Make sure to work slowly and carefully when countersinking with a Dremel. Let the tool do the work, applying light pressure, and frequently stop to check your progress. The key is to frequently test the fit of your screw to avoid over-grinding the hole. Take it slow, working in increments until the screw sits flush with the surface. Be very cautious on thin materials to avoid grinding right through.
The drawback of using a Dremel is that it can take longer than using a drill or proper countersink bit. The grindings can also be messy and harder to contain and clean up. Additionally, a Dremel doesn’t create the ideal angled sides of a proper countersunk hole. But for small jobs or in a pinch, a Dremel can work well for countersinking holes.
Filing the Hole by Hand
One of the simplest alternatives if you don’t have a countersink bit is to use a metal file or rasping tool to bevel the edge of the hole by hand. Here are some tips for hand filing a countersunk hole:
– Clamp the workpiece securely to avoid movement while filing. Use a vice or clamps on your workbench.
– Select a flat, smooth file that is slightly larger than your drilled hole. Look for bastard or second cut metal files with a safe edge to avoid scratching the work surface.
– Hold the file perfectly flat against the edge of the hole. Apply firm downward pressure as you make long, smooth strokes around the circumference of the hole. Let the file do the cutting rather than using a back-and-forth scrubbing motion.
– Use a deburring tool afterward to smooth any burrs or jagged edges left from filing. Chamfer the inner edge of the hole slightly.
– Frequently clean metal filings from the file’s teeth to maintain cutting effectiveness. Brush away debris from the workpiece.
Hand filing allows you to countersink holes and remove burrs without power tools. It provides excellent control and precision. However, it requires some skill and patience to master the filing technique. Removing a large amount of material by hand can also be tiring and time consuming compared to using a power drill or rotary tool. Hand filing works best for occasional holes in softer metals.
Comparison of Alternatives
There are pros and cons to each method of countersinking holes without an actual countersink bit:
Using a Standard Drill Bit at an Angle
Pros:
- Uses a basic tool most people already have – a standard drill bit
- Relatively fast and easy
Cons:
- Can be challenging to get a clean, even bevel since you’re trying to angle the straight drill bit1
- The angled bit can slip or “walk” producing an uneven hole
- Does not give as precise a result as a real countersink
Using a Dremel or Rotary Tool
Pros:
- Rotary tools allow good control and precision
- Can customize the bevel shape by grinding the bit
Cons:
- Slower than using a drill for each hole
- Rotary tool bits may lack the durability of a quality countersink
- Grinding a makeshift bit takes extra time and effort
Filing the Hole by Hand
Pros:
- No power tools needed
- Allows custom bevel shape if using shaping/contour files
Cons:
- Very labor intensive and time consuming to do multiple holes
- Difficult to get a precise, clean result
- Can be challenging on harder materials like steel
Choosing the Best Alternative for Your Needs
The best alternative to a countersink bit depends on several factors, including the materials you’re working with, the number of holes you need to make, and what tools you have on hand.
If you’re working with metal or steel, a standard drill bit used at an angle can work well for occasional holes. However, the drill bit will wear out faster than a proper countersink bit designed for metal. For deeper or more frequent use, invest in a carbide countersink bit made specifically for metalwork (source).
For wood projects, a standard drill bit tilted at an angle or a Dremel rotary tool with a grinding bit can be inexpensive alternatives for countersinking occasional holes. However, for the cleanest holes, it’s hard to beat a high-speed steel countersink bit designed for wood (source).
If you only need to make a few shallow holes, filing them by hand is an option. But this can be time-consuming and result in uneven angles if you need to make multiple holes. Investing in even an inexpensive countersink allows much faster and consistent results.
Take stock of the tools you have available before choosing the best workaround. And consider how frequently you need to make countersunk holes. For one-off DIY projects, improvising may work fine. For more regular use, invest in bits purpose-built for countersinking in your chosen materials.
Improvising a Countersink Bit
If you don’t have a countersink bit handy and need to create a countersunk hole, there are some ways you can improvise one using tools you likely already have. Keep in mind that improvising isn’t ideal and can damage your tools if done incorrectly. But in a pinch, give these methods a try:
Use a Drill Bit
While a countersink bit is preferred, you can grind the tip of a standard drill bit at an angle to create a makeshift countersink. Use a bench grinder, Dremel, or metal file to grind about a 1/4″ section of the drill bit tip at a 30-45 degree angle. Grind evenly around the tip to form the beveled cutting edge. Go slowly and cool the drill bit in water to avoid damaging the temper. This isn’t as clean or precise as a real countersink, but can work.
Modify a Screwdriver
Some woodworkers grind down the shaft of a flat head screwdriver to an angled point to improvise a countersink. Clamp the screwdriver horizontally in a vise and use a grinder or file to taper the tip. Rotate it as you grind to taper all sides evenly. Again, keeping the tool cool is key to avoid ruining the heat treatment. You can then chuck this modified screwdriver into a drill to countersink holes as needed.
Use a Spade or Forstner Bit
While spade and Forstner bits are normally used for drilling, their angled tips and cutting edges can also countersink if used carefully. Chuck one of these bits into your drill and plunge just deep enough to create the desired countersink. Don’t apply too much pressure or drill too deeply, as this can damage the cutting edges. Make light passes until you get the countersink formed.
When to Invest in a Real Countersink Bit
For occasional DIY projects, using alternative methods to countersink holes can be perfectly fine. However, if you find yourself frequently drilling holes that require countersinking, it is worth investing in a dedicated countersink bit for the best results.
Real countersink bits, made of hardened steel, can achieve clean, precise countersinks, especially in hard materials like metal, hardwood, and tile. They cut a smooth, conical shape into the material as this article explains, unlike an angled drill bit which leaves scratches and uneven edges. The specialty flutes of a countersink bit also help clear chips and prevent clogging.
For applications like furniture building with visible screw holes, a real countersink creates a professional, integrated look. The holes allow screws to sit flush with the surface material, avoiding protruding screw heads. If your projects require a clean, flush finishing appearance, a true countersink bit is recommended.
Investing in a countersink set with different sized pilot drills can allow precise hole drilling and countersinking in one operation. For frequent use, the quality and durability of real countersink bits make them a worthwhile investment over improvised methods.


