Clay Crafting Essentials: A Beginner’S Checklist
Clay is a versatile, creative medium that allows crafters to make functional pieces like bowls and mugs, as well as imaginative sculptures and decorative items. The tactile, malleable nature of clay makes it a joy to work with. As your hands shape and mold the clay, you can bring your artistic ideas to life.
The process of crafting with clay engages the mind and exercises creativity. Each piece starts as a lump that holds endless possibilities. What will you make today – a fanciful creature, an abstract modern sculpture, or a set of matching nesting bowls? The only limit is your imagination. With practice, patience, and persistence, you can learn techniques to craft increasingly complex clay works. The sense of satisfaction from creating something beautiful and functional out of simple clay is unmatched.
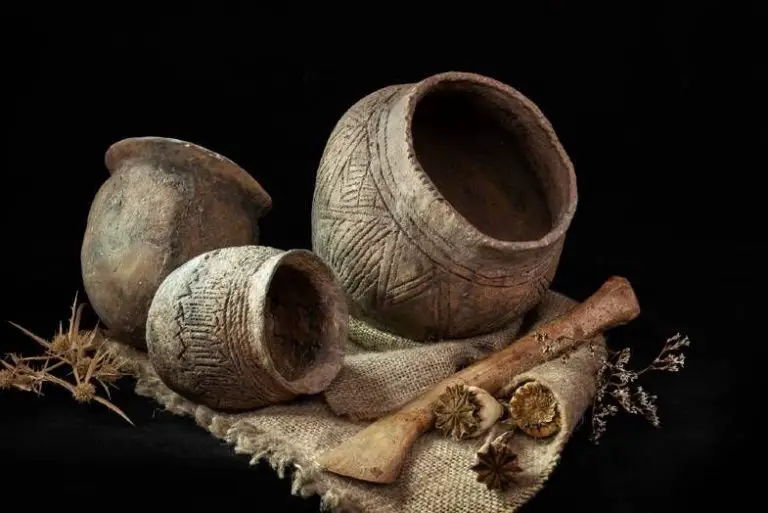
Clay crafting also provides a sense of connection. Humans across cultures and throughout history have shaped clay into both functional objects and artistic pieces. Working with clay allows you to tap into this long creative lineage. As you gain skill and share your clay creations, you can find community with other clay enthusiasts around the world.
Types of Clay
There are several major types of clay used for crafting projects, each with their own unique properties. According to this article, some of the most common are:
Earthenware – An air-drying clay, earthenware is very soft and easy to work with. However, items made with earthenware are fragile and porous unless glazed. Earthenware clays include pottery clay and air-dry clays like Crayola Model Magic.
Stoneware – Stoneware clays are stronger and less porous than earthenware. They are fired at higher temperatures to produce durable, watertight pieces. Stoneware is a popular choice for functional pottery and sculptures.
Porcelain – The purest clay, porcelain is fired at very high temperatures to become hard, dense, and smooth. Porcelain is commonly used for delicate tableware, figurines, and small sculptures. It’s more challenging to work with than other clays.
Beyond the major categories, there are specialty modelling and polymer clays. Each type has advantages and disadvantages when selecting clay for craft projects and sculptures. According to the Very Serious Crafts podcast, considering the desired finished product is key in choosing the right clay.
Essential Tools

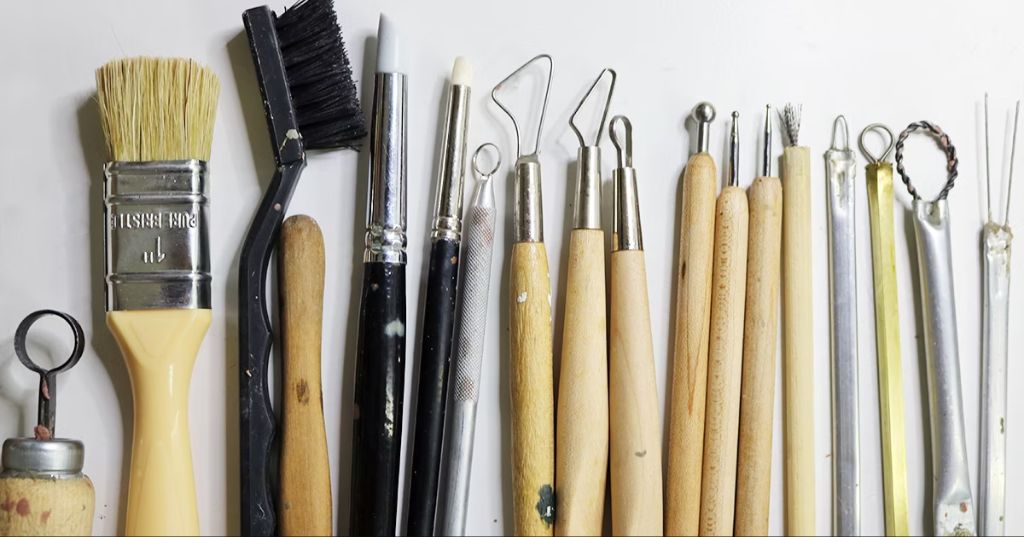
Modeling tools like ribs, loop tools, and shapers allow you to shape, smooth, and blend the clay (Source). Ribs can be made of wood, plastic, or metal and are used to compress and smooth the clay. Loop tools have a variety of looped wire shapes to create grooves and textures. Shapers have different shaped heads to sculpt smooth curves or organic textures.
Cutters like knives, fettling knives, and wands help cut, trim, and slice the clay (Source). Craft knives have interchangeable blades and allow for detailed cutting and trimming of the clay. Fettling knives have a curved blade perfect for smoothing rough edges. Clay cutters like wands have thin wire to slice through the clay.
Sculpting tools like stamps, molds, and texturing tools add interesting shapes, patterns, and details to the clay. Rubber stamps can imprint designs. Molds provide forms to shape the clay. Texturing tools like rollers, combs, cutters add tactile effects.
Setting Up Your Workspace
Having a well-organized workspace is crucial for successful and enjoyable clay crafting. Here are some tips for setting up your workspace:
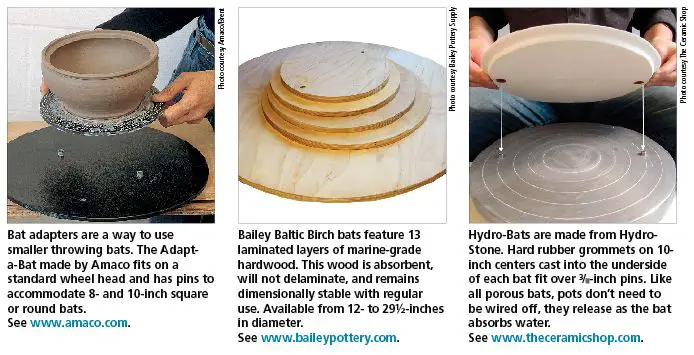
Make sure you have a sturdy, flat surface to work on. Avoid working on soft surfaces like bedding or carpet, as this can distort the clay as you work with it. A large table or countertop works well, or you can purchase a plastic craft mat (such as this self-healing cutting mat) to work on and easily transport.
Proper storage is key. Look for sealable containers like plastic bins or acrylic cases to store clay, tools, and unfinished projects. This keeps them clean and prevents clay from drying out.This Pinterest board has great storage solutions.
Ensure your workspace has good ventilation. Working with clay releases fumes, so open windows, use a fan, or consider a vent hood. Avoid breathing in clay dust by wearing a mask while sanding.
Allow enough space to work comfortably and spread out. Have separate areas for clay storage, tools, projects in progress, and finished pieces.
Keep a dedicated clean-up kit nearby with paper towels, baby wipes, and rubbing alcohol to easily wipe down tools and surfaces.
Safety Tips
When working with clay, it’s important to keep safety in mind. Here are some key tips:
Avoid breathing in clay dust by using proper ventilation. Opening windows or using a fan can help improve airflow and circulate dust away from you. Wearing an N95 mask is also recommended when sanding or carving clay to prevent inhaling particles [1].
Wear slip-resistant shoes to avoid falls, especially if you’ll be standing at a worktable for long periods of time. Clay residue on the floor can create slick conditions. Closed toe shoes are also a good idea when working with heavy materials or tools [2].
Take regular breaks when doing detailed clay work to avoid repetitive stress injuries. Use ergonomic tools and proper wrist support.
Keep an eye on cords and equipment so you don’t trip. Keep your workspace organized and free of clutter.
Clay Storage and Preparation
Proper storage and preparation of clay is essential for achieving the best results with your clay craft projects. Here are some key steps:
Make sure to properly seal unused clay in an airtight bag or container. This prevents the clay from drying out and becoming unusable. Slowly knead some vegetable oil into the clay before sealing for extra protection (Source 1).
Wedging or kneading clay before use is critical. It removes air bubbles and makes the clay consistency uniform. Roll clay away from you by pushing down and away, then roll back to you while putting your weight on it (Source 2). This wedging process makes the clay malleable.
Check clay consistency before crafting. The clay should be moist but not sticky. If too wet, let it sit exposed to air. If too dry, sprinkle water and knead it in. The properly prepared clay should be smooth, pliable, and have no cracks when bent or stretched.
Clay Crafting Techniques
There are several fundamental techniques to create objects from clay. Mastering these techniques will allow you to make a wide variety of pieces.
Pinch Pots
Pinch pots are a simple clay project for beginners. To make a basic pinch pot:
- Take a ball of clay and form it into a smooth sphere by rolling it between your palms.
- Poke your thumb into the center of the ball to create an indentation.
- Pinch the clay between your thumb on the inside and fingers on the outside, rotating as you work to shape the pot.
- Widen the opening and smooth the walls from the inside.
- Add decorations like textures or cutouts if desired.
Slabs
Slabs allow you to create flat pieces like tiles, plaques or wall hangings. To make a slab:
- Roll out an even sheet of clay with a rolling pin to your desired thickness.
- Cut the clay into shapes using cookie cutters or a craft knife.
- Decorate the surface by adding texture, carving, or attaching extra pieces.
- Join multiple slabs to build three-dimensional objects.
Coils
Coiling involves rolling ropes of clay and stacking them to build up 3D objects like vases, bowls and pots. Steps include:
- Roll clay into long strands like a snake or rope.
- Wind coils around a base, sealing each layer together with slip.
- Smooth the walls and joints using your fingers, a tool or a sponge.
- Cut away excess clay from the base and refine the shape.
Sculpture
Clay is a versatile material for free-form sculpture. Techniques include:
- Shaping figures by hand using fingers to pinch and blend the clay.
- Using basic shapes like balls, cones or coils as a starting point.
- Cutting away clay using loop tools, ribbon tools, or knives.
- Applying textures with stamps, found objects or modeling tools.
- Joining parts using slip and scoring to attach them.
Bisque Firing
Bisque firing is the first stage of firing in the clay crafting process. It is done at a lower temperature, typically between 1600-2100°F, in order to harden the clay and prepare it for glazing and decorating (Source). During bisque firing, any moisture is removed from the clay which will prevent cracking later on. The bisque firing process turns the clay from its soft, wet state into a hardened, porous state ready for the application of glazes and stains.
Here are some useful tips for bisque firing (Source):
- Make sure clay pieces are completely dry before loading them into the kiln to prevent cracking
- Place pieces with flat bases directly on kiln shelves and use stilts or firing posts for any pieces with narrow bases
- Stack pieces with at least 1⁄2 inch space between them to allow for air circulation
- Use a slow firing schedule, increasing temperature at 200-300°F per hour
- Hold the peak temperature (cone 05-06) for 30-60 minutes
- Shut off the kiln and allow pieces to cool down gradually inside
Following proper bisque firing techniques will help ensure your clay crafts come out strong, stable, and ready for the next steps in the firing process.
Glazing
Glazing is an important step for finishing air dry clay pieces and making them waterproof. While traditional glazing requires high heat from a kiln, there are products that can be used to “glaze” air dry clay and provide a protective seal.
There are several options for glazing air dry clay:
- Acrylic paint – Multiple thin coats of acrylic craft paint can provide color and seal the surface. Allow each coat to fully dry before adding the next.
- Acrylic sealer – Clear acrylic sealers like Mod Podge or Triple Thick Glaze provide a glossy, water-resistant finish when brushed over the surface.
- Epoxy resin – Applying a layer of epoxy resin will fully seal and add shine to the piece. This is best for jewelry, smaller items, or coatings over paint.
- Polyurethane – Water-based polyurethane can be used similarly to acrylic sealer for a protective topcoat.
- Nail polish – Using multiple coats of standard nail polish provides color and shine.
When glazing with acrylics, thin layers work best. Too much thickness can lead to cracking. Let paint fully dry between coats for the best durability. Clean brushes and avoid touching surfaces until completely set.
See this video for a tutorial on glazing air dry clay: Air Dry Clay – How to Glaze and Finish – YouTube
Final Firing
The final firing, also known as the second firing, is the last stage of hardening clay objects. This firing takes place after glazing at temperatures between 2200°F to 2300°F (1202°C to 1260°C).
The higher temperatures fully vitrify the clay body and melt the glazes onto the surface. This firing process hardens the glazed object, making it completely waterproof and ready for use. The final firing can last 8-12 hours or longer depending on the size of the kiln and objects inside.[1]
Final firings are usually done in high-fire electric, gas, raku, or wood-fired kilns that can reach higher temperatures. Firing abovecone 6 (2232°F/1222°C) requires special kilns and isnot recommended for beginners.
It’s important to follow thecorrect final firing schedulefor your clay and glazes. Firing too fast can cause defects like cracking, while underfiring prevents complete vitrification. Using a pyrometer, programmers, or cones helps monitor the progress and determine when firing is complete.
After firing, a 24-hour cooling period follows before opening the kiln. Once cooled, finished clay pieces can be removed and are ready for use or display.


