Clay Art For Kids: Fun And Simple Projects To Try Today
Clay art is a fun and engaging activity for kids of all ages. Working with clay allows children to express their creativity, develop fine motor skills, and gain a sense of pride and accomplishment in creating something with their own hands. In this article, we will cover some of the benefits of clay art for kids and provide step-by-step instructions for simple clay projects that children can make at home.
Clay is an extremely versatile art medium that can be molded, shaped, squished, rolled, cut, stamped, etc. Kids love the sensory experience of handling the clay. Projects made with clay also make great keepsakes because they can be dried and painted for display. Some of the clay art projects we will cover include making coil pots, sculpting animals, creating pressed flower jewelry, DIY magnets, handprint keepsakes, food jewelry, game pieces, and more.
Each section will provide a materials list, step-by-step photo instructions, as well as tips and tricks for working with clay. With minimal supplies needed, these clay art projects are fun activities that parents can do with their kids right at home. The finished pieces will bring joy and serve as cherished reminders of childhood creativity.
Supplies Needed
When getting started with clay art projects for kids, you’ll need a few basic supplies. The main ingredients are air-dry clay, clay sculpting tools, paints and brushes, and containers for water.
Air-dry clay is an easy modeling clay for beginners that doesn’t require baking or firing. Popular brands like Crayola Model Magic and Sculpey Air Dry Clay are non-toxic and ready to use straight from the package.
Clay sculpting tools like plastic modeling tools help shape, carve, and create texture in the clay. Look for kid-friendly sets with different shaped tips and edges. Tools with long handles are easier for small hands to grip.
Paints and brushes allow kids to add color and details to finished clay creations. Acrylic craft paints work well on air-dry clay. Paint brushes with thicker handles are better for little hands.
Containers for water are needed for rinsing brushes while painting. Small jars, cups, or bowls work well.
Making Clay Coil Pots
One of the most popular and satisfying clay projects for kids is making clay coil pots. This simple technique lets kids build up texture and shape using only their hands and some clay. Here’s how to make clay coil pots:
Start by rolling pieces of clay into long coils, about 1/4 inch thick. Encourage kids to roll the clay steadily between their hands to create long, tubular coils.
To form the pot, take one coil and lay it in a circle on your work surface. This will be the base. Then, take another coil and lay it on top of the base coil, gently pressing the seams together. Continue building up coils layer by layer, smoothing the seams together with your fingers as you go.
Let kids be creative with the pot shape – they can make short squatty pots or tall skinny vases. The coils can be laid uniformly or squeezed together in places to make organic, asymmetrical pots.
As the pot walls get higher, pinch the clay gently inward to avoid straight up-and-down sides. Kids can create texture by making wavy coils or indenting designs into the clay.
Once the desired height is reached, smooth any seams and let the pot air dry completely before painting or firing. Making coil pots helps develop fine motor skills and creativity in budding young artists!
Sculpting Clay Animals
One of the easiest and most fun clay projects for kids is sculpting animals out of clay. With just a few simple shapes like balls and snakes, you can create a wide variety of creatures. This is a great way to spark your child’s creativity and imagination. To start, show your kids how to roll clay into balls for the body and snakes for the tails, legs, necks, etc. Then they can attach these parts by wetting the clay slightly and pressing the pieces together.
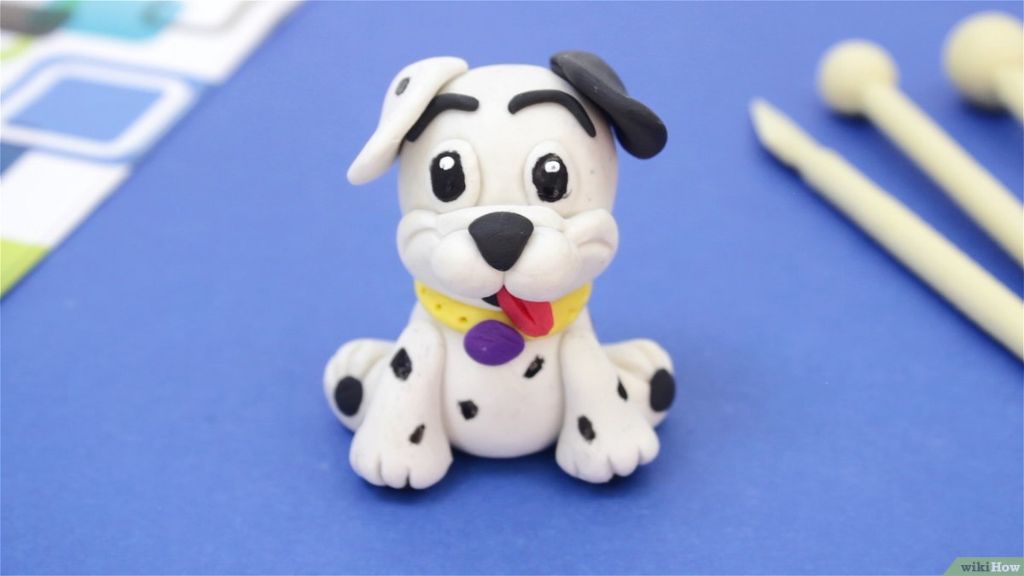
Encourage your kids to sculpt animals they know, like dogs, cats, bears, fish, birds, etc. Guide them on adding details like eyes, ears, noses, scales or feathers. They can reference photos of the real animals for a more accurate representation. Beyond real animals, let your kids’ imaginations run wild to create fantasy creatures like dragons, unicorns, mermaids and more. The possibilities are endless!
Add-ons like googly eyes, pipe cleaners, beads, pom poms and more can make the animal sculptures even more unique. Get creative with different colors of clay too. Let the clay animals air dry fully before playing. Sculpting clay animals helps develop fine motor skills, creativity and imagination in kids.
Source: https://teachingideas.ca/2018/08/26/clay-animals/
Pressed Flower Clay Jewelry
Pressed flower clay jewelry is a fun craft that allows you to preserve flowers and greenery in wearable art. The key is to choose thin, delicate flowers and leaves that will leave a clear imprint in the clay.
Start by gathering a selection of flowers and leaves. Lilacs, ferns, and grasses work beautifully. Lay them on a sheet of plain paper, then carefully cover with another sheet. Using your hands, gently press down to flatten the plant matter. Be careful not to shift or wrinkle the paper. Remove the top sheet and leaves carefully.
Roll out some clay about 1/4-inch thick. Gently press the dried flowers and leaves into the surface, taking care not to tear them. Use a craft stick or dull knife to help lift the plant matter away, avoiding pulling that could distort the imprint.
Once the impressions are made, use acrylic paint to add color. Brush over the surface, allowing the paint to collect in the imprinted areas. Remove any excess paint with a paper towel. Finish by adding jewelry findings like jump rings or bails. Clear glaze can be used to seal and protect the finished piece.
Pressed flower clay jewelry makes wonderful gifts and mementos. With the simple process of pressing plants into clay, you can create beautiful floral pendants, brooches, dishes and more. Experiment with different flowers and greenery for unique designs.
DIY Clay Magnets
Kids will love making their own custom magnets out of clay. It’s a fun project that allows them to add their own creative flair. Here are the steps:
Start by rolling out air dry clay to about 5mm thick, being careful not to make it too thin so it doesn’t become brittle (Source). Use cookie cutters or trace circular shapes to cut out flat clay circles. Add texture by pressing designs into the clay with tools like stamps, toothpicks, or popsicle sticks.
Bake the clay circles according to package instructions, usually at 225°F for 10-15 minutes. Allow to cool completely before gluing magnets onto the back with strong craft glue or E6000. Add a ribbon loop or keychain ring if desired. Let the glue cure fully before using.
Kids can make customized magnets for the fridge or give them as gifts by adding their own designs, textures, and shapes. It’s an easy clay project that boosts creativity.
Clay Hand Print Keepsake
Making a clay handprint keepsake is a fun craft that kids of all ages can do. Here are the steps to make a cherished handprint clay keepsake:
Start by making a baking soda clay dough. There are many simple clay dough recipes that use basic ingredients like baking soda, flour, and water. This type of clay air dries naturally.
Once the clay is made, have your child press their hand into the soft clay to make an imprint. Make sure to press down firmly so all the details of your child’s handprint are captured.
Allow the clay handprint to air dry completely. This may take 24-48 hours. As it dries it will harden.
Next, let your child paint their dried clay handprint. Acrylic craft paints work great. Encourage them to decorate it with their own unique patterns and designs.
Lastly, seal the painted clay handprint with a clear acrylic sealer spray. Once sealed it can be proudly displayed in your home as a treasured keepsake craft.
Clay Food Jewelry
Kids will love making their own wearable clay food creations. Some fun ideas are making clay pizzas, donuts, cupcakes, and other favorite snacks into pendants, charms, and earrings.
Start by taking a small piece of clay and shaping it into the desired food item. For example, roll coils to form a clay pizza slice or flatten a ball into a disk shape for a donut. Add texture and dimension by imprinting the clay with craft sticks, plastic utensils, or clay tools. Use acrylic paints or clay tints to add color and designs.
When the clay food charms are complete, they can be turned into jewelry. Attach a jewelry bail to the top before baking so the piece can be worn as a pendant. Or insert an earring post into the bottom of the clay shape before baking for instant earrings. Get creative with different jewelry findings to make necklaces, bracelets, rings, and more.
Making clay food jewelry is an easy craft that allows kids to work on their fine motor skills. The colorful results can be worn, displayed in their rooms, or given as gifts. Let their imaginations run wild creating their favorite tasty treats out of clay! For detailed guidance and inspiration, check out these sources: https://www.pinterest.com/sycochik21/polymer-clay-food/, https://tinyhandsonline.com/pages/how-i-make-it.
Clay Game Pieces
Making your own game pieces out of clay is a fun and creative activity for kids. It allows them to customize and personalize the pieces for their favorite board or tabletop games. Here are some ideas for making simple yet imaginative clay game pieces:
For chess or checkers pieces, roll the clay into balls for the pawns. Make the knights by shaping a ball and then pressing into it with your fingers to create a horse head and attaching a cylinder for the body. Form a ball with a flat top for the rooks, and make the bishops taller with a pointed top. Sculpt the king and queen pieces taller and more detailed. Let the pieces dry fully before painting them with acrylics.
Get creative by sculpting miniature monsters, creatures or characters for fantasy battle games. Make dragons, wizards, heroes, animals or anything else kids can dream up. Add details like scales, fur, claws, wings, armor or weapons to make each piece unique. Paint them in bright, bold colors. Let kids make up their own storylines and kingdoms for the figures to exist in.
Paint game pieces with fun patterns or designs using acrylic paint pens and markers. Try polka dots, stripes, swirls, faces or other decorative elements. Add some glitter or metallic accents for extra shine. Clear coat pieces after painting to protect the designs. Let kids make chess boards out of clay tiles too for a complete homemade game set.
Making clay game pieces allows endless room for imagination and personalization. Kids will love playing with objects they crafted themselves. Game nights with homemade sets become even more fun.
Conclusion
Clay is a fun, creative medium that provides many benefits for kids. The simple clay projects outlined in this guide, from sculpting animals to making jewelry, provide opportunities for kids to use their imagination and develop fine motor skills. As they manipulate and shape the clay, kids also gain sensory experience through touch and sight. The process of designing clay art boosts creativity, self-expression and problem-solving. Clay is an open-ended art material that allows kids to experiment, make mistakes, and keep trying until they achieve the desired result. So encourage your kids to get their hands messy and unleash their inner artist with clay! With just a few basic supplies, clay opens up a world of possibilities for kids to learn, grow and have fun being creative.