Advanced Clay Sculpting Secrets Unveiled
Clay sculpting is an ancient art form that dates back over 25,000 years ago to some of the earliest human civilizations, with evidence found in cultures across the world from Mesopotamia to China to the Americas. Clay’s malleability and availability has made it a popular medium for artistic expression throughout history. From small decorative works to monumental sculptures, clay allows artists to shape artwork by hand and breathe life into their creative visions.
Advanced clay sculpting techniques build upon the basic methods of pinching, coiling, and slab construction. Master sculptors employ refined skills like texturing, armature building, mold making, slip casting, and mixed media to create dramatic and complex works of art. This guide will provide an overview of essential techniques needed to take clay artistry to the next level.
Tools and Materials
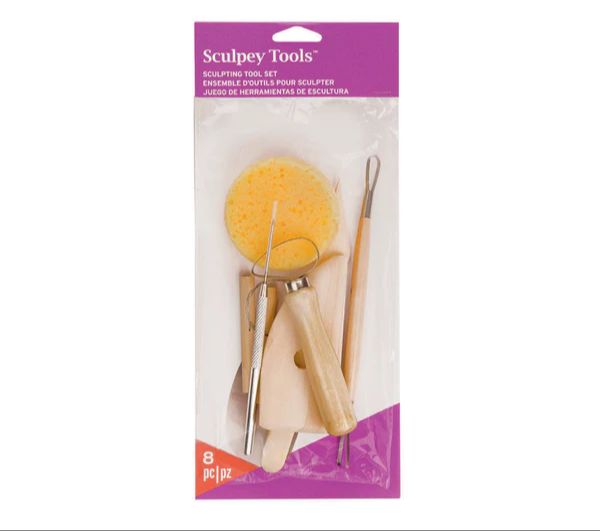
Clay sculpting requires a variety of specialized tools to shape, carve, and refine the clay. Sculptors use metal sculpting tools like ribbon tools, loop tools, modelling tools, carving knives, and clay shapers to create textures, details, and shapes in the clay.[1] The type of sculpting tool used depends on the desired effect. Ribbon tools are ideal for smoothing clay and creating long flowing lines, while loop tools excel at indentations and textures.
The most common types of clay used for sculpting are polymer clay, ceramic clay, paper clay, and plasticine modeling clay. Polymer clay is lightweight, versatile, and cures in a home oven. Ceramic clay requires higher firing temperatures but can be very durable for outdoor sculptures. Paper clay is made from cellulose fiber and dries lightweight yet strong.[1]
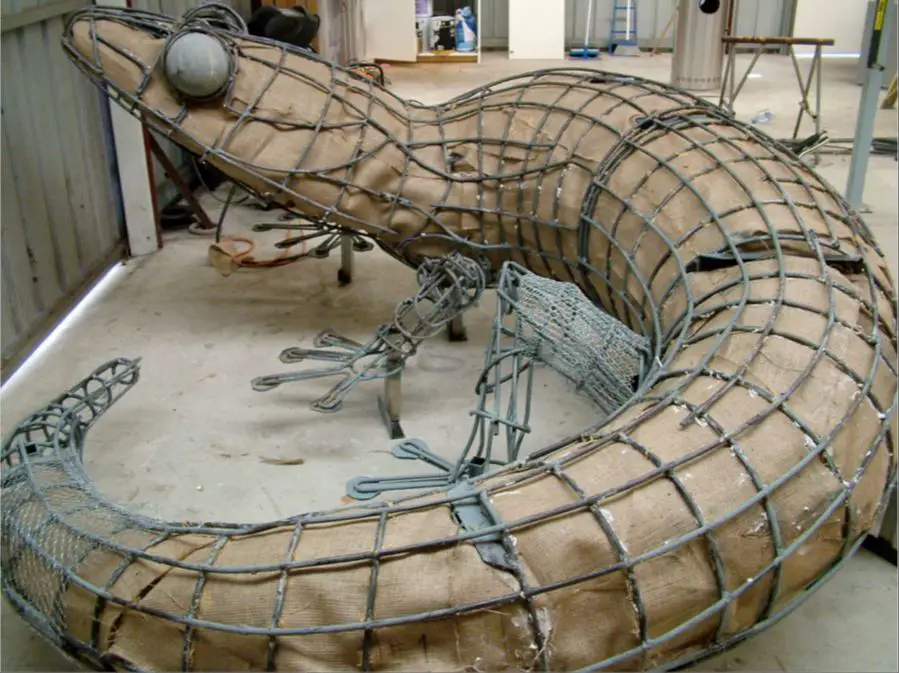
Armatures or wire frames provide structure and support for large or complex clay sculptures. Armatures are often made from thick wire, rolled aluminum mesh, wood, or other materials to create a rigid base before adding and shaping the clay.
Shaping and Forming
To craft advanced sculptures, shaping and forming the clay properly is essential. Rather than basic shapes like spheres and cylinders, focus on sculpting intricate forms like hands, faces, and realistic fabrics. This requires an understanding of anatomy and how to manipulate the clay to capture natural shapes and contours.
For sculpting hands, start with a basic mitten shape then refine the fingers, palms, and knuckles for realism. Use wooden or metal tools to define fingerprints and veins (1). Faces are also challenging – build up the features gradually and use calipers to measure and maintain symmetry. Adding small details like wrinkles and pores brings portraits to life.
When dealing with drapery and clothing, create the clothing folds before the body form for a natural look. Use slender tools to etch in fine details of trims and seams (2). Always keep the clay moist as you work to prevent cracking and fragmentation.
Avoid rushing the shaping process or sculpting without reference photos, as this leads to disproportionate forms. Take time to refine and perfect each element. With practice and care, intricate professional-level sculptures can be achieved.
(1) https://www.sculptureatelier.com/blog/how-to-start-sculpting
(2) https://www.youtube.com/watch?v=bJNE1CK4dKc
Textures and Details
One of the keys to creating realistic and visually interesting clay sculptures is mastering textures and fine details. Here are some techniques professional sculptors use to make their clay works come alive:
Skin Textures
For lifelike skin textures, use small loop tools to imprint delicate pore patterns. You can also stipple the surface using the back of a paintbrush. Lightly smooth over fingerprints for a polished look. Adding a wash of diluted acrylic paint creates depth and brings out the details.
Hair Textures
For sculpted hair, roll small snakes of clay and apply them strand by strand using slip. Use loop tools to add grooves and indentations. For short hair, imprint clay with a textured sponge or natural sea sponge. Use various thicknesses and roll directions to add realism.
Fabric Textures
Fold and drape actual fabric over the sculpted area to use as a pattern. Use loop tools, needle tools, or engraving tools to etch convincing fabric grains and folds into the clay. For smooth fabrics like silk, gently roll over the surface to soften textures.
Intricate Details
Add fine details like wrinkles, pores, strands of hair, and intricate patterns to bring your sculpture to life. Take your time on these final flourishing touches to elevate the realism. Let the details tell the story of your sculpture.
Painting and Finishing
After a clay sculpture has been sculpted and fired in a kiln, the next step is often painting and finishing. This process applies color, shine, protection and brings out details in the final sculpture. There are several options when it comes to painting and finishing clay sculptures:
– Acrylic paints are a versatile option for painting fired clay. Acrylics adhere well to ceramics and provide a bright, glossy finish. Multiple thin layers of acrylic paint can be built up for coverage and depth of color.
– Oil-based paints are another paint option for fired ceramics and provide rich, vibrant colors. However, oils take much longer to fully cure and harden compared to acrylics.
– Glazes made from mixtures of silica, fluxes and colorants can be used to coat clay sculptures before the final firing. Glazes melt and fuse with the clay body during kiln firing to create a shiny, glass-like surface.
– Clear finishes like polyurethane, varnish or lacquer can be used as a final sealing layer over acrylic or oil paints. This adds protection and sheen to the painted surface.
– Waxes provide a smooth satin finish and protective coating for fired clay. Wax is easy to apply and buff out.
– Firing unglazed clay sculptures in a kiln (called naked raku firing) can create beautiful smoky effects from the firing process itself.
Proper sealing and finishing is important for protecting clay sculptures and enhancing their visual appeal through gloss, color and texture. A combination of painting, glazing and protective coatings allow clay artists to achieve their desired look.
Large Sculptures
When creating large clay sculptures, there are some special considerations to keep in mind regarding structural integrity and logistics.
Supporting Weight
As a sculpture gets bigger, the weight of the clay can cause parts to sag or even collapse under its own weight, especially as the clay dries and loses its plasticity. Using an internal armature is crucial for supporting the weight of large sculptures.
Armatures
An armature provides internal support for the clay and distributes the weight. It is usually made from wire, wood, plastic or other rigid materials. The armature should be customized to the particular shape and pose of the sculpture. Long protruding limbs and overhangs need extra support brackets. The armature needs to be sturdy enough to hold the weight of the clay without bending or breaking.
Drying Large Works
As moist clay dries, it shrinks. With large sculptures, the shrinkage can lead to cracks and damage. Drying large works gradually, at moderate temperatures, helps minimize cracking. Allow thicker areas to dry partially before adding more layers. Regular misting and wrapping in plastic during the drying process also helps reduce cracking.
Firing and Transporting
Firing large sculptures may require special accommodations from your kiln service. Transporting unfired pieces to the kiln can also be challenging depending on size and weight. For the firing, large pieces may require extended hold times at peak temperatures or specialized firing cycles. Moving finished fired sculptures also requires care to avoid cracking or breaking. Consider final destination and display method when designing large works.
Portrait Sculpting
Capturing a lifelike portrait in clay requires carefully studying and reproducing the unique facial features and proportions of your subject. Pay attention to subtle angles and landmarks on the face to accurately depict the eyes, nose, lips, and overall head shape.
When sculpting eyes, note the precise shape and contour of the eyelids, and the form of the eyeballs beneath them. The nose is central to facial identity, so meticulously shape the nostrils, bridge and tip. Study the philtrum, Cupid’s bow, and volume of the lips to recreate a faithful mouth.
Capturing realistic hair in clay begins with forming the overall shape and flow, then refining strands and texture. Consider adding a wire armature to support long, elaborate hairstyles. Take care sculpting around delicate areas like ears and eyelashes.
The human head turns and tilts from every angle, so continually study your subject from multiple viewpoints. Maintain proper proportions and anatomy as you rotate the portrait. Regularly step back to check that all the facial features align and capture the subject’s true likeness.
Animal Sculpting
Capturing the anatomy, movement, and expressions of animals in clay can be quite challenging. It’s important to closely study the skeletal and muscular structure of the animal you wish to sculpt in order to accurately depict its form. Pay attention to how muscles flex and stretch as the animal moves. Observe videos and photos of the animal walking, running, and resting to understand its motion.
When sculpting fur or feathers, work in layers, using various sculpting tools to create flowing, textured effects. Consider the direction and flow of fur or feathers over the body. For facial expressions, study reference photos showing different emotions and states, like growling, yawning, or alertness. Carefully sculpt the eyes, brow, mouth, nostrils and other facial features to capture a lifelike expression.
It’s helpful to find anatomical drawings and detailed photos of the specific animal to use as reference. Sculpting a realistic animal requires close observation and attention to detail. Work slowly and methodically to accurately portray the proportions, anatomy, and essence of the animal in clay.
For further guidance, see these resources:
https://www.lessonplanet.com/search?keywords=sculpting+animals+in+clay
https://www.lessonplanet.com/search?keywords=clay+animals
Abstract Sculpting
Abstract sculpture focuses on shapes, forms, textures, and colors rather than representing real-world objects or figures. The artist uses non-representational techniques to create intriguing compositions that evoke emotions and invite interpretation. Clay is an ideal medium for abstract sculpture due to its versatility and ability to be molded into any shape.
When creating abstract sculptures, it’s important to think about rhythm, balance, and contrast. Repeating shapes and textures creates movement through the piece. Balancing large and small forms provides visual stability. Contrasting smooth and rough textures adds visual interest. The interplay of these elements results in dynamic, thought-provoking works.
Some ideas for abstract clay sculptures include:
– Stacking or interlocking clay coils into towers or walls
– Making geometric slabs or shapes that connect in unusual ways
– Sculpting organic, flowing forms that have no identifiable source
Abstract sculpture allows complete creative freedom. The focus is on sculptural qualities rather than subject matter. Through innovative use of form, line, mass, color, and texture, the artist can convey emotions ranging from serenity to chaos. With some planning and experimentation, clay can become the perfect medium for meaningful abstract art. (Source)
Expert Tips and Tricks
Advanced clay sculptors recommend always keeping a spray bottle of water handy while sculpting. A light misting of water helps smooth and blend the clay. Let the moisture penetrate for a few minutes before continuing to sculpt. Slip made from the same clay can also help surfaces adhere and blend together smoothly.
When sculpting delicate extremities like fingers, toes, tails, or ears, use wire armatures for extra support. Roll a small amount of clay around the wire to build up the form. This prevents breaking or sagging.
Allow adequate drying time for large sculptures. Dry from the inside first by occasionally blowing air into cavities with a straw. Avoid overly thick sections which can crack while drying. If cracking occurs, fill the seam with liquid slip.
Study human and animal anatomy to accurately depict muscles, bones, and proportions in figurative work. Reference photos can help capture unique gestures and personality.
Consider the viewing angle when sculpting portraits. The face can look very different from the front versus the side. Thin sharp tools excel at refined details like wrinkles and pores.
Abstract sculpting allows complete artistic freedom. Let the clay take shape organically without a planned outcome. Rotate frequently and analyze from all sides.
Protect finished sculptures from moisture and direct sunlight which can deteriorate clay over time. Apply a clear acrylic sealer for added durability.