Advanced Sculpting Strategies For Clay Artists
Clay sculpting is an ancient art form that has been practiced for thousands of years across many cultures. Evidence of early clay sculptures has been found dating back to 25,000 BCE, with clay figurines and pots being created as early as the Neolithic period according to this article. Clay is an incredibly versatile and malleable material that allows artists to craft detailed sculptures and expressive works.
The history of sculpting with clay can be traced back to some of the earliest civilizations. Primitive fired clay figurines were created in ancient Mesopotamia, Egypt, Greece, and China. Clay was an accessible material for early cultures, and it could be easily shaped by hand without specialized tools. As civilizations advanced, pottery wheels and kilns allowed artists to perfect their clay shaping and firing techniques.
Today, clay remains a popular choice for sculptors because of its affordability, workability, and responsiveness to the artist’s touch. It can be molded, carved, scraped, joined, and transformed in endless ways. The appeal of clay is its potential to rapidly render an artist’s vision into three-dimensional form. Many contemporary sculptors are drawn to clay as their primary medium because of this unique tactile engagement with the material.
Types of Clay for Sculpting
There are two main types of clay for sculpting – oil-based clays and water-based clays. Oil-based clays like polymer clay and plasticine are versatile, reusable, and don’t require firing. They are great for detailed sculptures, jewelry making, and small figurines. However, oil-based clays can be more expensive and don’t work as well for large scale sculptures according to this source.
Water-based clays like earthenware clay and stoneware clay require drying and firing but can be used to create large, durable sculptures. These clays are cheaper and can be found at most art supply stores. The downside is they require more equipment, firing knowledge, and planning compared to oil-based clays.
When choosing clay, consider the project goals. For small scale figurines and decorative pieces, oil-based polymer or plasticine clays allow for detail and reuse of extra clay. For large sculptures, busts, or abstract shapes, water-based clays hold their form better according to this overview. Pick a clay that aligns with the sculpting techniques required.
Sculpting Tools and Equipment
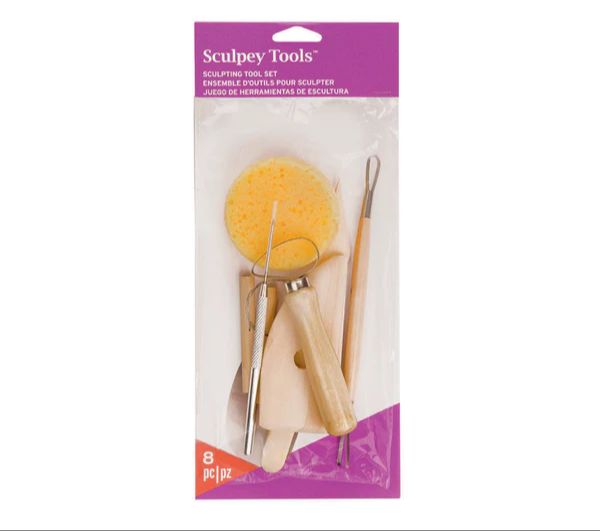
Clay sculpting requires having the right tools to create intricate details and textures. Here are some essential tools every clay sculptor needs:
Essential Sculpting Tools:
Clay loop tools allow sculptors to smooth surfaces and blend clay by scraping and dragging (source). Metal ribs make it easy to scrape away clay and create patterns and textures. Sponge smoothing tools help soften surfaces. Standard sculpting tools like wooden modeling sticks, plastic sculpting knives, and metal wire loop tools are useful for shaping, smoothing, cutting, and detailing clay (source).
Specialized Tools:
Needle tools create pores, wrinkles, and other fine details in skin and textures. Clay shapers have rubber tips for smoothing without scratching the clay. Dotting tools make consistent dots for texture. Cutting wire is useful for slicing through clay to remove sections or cut openings.
When sculpting intricate human forms, specialized tools like wood anatomy tools allow shaping muscles and contours. Aluminum callipers aid proportion. Brass hooks help define veins and tendons.
Setting Up Your Studio:
Good lighting, adequate work space, and proper storage for tools and clay are essential for an efficient studio. Use towels or drop cloths to protect work surfaces. Shelves nearby provide easy access to sculpting tools. A water bucket or spray bottle prevents clay from drying out.
Sculpting Techniques
There are several key techniques that clay artists use when sculpting with clay. Three of the most common techniques are coiling, slab building, and sculpting solid figures.
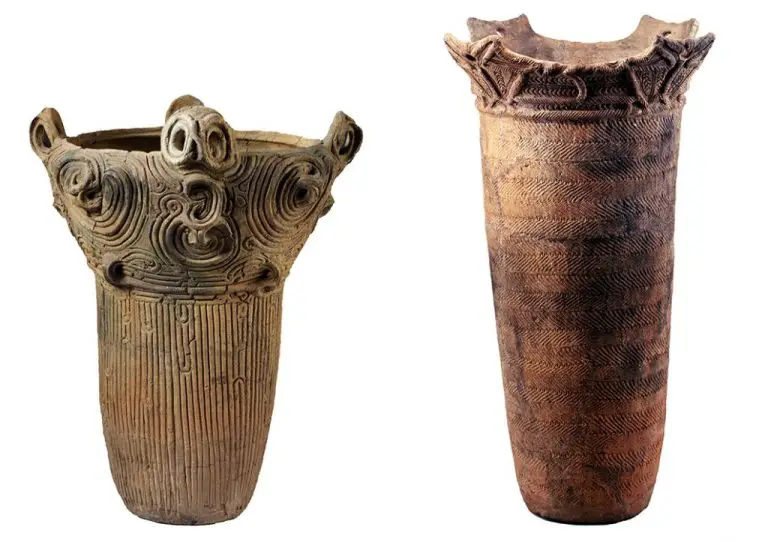
Coiling involves rolling out “snakes” of clay and stacking or attaching them together to build up a sculpture. This technique works well for making tall, hollow sculptures like vases or jars. Coiling allows excellent control over the shape and texture of the sculpture. It also avoids having thick, hard to dry interior sections. See this tutorial for more on coil building sculpture.
Slab building involves rolling out flat “slabs” of clay and cutting shapes that can be assembled into a sculpture. The slabs can be embellished with texture and attached using slip. Slab building is great for making flat or shallow sculptures. It’s also useful for pieces with straight lines and geometric shapes.
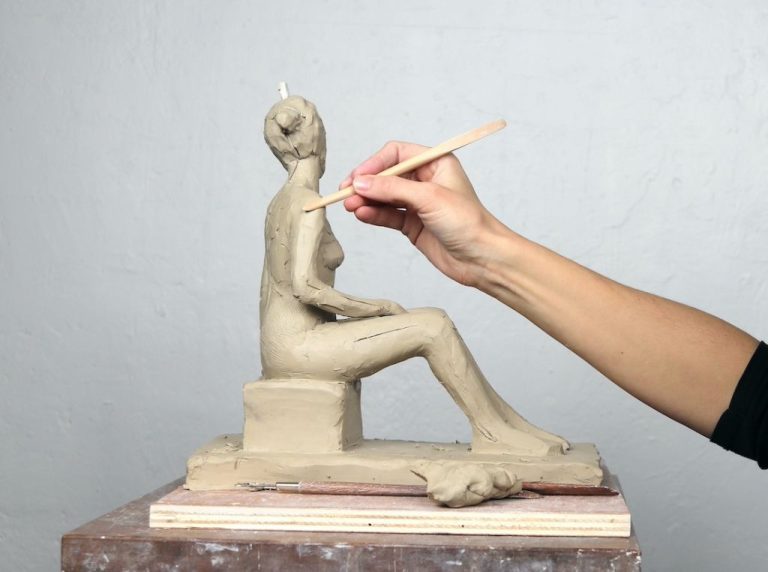
Sculpting solid figures is ideal for creating realistic human or animal forms. The sculpture starts as one solid piece that is shaped using fingers, basic sculpting tools, or advanced power tools. Careful attention must be paid to structural support when sculpting large solid figures. An armature or solid base is often necessary. Solid sculpting allows direct contact for finest detailing.
Clay artists choose techniques based on the desired end sculpture. For example, intricate relief sculpture is best achieved through slab building. Abstract organic shapes may be easiest to create using coiling. And familiar representational subjects like portraits and still lifes are often sculpted as solid figures.
Sculpting the Human Figure
One of the most challenging, yet rewarding, subjects to sculpt is the human figure. Capturing the anatomy and proportions accurately takes patience and practice. Here are some strategies for sculpting realistic human figures in clay:
Start by studying human anatomy, focusing on the skeletal and muscular structure. Pay attention to the proportions and relationships between different body parts. Having reference photos or a live model to observe is extremely helpful. As you sculpt, refer frequently to your reference to ensure accuracy.
When sculpting heads, carefully sculpt the underlying skull structure before adding facial features. Pay close attention to the eyes, nose, mouth, and ears, as these small details convey emotion and likeness. Take care when sculpting hands and feet, as these areas require intricate work to depict anatomy realistically.
Build up the forms gradually using additive clay sculpting techniques. Use wire armatures for arms, legs, and other extended body parts to provide internal support. Smooth and blend the clay to create natural, flowing curves over the musculature. Work systematically from large forms to small details.
Aim to convey weight, balance, and a sense of living energy within the figure. Subtle touches like flexed muscles and veins can enhance realism. Be patient and make small refinements until the proportions and anatomy feel accurate. Reference photos are invaluable for checking your work.
With diligent practice and observation of human anatomy, your skills for sculpting figures in clay will steadily improve. Celebrate the uniqueness and beauty of the human form in your sculpture.
Source: https://www.sculptureatelier.com/blog/how-to-sculpt-the-figure
Sculpting Animals
When sculpting animals in clay, it’s important to have a strong understanding of animal anatomy. Studying muscle structure, skeletal forms, and surface textures of fur, feathers, or scales will help artists capture a realistic likeness in their clay sculptures.
Some key tips for sculpting animal anatomy include:
- Study references of the animal from multiple angles to understand its forms.
- Start with basic shapes like spheres, cylinders, and cubes to establish the underlying armature.
- Layer on muscles and build up mass carefully.
- Pay attention to proportions and unique details of each animal’s physique.
- Consider weight and how gravity impacts the look of fur, feathers or loose skin on the animal.
Capturing textures like fur, feathers, or scales in clay can add realism. Some techniques to try include:
- Use various clay sculpting tools to etch in grooves or patterns for scales, feathers, or fur.
- Roll small clay coils and adhere them to build up a furry texture.
- Drag clay scraping tools lightly across areas to create subtle stripes or feather patterns.
- Consider baking specialty clays like woolly clay for an integrated fur-like texture.
With practice and close observation of animal references, clay artists can bring many realistic creatures to life in sculpture form.
To learn more, see this reference on constructing animal armatures in clay: How to make Animals using clay armatures.
Abstract Sculptures
Abstract sculptures allow clay artists to explore shape, form, texture, and color in creative ways not bound by realism. While realistic sculptures aim to faithfully depict figures, objects, or scenes, abstract sculptures use non-objective forms to express feelings, ideas, and emotions. There are many techniques clay sculptors can use to create compelling abstract pieces.
Working abstractly involves letting go of recognizable forms and focusing on principles of design like line, rhythm, balance, and contrast. Sculptors can assemble abstract shapes intuitively, or begin with a rough sketch to map out the composition. Geometric shapes like circles, rectangles, and triangles can be arranged into interesting configurations. Organic, free-flowing lines and forms also work well. Combining geometric and organic shapes creates tension and interest.
Texture adds visual richness and tactile appeal to abstract sculptures. Rollers, stamps, and modeling tools imprint patterns onto the clay surface. Objects like netting, burlap, or bubble wrap can also transfer texture when pressed into the clay. Using slip trailing, sgraffito, or mishima techniques adds color and design into textured areas.
Abstract sculptures may incorporate some representational forms, but focus on simplifying, distorting, or fragmenting them. Subtractive techniques like carving or cutting away realistic elements leaves behind intriguing, semi-abstract shapes. Assemblage sculptures can juxtapose found objects and clay components in thought-provoking, unconventional ways. Finding balance between abstraction and realism allows room for personal expression and interpretation.
https://www.ideelart.com/magazine/art-techniques
With an emphasis on form over function, abstract sculpture offers complete freedom to clay artists. Learning to work loose, take risks, and tap into imagination allows for the creation of unique, evocative abstract artworks.
Finishing and Polishing
Once your clay sculpture is complete, you’ll want to take steps to smooth, refine, and polish it to achieve a professional finished piece. There are several techniques clay artists can use to finish sculptures.
For smoothing imperfections, a basic sculpting tool like a rounded modeling spoon can gently smooth over fingerprints, rough edges and uneven surfaces. Using a soft dry brush can also help brush away debris and refine details. For a perfectly smooth look, use fine grit sandpaper or a clay bar to gently buff the surface. Dampening the sculpture slightly can help the sanding. Be cautious not to over-sand or you may remove important sculpted details.
To achieve a polished look, liquid acrylic polishes designed specifically for polymer clay can be painted on in thin layers and buffed with a soft cloth as they dry. This will create a beautiful smooth sheen. Pastes with beeswax can also be rubbed into the surface and buffed into a satin polish. Work in small sections and buff thoroughly. Avoid liquid polishes prior to baking, as they can interfere with the curing process.
Take time and care with finishing techniques for the most refined professional sculptures that will stand the test of time.
Firing and Baking Clay Sculptures
Properly firing clay sculptures is essential for hardening and preserving the artwork. There are some key steps in preparing pieces for firing:
Make sure clay sculptures are thoroughly dried before firing. Air drying for several days is ideal, but accelerated drying with a heat lamp or hairdryer can also work. Bone dry clay is necessary so sculptures don’t explode from trapped moisture in the kiln.https://www.instructables.com/Ceramic-Sculpture-for-the-Absolute-Beginner-Firing/
Choose an appropriate firing temperature. For earthenware clays, a bisque firing temperature of around 1800°F is typical. Stoneware clays need higher temps up to 2200°F. Match the type of clay to the proper heat range.
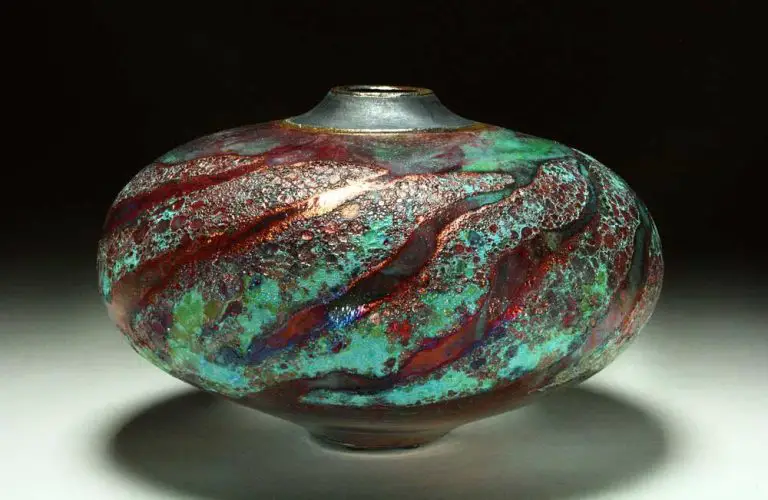
Consider glazing or staining sculptures before the bisque firing for color. Glazes and stains work by melting and fusing with the clay at high temperatures. Washes can also be applied after firing for different effects.
Use a kiln or make your own firing pit for heating sculptures evenly. Monitor the temperature and firing schedule closely. Cool slowly once complete.
The firing process hardens and seals the clay permanently. Take time to properly prepare, fire, and cool sculptures to bring out the best qualities in the finished artwork.
Displaying and Selling Clay Sculptures
Once your clay sculpture is complete, you’ll want to display it properly to showcase your artistic talents. Here are some tips on presenting your clay sculptures, entering art competitions and shows, and selling your artwork online or through galleries.
Presenting Sculptures
Clay sculptures can be displayed on shelves, pedestals, or in glass cases. Neutral colored pedestals work well to avoid distracting from the sculpture. Glass shelves or cases help protect the sculpture while still allowing it to be viewed from all angles.
Pay attention to lighting when displaying clay sculptures. Overhead spotlights or track lighting can cast shadows and create visual interest. If placing the sculpture near a window, be sure the sunlight won’t cause fading over time.
Consider small background elements like drapes or greenery to complement the sculpture without overwhelming it. Simple backgrounds keep the focus on your artwork.
Entering Art Competitions and Shows
Entering your clay sculptures in local art shows or competitions is a great way to gain exposure. Look for upcoming juried art shows in your area that you can submit entries to. Be sure to carefully pack and transport your sculptures to prevent breakage.
For major national shows like NCECA or Sculpture Objects Functional Art and Design (SOFA), you’ll need to submit clear photographs of your work and a description. Getting accepted to prestigious shows can significantly boost your reputation.
Awards and prizes at art shows provide validation of your skills. As you accumulate achievements, update your artist biography and portfolio.
Building an Audience and Selling Sculptures Online
These days, having a robust online presence is key for selling your artwork. Start by setting up a website to showcase your clay sculptures and artistic background. Update it frequently with new pieces, photos from shows, and a blog.
Promote your site and sculptures by networking on art forums and social media. Facebook, Instagram and Twitter allow you to connect with potential collectors and share images of new works. Consider running small social media ads to expand your audience.
You can also sell clay sculptures directly through your website using ecommerce platforms like Etsy or Squarespace. Take high quality photographs and write intriguing descriptions to attract buyers.
Your online presence and reputation make a significant impact on your ability to sell your artwork and make a living as a professional clay sculptor.