Clay Art Innovations: Fresh Ideas For Your Creations
Clay is one of the oldest and most versatile art mediums, with evidence of clay figurines and vessels dating back over 25,000 years. Clay’s plasticity allows it to be shaped into endless forms, both functional and decorative. When fired at high temperatures, clay undergoes an irreversible chemical change and becomes a ceramic material that is durable, water-resistant, and suitable for extended use.
Ceramics and pottery are some of the most enduring and widespread art forms found across human cultures. From ancient Greek pottery to Chinese porcelain, to Native American pottery, clay has been used not just for utilitarian wares but also as an expressive artistic medium. Contemporary ceramic artists continue to push the boundaries of what can be created with this elemental material.
This article will explore fresh techniques and innovative approaches for creating original clay artwork, sculptures, pottery, and more. Whether you’re just starting out or looking to add new skills, this guide offers inspiration and practical tips to help advance your clay artistry.
Sculpting Techniques
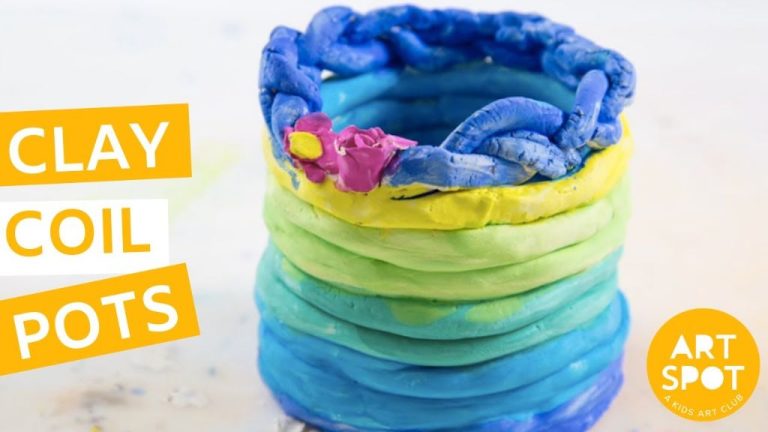
There are two primary methods for creating clay sculptures: handbuilding and wheel throwing. Handbuilding involves manipulating the clay directly with your hands and tools to mold it into the desired shape. This method allows for asymmetrical forms and facial expressions. Common handbuilding techniques include pinching, coiling, slab construction, and sculpting according to experts. Wheel throwing is done on a potter’s wheel and involves centering the clay on the wheel head and using your hands to shape it as it spins. This creates symmetrical forms. Wheel throwing requires practice to gain dexterity and a feel for the clay. While handbuilding may be easier for beginning sculptors, combining the two methods allows for more creative freedom in your clay art.

Texturing Clay
Texturing is an important part of sculpting with polymer clay, as it adds interest, realism, and visual appeal to a piece. There are many techniques for texturing polymer clay. Some of the most popular include:
Impressing involves pressing items into the clay to leave an imprint behind. Things like lace, netting, burlap, leaves, seashells, and textured fabrics work well for this. Impressing adds interesting patterns and textures to the clay surface.
Incising involves using tools to carve lines or patterns into the clay. Clay sculpting tools like loop tools, ribs, or chisels can create lines and grooves. Items like knitting needles, forks, combs, or toothpicks also work for incising. This can add a handmade, artisanal look.
Piercing is poking holes into the clay surface, either in random patterns or precise shapes. A clay piercing tool works best, but a knife, skewer, or thick needle can also pierce the clay. This creates interesting dot and hole patterns.
Sgraffito involves scratching through a top layer of clay to reveal a different colored clay underneath. A clay scraping tool works well for sgraffito. This creates color contrast and a hand-drawn look when done in intricate patterns.
Sources:
https://m.facebook.com/shoponlinekhin/posts/2194271187537296/
Glazing and Firing
Glazing clay is the process of applying a glass coating to ceramic ware before it goes into the kiln to be fired. It helps keep the clay wares, like cups, plates and sculptures, impermeable to liquids and adds beautiful colors or designs.
There are several types of glazes including gloss, matte, crystalline and underglaze. Gloss glazes are smooth, shiny and waterproof. Matte glazes are not shiny and are made by adding minerals that produce micro crystals that scatter light. Crystalline glazes contain additives that form crystals as the glaze melts in the kiln, creating gorgeous designs and textures. Underglazes are applied first, then painted over with clear glaze to create colorful designs under the surface. Glazes can be brushed, dipped, poured or sprayed onto ceramic pieces.
Firing is the process of heating clay ware to high temperatures in a kiln to fully mature it. Different clay bodies require different temperatures for firing, but most stoneware clays fire between 2,200°F and 2,400°F. Firing causes chemical changes in the clay and glaze that permanently harden and finish the piece. When firing glazed pieces, the glaze and clay body must be compatible and have similar firing temperature requirements. The firing process involves slowly raising the temperature to allow the clay and glaze to mature properly, followed by a period of soaking at maximum temperature and then gradual cooling.
Proper glazing and firing techniques are critical for creating durable, food-safe and beautiful ceramic art. With the right glazes, firing schedule and compatible clay body, you can achieve stunning results for your clay creations. Just be sure to follow specific glaze manufacturer instructions for application and firing.
(Sources: Process and Perspectives in Clay, Pottery blog posts)
Mixing Media
One innovative way to take your clay art to the next level is by mixing in other media besides clay. Adding items like metal, fabric, found objects, and more can create interesting textures, colors, and dimensional elements in your clay sculptures. According to Etsy, mixed media clay art has become an increasingly popular technique among clay artists looking to make their work stand out.
Some ideas for mixing media into clay art include:
- Pressing small metal objects like beads, charms, or jewelry into soft clay before firing
- Using pieces of lace, burlap, or other fabrics to add texture by impressing them into the clay surface (from https://www.etsy.com/market/mixed_media_clay_art)
- Incorporating found objects like sticks, shells, or bottle caps into a clay sculpture
- Painting fired clay pieces with acrylics, watercolors, or other paints for an extra pop of color
When mixing media, make sure any items are safe to fire if the piece will be kiln-fired. Some artists glue items on after firing for more flexibility. The possibilities are endless when you break free from pure clay and start experimenting with mixed media techniques!
Making Molds
Molds allow you to reproduce clay pieces efficiently. There are several options for making molds:
Plaster molds – These molds are made by pressing clay into plaster that has been molded into the desired shape. The plaster soaks up moisture from the clay, allowing you to remove the clay original. Liquid clay can then be poured into the plaster mold and allowed to harden.
Commercial molds – Many craft stores sell flexible rubber or silicone molds in basic shapes like bowls, vases, and tiles. Press your clay into these molds to easily reproduce the shape.
Slip casting – This involves pouring liquid clay slip into a porous plaster mold. The plaster absorbs water, forming a layer of hardened clay on the interior surface. Once thick enough, the excess slip can be poured out to leave a finished clay piece.
Choosing the right mold material is crucial. Porous materials like plaster work best for slip casting. Non-porous materials like silicone are ideal for molding solid pieces. Research your options to find the best mold material and process for your project.
Sculpting Tools
Having the right sculpting tools is key to working with clay effectively. There are a variety of tools available for different sculpting techniques.
Modeling Tools
Modeling tools like metal loop tools allow you to smoothly shape and blend clay. They come in a variety shapes like discs, quadrants, and teardrops to create different effects. Flexible rubber tools can also be used for smoothing and shaping clay. Sponge and wood modeling tools are softer for delicate work.
Metal ribs are useful for scraping and refining the surface. Kidney tools named for their shape allow you to trim and hollow out areas. Metal tools with various shaped tips give you precision control for detailing.
Carving Tools
For subtracting clay and carving fine details, you’ll need carving tools. These include metal loops, ribs, veiners, and wire tools. Loop tools with sharp edges are great for cutting into clay. Needle tools allow you to dig, scrape, and hollow out spaces.
Wire clay cutters make it easy to slice off sections of clay smoothly. Clay shapers are tapered metal or wooden tools used to blend and smooth away carving marks. Wooden carving tools are good for making impressions and scoring the surface.
Texture Tools
There are many options for adding texture to clay like ribs, rollers, and stamps. Clay rib tools have notched edges to impression patterns. Rolling pins with texture can press designs into clay. Rubber stamps and silicone molds can transfer textures.
Found objects like nets, mesh, leaves, or lace can also be pressed into clay to leave behind interesting textures. You can use stiff-bristled brushes, combs, or scratch tools to scratch designs into the surface.
Finishing
Finishing clay artwork well is critical for giving pieces a polished, professional look. There are several key techniques to focus on during the finishing process:
Sanding helps smooth any rough edges and remove excess clay. Start with a coarse sandpaper like 80 grit to aggressively shape and smooth the clay, then move to finer 120 or 220 grit papers to refine the surface. Always sand in small circular motions. Be sure to sand all surfaces thoroughly. According to ceramic artist Odd Massimo, sanding should remove any visible tool marks (source).
Sealing the clay before firing helps protect the surface and prevent oxidation. Acrylic polymer sealers work well as they soak into the clay and dry clear. Use a soft brush to apply 2-3 thin, even coats of sealer, allowing each coat to fully dry before adding the next (source). Too much sealer may prevent glazes from adhering properly.
Applying patinas can add beautiful colors and metallic finishes. Patinas often contain acids, so wear gloves and work in a ventilated area. Softly brush the patina onto the clay, let it sit 10-20 minutes, then wash off any residue. Multiple layers can deepen the patina effect. Allow the patina to fully dry before sealing or firing.
Innovative Techniques
New technology is allowing clay artists to take their creations to the next level. One of the most popular innovations is 3D printing. Artists can design three-dimensional models on a computer using programs like AutoCAD or Blender, and then print them out in clay using a specialized 3D printer. This allows for very intricate and detailed designs that would be difficult or impossible to sculpt by hand (Source 1).
Another innovative technique is laser cutting. A laser cutter can be programmed to cut shapes and patterns out of clay slabs with extreme precision. Artists can experiment with complex geometric designs or delicate lace patterns using this method. Laser cutters work especially well on porcelain clays to create paper-thin layers for assembling into sculptures (Source 2).
Computer-aided design (CAD) allows artists to digitally model their sculptures before starting the physical work. Programs like ZBrush let you sculpt virtual 3D models which can then be 3D printed or used as a reference. CAD gives the freedom to test different poses, experiment with textures, and make modifications easily compared to traditional sculpting. It’s a powerful tool for visualizing and planning complex multi-piece sculptures.
Conclusion
As we’ve seen, clay art offers endless possibilities for innovation and creativity. While traditional techniques provide a solid foundation, don’t be afraid to experiment with new tools, textures, mixes of media, and firing methods. The joy of working with clay is that it’s very forgiving – if you don’t like the results, you can simply rework the clay and try something different. The key is to let your imagination run wild and use the techniques we’ve covered as a springboard for your own artistic vision. With some practice and persistence, you’ll be amazed at the innovative clay art you can produce.
Clay art allows for individual expression and limitless experimentation. Master the fundamentals, then put your own creative spin on the medium. Tap into your inner innovator – let the clay, tools, and techniques interact in new ways. Innovation in clay art arises from a spirit of play, curiosity, and a willingness to learn from mistakes. There are no real limits except those imposed by your own mindset. The joy is in the doing and discovering. With an open and explorative mindset, you’ll unlock new potentials in this dynamic art form.