Hand-Painting Techniques For Clay Pottery: Expressing Creativity
The history of hand-painting pottery dates back thousands of years. Early potters would use natural pigments made from minerals, plants, and animals to create decorative designs on utilitarian vessels. Some of the earliest known examples come from ancient Egypt, China, and Greece where pottery painting was an established artform by 3000 BCE.
Hand-painting on clay allows for great creativity and personal expression. Some popular techniques used over the centuries include outlining, brushing and sponging color, carving through layers of slip, using resists to preserve areas of clay, and applying decorative color glazes. The colors and designs could convey cultural meaning, personal stories, or just creative flair.
Compared to other decoration methods like stamping, hand-painting gives the artist more direct control. It allows for versatility in the placement of design elements and the blending of colors. The finished effect can range from simple patterns to elaborate scenes. Hand-painting results in each piece being unique, with subtle imperfections that add charm. Many ceramic artists today still use these traditional painting methods to make one-of-a-kind works of art.
Brushing
Brushing is a hand-painting technique that involves using a brush to apply glaze to leather-hard or bisque pottery. This allows the artist to create interesting brushstroke patterns and textures on the surface. A good bristle brush with stiff, short bristles works best for brushing glazes. Fan brushes and small round brushes are also useful. Typical brushes used include hake brushes, ox hair brushes, or acrylic painting brushes.
When brushing glaze, it’s important to load the brush evenly and apply consistent, even pressure as you brush. Long, continuous strokes work well for covering large areas. Short, brisk strokes create rough, textured effects. You can also experiment with circular or zig-zag motions. Layering colors by brushing over a base glaze with a contrasting color lets you achieve depth and dimension.
Brushing gives pottery an organic, handmade look. It allows artists to create gestural patterns like stripes, squiggles, and swirls. The brushstrokes can range from loose, thick lines to thin, hairlike markings depending on the brush used and the pressure applied.
Sponging
Sponging is a fun and easy way to add texture, patterns, and visual interest to hand-painted pottery. With sponging, a sponge is used to dab or stamp paint onto the surface of the clay. It’s an intuitive technique that allows for a lot of creativity and experimentation.
Sponges come in many shapes, sizes, and materials. Natural sea sponges work well for holding and applying paint. Craft sponges cut into different shapes like circles, diamonds, or stars can create cool designs. Even common household sponges can be used.
The key with sponging is applying the right amount of paint to the sponge – enough to transfer onto the clay, but not too much that it oozes and drips. Dabbing in a stippling motion creates a mottled texture. Stamping in a pattern makes defined shapes. Combining colors produces an interesting layered effect.
Sponging pairs beautifully with brushwork. Use a brush to paint solid backgrounds or defining lines, then sponge overtop to add dimension. Or sponge patterns first, then accent with brushed detailing. The blending of these techniques results in complex, engaging designs.
Stamping
Stamping is a fun and easy way to add decorative patterns to clay pottery. Custom stamps allow you to imprint custom designs, names, dates, symbols, and more onto clay. Found objects like leaves, lace, nuts, bolts, and textured items can also be used as stamps to create natural patterns.
Stamps are usually made from rubber, wood, foam, or linoleum. Clay stamps can be purchased or hand-carved. When working with stamps, it’s best to use soft clay, such as low-fire earthenware clay. Apply an even pressure and lift the stamp straight up to get a clean imprint.
To create repeating patterns, stamp shapes in rows, circles, diagonals, or grids. Overlap stamps or alternate directions. Use stamping to cover an entire surface or combine stamping with other techniques like sgraffito. Allow stamped pieces to fully dry before firing.
Some tips when stamping clay:
– Dust the stamp with cornstarch, talcum powder or clay slip if sticking occurs.
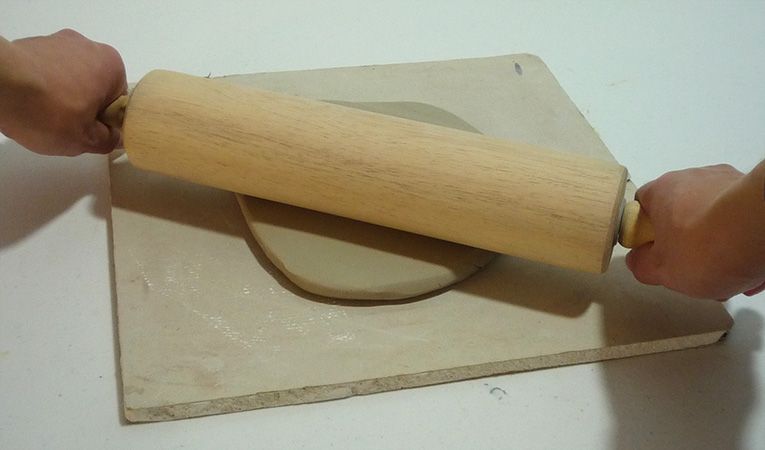
– Roll out clay to an even thickness for clear imprints.
– Clean stamps after each use to prevent buildup.
Stamping is an easy way for both beginners and experts to add beautiful, custom designs to handmade clay pottery. With some creativity and well-made stamps, the possibilities for patterns are endless. (https://www.oldforgecreations.co.uk/blog/how-to-stamp-clay)
Stenciling
Stenciling is a fun and creative way to add patterns and designs to hand-painted pottery. It involves cutting out a template from stencil material, then placing the stencil on the bisqueware and applying paint over it with a brush or sponge. The empty spaces in the stencil form the pattern or design.
When creating stencils, you can cut them freehand with an X-acto knife, use pre-made stencils, or use a digital cutting machine like a Cricut or Silhouette. Some good materials for stencils include plastic, cardstock, acetate sheets, and frisket paper. The material you choose affects the crispness of the lines. Plastic and acetate make the crispest stencils.
To achieve clean, crisp lines when stenciling:
– Make sure stencil adheres tightly to the bisqueware surface. You can use stencil adhesive or masking tape.
– Use a soft brush or sponge and apply paint lightly. Don’t overload it.
– Apply paint in a stippling motion rather than broad brushstrokes.
– Make sure paint is not too thin; slightly thicker paint works better.
– Carefully lift stencil straight up after painting. Don’t slide it off.
Stenciling allows you to add complex, intricate designs that would be hard to paint freehand. It’s a great way to incorporate patterns like animal prints, landscapes, flowers, mandalas, and more. With some creativity and the right stencil materials, beautiful works of art can be created on hand-painted pottery through stenciling.
Sgraffito
Sgraffito is an ancient technique that involves scratching through a surface slip to reveal the clay body underneath. The word “sgraffito” comes from the Italian word “sgraffiare,” meaning “to scratch.”
To create sgraffito designs, start by applying a colored slip to the leather-hard clay surface. Once the slip has dried to the touch, use tools like sticks, clay carving needles, or even your fingernails to scratch through the slip and expose the contrasting clay underneath. This reveals your design in the color of the clay body against the background of the colored slip.
Sgraffito is done using leather-hard clay. The surface needs to be firm enough not to smear when scratching through it, but still soft enough that the slip adheres well and tools can carve into it. Wait until the slip has dried to the touch before scratching.
Traditional sgraffito tools include sticks, needles, and homemade clay carving tools. Anything with a sharp point can be used. Some potters will scratch using just their fingernails for simple designs.
To add more interest to sgraffito designs, multiple colored slips can be used. Apply the first color and let it set up to leather-hard. Then apply the second colored slip on top and scratch through that to reveal the first color. This creates designs with two or more colors.
Sgraffito has been used since ancient times to ornament pottery. It creates beautiful etched designs and intricate patterns when done with skill. The color contrasts and sense of depth give visually appealing results. See techniques for creating sgraffito pottery at https://www.lakesidepottery.com/Pages/Pottery-tips/How-to-create-sgraffito-pottery-tutorial.htm
Adding Dimension
Adding dimension to hand-painted pottery creates visual interest and texture. There are several techniques to give pottery pieces a 3D look and feel.
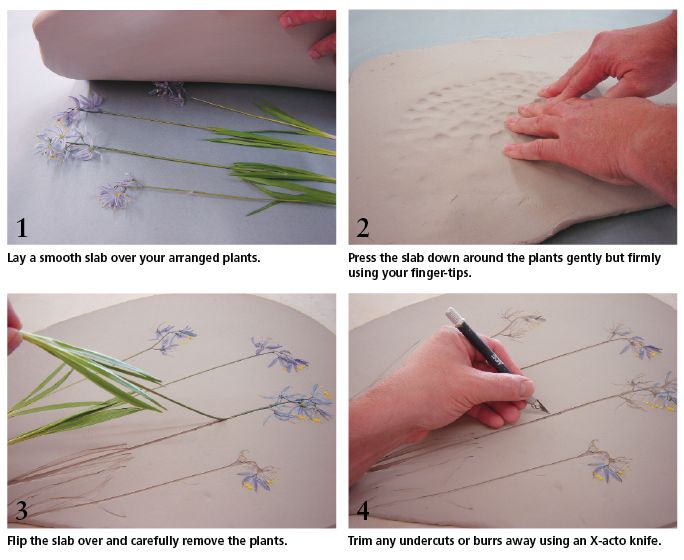
Outlining involves using a paintbrush or tool to trace around raised areas or indentations on the pottery surface. This helps define the edges and make details pop. Contrasting colors work well for outlining, like black around red clay. Refer to this example of outlined dimensional flowers.
Dotting involves using the tip of a brush, skewer, or dotting tool to add small dots of color. Dots can be clustered together to fill spaces or sparse to create texture. Vary dot size for more interest. See this example of dotted dimensional clay.
Contouring involves brushing color lightly and blending to create the illusion of shape and form. Use darker shades in recessed areas and lighter colors on raised areas. Slowly build up depth by layering. Shading in this manner adds realism. View this contoured dimensional bird.
Using Resists
Resists are materials applied to the surface of clay that resist or mask off areas to control where glazes or underglazes are applied. Using resists allows for interesting designs and patterns. Three common types of resists are tape, wax, and latex.
Tape resist involves applying strips of tape onto the bisqueware surface before painting with underglazes or glazes. Once fired, the taped areas will be devoid of color for a clean, precise resist line. Low-tack masking tape works well, as does frog tape for curved surfaces [1].
Wax resist is applied by painting or drawing directly onto the clay surface with wax-based products like beeswax, paraffin, or crayon. The wax seals off areas, keeping them free of any paints or glazes. Cracking or imperfect lines can create organic, rustic effects. Allow thorough drying before painting; heat from hands can smear the resist [2].
Latex resist provides raised texture when layered under glazes. Brush liquid latex onto the clay and allow it to fully dry before painting over it with glazes. During firing, the latex burns away leaving indented lines. Latex works well for making animal fur textures.
Combining Techniques
One of the most exciting aspects of hand-painting pottery is combining various techniques to achieve beautiful and complex results. Skillful potters use layering methods to add depth and dimension to their pieces.
A common approach is to start with a base coat of colored slip or glaze. Once the base dries, the potter can add layers of brushwork, stamps, stencils, and more. For example, a blue slipped background can be gracefully accented with delicate white sgraffito lines and gold leaf details. The layers intermingle to showcase the potter’s creativity.
Another effective layering method is to use stencils or resists to block out sections before brushing on new colors. The resist sections provide gaps that reveal the underlying layers in the finished motif. Washes and additional brushwork can be layered on top to achieve further complexity. With thoughtful planning and execution, potters can build up designs with incredible variation and visual interest.
By thoughtfully combining a range of hand-painting techniques, skilled artisans can craft one-of-a-kind pots with symbolic meaning andlimitless artistic expression. Their creations reflect an interplay of planning and spontaneity achieved through mastering diverse approaches.
Finishing Considerations
After painting the pottery, it’s important to properly finish the piece to protect the decoration and give it a glossy sheen. Clear glazing is essential for sealing and preserving hand-painted designs on clay. Most potters use a basic clear glaze that they brush over the entire painted surface and edges. Allow the glaze to dry, then follow the manufacturer’s instructions for firing in a kiln. Once fired, inspect closely for any imperfections like pinholes or thin spots and touch up with additional clear glaze as needed. If replacing the pottery in the kiln, use a slightly lower temperature for the second firing. Repeated firings help create an impervious glaze coating. While patience is required for the painting and firing steps, the end result is a vibrant, durable work of art.
Source: https://www.thesprucecrafts.com/how-to-paint-pottery-2746190