Advanced Clay Sculpting: Tips And Tricks For Professionals
Clay sculpting is an ancient and beloved art form that involves shaping clay into creative forms and figures. The practice dates back thousands of years, with some of the earliest known clay sculptures found in ancient Mesopotamia and prehistoric Europe. Clay’s accessibility and malleability have made it a popular medium for artistic expression across cultures.
Today, clay remains a versatile material for sculptors working in ceramics, pottery, and three-dimensional design. Professional clay sculptors employ an array of techniques to craft both functional pottery and elaborate works of art. From coil building to wheel throwing to slipcasting, artists can shape clay into incredibly detailed sculptures, decorative objects, jewelry, and more.
This guide will provide tips and techniques to help advance the skills of professionals working with clay. It covers choosing the right clay, essential tools and equipment, sculpting methods for crafting figures and forms, finishing techniques, and expert advice for displaying clay sculptures.
Types of Clay
There are two main categories of clay used for sculpting: oil-based and water-based clays. Each has its own properties and is suited for different uses.
Oil-based clays like plasticine are made from a mix of oils, waxes, and minerals. They have a smooth, soft texture that is great for sculpting fine details. Oil-based clays don’t harden or dry out, so sculptures made from them remain indefinitely workable. This makes them a good choice for animators and modelers who need to adjust their sculptures over time. The downside is oil-based clays are messy, never fully harden, and the sculptures are fragile and cannot be fired in a kiln. 1
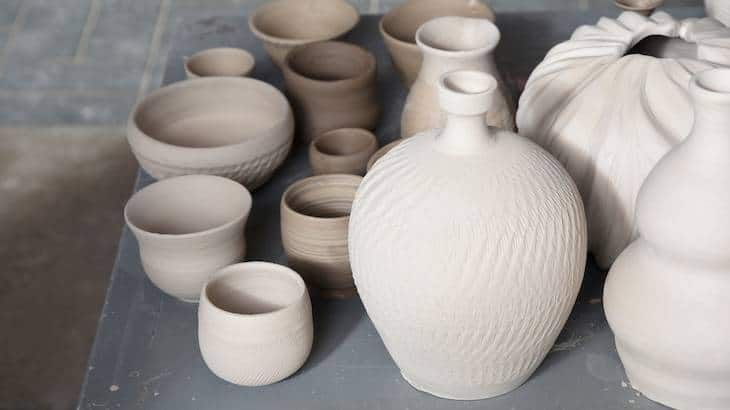
Water-based clays use water as a binding agent instead of oil. They have a firmer, drier texture and harden either by air-drying or firing in a kiln. This makes them more durable for long-lasting finished sculptures. Polymer clays like Sculpey are the most popular water-based clays for sculpting. They harden at low temperatures and don’t shrink much during firing. Earthen clays are also water-based and can be fired at high temperatures for ceramic sculptures. The tradeoff is water-based clays can dry out while sculpting and tend to be less malleable than oil-based. Overall, water-based clays are better for creating finished art pieces while oil-based clays are favored for animation and modeling.
Tools and Equipment
Having the right tools and equipment is essential for advanced clay sculpting. Here are some key items every professional clay sculptor needs:
Wire armatures provide structure and support when sculpting large or complex forms. An armature made from aluminum wire, steel wire, or plastic coated wire can be shaped into the basic form before adding clay. This helps support the weight of the clay and prevents sagging or damage while working (1).
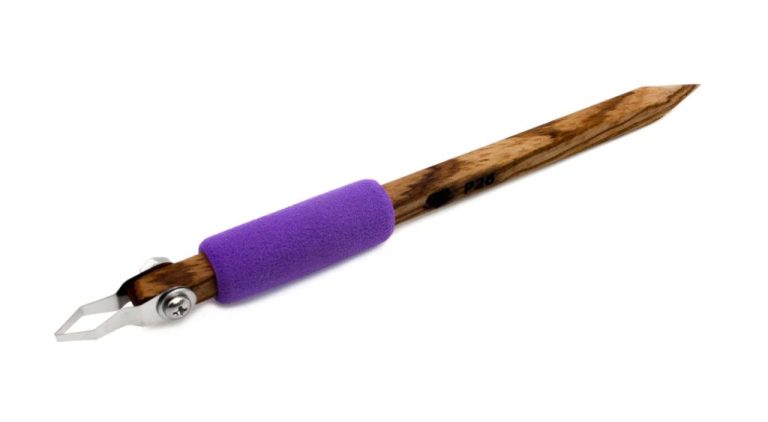
Sculpting tools like loop tools, ribs, wooden modeling tools, and wire tools allow shaping, smoothing, carving, and detailing the clay. Hardwood, metal, and polymer clay tools are available in various shapes and sizes for different effects. Having a full set of basic sculpting tools is recommended (2).
A sculpting stand or turntable allows the clay sculpture to be rotated while working on it. This enables detailing and access from all angles without needing to move or hold the piece. Sturdy metal or wood stands with ball bearings provide smooth rotation.
Other useful equipment includes calipers or dividers for measuring proportions, a spray bottle for misting clay with water, and armature pliers for bending wire (3). Having the proper tools allows advanced sculptors to focus on their creative work rather than struggling with difficult-to-work materials.
(1) https://www.amazon.com/clay-sculpting-tools/s?k=clay+sculpting+tools
(2) https://www.potterywithapurpose.com/products/sculpting-tools-add-on
(3) https://diamondcoretools.com/collections/clay-carvers
Sculpting Techniques
Sculpting techniques refer to the various methods used to shape and manipulate clay when creating sculptures. Mastering sculpting techniques allows artists to effectively add, remove, smooth, and texture clay as desired.
Some key techniques include:
- Adding clay – Roll pieces of clay into logs, coils, or balls and attach them to the sculpture using slip. Add clay gradually and blend into the existing shape.
- Removing clay – Carefully slice away excess clay using sculpting knives or loop tools. Shave off small amounts at a time.
- Smoothing – Use plastic sculpting tools, a wet finger, water, or slip to gently blend rough areas and create smooth surfaces.
- Texturing – Impress textures into the clay by pressing in items like lace, burlap, or plastic nets. Use loop tools, rakes, or clay shapers to create patterns.
Applying the right combination of techniques allows sculptors to accurately depict the forms they envision. With practice, artists gain dexterity and control over the clay. Understanding these core techniques provides a foundation for more advanced sculpting work.
For more details on specific sculpting techniques, refer to the step-by-step guides at [url of source 1] or [url of source 2].
Creating Realistic Features
Sculpting realistic human features like hands, faces, and hair in clay requires careful observation and practice. Pay close attention to anatomy, proportions, and textures when sculpting features. Some tips:
- For faces, position the eyes halfway between the top of the head and chin. The bottom of the nose should be halfway between the eyes and chin. The mouth is located about one third of the way between the bottom of the nose and chin.
- Study reference photos to understand the anatomy and proportions of hands. Thumbs are usually set apart from fingers. Carefully sculpt each finger, nail bed, knuckle, palm line and wrinkle.
- For realistic hair, roll out thin coils of clay and layer them on the head, pressing with tools to create strands. Vary the lengths and directions of strands.
- To create realistic folds in clothing, study how fabric drapes over a form. Use clay tools to make indentations and ridges for hard and soft folds.
With practice and observation, sculptors can create amazingly life-like features in clay. Check out this tutorial for more tips on sculpting realistic faces: https://missbaide.wordpress.com/sculpting-faces-in-clay/.
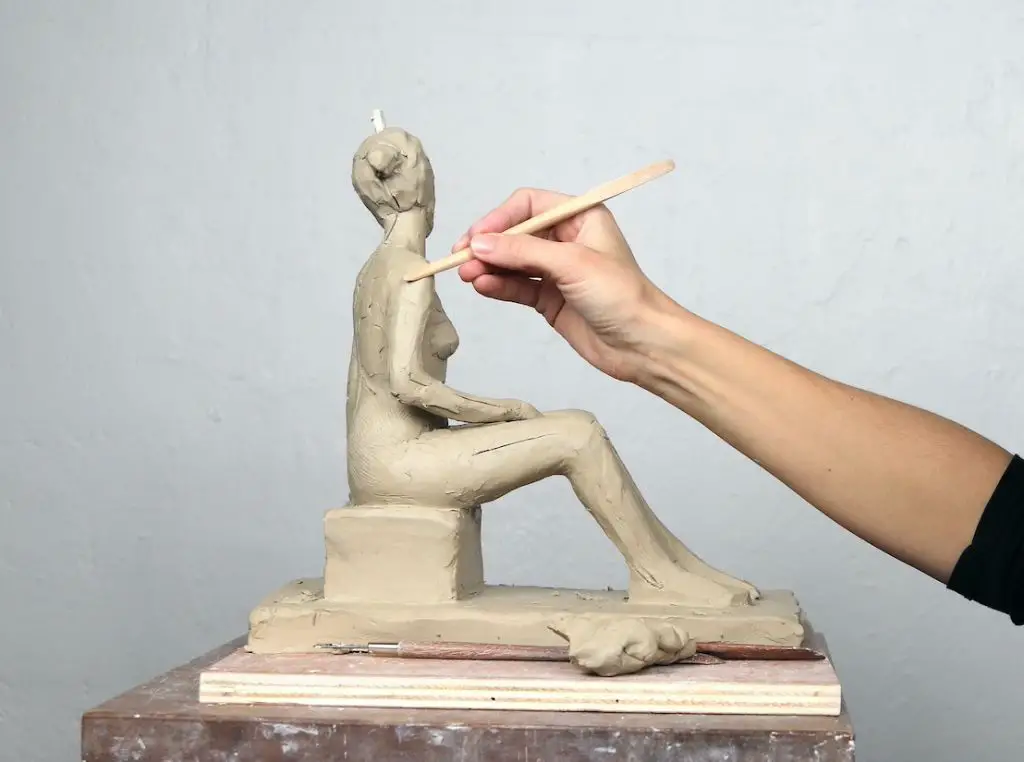
Sculpting the Human Figure
When sculpting the human figure in clay, it’s important to understand proper body proportions and anatomy. The average adult figure is about 7-8 heads tall. To ensure proper proportions, start by sculpting the head and neck, then the torso, then limbs. Reference photos are very helpful when sculpting figures.
Pay close attention to anatomy when sculpting the body. Sculpt the underlying muscle structure to achieve a realistic figure. For example, carefully sculpt the pectoral and abdominal muscles on the torso. Indicate joints like the knees and elbows, and proportions of the hands and feet.
When posing a figure, consider contrapposto – subtly shifting the weight to one leg so the hips and shoulders rest at different angles. This creates a more dynamic, realistic pose. Avoid perfectly straight limbs. Refer to artist mannequins or skeleton models to properly pose a figure.
See this article on sculpting human figures and faces for more tips: https://medium.com/@aaravsahni/sculpting-human-figures-and-faces-a26cdb350a99
Sculpting Animals
Creating a lifelike animal sculpture in clay requires a strong understanding of anatomy and capturing movement. When sculpting animals, it’s important to carefully study their proportions, musculature, and skeletal structure. For example, animals like horses have defined leg muscles from supporting their body weight, while monkeys have long limbs and tails for swinging from trees. Capturing the essence of the animal’s natural state or movement within the sculpture is also key. This means paying attention to how their body naturally rests or how muscles flex when moving. According to a Polymer Clay Sculpting: Animals course, studying animal anatomy from photos or life drawings can help inform realistic sculptures.
When sculpting an animal, it’s helpful to start with basic forms like cylinders, spheres and cubes to establish the core structure and proportions. Details like fur, scales or feathers can be added later. Creating an armature or wireframe supports the clay and allows limbs to be attached in active poses. Let the natural properties of the clay enhance the realism – pulling, twisting and smoothing the material to mimic the look of fur or feathers. Hair can be shaped by making slashes and grooves with tools. Final touches like textured rollers, clay shapers and rubber stamps add realism and definition.
With practice and observation, clay is an ideal material for capturing the energy and vitality of animals in motion. A strong foundation in anatomy combined with carefully crafting surface details allows artists to sculpt animals that truly come alive. The natural medium becomes a window into portraying the wonders of the animal kingdom.
Advanced Techniques
As sculptors gain more experience working with clay, they can explore more advanced techniques to take their art to the next level. Some advanced techniques to try include:
Layering
Layering involves adding thin sheets or slabs of clay on top of each other to create depth and dimension. This allows sculptors to achieve effects that would be difficult with a solid clay base. Layering can be used to depict clothing folds, hair, or anything requiring subtle contours.
To layer effectively, each sheet should be thin and scored before attaching to the layer below. Let the clay slightly firm up between adding layers. Blend seams together smoothly with fingers or tools. Mist work occasionally while layering to prevent cracking.
Relief Work
Relief sculpture involves shaping artwork that projects from a flat background. The depth can range from low relief (barely protruding) to high relief (fully three-dimensional forms). Relief work allows creating sculptures that seamlessly blend with a surface or background.
When planning relief sculptures, consider how shapes will cast shadows to enhance the image. Undercuts and deeply recessed areas should be avoided unless the clay will be reinforced. Bake relief work in layers to prevent sagging.
Large Sculptures
Creating large-scale clay sculptures brings additional challenges such as stability, weight, and fragility issues. For very large works, build an internal wire or wood armature for structural support. Score and seal all joints between clay pieces to bind them securely.
To manage the weight, use thick coiled bases and hollow out sections that don’t require interior detail. Let the sculpture dry thoroughly and bake in phases if needed. Transport large pieces carefully and allow sufficient drying time before exhibiting.
With planning and care, clay artists can successfully scale up their work for an impressive statement piece.
Finishing and Polishing
Finishing and polishing are critical steps when creating clay sculptures. Properly finishing a sculpture enhances its visual appeal and durability. There are several techniques professional sculptors use to finish their clay artworks.
Sanding helps refine the sculpture’s shape and smooth out any irregularities in the surface. Start with a coarse grit sandpaper like 60-80 grit to remove larger imperfections. Then proceed through finer grits like 120, 220, and 400 to achieve a smoother finish. Always sand in small circular motions. Be sure to wear a dust mask when sanding clay.
Sealing the sculpture protects it from moisture and prevents colors from fading over time. Acrylic varnish or polyurethane are common sealants for clay. Apply multiple thin coats of sealant using a brush or cloth. Let each coat fully dry before adding the next. Too much sealant can give the clay a plastic look.
Surface treatments can give clay sculptures different visual textures and effects. Using slip trailing, colored slips are applied by hand to create lines and patterns. Incising lines and textures into leather hard clay adds interest. Cracking clay intentionally with techniques like sgraffito reveals the color underneath. Metallic powders or patinas introduce color while maintaining a matte look. Source
Use detailing tools like the Valdez Wiretool to refine small areas and add texture. Pay special attention when finishing to polish, highlight, and accentuate details that bring your sculpture to life.
Displaying Clay Sculptures
After spending hours or even days sculpting your masterpiece, you’ll want to display it properly to show off your hard work. Here are some tips for effectively displaying clay sculptures:
Bases
Clay sculptures should be displayed on sturdy bases to provide support and prevent tipping or cracking. Bases can be made of wood, glass, acrylic, metal, or marble. For large sculptures, choose a heavy material like wood or acrylic to properly support the weight. For smaller sculptures, glass shelves and pedestals work well. Secure the sculpture to the base with clay, putty or adhesive.
Lighting
Strategic lighting brings out the best in any sculpture. Position spotlights or directional lighting to illuminate your sculpture from different angles. Avoid direct overhead lighting which can create unwanted shadows. Backlighting behind a translucent sculpture can create interesting effects. LED strip lights work well to accentuate contours and details.
Protection
Take measures to protect fragile clay creations. Avoid areas with direct sunlight, heat or humidity which can cause cracking. Use plexiglass boxes or cloches over tabletop sculptures. For large sculptures, build an enclosure with transparent acrylic or polycarbonate sheets. Apply a protective sealer or acrylic spray coating. Transport sculptures securely nested in packing materials.
With the right base, lighting and protection, you can proudly exhibit your clay artworks for all to admire.