Clay Modeling For Children: Exciting Projects To Explore
Clay modeling is a fun, creative activity that provides many benefits for children. Working with clay allows kids to express themselves, develop fine motor skills, and engage their senses. It also builds confidence as children create anything they can imagine. Clay is an open-ended art material that fosters creativity, problem-solving, and self-expression. This enriching hobby will excite and engage kids while supporting their development.
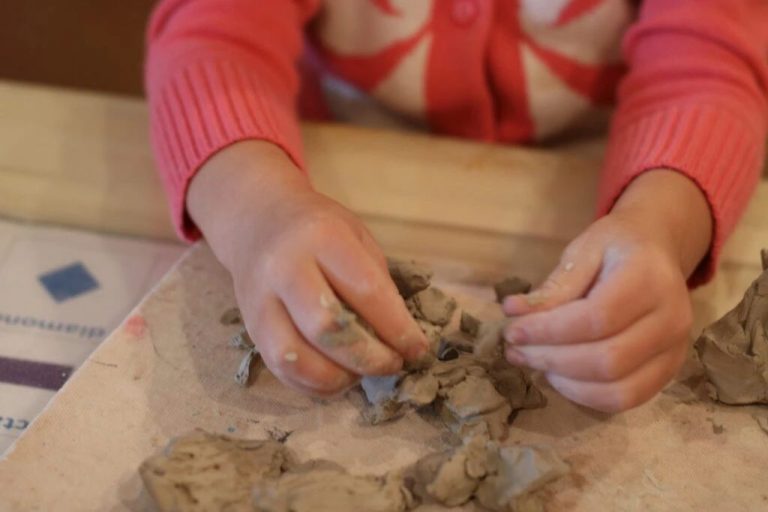
Children have a natural affinity for tactile materials like clay. Its pliability allows them to shape and mold it into any form. The feel of the soft clay in their hands is soothing and satisfying. As they sculpt clay, children strengthen hand-eye coordination and fine motor control. Clay modeling also engages multiple senses – sight, touch, and smell. The entire experience helps develop sensory integration.
This guide will provide tips on supplies, safety, and projects to help kids get the most out of clay modeling. With some basic instruction, children can create simple shapes, animals, characters, nature sculptures, and more. By making imprints and adding decorations, they give their artwork unique personal touches. Clay modeling opens up a world of creativity and imagination for children.
Supplies Needed
When working with clay, having the right supplies on hand is crucial for success. The three main types of clay kids can use for modeling include polymer clay, air-dry clay, and homemade clay.
Polymer clay is very popular for clay modeling as it doesn’t dry out and can be baked in a regular oven to harden it. Well-known brands like Sculpey and Fimo make polymer clay in a wide array of colors. Polymer clay is reusable even after baking.
Air-dry clays are convenient modeling clays that harden by drying exposed to air. Popular brands like Crayola Air Dry Clay and Artsity Air Dry Clay are non-toxic and easy for kids to use. Leftover bits of air-dry clay cannot be reused once dried.
Homemade salt dough or playdough are budget-friendly clay options. While they may dry out more quickly, homemade clays let kids experiment with making their own clay “recipes.”
In addition to clay, having basic sculpting tools (popsicle sticks, toothpicks, clay sculpting tools), work surface protection (newspaper, plastic tablecloth), paints/glazes, and cleanup supplies will make any clay project go smoothly.
Safety Tips
When working with clay, proper supervision and following safety guidelines is important, especially for children. According to the article Safety with clay, some basic tips include not eating, drinking, or smoking when working with clay to avoid ingesting any dust or particles. Tools should be used properly and clay modeling knives kept out of reach of young children. Store clay in sealed containers and clean up properly to avoid dust buildup.
As the article Safety First: Modeling Safety in Clay Use explains, choose the right type of clay for the child’s age and avoid oil-based clays for young children who may try to eat it. Make sure to teach proper clean-up techniques like wet mopping over sweeping to minimize dust. Proper ventilation, gloves, and aprons can also help reduce exposure to clay dust. Supervise children closely and teach them basic clay safety rules.
According to Safety Rules for Ceramics, it’s important to have good ventilation when working with clay and to wet mop often to control dust. Storing projects and tools properly will help ensure a safe workspace for children to explore modeling with clay.
Basic Shapes
When starting with clay modeling, it’s best to begin by learning some basic shapes. These fundamental forms serve as the building blocks for more complex creations. According to Clay Basic Shapes, three of the most common starter shapes are balls, coils, and slabs.
Balls, or spheres, are a versatile shape to make with clay. They can be rolled between your palms to form smooth, rounded forms. Balls work well for sculpting heads, fruits, or any circular object. Coils are made by rolling clay into snake-like strings. Coiling is useful for making vases, bowls, pots, and more. Long coils can be shaped into curving lines and patterns. Finally, slabs are flat sheets made by flattening clay with a rolling pin. Slabs allow you to create flat surfaces and textures. With practice, kids can combine balls, coils, and slabs to craft animals, vehicles, jewelry, and more.
Starting with these elementary clay forms teaches fine motor skills and creativity. As children gain experience, they can graduate to sculpting more intricate items. But balls, coils, and slabs form the foundation for exciting clay modeling projects.
Simple Projects
Some easy clay projects that are perfect for beginners and young children are pinch pots, tiles, and beads. Pinch pots are a classic clay project where kids roll clay into a ball and use their fingers and thumbs to pinch and shape the clay into a little pot or cup. This helps strengthen fine motor skills. Let the pinch pots air dry and they can be painted or decorated when finished.

Making clay tiles is another simple yet fun project. Roll out slabs of clay and use cookie cutters, stamps, or sculpting tools to imprint designs. Add beads, shapes, or textures to personalize each tile. Lay the finished tiles out to dry before coating with glaze or acrylic paint. These tiles can be strung together to make sun catchers or hung up individually as ornaments.
Clay beads are easy to shape by rolling pieces of clay into balls, then poking holes through them with a skewer or straw before baking or air drying. Make different sizes and shapes for variety. Young kids can thread the beads onto pipe cleaners or string to make necklaces and bracelets.
Animal Models
Kids love modeling creatures and animals out of clay! From cute pets like cats and dogs, to zoo animals like giraffes and elephants, modeling clay is a great way for children to explore animals and their unique shapes, textures, and habitats. Start by choosing familiar animals that are easy to sculpt like snakes, fish, turtles, or farm animals like pigs and cows (https://teachingideas.ca/2018/08/26/clay-animals/). For snakes, roll out a long thin cylinder, adding texture by pressing fork tines along its length. For fish, flatten and cut out a basic shape, adding fins and scales. Turtles can be made by forming a ball for the shell and attaching a head and feet.
After mastering basic animals, try more complex creatures like lions, bears, or giraffes using balls of clay for major body parts. Attach ears, tails, legs, heads, and other details. Encourage kids to consider habitat elements, like sculpting undersea plants for fish or trees and rocks for a forest bear. Clay habitat dioramas bring animal sculptures to life! The endless variety in the animal kingdom provides tons of inspiration for clay creatures. Let kids use their imagination sculpting both realistic and imaginative animals, from lifelike family pets to mythical beasts!
Fantasy Characters
Kids love bringing their favorite fantasy characters to life with clay. From dragons and fairies to superheroes and monsters, the possibilities are endless when designing fantasy figures with modeling clay. Here are some ideas for creating fun fantasy characters:
To make action figures like superheroes or warriors, start with a basic human shape, then add details like capes, masks, armor, weapons, and other accessories. Let kids look through comic books or movies to find inspiration for their own original heroes and heroines. Sources such as Fantasy Characters: Easy-to-Follow Clay-Making provide step-by-step instructions for sculpting popular figures like Spiderman, fairies, knights, and more.
Sculpting creatures and animals from fantasy stories engages a child’s creativity. Help them make snakes, dragons, griffins, unicorns, and other beasts by starting with basic shapes like balls, coils, and teardrops. Add scales, fur, horns, ears, wings, tails and other textures to bring the models to life. Get inspiration from books, movies, games, and mythology.
Clay is perfect for designing tiny accessories that let kids customize their own one-of-a-kind fantasy figures. They can sculpt helmets, weapons, jewelry, clothing, armor, and more to personalize their creations. Show them how to use toothpicks, pasta, foil, beads, buttons and other items to embellish the accessories.
Making fantasy characters with clay encourages creativity, problem-solving, and storytelling. Let children’s imaginations run wild as they sculpt their own magical worlds.
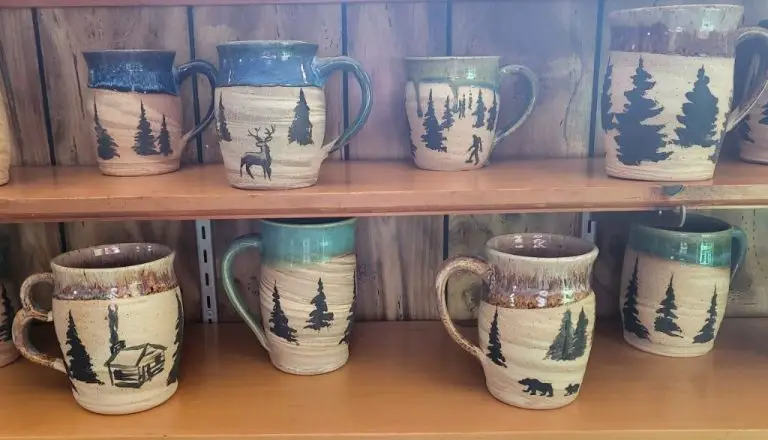
Nature Inspiration
Nature provides endless inspiration for creating beautiful clay art. Projects inspired by leaves, flowers, and trees allow children to connect more deeply with the natural world. Leaf impressions are one classic nature-inspired technique. Children can press actual leaves into clay then remove them to reveal detailed imprints. They can embellish the impressions with texture or color to make pendants, wall hangings, and more. Another idea is creating clay flowers and trees. Children can sculpt and paint vibrant flowers in clay, from delicate roses to bright daisies. For trees, they can roll and shape clay coils to form branches, adding texture with tools. Painting the clay creations with earthy colors brings them to life. References for nature-inspired clay projects: https://www.pinterest.com/chsh2025/nature-inspired-clay-vessels/
Making Impressions
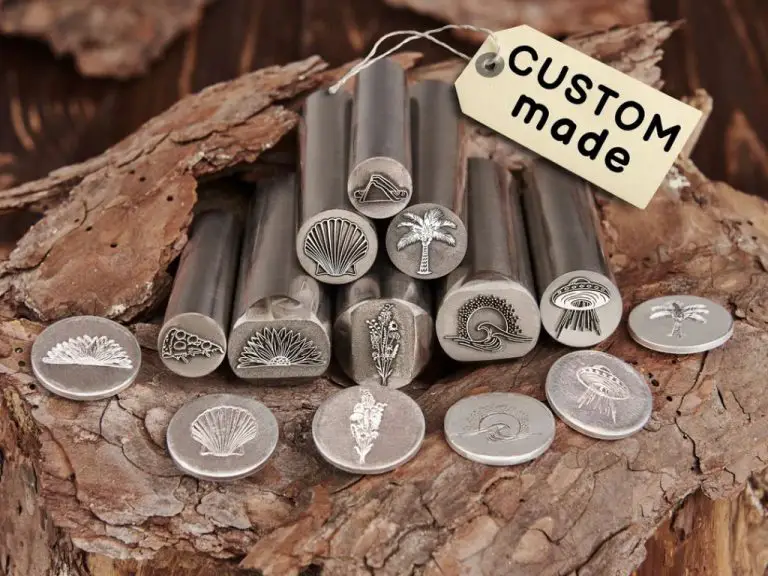
Making impressions in clay is an excellent way for children to explore textures and patterns. Simple household objects like leaves, seashells, buttons, and even kitchen utensils can be pressed into clay to create beautiful designs 1. Start by gathering a variety of items with interesting shapes and textures. Smooth items like buttons work best. Avoid using anything too detailed or porous as the clay may get stuck 2.
Show children how to press the objects firmly into the clay to create an imprint. Lego blocks, cookie cutters, and even plastic toys work great for this. Get creative by layering shapes and alternating directions. To make patterns, press the same object repeatedly in rows. Use clay tools like rollers and cutters to further enhance the designs.
Textured materials like lace, burlap, mesh, or rubber stamps will leave behind beautiful impressions. Consider using natural items like leaves, feathers, or flower petals collected on a nature walk. Impressions connect art to the real world in an exciting way. Allow dried clay imprints to inspire further creation like paintings or collages.
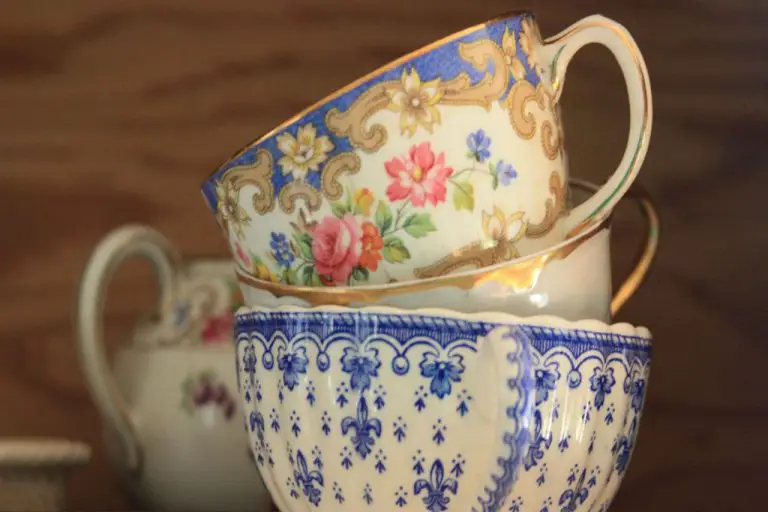
Finishing Touches
After the clay sculpture is complete, there are some final steps to really make the artwork shine. Applying paint, glaze or varnish can help bring out details and give the sculpture a polished look. Acrylic paints work well on cured polymer clay and come in endless color options. Apply in thin layers and allow to dry between coats. Another option is to use an acrylic glaze or polyurethane to give a glossy coat (1). For displaying clay sculptures, consider placing them on a base, stand or in a shadowbox for protection. This also helps highlight the artwork. Some options are acrylic bases, wood stands, glass domes, plastic display cases or simple frames (2). The finishing touches allow young artists to add their personal flair and truly complete their clay masterpiece.
(1) https://www.instructables.com/Finishing-and-Detailing-a-Sculpey-Polymer-Clay-Scu/
(2) https://www.instructables.com/Finishing-and-Detailing-a-Sculpey-Polymer-Clay-Scu/