Exploring Clay Art: Inspirational Ideas For Beginners
This article explores clay art and provides beginners with an introduction to working with clay. Clay art offers many benefits, including relaxation, creative expression, and developing fine motor skills. The purpose of this article is to give an overview of clay art, explain the different types of clay and techniques, provide project ideas and inspiration for beginners, and share tips to avoid common mistakes.
According to research, clay art can provide therapeutic benefits like reducing anxiety and negative moods (source). The physical nature of sculpting engages the senses and imagination in a creative process that is both fulfilling and calming. Working with clay allows beginners to tap into their creativity in a flexible medium capable of taking any form.
This article will cover the basics of clay art, from the types of clay to essential tools and techniques. Simple projects, inspiration images, and tips tailored for beginners will help readers get started sculpting with clay. By the end, readers will have a foundation for beginning their clay art journey.
Types of Clay
There are several main types of clay that beginners should be familiar with for clay art projects. The three most common types include pottery clay, polymer clay, and air-dry clay. Each has unique characteristics and is suited for different types of projects.
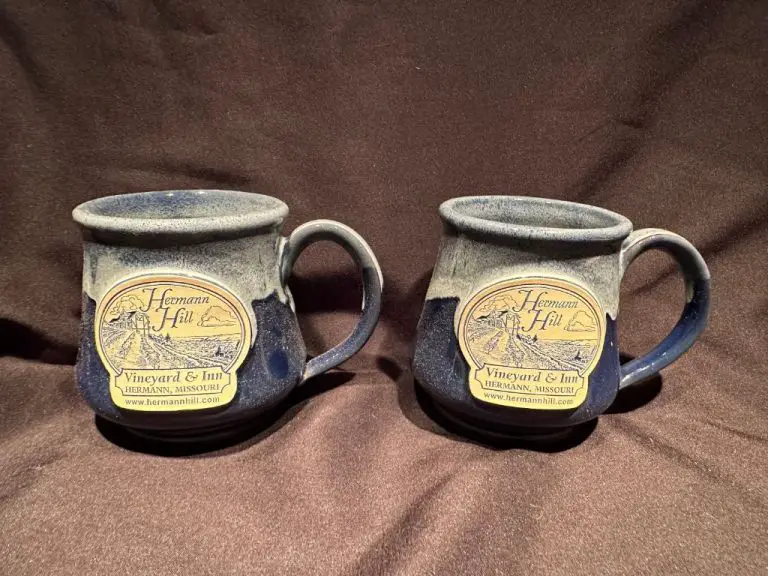
Pottery clay, also known as earthenware, stoneware or porcelain, is natural clay that is molded while wet and then fired in a kiln to harden it. Pottery clay is excellent for functional pieces like mugs, vases, and plates, as well as sculptural artwork. It can be more challenging to work with as it requires specialized tools, kiln firing, and advanced techniques.
Polymer clay is made from plastic polymers and modeling compounds. It air dries but does not harden until baked in a regular oven or toaster oven. Polymer clay is extremely versatile for detailed sculptures, jewelry making, dolls, and decorative items. It’s easy to use right out of the package and does not require specialized tools.
Air-dry clay is made from natural clays mixed with binders that cause it to harden as it dries in the air. It does not require baking or firing. Air-dry clay is simple to use and dries quickly, making it ideal for kids’ craft projects and decorative pieces. However, finished pieces may be more delicate and fragile compared to polymer or pottery clay.
Beginners may want to start with polymer or air-dry clay as they are the easiest to work with. Pottery clay requires more skill but can be used to create long-lasting functional and artistic pieces.
Clay Art Tools
Having the proper tools is essential for beginning clay artists to be successful in sculpting and shaping clay. Some of the basic tools that every beginner should have include:
Sculpting Tools
Sculpting tools like loop tools, ribs, and metal scrapers allow you to refine the shape of clay and add fine details and textures. Standard loop tools have different shaped wire loops on the ends that can smooth and compress clay. Metal ribs can sharpen edges and scrape away excess clay (https://fowlersclayworks.com/basic-pottery-tools-for-beginners).
Rolling Pin
A rolling pin is used to roll out and flatten clay into thin, even sheets and slabs. Acrylic or wooden rolling pins without handles work best. The rolling pin should be reserved just for clay to avoid transferring any unwanted marks or textures (https://thepotterywheel.com/pottery-tools).
Work Surface
A dedicated work surface like a canvas, wood, or silicone mat provides an ideal scratch-free foundation for working with clay. The surface should be large enough to roll out clay and transfer projects.
Baking Tools
Baking trays, kiln shelves, and kiln posts allow you to properly fire and bake your clay creations. Smooth ceramic tiles can also work as makeshift baking trays.
Clay Art Techniques
There are several fundamental techniques used in clay art that beginners should become familiar with. Mastering these foundational techniques will allow you to explore more advanced projects and develop your own artistic style.
Sculpting
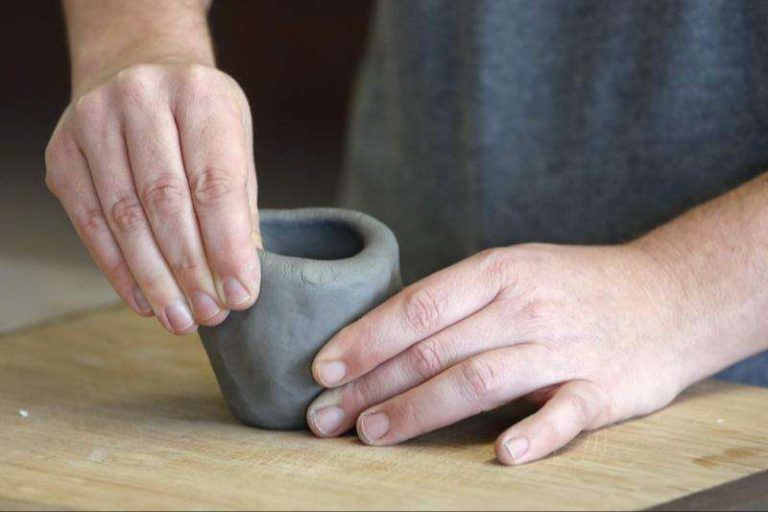
Sculpting is the process of molding and shaping clay to create a 3D form. When sculpting, it’s important to envision the final sculpture before beginning. Start with basic shapes like balls, coils, and slabs to build up the form. Remove excess clay and refine details using sculpting tools. Water can help smooth and blend the clay. Let your sculpture dry fully before baking according to package directions. For more sculpting tips, see this beginner’s sculpting guide.
Coils
Coil building involves rolling clay into long coils or snakes, then stacking and blending the coils together. This technique can be used to make pots, bowls, vases, and more. Start with a solid clay base, then apply coils in a spiral pattern, blending each coil into the previous layer. Use a clay tool to smooth transitions between coils. Let the piece dry slightly between adding coils to avoid collapse. With practice, coil building allows you to create stunning freeform ceramics.
Slabs
Slab techniques involve flattening clay into thin sheets which can be cut, shaped, layered, and joined. Roll clay with an acrylic roller to an even thickness. Cut slabs using cookie cutters or a craft knife. Decorate slabs with texture, stamps, or underglazes before assembly. Layer and join slabs using slip, a liquid clay adhesive. This method works well for making flat items like tiles, plaques, and plates. Refine edges and add surface patterns for artistic appeal.
Molding and Extruding
Molding uses existing forms to shape clay. Press soft clay into silicone molds or found objects like bowls, jars, and toys to easily replicate shapes. Extruders push clay through dies to create uniform coils, tubes, and strips. Maker’s tool kits provide fun shaped extruder tips to play with. Experiment extruding and molding clay then add your own creative touch.
Clay Art Projects
Clay is a versatile material that can be used to create a wide variety of fun and creative projects. Here are some clay art projects that are great for beginners:
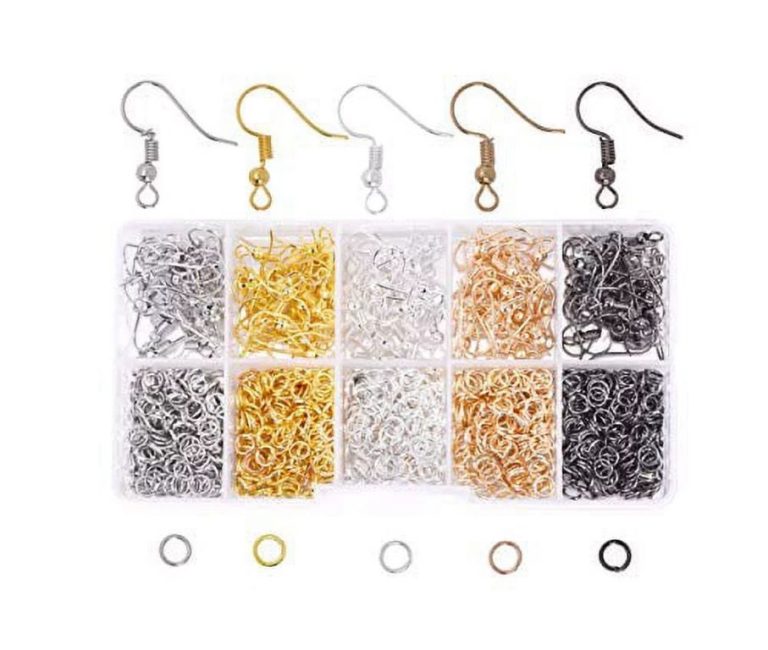
Jewelry
Making clay jewelry is an easy way to get started with clay art. Some ideas include:
– Clay beads – Roll pieces of clay into balls or other shapes, then pierce them with a toothpick when dry to string them into necklaces or bracelets.
– Clay pendants – Cut clay into shapes using cookie cutters, then make a hole before baking to turn them into necklace pendants.
– Clay rings – Roll a snake of clay into a ring shape, overlapping the ends to join them.
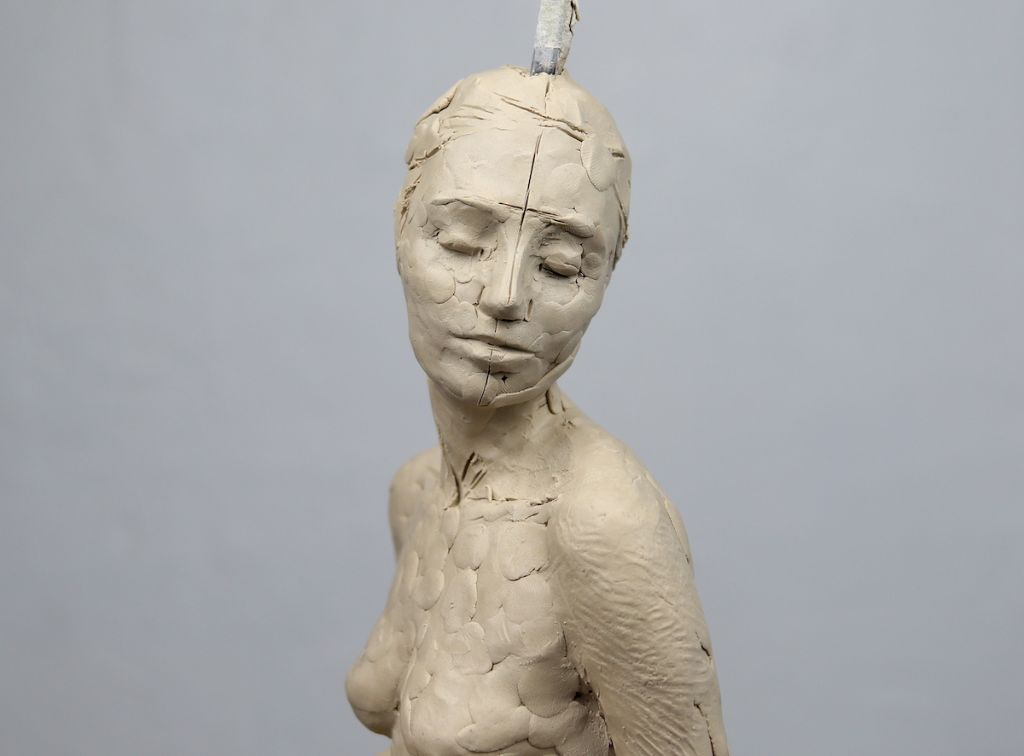
Figurines
Sculpting little clay figures is fun for both kids and adults. Try making:
– Animals – Use cookie cutters or sculpt freehand to make creatures like cats, dogs, birds, etc.
– People – Make miniature clay heads, bodies, or full figures as decor or toys.
– Storybook characters – Recreate favorite fictional characters out of clay.
Vases
Clay vases make for pretty decorations and can be customized in many ways. Some vase-crafting tips:
– Roll flat slabs of clay and join them into basic vase shapes. Or roll and pinch clay into simple pot forms.
– Imprint patterns into the clay using stamps, cookie cutters, or other tools before baking.
– Paint or glaze finished vases for color and shine.
Bowls, cups, and plates are other vessel forms that can be shaped from clay as beginner projects.
Buttons
Clay buttons make quirky additions to clothing or craft projects. To make:
– Roll small balls of clay, then flatten into disks.
– Use a straw or other tool to cut out the button holes before baking.
– Consider imprinting decorative patterns on the buttons.
Magnets
Fun clay magnets can be made in simple geometric shapes or sculpted into mini creatures and objects. Allow magnet strips to be inserted before baking.
Baking and Finishing
When you are done sculpting your clay art piece, you will need to properly bake it to harden and cure the clay. Oven baking instructions can vary slightly by clay brand, but in general you will want to bake polymer clay at 275°F for 10-15 minutes per 1/4 inch thickness. Place the item on a baking tray and ensure adequate airflow around the piece. After baking and cooling, you can choose to apply a finish like glaze, paint, or varnish to enhance the look.
Glazing polymer clay can give it a glossy appearance, while acrylic paint adds color. Varnishes come in glossy or matte versions to change the sheen. Some popular varnish options include Sculptd Clear Varnish, Liquitex Matte Medium, and Varathane Clear Polyurethane according to this article. It’s best to avoid over-sanding polymer clay, and apply any paints or finishes after baking for best results.
Inspiration and Ideas
Clay art is an incredibly diverse medium that allows for endless creativity. However, it can be helpful to look to others for inspiration when getting started. Here are some great sources to ignite your imagination and get those creative clay juices flowing:
Highlighting the work of inspiring clay artists can provide beginners with ideas on techniques, styles, and subject matter to explore. Some standout ceramic artists to check out include Ai Weiwei, known for his conceptual porcelain pieces; Arlene Shechet, admired for her sculptural vessels; and Patricia Corcoran, recognized for her whimsical animal creations.
Pinterest and Instagram are incredible sources to discover clay art concepts and find inspiration. Searching keywords like “clay art ideas”, “polymer clay art”, or “ceramic sculpture” yields thousands of pins and posts to ignite your imagination. You can also follow specific clay artists like Ruby Spell Clay and Polymer Clay Journey for a regular dose of inspiration.
Online galleries like the Ceramic Arts Network and This is Colossal feature stunning clay works across many styles and genres. Perusing these sites opens up new realms of possibility for beginners exploring the medium.
Immerse yourself in clay inspiration to unlock new creative possibilities. With an open mind, you never know what idea might spark your next great clay art piece.
Tips and Tricks
When working with clay, there are some helpful tips and tricks to know that can help avoid common issues and improve your clay creations. Here are some top tips for beginners focused on avoiding cracks, smoothing seams, and conditioning clay properly:
To avoid cracks in baked clay pieces, work slowly and avoid rushing. Thinner areas are more prone to cracking so keep walls and appendages thick (1/4 inch or more). Also avoid dramatic temperature changes like putting hot clay in the fridge. Cool clay gradually. Let clay pieces come to room temperature before baking. And bake pieces low and slow, especially larger ones (275F for 30 mins per 1/4 inch thickness).
To smooth visible seams and joints, use liquid clay or rubbing alcohol. Dip your finger in liquid clay and smooth over cracks and seams. Rubbing alcohol can also help soften and smooth seams. Use sculpting tools to blend and smooth seams. Let pieces sit overnight and sand or buff gently when hardened.
Properly conditioning clay makes it smooth and pliable for shaping. To condition clay, knead it firmly in your hands until soft and smooth. Roll it into a ball or log and bend it back and forth. Old or hard clay can be conditioned by cutting it into small pieces and working it with your hands. You can also run hard clay through a pasta machine repeatedly to soften it. Well-conditioned clay is crucial for avoiding cracks.
Check out these polymer clay tips from Montmarte for more advice on avoiding cracks, smoothing seams, conditioning clay, and other beginner techniques: https://www.montmarte.com/blogs/tips-techniques/20-polymer-clay-tips-and-tricks-for-beginners
Common Mistakes
Clay art may seem deceptively simple, but beginners often run into common issues like soft clay problems, underbaking, fingerprints marring the surface, and general discouragement. Having awareness of these common mistakes can help beginner clay artists avoid pitfalls and improve more quickly.
One of the most frequent issues is improperly prepared clay that is too soft. As noted on Pottery Crafters, clay that is too wet will be sticky and can collapse[1]. On the other hand, clay that is too dry cracks easily. Thorough wedging and testing consistency helps ensure the clay has the right amount of moisture.
Underbaking clay is another common mistake. When clay is not baked long enough at the proper temperature, it will not fully harden and become durable. Pay close attention to baking instructions and use a kiln thermometer for best results.
Clay often picks up fingerprints and smudges. Wearing gloves when handling projects helps minimize oils from skin affecting the clay surface[2]. Smooth clay surfaces gently with a rib tool or soft sponge before baking.
Finally, creating artwork from clay involves a learning curve. Newcomers should not get discouraged by initial failed attempts. With practice and persistence, skills improve. Stay patient, keep trying, and have fun with the process.
Conclusion
Clay art is such a rewarding and fulfilling hobby. To recap, we discussed the different types of clay and essential tools, overviewed basic techniques like sculpting and handbuilding, and provided inspirational project ideas. The most important thing is to have fun and embrace your creativity. Clay is an incredibly versatile medium that allows you to bring your imaginings to life.
Don’t be afraid to experiment and make mistakes. Every piece is an opportunity to gain experience and skills. Focus on enjoying the tactile, hands-on process. With practice, you’ll be amazed by what you can create.
For those looking to take their clay art passion further, there are many books, blogs, YouTube channels, and online classes to explore. Connect with other clay artists for support. Consider joining a ceramics studio or taking a class if available in your area.
Clay art is open to budding artists of all ages. Approach it with a playful, creative spirit and see where your imagination takes you. The possibilities are endless. We hope this beginner’s guide provided helpful inspiration to start molding and crafting your own beautiful clay artworks.