Can I Use Air-Dry Clay For Incense Holder?
An incense holder is a small container or stand designed to hold incense sticks or cones while they burn and produce fragrant smoke. Incense holders help contain the ash and allow the incense to stand upright while burning. They also serve a decorative purpose, often crafted into interesting shapes, patterns, and materials that enhance the incense burning ritual.
Air-dry clay is an excellent material for creating handmade incense holders. Air-dry clay, also known as “cold porcelain” clay, is a moldable ceramic clay that dries naturally at room temperature. It does not require baking in a high heat kiln. Air-dry clay is lightweight yet strong when dry. It’s easily workable for hand-shaping and sculpting. The finished look resembles porcelain while being much lighter weight. When sealed properly, air-dry clay items are durable, non-toxic and can last for many years.
Pros of Using Air-Dry Clay
Air-dry clay is an ideal material for creating homemade incense holders. Here are some of the main benefits of using air-dry clay:
Inexpensive and Accessible. Air-dry clay is very affordable, especially when bought in bulk. It’s readily available at most craft stores. This makes it easy for anyone to get started on DIY clay projects.
Lightweight. Since air-dry clay is lightweight even in larger pieces, the finished incense holder will be easy to move around and display.
Easy to Mold. With air-dry clay you can shape it into any form imaginable. It’s very responsive to hands and sculpting tools allowing you to create unique incense holder designs.
Durable When Dry. Once fully cured, air-dry clay becomes very hard and long-lasting. Incense holders made from it will withstand regular use and last for years.
Variety of Colors. Air-dry clays are available in white, terracotta and gray shades. There are also paints made specifically for coloring air-dry clay.
Cons of Using Air-Dry Clay
While air-dry clay is very versatile, there are some downsides to be aware of when using it for crafting incense holders:
Can crack or break if dried too quickly – If air-dry clay dries too fast, either by being exposed to direct heat or dry air flow, it can develop cracks or weak spots that cause it to break easily. Avoid quick drying and keep your air-dry clay incense holders in a cool, humid area as they cure.
Shrinks slightly when drying – Air-dry clay will shrink up to 10% from its original size as the water evaporates during drying. Keep this in mind when sizing your incense holder design.
Not waterproof unless sealed – Unfinished, unsealed air-dry clay is porous and will absorb water. Be sure to seal your incense holder properly if it will be exposed to moisture.
Limited strength compared to fired ceramics – While strong for craft projects, air-dry clay has lower durability than high-fire ceramics. Avoid very thin or delicate shapes in your incense holder that may crack under pressure.
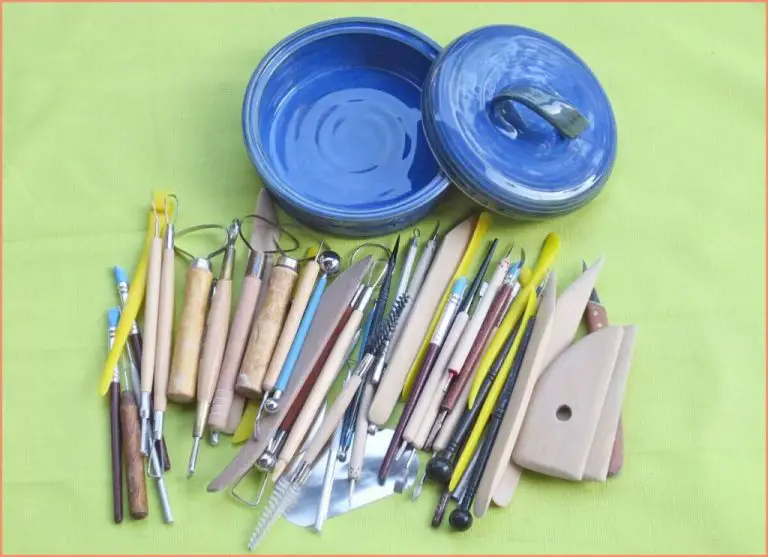
Tips for Using Air-Dry Clay
When working with air-dry clay, following some basic tips will help you achieve the best results:
Knead the clay thoroughly. Spend several minutes kneading the clay after opening the package. This softens the clay and removes any air bubbles that can lead to cracking as the clay dries.
Work in thin layers and let dry between applications. Avoid making sections too thick or adding new clay before previous layers have dried. Thick sections will dry unevenly and can crack or even collapse.
Smooth joints and seams. Where two pieces of clay join, gently blend and smooth the seam.Any ridges or uneven areas can become weak points once dried.
Allow proper drying time. Drying takes longer with thicker sections. Letting clay dry thoroughly between steps prevents cracking and provides a solid base for adding layers.
Seal the surface. Once fully dry, use a sealant like polyurethane or acrylic paint to seal the surface. This helps protect the clay from moisture damage over time.
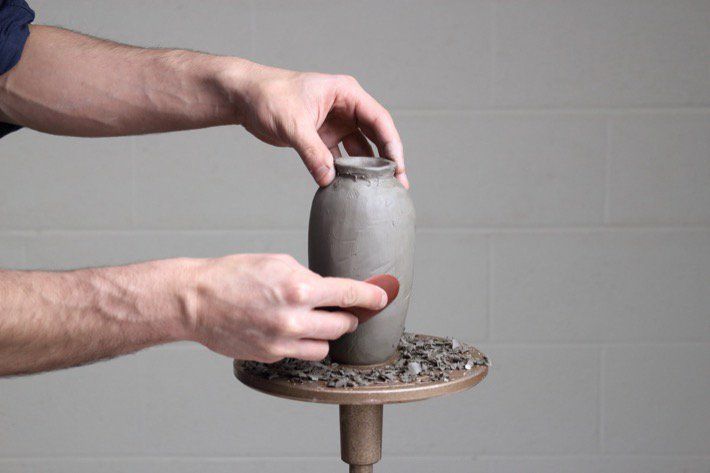
Making an Incense Holder
When making an incense holder out of air-dry clay, the first thing to consider is the size and shape you want it to be. A rounded or cylindrical shape tends to work well for containing the smoke and scent of incense. Make sure to make the base thick and stable so it doesn’t tip over easily.
Add several small holes in the sides and lid of the holder to allow ventilation and let the incense smoke escape. The holes should be small enough so pieces of ash don’t fall out. For incense sticks, you can poke holes into the side of the holder to insert them. For incense cones, make a small receptacle in the center of the holder that you can place the cone in.
Decorate the holder however you like with stamps, paints, or other embellishments. Just make sure to avoid overly elaborate shapes or decorations that may weaken the structure. Keeping the design relatively simple will help ensure the holder maintains its shape and stability once dried.
Decorating the Incense Holder
One of the best parts of making an incense holder from air-dry clay is having the ability to decorate it however you’d like. The surface of the clay can be carved or stamped with custom designs using clay tools. You can also paint the holder with acrylic paints, using patterns, images, or freehand designs. The painted clay should be sealed with a varnish or glaze for protection and shine.
Air-dry clay also allows you to attach embellishments to the holder. You can add beads, sequins, shells, or any small objects by simply pressing them into the surface of the soft clay. These add nice decorative accents and texture. Just make sure any objects are secured well so they don’t fall off once the holder is dry.
No matter which decoration method you choose, an air-dry clay incense holder provides the perfect blank canvas for your creativity. The finished piece will be uniquely yours. Just take care not to overload the holder with too many heavy embellishments, as the clay can be fragile after drying.
Drying and Curing Process
Proper drying and curing is essential when working with air-dry clay. Here are some tips for best results:
Let air-dry 24-48 hours – Air-dry clay needs sufficient time to dry thoroughly before baking or painting. Allow your creation to air-dry for 24-48 hours to reduce cracking or breakage.
Can accelerate with low oven temp – If needed, you can accelerate drying by placing air-dry clay creations in a warm oven at the lowest temperature setting, around 150-200F. Monitor closely to prevent over drying.
Fully cure may take 1-2 weeks – While air-dry clay will harden within 24-48 hours, it takes 1-2 weeks to fully cure and reach maximum hardness. Handle gently during this time.
Avoid rapid drying – Prevent cracks and breakage by avoiding direct heat, fans, or dry climates. Slow, even air drying is best for thorough, stress-free curing.
Sealing and Protecting
Once your air-dry clay incense holder is fully cured and dried, it’s important to seal and protect it for longevity. Air-dry clay is porous and can absorb odors and stains over time if left unsealed.
Seal the incense holder with an acrylic varnish or waterproof sealant designed for clay. This creates a protective barrier that prevents absorption. Apply multiple thin coats and allow to fully dry between coats. Select a matte, satin, or gloss varnish based on your desired finish.
To maintain the seal and extend the life of your air-dry clay creation, recoat it with sealant every year or when you notice the surface becoming porous again. Taking time to reseal will prevent odors, stains, and other damage over many years of use.
Example Designs
Coil Pot
A simple but beautiful incense holder design is a coil pot. To make this, roll out ‘snakes’ of air-dry clay and coil them on top of each other in a spiral pattern. Smooth the coils together and shape into a rounded pot form. Add decorative elements like stamps, texture, or cutouts shapes. Let dry fully before applying a sealant.
Sculpted Animal
For an incense holder that doubles as decoration, sculpt your favorite animal out of air-dry clay. Start with a solid base shape and build up the details. Let your creativity shine by adding texture, pattern, or other embellishments. Allow to dry fully, then paint or leave natural.
Geometric
An angular, geometric incense holder has a modern, sleek look. Cut out geometric shapes from rolled sheets of air-dry clay and assemble into a holder form. Consider a pyramid, diamond, or abstract shape. Allow to dry fully before painting bold colors or metallic finishes.
Decorative Box
A box-shaped incense holder adds visual interest. Construct the basic box shape out of air-dry clay slabs or coils, then embellish the sides with decorative elements like patterns, textures, cutouts, stamps, or modeling. Allow to dry fully before sealing and decorating further.
Conclusion
To summarize, air-dry clay is an accessible and versatile material for crafting homemade incense holders. Its low-cost and ease of use make it ideal for beginners. The clay can be molded into any shape and decorated in countless ways. Once dry, it provides a sturdy base to hold incense sticks or cones.
However, air-dry clay has some downsides to consider. It can be messy to work with and takes time to fully cure. The finished product is also quite fragile. Applying a sealer is recommended for protection and durability.
Overall, feel free to get creative with air-dry clay! Make simple or elaborate holders based on your skill level. The right techniques will help the clay maintain its form during drying. With some care and sealing, an air-dry clay incense holder can make a wonderful addition to your home.