How Do You Attach Things To Air Dry Clay?
Air dry clay (or clay that dries at room temperature) is a modeling and sculpting material made of natural components like clay and cellulose. It typically includes non-toxic ingredients and comes in white or terracotta colors. Air dry clay dries hard but remains lightweight and easy to cut, drill, sand, and paint. It’s an accessible, kid-friendly material, popular for crafts and decorative pieces.
One of the great things about air dry clay is its ability to attach separate components together to form more complex designs. From adding small details like beads or sequins to securing larger pieces like handles or bases, there are simple techniques for smoothly incorporating add-ons. Attaching items allows more creativity and customization in clay projects, from jewelry and figurines to home decor and DIY crafts.
Common things people like to attach to air dry clay are decorative items like beads, buttons, seashells, and found objects; functional pieces like hooks, handles, and hinges; as well as extensions like clay coils, ropes, and rods. With some basic preparation and the right adhesive, air dry clay can securely hold all kinds of attachments in place.
Preparing the Clay
Before you attach anything to air dry clay, it’s important to properly prepare the clay so it has the right consistency. Air dry clay often comes in brick form, so you’ll need to knead and condition it first to make it pliable. Kneading helps distribute moisture evenly throughout the clay and softens it up. The ideal consistency is smooth and flexible, but not sticky. If the clay is too dry, add just a bit of water and continue kneading until it reaches the desired texture. Avoid over-wetting the clay, as excess moisture can lead to cracking.
Once the clay is conditioned, you can roll it out into even sheets or slabs using an acrylic roller or your hands. Roll the clay out to approximately 1/4 inch thickness on a flat surface lightly dusted with corn starch or powder. Smoothing the clay into sheets or slabs gives you a uniform surface to work on when adding decorations or attaching objects.
Using Slip
Slip is a thin liquid mixture of clay and water that can act as an adhesive to attach objects, appendages or additional clay pieces to an air dry clay sculpture. Slip helps fuse surfaces together to create stronger bonds and seamless joints.
To make your own slip, start by mixing equal parts air dry clay and water in a container or plastic bag. The mixture should be fluid but still slightly thick. For a smoother application, you can strain the mixture through a sieve or pair of tights.
When affixing lighter objects like paper or fabric, apply slip generously to both surfaces with a paint brush or sponge brush. Press the items together firmly and let dry completely. For heavier objects, score or roughen the surfaces first before applying slip and affixing.
Slip creates strong adhesive bonds as it dries and shrinks slightly. It helps merge clay surfaces and provides an imperceptible seam for a smooth, cohesive finish.
Scoring and Slip Method
One of the most common and effective ways to attach objects to air dry clay is by scoring and applying slip. This involves using a tool to rough up the surfaces to be joined, applying a layer of watered-down clay (slip), then pressing the pieces together.
To start, use a toothpick, skewer, or other pointed tool to scratch crosshatch marks into the clay where you want to attach something. Scratch deeply enough to expose the porous interior of the clay. Score both the attachment object and the clay base.
Next, create some slip by mixing a bit of clay with some water. The mixture should be about the consistency of thick paint. Use a paintbrush or your finger to apply a layer of slip to the scored areas on both surfaces.
Then simply press the attachment object onto the base, slipping the scored areas together firmly. The scratches and wet slip help the pieces bond. Let the slip dry completely, usually 15-30 minutes. The attachment should now be secure.
Scoring and using slip creates a strong connection once dry. This method can attach clay pieces together or affix objects like jewelry, beads, stones, or small toys onto a clay base. With the right slip consistency and thorough scoring, the objects should bond tightly.
Inserting Objects
One simple way to attach items to air dry clay is by pressing them directly into the surface while the clay is still soft and malleable. Items that have some weight or thickness to them like beads, buttons, game pieces, and charms work best for this technique.
Start by softening the clay if needed. Knead it for a few minutes until smooth and free of cracks. Press the object firmly into the surface, angling it slightly if desired. Make sure there is good contact between the clay and object, without any air gaps. Let the clay firm up and dry around the object over the next 24 hours before handling. The clay will form a tight seal around the inserted object.
With this method, no glues or extra steps are needed. The friction and grip of the clay is enough to hold small lightweight objects in place once fully hardened. Just be careful when moving project pieces before the clay has fully set.
Using Regular Glue
Many common white and wood glues can be used to attach lightweight objects to air dry clay. White school glue, tacky glue, and wood glue such as Elmer’s are all good options. The key is using one that dries clear so it doesn’t detract from the look of your finished piece.
Be aware that glue can take longer to dry on clay than other surfaces. Allow the glue to dry completely, usually 24 hours, before handling the clay further or baking it. Glue is best for attaching flat lightweight materials like paper and photos. Avoid attaching anything with 3D form or weight such as charms, since the glue may not hold up long-term.
Glue has some limitations when used with clay. It can result in visible brush strokes on the clay surface that detract from the appearance. Glue also does not hold up as well over time compared to other methods. Pieces attached with glue may loosen or fall off more readily if the item is played with or dropped. For a more secure hold, scoring and slip is recommended over glue when possible.
Using Nails and Wire
Nails and wire can provide an internal framework to support structural elements in air dry clay models. Here are some techniques to use them effectively:
Hammering nails into firm clay allows you to embed strong attachment points. Avoid hammering into soft, moist clay as it may dent or compress too much. Let pieces firm up until nails can be tapped in without excessive impact.
Inserting wire armatures involves shaping wire to the desired form, then pressing it into the clay as a skeleton. This is great for sculpting figures, shapes that need poseability, or projects that require more strength. Use stiff, thick wires that will hold their form.
Securing with clay around nails or wire binds them firmly into the piece. Add extra clay to fully encase insertion points and blend seamlessly. Smooth and meld clay around wires using fingers, sculpting tools, or a bit of water. Allow clay to dry completely to grip objects tightly.
Baking Models
Once you’ve attached all elements to your air dry clay model, it’s time to bake it to fully harden and set the attachments. Baking hardens the clay through a chemical reaction that requires heat. It also adheres any items stuck into the clay by melting the glues and scoring slightly.
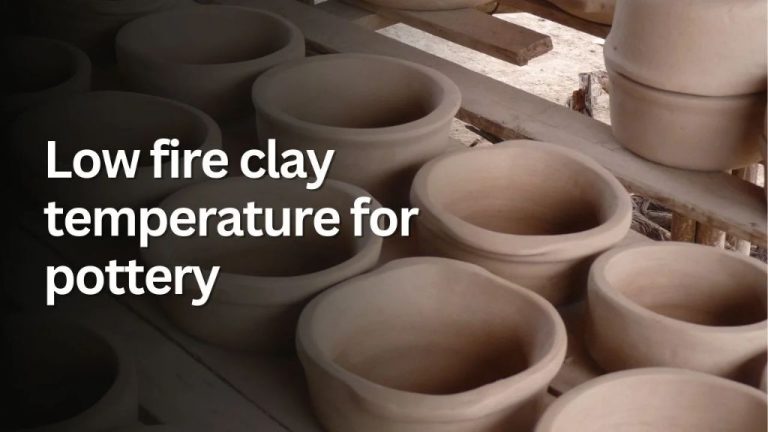
Air dry clay bakes at relatively low temperatures, usually between 130-275°F. Follow your clay brand’s instructions for exact time and temp. Bake pieces for 1-3 hours depending on thickness and size. Thicker areas and attachments may need longer. You want the entire piece to heat through fully.
Test attachments periodically while baking. If items become loose, they may need more scoring or slip. Avoid higher temps that could melt or burn pieces. Most natural materials like wood, leather or feathers do fine at low baking temps. Plastics and metals may require lower temps or shorter baking.
Let models cool fully before handling. Baking solidifies attachments for a long-lasting bond. With proper prep and baking, attachments should hold up to regular handling and display.
Applying Finishing Layers
Once your model is baked, you may notice that some of the attachments and inserts are still visible or uneven. Applying finishing layers of clay can help smooth everything out and give your entire sculpture a uniform look.
Start by adding small balls of clay over any visible attachments or uneven areas. Use your fingers to gently press the clay over the spots, filling in gaps and crevices. Add thin snakes of clay to build up layers and blend pieces together. Water can help smooth and merge clay surfaces.
Focus on covering any nails, wire or objects that are protruding. Cover attachments completely with the clay. Make sure to extend the clay out beyond the edges of attachments, tapering it off into the existing clay sculpture.
Work slowly and carefully, letting the clay fully dry between applications. Once you’ve built up the area sufficiently, use modeling tools or your fingers to gently blend and smooth the clay. Scratch textures can help naturalize added clay layers.
When you are happy with the results, bake the model again. Then you can paint the entire surface with acrylics or other paints. Match the paint color to the surrounding clay for a seamless look. The finishing layers help hide imperfections for a uniform finished sculpture.
Troubleshooting
If you find that items are falling off or attachments breaking on your air dry clay models, there are a few techniques you can try to remedy the issues:
Dealing with Things Falling Off
If attachments are falling off your clay model before it fully dries, first examine the area where they detached. If there is no visible clay residue or impression left behind, then the item likely was not attached firmly enough. Going forward, be sure to really press and smooth the clay over and around the object to maximize contact and adhesion.
You can also try roughing up smooth surfaces before attaching items, and letting the clay dry a bit before attaching so it’s not as malleable.
Repairing Broken Attachments
If an attachment breaks off from the dried clay, you can easily reattach it using slip. Add some water to leftover clay and mix until it reaches a glue-like consistency. Brush the slip over the broken surfaces, press them back together firmly, and let it dry completely.
For a stronger bond, you can also score or roughen the surfaces first before applying slip and attaching. Use a sharp tool like a toothpick or skewer to scratch crosshatch marks where the pieces will meet.
Improving Adhesion
To get the strongest bond possible when attaching items:
- Make sure the clay is firm but still pliable, not too soft.
- Roughen smooth surfaces with a tool before attaching.
- Use plenty of slip or glue and really press the item into the clay.
- Wrap clay over edges and around openings for a better hold.
- Let dry thoroughly, at least 24 hours.
With proper techniques, you can create durable clay models with attachments that hold up over time. If pieces do break or fall off, repairing with slip is quick and effective.