Can You Kiln Pottery At Home?
Kiln pottery refers to clay pots, vases, plates, and other ceramic items that are fired in a kiln to harden them. A kiln is a special oven used to fire clay and ceramics at high temperatures ranging from 1,800 to 2,400 degrees Fahrenheit (982 to 1,316 degrees Celsius). The heat from the kiln permanently transforms the clay by fusing the silica particles, making the finished pottery durable, water-resistant, and able to withstand repeated use (Encyclopedia Britannica). Firing clay pottery in a kiln allows artists to create ceramic works that would not withstand being fired at lower temperatures, such as stoneware and porcelain.
Benefits of Having a Kiln at Home
Having a kiln at home provides a wonderful creative outlet for ceramic artists. With a home kiln, you can experiment and create pieces at your own pace without being bound by studio schedules. You’ll have the ability to fully glaze and finish your creations.
A home kiln enables you to produce gifts for loved ones. Creating personalized mugs, plates, bowls, and figurines makes for heartfelt presents. The pieces you make will showcase your unique talents.
You may even sell your ceramic wares with an at-home kiln. Setting up an Etsy shop or selling at local fairs and markets can help offset the costs of clay and equipment. Having full control over firing and glazing results in high-quality pieces that fetch premium prices.
Types of Kilns for Home Use
There are several types of kilns available for home ceramic use. The most common options are:
Electric Kilns
Electric kilns are the most popular choice for home pottery. They provide consistent, even heat and are easy to use and maintain. Electric kilns come in a range of sizes and can be used for ceramics, glass fusing, enameling, and heat treating [1].
Gas Kilns
Gas kilns allow for atmospheric effects like reduction firing. They can reach higher temperatures than electric kilns. However, gas kilns require good ventilation and take more skill to operate safely. Propane and natural gas are commonly used [2].
Raku Kilns
Raku kilns are small, portable kilns used for raku firing. This involves removing pottery from the kiln while it’s still glowing hot and placing it into combustible materials to create unique finishes.
Pit/Barrel Firing
Pit or barrel firing involves placing pottery into a hand-dug pit or old barrel along with combustible materials. It’s an inexpensive, low-tech option for small-scale outdoor firing.
Factors to Consider Before Purchasing
There are several key factors to consider when deciding on purchasing a kiln for home use:
Cost
Kilns can range dramatically in price from a couple hundred dollars to several thousand depending on the size, features, and capabilities. Consider your budget and how much you plan to use the kiln to determine what makes the most economic sense for your needs. Small tabletop kilns often provide an affordable entry point for beginners.
According to The Best Ceramic Kilns for Home Use, expect to spend $500-1000 for a quality starter kiln suitable for small projects.
Space
Make sure you have adequate space for the kiln itself plus room to load and unload it safely. Kilns generate tremendous heat so sufficient ventilation and clearances from walls and other objects is crucial.
As recommended by Finding the Perfect Kiln for Ceramics in Lab and Home, allow at least 2 feet clearance on all sides and do not operate under shelves or cabinets.
Ventilation
Proper ventilation is essential to dissipate heat and vent fumes. Kilns require a hood, chimney vent, or being placed in a well-ventilated area such as a garage. Never operate a kiln in an enclosed space.
Electricity Load
Kilns draw considerable electricity while firing so ensure your electrical system can handle the load. Have an electrician inspect your setup if necessary. Choose a kiln that matches your available voltage and outlet amperage.
Safety Precautions
Operating a kiln at home requires taking proper safety precautions. Proper ventilation is crucial – fumes from firing can contain carbon monoxide and other dangerous gases, so make sure your kiln is vented outside or equipped with an afterburner (Kiln Safety Tips | How to Fire Safely and Effectively). Keep a fire extinguisher rated for electrical fires nearby, and never leave your kiln unattended while firing. Supervise the kiln at all times and be cautious when opening the door once firing is complete. Wear protective eyewear when looking inside a hot kiln and avoid touching heated elements. Keep combustible materials like paper and solvents away from the kiln. Follow all manufacturer guidelines and local fire codes for safe installation and operation (Kiln Safety in Schools).
Preparing Your Studio
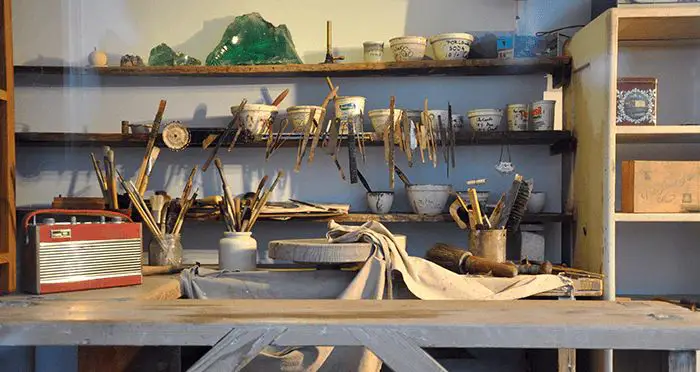
Setting up a proper home pottery studio requires attention to details like electrical, shelving, tools, and furniture. Installing a kiln and pottery wheel, along with other equipment, will require sufficient power supply and outlets. Consult an electrician to assess your electrical needs and if necessary, upgrade your home’s electrical panel or wiring. Ensure outlets near equipment are grounded to handle high wattage safely.
Install open sturdy shelving at medium heights for holding clay and tools. Leave lower shelves open for storing larger work. Use furniture like tables, counters and storage cabinets suitable for a working studio space. Have adequate lighting for task work but avoid too much heat from light sources (Homestead Pottery). Gather essential pottery tools for each stage of the process – clay prep, wheel throwing, handbuilding, sculpting, decoration, and cleanup.
Clay and Glaze Selection
When selecting clay and glaze for firing in a home kiln, the main options are stoneware and porcelain clays, paired with low-fire or high-fire glazes. Stoneware clays are dense, durable, and less prone to warping or cracking. They can withstand firing up to 2,300°F. Porcelain clays are more translucent and delicate but can be fired up to 2,600°F. For home kilns that fire below 2,200°F, stoneware clays paired with low-fire glazes tend to work best.
Low-fire glazes mature at lower temperatures, typically between 1,750-2,200°F. They allow for shorter firing times and often have brighter colors. However, they are less durable for functional ware. High-fire glazes mature at over 2,200°F and result in more durable finishes, though the colors tend to be more muted. For consistent results in a home kiln, low-fire glazes are generally recommended.
When selecting clay and glaze combinations, it’s important to match the temperature requirements. Using a low-fire glaze on a high-fire clay risks under-firing the glaze. Conversely, a high-fire glaze on low-fire clay can cause bubbling or burning. Consulting manufacturer specifications can ensure the best pairings.
Firing and Cooling
Firing pottery at home involves three main steps – bisque firing, glaze firing, and annealing. Bisque firing is done on greenware or unfired clay to convert it from its soft leather-hard state into a hard, porous ceramic material. Clay is fired to around cone 04-06 for bisque firing. According to The Basics of Firing Electric Kilns, ramp up the kiln by 100-150°F per hour for bisque firing. Soak at top temperature for 30-60 minutes before allowing the kiln to cool naturally with the door closed.
During glaze firing, the glazed bisqueware is fired to a higher temperature, usually between cone 6-10 depending on the glaze used. Ramp up the kiln by 150-250°F per hour. A faster ramp leads to more glaze movement while a slower ramp reduces glaze defects. Soak at top temperature for 10-15 minutes then anneal by cooling the kiln at 100°F per hour down to 1900°F before allowing it to cool naturally with the door closed. According to How Long Does It Take for a Kiln to Cool Down?, a cone 10 glaze firing and annealing can take 16-24 hours total.
Allow sufficient time for pieces to cool completely before unloading. Thermal shock can occur if pieces are unloaded while still hot. Let the kiln cool below 150°F before unloading. With proper firing and cooling time, your homemade pottery will be strong, finished, and ready to use.
Troubleshooting Common Issues
Firing your own pottery at home can be very rewarding, but it may also come with some troubleshooting from time to time. Here are some of the most common issues that come up with home kilns and how to address them:
Uneven Firing
If some areas of your pottery turn out underfired while other areas are overfired, this is referred to as uneven firing. Some potential causes include:
- The kiln lid or door not sealing properly against the kiln body. Check for cracks or warping and reseat the lid if needed. Gaps can be detected by a red glow during firing according to Important General Instructions for Troubleshooting (https://www.clay-king.com/trouble.htm).
- Objects stacked too closely together inside the kiln, obstructing heat circulation. Leave 1-2″ between pieces.
- Heating elements not functioning properly. Have an electrician check the elements and replace if necessary.
Glaze Defects
Issues like cracking, crazing, pitting, or crawling in the glaze can indicate firing problems. This may be caused by:
- Firing too fast – increase hold times at lower temperatures.
- Insufficient heatwork – try firing to a higher top temperature.
- Incompatible clay and glaze – use glazes formulated for your clay type.
Kiln Maintenance
Regular kiln maintenance can prevent many problems. Be sure to:
- Calibrate thermocouples annually according to manufacturer instructions.
- Check heating elements – replace if coils are loose, sagging or corroded.
- Lubricate the kiln lid hinges regularly.
- Clean kiln shelves and vent system periodically.
Following the manufacturer’s maintenance schedule can help avoid costly repairs down the road. Be proactive and issues can be avoided before they escalate or ruin a firing.
Conclusion
Having your own kiln at home opens up many possibilities for creating custom ceramic pieces. With the right type of kiln for your space and budget, knowledge of firing procedures, and safety precautions, you can achieve beautiful results firing your own pottery and sculptures. The process requires careful planning and practice, but being able to glaze and fire your clay work in your own studio is very rewarding.
In summary, the major factors to weigh are the capacity you need, fuel options, and controls that suit your experience level. Make sure to budget for high-quality ceramic materials and tools to complement your new kiln. Finding the right firing temperature through test tiles can take some trial and error. With responsible use and maintenance, a home kiln can provide years of firing your custom glazed pots, tiles, or ceramic artwork.

