Can You Layer Different Colors Of Glaze?
Ceramic glazing involves applying a coating to pottery or ceramic ware to provide protection and decoration. Glazes are made from powders, minerals, and metal oxides that melt and fuse to the clay surface when fired in a kiln at high temperatures (The History of Ceramic Glaze). Layering different colored glazes allows artists to achieve striking visual effects as the layers interact and blend together. This technique opens up many creative possibilities, as multiple translucent layers can produce deeper, more complex colors and patterns. Glaze layering allows potters to test out new color combinations and explore innovative glaze techniques.
Materials Needed
To layer different colors of glaze, you will need:
- Glazes in various colors and opacities – Select glazes in colors you wish to layer. Consider both transparent and opaque glazes to allow underlying colors to show through or to block them out.
- Brushes – Small brushes with soft, flexible bristles work best for controlled glaze application. Have a variety of brush sizes for detail work.
- Pottery/ceramics – Bisqueware pottery or ceramic items provide the base surface for glaze layering. Make sure pieces arebisque fired before applying glazes.
Start with these basic supplies before expanding into specialty materials for more advanced techniques.
Process
The process of layering glazes involves applying multiple layers of glaze over one another on the bisqueware surface. Here are the key steps:
First, apply the initial glaze layer and allow it to completely dry. It’s important that each layer is fully dried before applying the next, to prevent colors from bleeding or mixing undesirably. According to this source, allowing at least a few hours between layers is recommended.
Once the first layer is dry, apply the second glaze over top, covering the entire surface. Allow this layer to dry fully as well before proceeding.
Continue layering on additional glazes as desired, letting each layer dry in between. The number of layers is up to you – some potters may use only two, while others will layer on four or more for more complex effects.
Proper drying time between layers is crucial for the glazes to interact as intended, rather than blending together into one indistinguishable color. With careful layering and drying, intricate patterns and depth of color can be achieved.
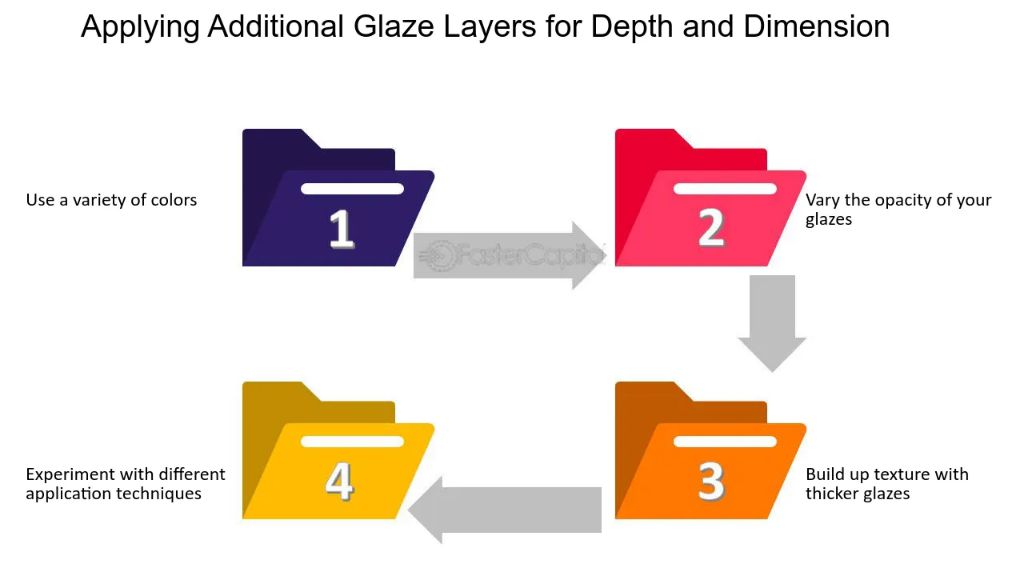
Achieving Different Effects
There are several techniques you can use when layering glazes to achieve different artistic effects:
Order of Glaze Colors
The order in which you apply colored glazes will impact the final results. Applying lighter colors first and then layering darker colors on top will allow the underlying lighter colors to show through for depth and dimension. According to this source, darker colors tend to overwhelm lighter ones, so plan your layering order accordingly.
Varying Opacity of Glazes
You can thin out liquid glazes with water or glycerin to make them more transparent. This will allow underlying layers to show through more. Thicker, less diluted glaze layers will conceal more. Adjusting glaze opacity gives you more control over the layering effects.
Brushstroke Techniques
The way you apply the glazes can create visual interest. Try different strokes, textures, and patterns for each layer. Scrape glazes, blend edges, or gently feather out the glaze to get variations in opacity and blending with lower layers. Refer to this guide for brushstroke techniques to try.
Common Combinations
Some common color combinations used in layered glazing include:
Complementary Colors
Complementary colors are opposite each other on the color wheel, like red and green or blue and orange. When layered, complementary glazes create a vibrant, high-contrast effect. For example, layering Mayco’s SW-274 Lava over SW-153 Celadon produces a striking red and green combination.
Monochromatic
A monochromatic scheme uses shades, tones, and tints of one color. Layering monochromatic glazes in varying opacities creates subtle, elegant effects. For instance, try layering different tints of Mayco’s SW-801 Blue.
Analogous Colors
Analogous colors sit next to each other on the color wheel, like blue and green. They create harmonious, sophisticated color combinations when layered. A popular analogous pairing is layering Mayco’s SW-803 Turquoise over SW-804 Green.
Primary Colors
The primary colors are red, yellow, and blue. Layering primary glazes produces bold secondary colors like purple, orange, and green. For example, try layering Mayco’s SW-11 Canary Yellow over SW-33 Majolica Red.
Troubleshooting
When layering glazes, there are a few common issues that can occur:
Bubbling Between Layers
Bubbles can form when the bottom glaze layer is still molten when the top glaze is applied. This causes gases to get trapped between the layers, creating bubbles. Allowing the bottom layer to completely cool before adding the next layer can help prevent bubbling.
Firing too fast can also cause bubbling between glaze layers. Slow down the firing schedule and allow gases to escape before progressing to higher temperatures. Adding a hold time can also help gases to escape.
Glazes Mixing and Turning Brown
Some glazes can interact and mix together when layered, causing the colors to turn muddy brown. Test compatibility between glazes on a test tile before applying to your actual piece.
Increase the layer thickness and make sure glazes are completely dried between applications. Using an intermediary layer like a base coat in between glazes can also prevent mixing.
Flaking/Cracking
If the glaze layers have different coefficients of expansion, the glaze may crack or flake off during firing. Choose glazes with similar expansion rates or use a base coat between layers.
Firing too quickly can also cause glazes to crack. Slow down the firing schedule and allow gases to fully escape.
Safety
When layering glazes, it’s important to take proper safety precautions. According to Big Ceramic Store, you should always work in a well-ventilated area when applying glazes to avoid breathing in harmful fumes. Wearing a respirator mask certified for use with glazes is highly recommended.
You’ll also want to be careful not to cross-contaminate between different glazes. Thoroughly clean your glaze brush between colors using warm water. If glazes interact in unexpected ways, they can create toxic compounds that are unsafe for food surfaces according to Big Ceramic Store. Keeping glazes separate until fired prevents accidental mixing.
Notable Examples
Layering different colors of glaze to achieve aesthetic effects has been practiced by ceramic artists for centuries. Some of the most famous examples include:
Leonardo da Vinci’s painting Mona Lisa is widely considered to be a masterpiece of the glazing technique. Da Vinci painted Mona Lisa using multiple thin layers of translucent oil glazes to create subtle variations in tone and depth (https://leprince.com/blogs/about-art/a-guide-to-glazing-in-oil-painting-techniques-history-and-challenges).
The American ceramic artist Karen Karnes (1925-2016) was known for her expert use of layered glazes. She often combined soft pastel colors like blues, greens, and pinks in her functional porcelain vessels to achieve depth and luminosity (https://www.pinterest.com/missgardziel/glaze-artists-choiceopalescent-amaco-layers/).
Bernard Leach (1887-1979), considered the father of British studio pottery, frequently used Japanese-inspired layered glazes like shino, oribe, and hakeme on his stoneware pots. The combinations created complex patterns and textures.
Other leading ceramic artists who have utilized layered glazing techniques in notable works include Shoji Hamada, Lucie Rie, Hans Coper, and Peter Voulkos.
Creative Possibilities
Glaze layering opens up many creative possibilities for potters and ceramic artists. By combining various colors and textures, complex patterns and effects can be achieved.
Layering transparent glazes creates depth and dimension. The interaction between the layers results in unique textures not possible with a single glaze. Firing temperature and glaze viscosity impact how the layers merge and move. Strategic layering can mimic natural materials like stone, wood grain, or feathers.
Using glaze trails, dripping, and splattering between layers produces organic, fluid patterns. Sgraffito techniques reveal underlying layers by carving into dried glaze. Combining matte and glossy glazes also adds visual interest.
The works of ceramicists like Linda Neubauer showcase the creative possibilities of layered glazing. With thoughtful experimentation, limitless effects can be achieved.
Conclusion
In summary, layering glazes on ceramic pieces can create beautiful, intricate effects by combining colors, textures, and patterns. Glaze layering introduces more complexity and visual interest compared to using a single glaze. With careful planning and preparation, ceramic artists can achieve a wide range of looks by layering complementary glazes.
The major benefits of glaze layering for ceramic artists include:
- Combining colors, sheens, and textures
- Creating visual depth and dimension
- Achieving unique custom effects
- Adding complexity and interest
- Expanding creative possibilities
By thoughtfully layering glazes, ceramic artists can bring their pieces to the next level. This versatile technique allows for abundant experimentation and beautiful results. With some practice and an understanding of materials, any ceramic artist can use glaze layering to enhance their work.