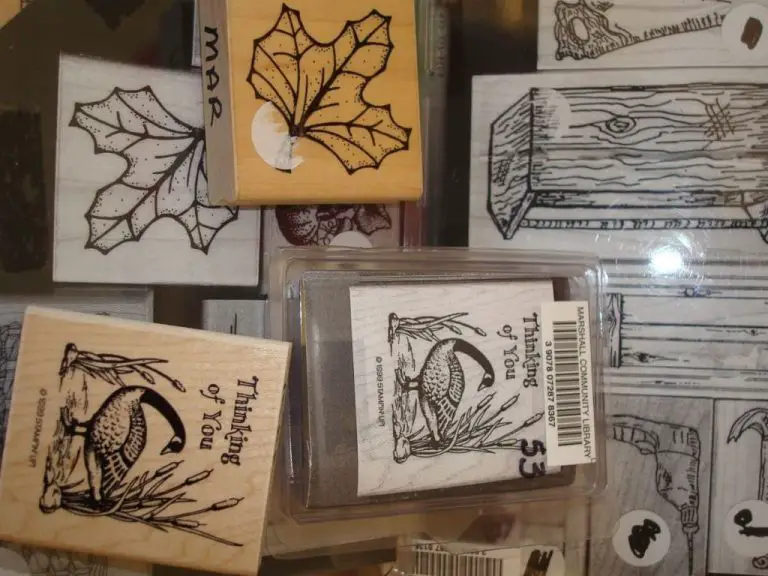
Can You Make Stamps Out Of Wood?
Woodblocks and wood stamps have a long, fascinating history dating back thousands of years. Although their popularity waned with the invention of moveable type and other printing methods, handcrafted wood stamps have seen a resurgence in recent decades. Today, wood stamps are beloved by crafters and artists who enjoy making their own designs for cards, scrapbooks, gift wrap, and other projects. Read on to learn the basics of making wood stamps yourself.
Types of Wood for Stamp Making
When choosing wood for hand-carved stamp making, you’ll want to select a material that is hard enough to hold fine details when carved, but not so hard that it is difficult to carve by hand. Hardwoods like maple, oak, cherry, and walnut are good options. Softwoods like pine and basswood are easier to carve but may not hold intricate details as well. Avoid very dense exotic hardwoods, which can be challenging for beginners to carve by hand.
The grain direction is also an important consideration when selecting wood for stamp carving. Wood tends to split more easily when carved across the grain rather than with the grain. For the carved stamp design to hold up over many impressions, it’s best to orient the design to go with the wood grain rather than across it. Some figured woods with wild grain like burl can be difficult to carve predictably.
Optimal woods for hand-carved stamps are straight-grained hardwoods like maple and cherry. Though softer, basswood is a classic choice due to its fine straight grain and ease of carving. Stay away from troublesome woods like knotty pine or heavily figured wood.
References:
https://hardwooddistributors.org/postings/top-hardwoods-for-carving
Wood Stamp Carving Tools
There are several key tools used for carving wood stamps. The most essential are various types of chisels, gouges, and v-tools:
Chisels come in different shapes and sizes, with flat, straight edges for carving lines and cleaning up details. Many will have beveled edges, which make it possible to carve out concave spaces. Skews have angled edges and are useful for detail work.
Gouges are chisels with curved or u-shaped blades, allowing you to scoop out material and create concave shapes. They come in a variety of widths, from fine detailing gouges to larger roughing gouges.
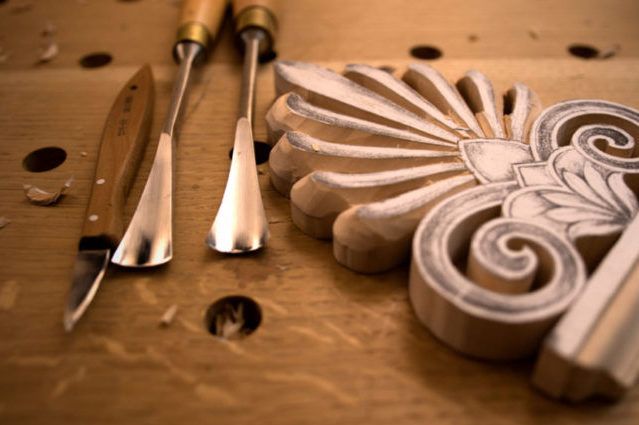
V-tools have a v-shaped point and are helpful for outlining designs and adding texture. You can find them in several sizes. The angle of the V can vary as well from 60 to 90 degrees.
In addition to chisels, gouges and v-tools, other helpful carving tools include mallets for hammering chisels, carving knives, and rifflers or rasps for smoothing surfaces.
High-quality beginner sets like this one from Michihamono provide all the essential wood stamp carving tools you’ll need to start stamp making.
Wood Stamp Carving Techniques
There are two main techniques used for carving wood stamps: relief carving and engraving.
Relief carving involves carving away areas around the main design so that it stands out in relief from the rest of the block. This technique is good for beginners as it allows you to gradually remove wood until the design emerges. Relief carved stamps tend to create bolder impressions.
Engraving involves carving into the wood block to create recessed lines and patterns. This requires more precision but allows for greater detail and shading in the design. Engraved stamps create finer, more delicate impressions.
When starting out, relief carving is generally easier to learn. However, many wood stamp artists use a combination of both techniques. The choice depends on the design, personal preference, and desired impression result.
No matter which technique is used, it’s important to have sharp carving tools to cleanly slice away wood. Chisels, gouges, and V-tools are commonly used. Sandpaper helps smooth and refine the carved stamp design.
For step-by-step guidance on relief carving a simple stamp design, see this tutorial: https://www.atlasquest.com/tutorials/carving/carving-the-stamp/
Transferring a Design
There are a few different methods for transferring a design onto a piece of wood for wood stamp carving. One common method is to use tracing paper. Simply place the tracing paper over your design and trace the outline and details with a pencil. Then place the tracing paper graphite-side down onto the wood and retrace the design so that it transfers onto the wood. The transferred pencil lines will create the outline for you to carve.1
Another option is to use graphite paper, also known as transfer paper. Place the graphite paper between your design and the wood with the graphite side facing the wood. Then trace over the lines of your design using a stylus or ballpoint pen, pressing firmly so the graphite transfers onto the wood. This creates dotted lines for you to connect and carve.1
Finally, some wood carvers prefer to draw the design freehand directly onto the wood using a pencil. This takes practice and skill but allows for a more organic, hand-drawn look. Start by lightly sketching the outline then go back and refine the details once you have the main shape mapped out.
Finishing Wood Stamps
Proper finishing is an important step in creating durable and long-lasting wood stamps. There are a few techniques to provide a smooth surface and protect the carved wood from wear:
First, sand the wood stamp with increasingly finer grit sandpaper, up to at least 220 grit. Be sure to sand in the direction of the wood grain. This will smooth the surface and remove any rough edges left from carving. According to a Reddit discussion on wood stamp finishing, starting with 100 grit and working up to 220 or 320 grit sandpaper works well.
Next, apply a food-safe oil finish like walnut or mineral oil. Let the oil soak into the wood, then wipe off any excess. Adding oil protects the stamp from moisture and gives it a polished look.
Finally, seal the wood stamp. A sealant like polyurethane will protect the stamp from repeated inking and impressions. The blog How to: Make a Hand Carved Stamp recommends 2-3 thin coats of sealant, letting each coat dry fully before adding the next. This creates a hard, durable surface.
With proper sanding, oiling, and sealing, a hand-carved wood stamp will withstand repeated use while keeping its fine carved details.
Inking Wood Stamps
When inking wood stamps, you have two main options for ink: oil-based ink or acrylic ink. Oil-based inks like linseed oil are commonly used for woodblock printing and provide rich, saturated color on paper. They can be thinned with solvents for a lighter application. Oil inks work well on bare wood but some find the cleanup more difficult. Acrylic inks are water-soluble, making them easier to wash up with just soap and water. They dry quickly and some brands like Prima inks provide good coverage on wood. However, acrylic inks can stain wood if left to soak in. They may not be as vibrant on paper compared to oil inks.
When applying ink to a wood stamp, use a brayer or roller to evenly distribute ink on the carved stamp surface. Roll the ink gently over the carved areas. Too much pressure can damage the carved design. Make sure to fully ink all of the recessed design but avoid getting ink on the uncarved surfaces. Test your image on scrap paper first before stamping your final work. Allow oil-based inks to set for 5-10 minutes before stamping for best results. Clean any excess ink on the edges for a crisp impression.
Using Wood Stamps
Wood stamps can be used to apply images and patterns to a variety of surfaces. Some common uses for wood stamps include:
On paper – Wood stamps work great for stamping designs on paper for cards, scrapbooking, journaling, and more. They can be used with ink pads or paint.
On fabric – Stamp designs onto fabric like cotton, linen, or canvas using fabric paint or ink. Wood stamps can be used to decorate apparel, table linens, tote bags, and more.[1]
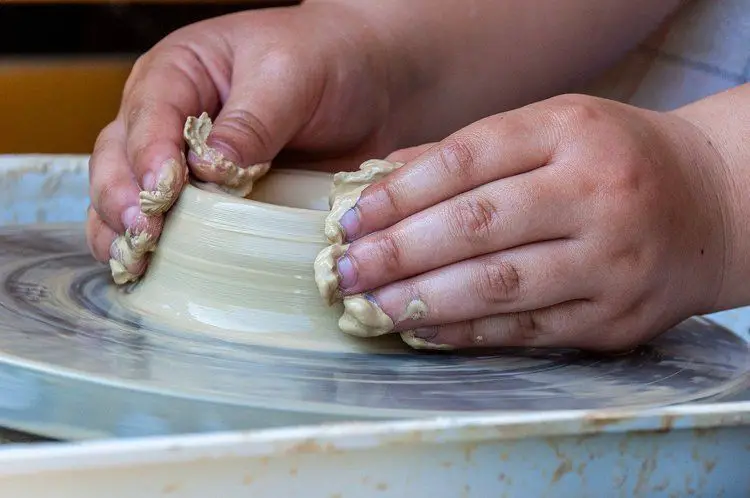
On polymer clay – Impress wood stamps into polymer clay to add patterns and texture before baking it. The carved design will transfer nicely to the clay.
On candles – For homemade or handcrafted candles, use wood stamps and candle dye to decorate the surface with custom designs.
On paper mâché – Add interest to paper mâché bowls, boxes, and other crafts by stamping designs into wet paper mâché before it dries.
Wood stamps can also be used on surfaces like leather, modeling compounds, soaps, and more. Experiment on different materials to discover the range of possibilities with hand-carved wood stamps.
Caring for Wood Stamps
Properly caring for wood stamps is important for preserving their quality and longevity. There are a few key things to keep in mind when storing and cleaning wood stamps:
For storage, keep wood stamps in a cool, dry place out of direct sunlight. Exposure to light, heat, and moisture can cause the wood to warp or crack over time. Store stamps standing up in a box or container, or lay them flat. Avoid stacking stamps directly on top of each other to prevent damage.
Clean wood stamps regularly with a soft dry cloth to remove excess ink. For a deeper clean, use a mild soap and warm water, gently scrubbing the stamp surface with a soft brush or sponge. Rinse thoroughly and pat dry with a lint-free cloth. Avoid submerging the entire stamp in water. Let stamps dry completely before storing.
Don’t use harsh chemical cleaners on wood stamps, as these can damage the wood. Avoid rubbing too hard when cleaning, as this can erode fine details in the carved design over time. With proper storage and gentle cleaning, wood stamps can last for many years.
Source: http://blog.creativekismet.com/2008/04/29/carved-rubber-stamps-storage-and-care/
Conclusion
Wood stamp making provides a personal touch for crafts, decor, and gifts. Once you learn the basics of carving, transferring designs, and stamp finishing, you can create quite beautiful and professional results from a simple block of wood. The interest in handmade stamps has grown tremendously, allowing you to share your wood stamp creations through online communities, blogs, and craft shows. While it takes some practice to master the techniques, with patience and the right tools, anyone can become skilled at crafting delightful wood stamps. The end result is a truly custom, one-of-a-kind stamp to be cherished.