Can You Paint Ceramic Bisque?
What is Bisque?
Bisque is a term used to refer to unglazed ceramic that has undergone an initial firing process. Unlike glazed ceramics, bisque has a porous, absorbent surface that allows it to readily accept paint, glazes, and stains.
The difference between bisque and glazed ceramics is that bisque is fired only once, while glazed pieces go through a second firing to melt the glaze and create a smooth, impervious surface. Bisqueware has a matte appearance and feel, lacking the glossy finish of glazed ceramics.
Since bisque is unglazed and porous, it provides an ideal surface for painting and decoration. The absorbent nature of the bisque allows paints and stains to soak in and adhere to the surface. Once decorated, bisque pieces can be fired again to permanently affix the paint or glaze.
Why Paint Bisque?
There are several compelling reasons to paint bisque ceramics:
First and foremost, painting allows you to add color and design to plain bisque pieces. Applying acrylic, enamel, or other paints lets you customize a ceramic object and make it your own with the colors and patterns you want. Painting bisque is an easy way to give a personalized touch to mugs, figurines, vases, plates, and more (Source).
Painting bisque ceramics is also popular for decorative purposes. Painted bisque pieces often feature beautiful, artistic designs. From simple patterns to intricate illustrations, painted bisque provides an avenue for creative expression. The colors and imagery you add can be minimalist or elaborate. Painted bisque decorates homes and makes wonderful gifts (Source).
Overall, painting bisque ceramics allows you to transform plain, unfinished pieces into colorful, personal works of art. The painting process enables creativity and customization for both aesthetic and practical purposes.
Types of Paint for Bisque
When choosing paint for bisque, there are a few main options:
Acrylic paint is one of the most popular and versatile choices for painting bisque. According to Artist Acrylic Paints and Ceramics, acrylics adhere well to bisque and many ceramic artists use them exclusively for finishing pieces. Acrylics provide vibrant colors and a matte finish.
Oil-based enamels can also be used to paint bisque. Enamels create a glossy finished look. However, enamels take longer to dry than acrylics.
Ceramic glazes are another option, though they require firing in a kiln after application to bond them to the bisque. Glazes allow for colorful finishes and glass-like effects. According to What is the Best Ceramic Paint?, glazes are best for finishing porous clay before bisque firing rather than painting an already-fired bisque piece.
How to Prepare Bisque for Painting
The bisque must be properly prepared before painting to ensure the paint adheres well and produces a smooth finish. The key steps are:
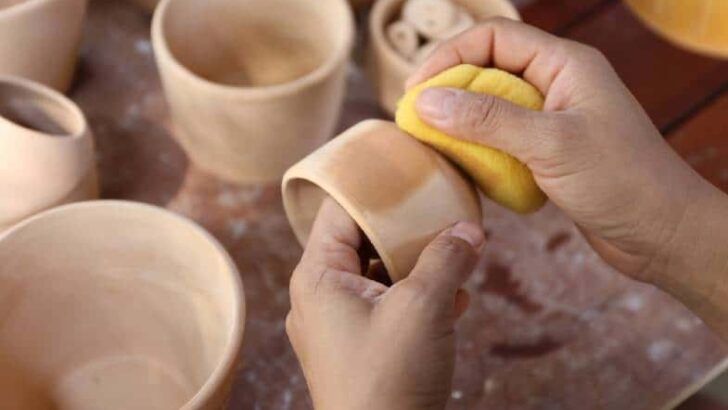
First, clean the bisque thoroughly to remove any dust or debris. Wipe down with a dry cloth or brush to eliminate surface dust. According to this guide, bisque pottery is very porous and needs a wet sponge to clean any remaining particles.
Next, lightly sand the bisque surface with fine grit sandpaper. This roughens up the bisque so the paint can grip better. Focus on sanding any smooth glazed areas.
Lastly, wipe down the bisque with a clean, damp cloth. This removes any remaining dust from sanding and ensures the surface is prepared for painting. The bisque should be completely clean and dry before starting to paint.
Painting Techniques
There are several techniques you can use when painting ceramic bisque to achieve different effects. Two main tools for applying paint are brushes and sponges. Brushes allow for more control and finer details, while sponges create softer, blended effects.
You can choose to outline shapes first or use a flooding technique to fill in large areas with color. Outlining involves sketching out a design in pencil first or painting just the contours with a thin brush. Flooding entails covering a section entirely with paint using a brush, sponge, or other tool.
Mixing paints is also an important technique. You can combine colors on a palette to make new hues or layer different shades of paint to add dimension. Starting with a lighter base coat and going darker on top creates depth. Adding metallic paints, glitter, or textured finishes over a base coat provides extra interest.
By combining various brushes, outlining versus flooding, mixing paints, and layering colors, you can create many different painting techniques when decorating ceramic bisque.
Applying a Base Coat
The purpose of applying a base coat to bisque is to provide an even, opaque coating for the bisque before adding additional layers of color. The base coat helps cover the original bisque color and provides a uniform surface for painting. According to The Ceramic Painters Web Site, “Your piece should have a Base coat using an opaque stain” (https://streamers.com/ideas/basic1.htm).
When applying a base coat, it’s important to apply it evenly across the entire surface. Use a soft brush or sponge, dampening it slightly so it is not soaked but just damp enough to pick up paint. Apply the base coat in smooth, overlapping strokes until the bisque is fully covered. Allow plenty of drying time between coats. Acrylic base coats dry quickly, while oil-based stains may require overnight drying.
Applying multiple thin coats of base paint helps ensure an even, smooth base for coloring. Rushing this step or applying too thickly may result in brush strokes, drips, or uneven coverage. Taking the time to patiently apply smooth, thin coats leads to better results.
Adding Color and Design
When adding color and design to your bisque, it helps to have inspiration for the patterns, textures, and color combinations you want to achieve. Sources like Pinterest boards with painted bisque can provide inspiration on color choices, painting techniques, and designs.
A good approach is to start with the largest background areas first. Paint the main background color or pattern over the primed bisque piece. Let this layer dry fully before moving on. Next, use different colors and techniques to build up layers of color and texture. Blend colors together for smooth gradients. Add dots, lines, and other patterns for interest. Overlap colors in some areas to achieve depth and dimension.
Don’t be afraid to layer many colors and combine techniques like sponging, splattering, and texturing as you build up the design. Let each layer fully dry before adding more paint. The layering and blending of acrylic paint is key for creating complex, visually appealing designs on your bisque.
Clear Coating
Applying a clear coat over painted bisque is an important final step that provides several benefits. A clear coat protects acrylic or other paints from potential chipping, fading, or scratching over time with use or cleaning. A clear top coat also enhances the color vibrancy and provides a uniform sheen and depth to the painted design [1]. There are a few main options for clear coating painted bisque:
- Polyurethane – Water-based or oil-based polyurethane can be brushed or sprayed over acrylic paint on bisque. It dries clear and hard and provides excellent protection.
- Resin – Two-part epoxy resin or UV-cured resin provides a glass-like coating over paint. Resin gives the deepest clarity and glossy finish.
- Varnish – Artists’ varnishes like polycrylic or damar can be used as clear topcoats. They are easy to apply but less durable than other options.
- Glaze – Ceramic glazes vitrify when fired in a kiln, forming a glassy coating. Liquid clear glazes brushed over paint can provide protection without refiring.
By applying a clear topcoat, the beauty and vibrancy of painted bisque can be preserved and enhanced. Carefully choosing an appropriate clear coat ensures the paint is protected and looks its best.
[1] https://craftyartideas.com/clear-coat-painted-clay/
Firing Painted Bisque
The purpose of firing painted bisque is to permanently set the paint onto the ceramic surface through exposure to high heat. Firing causes the paint to fuse with the bisque, making it durable and resistant to chipping, peeling or scratching.
Bisque ware is porous, which allows it to absorb paint nicely. However, the paint will not adhere permanently unless the bisque goes through a firing process. Firing temperatures are typically between cone 04 (1945°F / 1063°C) and cone 06 (2232°F / 1222°C). The optimal cone level depends on the type of paint used.
It’s important to follow the recommended firing schedule for the particular paints. Most enamels, acrylics and epoxy paints do well firing to cone 06. Firing too hot can burn off the paint, while underfiring prevents proper fusion. Slow heating and cooling is necessary to avoid cracking or crazing. A typical firing schedule is:
- Heat at 200°F per hour to 1000°F
- Heat at 100°F per hour to 1400-1450°F (cone 06)
- Hold for 10-15 minutes at top temperature
- Cool at 200°F per hour down to 1000°F
- Cool at 100°F per hour down to room temperature
Following the recommended firing schedule will result in durable, vibrant finishes on painted bisque ware.
Tips for Successful Painting
When painting ceramic bisque, it’s important to follow some basic tips to ensure your finished piece turns out well. Here are some key tips to keep in mind:
Work in thin layers. Don’t apply too much paint at once or it may pool and run. It’s better to apply multiple thin coats and allow each layer to fully dry before adding more paint. Thin layers will help prevent cracking or peeling later in the process.
Allow proper drying time between coats. Acrylic paint typically dries within 30 minutes, while spray paint may take 1-2 hours to cure. Be sure each layer is fully dry to the touch before adding another coat. Rushing the process can lead to chipping or smearing.
Start simple and practice. If you’re new to painting bisque, begin with basic shapes, solid colors, and minimal detail. Simple designs allow you to get comfortable with the painting techniques before attempting more complex projects. Take your time, don’t get frustrated, and have fun practicing.