Can You Use Clay To Make A Candle Holder?
The Beauty and Versatility of Clay Candle Holders
Candle holders made from clay provide a wonderful way to add customized, artistic touches to any space. The earthy nature of clay delivers a raw, organic feel that mass-produced holders simply cannot replicate. Clay’s malleability empowers you to shape it into an endless array of styles, colors, and sizes. With some basic knowledge, clay can easily be transformed into candle holders that complement your decor.
In this article, we will walk through the steps for crafting your own clay candle holders. You’ll learn about the properties of clay, essential techniques for sculpting and baking clay safely, and creative ways to display your finished pieces. We’ll also provide helpful tips to keep your clay candle holders looking their best over time. Follow along, and unlock your inner artisan!
Clay Properties
Clay is an excellent material for crafting candle holders due to its versatility and workability. There are several different types of modeling clay that can be used:
Modeling Clay – This type of clay is oil-based and flexible when kneaded. Modeling clay is easy to shape by hand and holds fine details well. However, modeling clay is not suitable for high temperatures, so it cannot be hardened by firing in a kiln. Finished modeling clay projects remain soft.
Pottery Clay – Pottery clay is water-based clay that can be shaped when wet, then hardened by firing in a high temperature kiln. When fired, the clay undergoes a chemical reaction that permanentlyhardens it. There are many varieties of pottery clay, including earthenware, stoneware, and porcelain.
Polymer Clay – Polymer clay is made from plasticized PVC and hardens when baked at low temperatures in a home oven. It comes in a wide range of colors and can be blended and sculpted to create highly detailed pieces. Polymer clay remains flexible when conditioned properly.
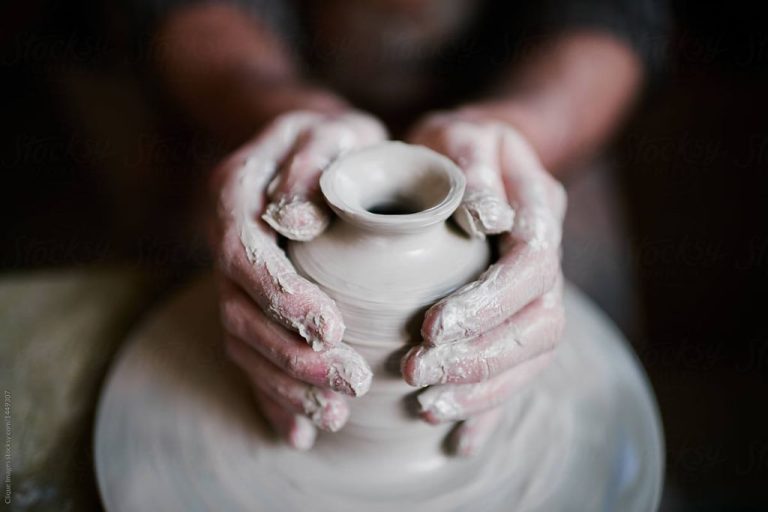
The moldable nature of clay allows crafters to shape it into just about any form imaginable. Clay is easy to work with using hands and simple household tools. It holds its shape well but can also be reworked multiple times to create the perfect design. When cured or fired, clay becomes a strong, permanent material that makes an excellent base for candle holders.
Making Clay Candle Holders
Making your own clay candle holder is a fun and satisfying craft project. With some basic equipment and materials, you can sculpt clay into a wide variety of candle holder designs.
Here is what you’ll need to make a clay candle holder:
Equipment
-
Clay – Polymer clay or air-dry clay work best.
-
Rolling pin
-
Clay sculpting tools – Popsicle sticks, toothpicks, silicone shaping tools, etc.
-
Candle to use as sizing template
-
Baking sheet or work surface
-
Oven for baking polymer clay, or air-dry space for air-dry clay
Instructions
Follow these steps to make a clay candle holder:
-
Knead the clay until soft and pliable. For polymer clay, condition it first per package instructions.
-
Flatten into a slab using a rolling pin. Make the slab thicker than the candle diameter.
-
Cut a circle out of the slab using the candle as a guide. Make the circle slightly larger than the candle.
-
Use sculpting tools to refine the shape if desired. Add decorative elements, texture, etc.
-
For polymer clay, bake per package instructions. For air-dry clay, allow to fully cure.
-
Insert candle into finished holder to display.
Get creative with your clay candle holder shape and decorations! The possibilities are endless.
Clay Candle Holder Designs
There are endless possibilities when it comes to the shapes and styles you can make clay candle holders in. Some popular designs include:
- Simple, cylindrical holder – This is the easiest shape to make as you simply roll the clay into a coil and form it into a circle.
- Bowl or saucer shape – Form the clay into a wider, shallow dish shape to cradle tea lights or votive candles.
- Geometric shapes – Try squares, rectangles, triangles or more abstract shapes for modern designs.
- Animals or figures – Mold the clay into the shape of animals, people, flowers or other objects for whimsical holders.
When it comes to decoration, you can imprint textures into the clay, add embellishments, or paint designs when finished. Some ideas include:
- Pressing stamps, sequins or shells into the soft clay to leave an impression.
- Rolling or imprinting patterns using textured items like lace or burlap.
- Incising designs into the clay using tools, cookie cutters or your own hands.
- Painting with acrylics and then sealing with a glaze when dry.
- Adding beads, crystals or glitter for sparkle.
The options are endless, so feel free to get creative with the shapes and decorations!
Curing Your Clay Candle Holders
Properly curing and drying your clay candle holders is a crucial step. If not cured thoroughly, the clay can crack or break apart over time. Curing removes any moisture from the clay and hardens the material through oxidation. There are a few techniques you can use to cure clay candle holders:
Air-Dry: Allow your clay creations to sit at room temperature until completely hardened. This is the most basic curing method, but can take several days or weeks. Ensure the clay is in a dust-free space.
Oven Dry: Place your clay holders in a cold oven, then turn the heat to 200°F. Allow them to bake for 1-2 hours. Turn off the oven and don’t open the door until fully cooled. This speeds up the curing time.
Food Dehydrator: A dehydrator set to around 115°F can slowly extract moisture from the clay over 6-12 hours. Rotate the pieces periodically.
Sealants: Certain glazes and sealants can help cure and harden the outer layer of air-dried clay. Apply multiple thin coats while the clay is drying.
Properly curing your clay creations ensures they last for years. Never expose unbaked clay to moisture or humidity. Take the time to use proper clay curing techniques for a long-lasting candle holder.
Safety Tips
When working with clay candle holders, safety should always be a top priority. Here are some key tips to keep in mind:
Use the Proper Clay
Not all clays are suitable for candle holders. Porcelain and stoneware clays are the best choices as they can withstand high temperatures and prolonged heat exposure. Avoid using low-fire clays as they can crack or explode when candles are burned in them.
Practice Fire Safety
Never leave burning candles unattended. Keep them away from flammable materials like curtains, books, paper, etc. Allow adequate ventilation so heat and smoke have a place to escape. Trim wicks to 1⁄4” before lighting to prevent overly large flames. Extinguish candles before going to bed or leaving a room.
By selecting appropriate clays and making fire safety a priority, you can safely enjoy beautiful clay candle holders.
Clay vs. Other Materials
Clay has some advantages and disadvantages compared to other common materials for making candle holders like glass, metal, wood, and plastic:
Pros of clay:
- Clay is an inexpensive material that’s easy to mold into creative shapes.
- Clay candle holders can be personalized with handmade designs.
- Clay is heat-resistant so safer for holding candles.
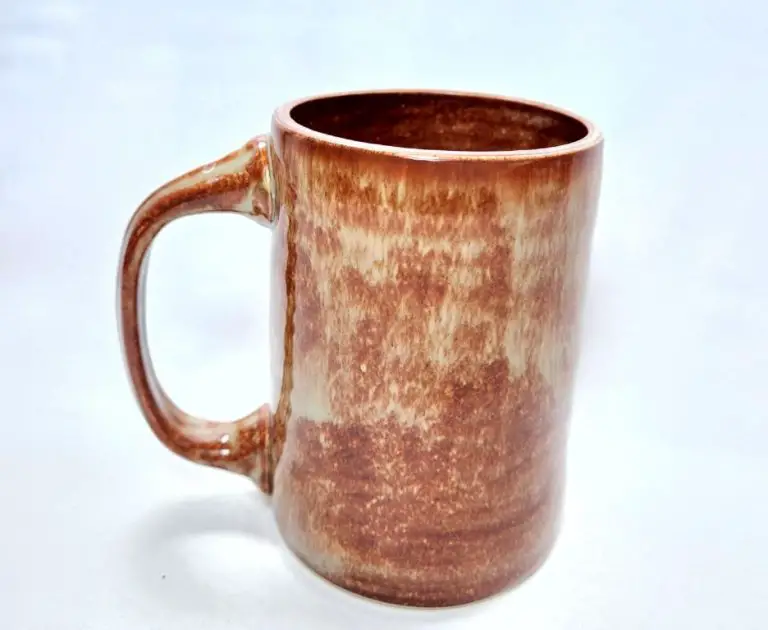
- Clay comes in varied natural colors like terra cotta, gray, red, and brown.
Cons of clay:
- Clay is breakable, unlike materials like metal and plastic.
- Clay requires sealing and can be high-maintenance.
- Clay absorbs water so requires protection from moisture.
- Clay is heavier than glass, wood, or plastic holders.
When choosing a material for candle holders, clay is a good option if you want to make something by hand or customize the design. The natural look and feel of clay also complements candles nicely. However, glass, metal or plastic may be better choices if you need something sturdy and long-lasting or prefer a more modern, sleek aesthetic.
Displaying Clay Candle Holders
There are many creative ways to display handmade clay candle holders in your home to accent your existing decor. Here are some tips for showcasing these pieces:
Create a grouping on a console table or mantle to form a collection. Try mixing different shapes, sizes, and styles of clay candle holders for visual interest. Layer the holders or arrange them in an asymmetrical way for a dynamic look.
Use clay candle holders on bookshelves or etageres to add handmade flair. Place them on different shelves interspersed with books, plants, and other decor items. The clay texture will make for an earthy contrast.
Display clay candle holders on windowsills or coffee tables to accent living spaces. The glowing candlelight will create cozy ambience. Choose colors like terracotta or neutral clays that complement your existing palette.
Nestle clay votive holders on side tables next to sofas or beds to create warm, intimate lighting. The small size makes them perfect for clustering in threes or fives.
Consider using clay candle holders in entryways, bathrooms, or halls to add charm. Their handcrafted look can personalize these high-traffic spaces in an easy, affordable way.
With thoughtful styling and placement, handmade clay candle holders can enhance any area. Let your personal taste and style shine through in the colors, shapes and décor pairings you choose.
Maintenance
Taking proper care of your clay candle holders will help them last for years. Here are some tips for cleaning, repairing, and maintaining clay candle holders:
Cleaning and Care
Use a soft, dry cloth to gently dust clay surfaces. Avoid abrasive cleaners or scrubbing that could scratch the clay. For more thorough cleaning, use a slightly damp cloth with a mild soap and gently wipe away dirt or wax residue.
Check the candle holder for stains after each use and promptly clean any wax drips or spills to prevent staining. Avoid soaking clay candle holders in water or putting them in the dishwasher.
Repairing Chips and Cracks
Small chips or cracks in cured clay can often be repaired. Carefully sand any rough edges of the damaged area. Mix a small amount of clay and use it to fill in cracks or chips. Smooth with your fingers. Let the repair fully cure before using the candle holder again.
For larger cracks, embed thin wooden coffee stirrers into the clay repair for extra stability. Avoid repairing pieces with major structural damage; these are better replaced than repaired.
Conclusion
Making candle holders out of clay is a fun, creative way to add beautiful decorative pieces to your home. As we’ve discussed, clay is an extremely versatile material that can be molded into endless shapes and designs. With proper clay curing and firing, clay candle holders can be durable while still showcasing the artistry of handmade pottery.
The key steps outlined include choosing the right type of clay, sculpting your preferred shapes and patterns, allowing thorough drying time, and properly firing the clay. Safety precautions should be taken, such as ensuring adequate ventilation when working with clay and keeping lit candles away from flammable materials. While clay requires some special care, it produces stunning results not achievable with other materials. With a bit of creativity and patience, you can make custom clay candle holders that add charm and elegance to any space.