Clay Art Adventures: Ideas For Exploring Your Creativity
Clay art has become an increasingly popular creative outlet and hobby over the past decade. According to market research, worldwide sales of modeling clay increased steadily, reaching approximately $29 million in 2019.
Polymer clay in particular has seen growth, with sales increasing 2.6% from 2018 to 2019. The polymer clay jewelry market specifically is thriving as well. Overall, clay art offers a fun, engaging way for both children and adults to express their creativity.
This guide will provide an overview of clay handbuilding techniques, sculpting, making jewelry, pottery, and more. With the right supplies and a bit of practice, anyone can discover the joy of bringing clay creations to life.
Supplies for Beginning Clay Artists
When getting started with clay art, having the proper supplies and tools is essential for success. The three main types of clay used by beginners are polymer clay, air-dry clay, and pottery clay like stoneware or earthenware. Polymer clay is very versatile and doesn’t require baking. Air-dry clay is easy to use and dries at room temperature. Pottery clays require firing in a kiln but allow you to create sturdy, functional pieces.
Some basic tools every beginning clay artist needs include:
- Clay sculpting tools like loop tools, rubber shapers, and silicone tipped tools for smoothing, shaping, and texturing the clay. The Different Kinds of Polymer Clay Tools for Beginners
- Clay cutting tools like tissue blades, craft knives, and clay cutters for slicing clay cleanly.
- Work surface like glass or ceramic tiles.
- Acrylic roller for conditioning and flattening the clay.
Having the right selection of clays and essential tools allows beginning artists to start creating a wide variety of clay art pieces and develop their skills.
Clay Handbuilding Techniques
The three primary methods of handbuilding with clay are pinching, coiling, and slab building. Once you gain experience with these three techniques, you can make a wide variety of ceramic art and pottery at home without the use of a pottery wheel.
Pinching is one of the most basic and instinctive ways to shape clay. To pinch pottery, start with a ball of clay and use your fingers and thumbs to pinch and pull the clay into the desired shape. Pinch pots are an easy beginner project for both kids and adults. For more intricate hollow forms, insert your thumb first to hollow out an opening before pinching the vessel into shape. Sources for pinching inspiration include https://www.thecrucible.org/guides/ceramics/handbuilding/.
Coil building involves rolling clay into long coils or ropes and stacking or attaching them into the desired form. Coiling allows you to gradually build up taller pottery and enables excellent control over the shape. Smooth and blend coils together with a wet clay slip. Coiling can be time-consuming but delivers beautiful results. Useful resources on coiling can be found at https://ceramicartsnetwork.org/daily/handbuilding-techniques.
Slab building uses flat “slabs” made of rolled out clay to construct forms. Cut and attach slabs to make boxes, bowls, plaques, and more. The slab thickness controls the final thickness of the piece. Allow slabs to firm up partially before assembly. Score and slip the joining edges. Slab building lends itself well to both functional pottery and decorative clay wall art.
Clay Sculpting
Clay sculpting allows you to create three-dimensional works of art from clay. You can sculpt anything from realistic figures and animals to abstract shapes and forms. The possibilities are endless!
When sculpting figures, it’s important to first construct an armature or frame from wire to support the weight of the clay. Add clay gradually and use sculpting tools to shape the forms. Pay close attention to anatomy and proportions to achieve a realistic look. Eyes, nose, mouth, hands, and feet can be sculpted in detail to bring the figure to life.
Sculpting animals follows a similar process, with extra attention on capturing the unique textures and characteristics of fur, feathers, scales, etc. Reference photos are very helpful. Let the clay soften a bit before sculpting so it’s pliable enough to hold finer details.
Abstract sculpting allows complete creative freedom. Experiment with different shapes, textures, and patterns. Try sculpting curved, geometric, or jagged shapes, or combining multiple shapes together. Adding visual interest through patterns, textures, or surface treatments like staining, painting, and glazing can make abstract sculptures pop.
The sculpting process requires patience but it’s incredibly rewarding to see your vision emerge from a simple lump of clay. With practice, you’ll gain skills in shaping clay and bringing dynamic forms to life.
Making Clay Jewelry
Making jewelry with clay is an easy and fun way to explore your creativity. Polymer clay such as Sculpey is perfect for handcrafting colorful beads, pendants, rings and more. The possibilities are endless!
To make beads, simply roll small balls or tubes of clay and bake according to package directions. Try different shapes, sizes, and color combinations. Layer contrasting colors for an ombre effect. Make dots, stripes, and geometric patterns by blending colors together. Add texture by pressing designs into the clay before baking with stamps, rollers, or improvised household objects like forks or bubble wrap.
Pendants can be sculpted into any shape imaginable. Cut out basic shapes with cookie cutters or craft blades. Mold the clay over cabochons for a domed effect. Use liquid clay to attach findings before baking. Get creative with clay canes to make intricate designs like flowers and animals. The baking process cures the clay into a durable, lightweight material perfect for jewelry.
To create rings, roll out a snake of clay and shape into a band. Overlap the ends slightly and smooth together. Size the ring on your finger before baking. Embellish bands with stripes, dots, and dimensional designs. Clay rings make wonderful gifts and can be customized for any style.
The beauty of polymer clay jewelry is that it can be made at home without special tools. Follow basic sculpting techniques to shape stunning beads, pendants, rings and more. Let your imagination run wild with clay to make completely unique jewelry creations.
Clay Pottery
Pottery making is one of the most accessible and satisfying ways to work with clay. With just a few simple tools and techniques, beginners can craft beautiful bowls, cups, vases, and planters to use or display. Some easy pottery projects to try include:
Handbuilt bowls – Start with a basic pinch pot or coil built bowl. Decorate the surface with textures made from everyday objects. Finish with food-safe glaze for serving soups and salads.
Mug – Roll out a slab for the sides and pinch a base. Wrap the clay around a cylinder to get clean, even sides. Add a handle and your favorite colors of glaze. Drink your morning coffee in your personal handmade mug.
Succulent planter – Sculpt a simple bowl shape then let it dry completely before bisque firing. Apply a crystalline glaze for an organic, geode-like effect. Plant with a mini succulent arrangement.
Vase – Throw a basic vase shape on the pottery wheel or hand build one from coils. Impress designs into the wet clay or layer on colorful glaze for interest. Display fresh or dried flowers.
The satisfying process of making pottery and seeing your finished fired creations makes clay pottery a wonderful creative adventure for beginners. Start simple and develop your skills at your own pace. Refer to introductory pottery books and online tutorials to learn timing, drying, firing, and glazing techniques.
Source: https://wheelandclay.com/blog/pottery-ideas-for-beginners/
Decorating Clay Creations
Glazing, painting, and mixed media techniques allow you to add color, texture, and visual interest to your clay creations. Glazes come in a variety of finishes from glossy to matte, and there are myriad colors available. According to The Pottery Wheel, popular glaze options include celadon, ash, copper red, and tenmoku.
Acrylic and ceramic paints also work beautifully on unfired clay. Paint can be used to hand-paint designs or patterns. Another technique is scraffito, where you scratch through one layer of colored slip or paint to reveal the clay color underneath. Using markers, rubber stamps, and stencils are other options for decorating clay before firing.
For mixed media clay art, you can attach found objects, beads, shells, or glass. Items with holes can be inserted before baking so they affix permanently to the clay. Anything flammable must be glued on after firing. Let your creativity run wild combining clay with various collage materials!
Clay Art for Kids
Clay is a fun and creative medium for kids to explore art. There are several types of clay that are safe for kids to use including air-dry clay, Model Magic, and polymer clay brands like Sculpey. Avoid oil and polymer-based clays which can be toxic. Focus on clays that air-dry at room temperature.
Kids can make simple pinch pots, coils pots, clay jewelry, and clay sculptures with basic handbuilding techniques. Let them imprint designs using homemade stamps, leaves, seashells, and other found objects. Make colorful beads by rolling balls of clay in glitter or ground chalk pastels. The possibilities are endless!
Some fun clay projects for kids include:model birds and pinch pot nests, nature prints using flowers and leaves, handprint dishes, coil pots, and beaded clay heart ornaments. Let their creativity run wild!
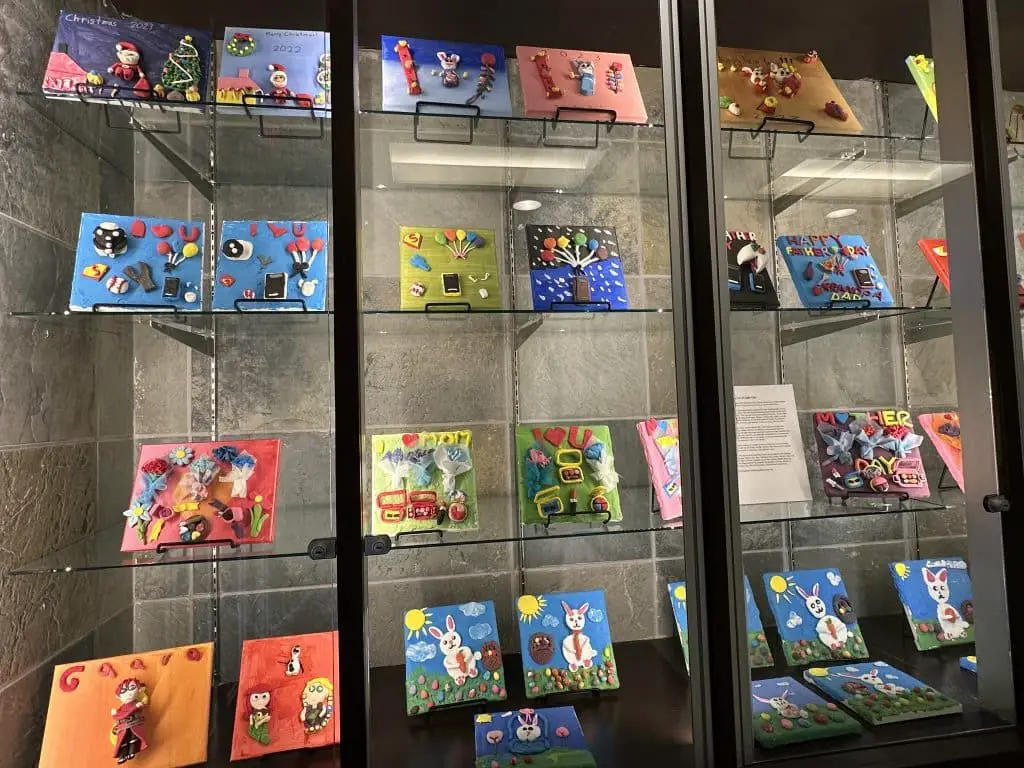
Displaying Clay Artwork
Properly displaying your clay creations can enhance their beauty and allow you to fully appreciate your art. When deciding how to showcase your clay artwork, consider the following display methods:
Installing shelves is one of the easiest ways to exhibit clay pieces of various sizes. Floating shelves can add modern flair while allowing more flexible arrangements. Group pieces by color, style, or size for a cohesive look. Ensure shelves are sturdy enough to hold the weight of clay.
Proper lighting can make the colors and textures of clay art shine. Spotlights aimed at sculptures or overhead lighting on a display shelf help artwork stand out. Natural lighting from a window also illuminates subtle details. Avoid direct sunlight which can fade colors over time.
Clay sculptures may require bases for stability and presentation. Neutral colored bases don’t distract from the art. Clear acrylic bases give the illusion of a floating sculpture. Consider sculpting your own customized bases during the clay art process.
For more display inspiration, refer to the sources below:
[10 Simple Things to Make With Clay](https://www.skillshare.com/en/blog/simple-things-to-make-with-clay/) – Shelving ideas
[28 Charming Ways To Use Your Kids’ Art As Decor](https://www.pinterest.com/pin/48061921001795972/) – Creative displays
Joining a Clay Art Community
Getting involved in a clay art community can enrich your practice and develop your skills as an artist. From classes and clubs to shows and open studio time, clay communities offer opportunities to learn, share, and exhibit your work.
Many local arts centers, studios, and colleges offer clay classes for all levels of experience. Check for beginner wheel throwing, handbuilding, sculpture, and glazing classes to build foundational skills. More advanced classes are useful for refining techniques or exploring new methods. Community centers may offer one-day clay workshops as well (Clay Art Center).
Clay clubs provide spaces for artists to come together and share ideas, troubleshoot problems, and foster connections. These groups may meet at studios, schools, or artists’ homes for informal gatherings. Some organize field trips to exhibitions, museums, and working pottery studios as well (The Clay Studio of Missoula).
Local clay exhibits and shows offer opportunities to display finished pieces and see others’ work. Juried shows provide exposure and feedback from experienced artists. Be sure to learn the application process and work within specified rules and limitations. Setting up a booth at community art festivals is another great way to show and sell clay creations.
Open studio hours, offered at many clay centers, provide space, tools, and equipment for independent work time. Memberships often allow discounted rates for studio time, materials, and firing. Check if studios offer mentoring opportunities or critique sessions as well.
Getting plugged into a clay community can expand your knowledge, technical skills, and creative vision. Seek out groups and resources in your area to grow your artistry within a supportive network of fellow clay enthusiasts.