Clay Pottery Mold-Making Techniques: From Design To Creation
The art of making molds for clay pottery dates back thousands of years. Evidence of early pottery molding has been found across many ancient civilizations, including China, Mesopotamia, and Ancient Greece [1]. Molding allowed artisans to efficiently produce multiple copies of designs with consistency.
The basic process of mold-making involves creating an original master design, making an impression of this master to create the mold, preparing the mold for casting, casting the clay pieces using the mold, and finishing the molded pieces. There are several types of molds used in pottery, including plaster molds, press molds, and slipcasting molds.
This guide will provide a step-by-step overview of the clay pottery mold-making process, from conceptual design to final fired pieces. We’ll cover key techniques, tools, and materials needed at each stage, as well as tips and tricks for creating successful molds for intricate designs.
Design Considerations
When designing a piece to be molded and cast, there are several key factors to consider for the original master design. Choosing the right shape, size, texture, and decorative elements will ensure the finished cast pieces turn out as intended.
Simple, rounded shapes often work best for beginner mold making. Avoid overhangs and intricate undercuts that could complicate the mold making process. The size should be manageable for molding and casting – smaller pieces are easier. Scale the original master down if needed.
Add texture, patterns, or decorative elements as desired to the master. Just keep in mind the mold will capture every detail – subtle textures will translate better than deep undercuts. Consider how the mold will be made and how the form can be easily released when designing decorative elements. Simple patterns with clay candelilla, stamps, or carving typically mold well.
Plan any surface decoration for after casting rather than on the master itself. Decorate the master simply and focus on form and texture. Further ornamentation can be added to finished cast pieces through glazing, painting, etc. This allows for more versatility in the final decorative outcomes.
Do tests with clay slabs first when designing an intricate piece. Refine the shape and details as needed before committing to a final clay master. Having a realistic sense of the scale and form before mold making will prevent issues down the line.
For design inspiration, look at books like Andrew Martin’s The Essential Guide to Mold Making & Slip Casting or search online terms like “ceramics mold making” and focus on images. Consulting mold making references will provide visual examples of forms suitable for the process.
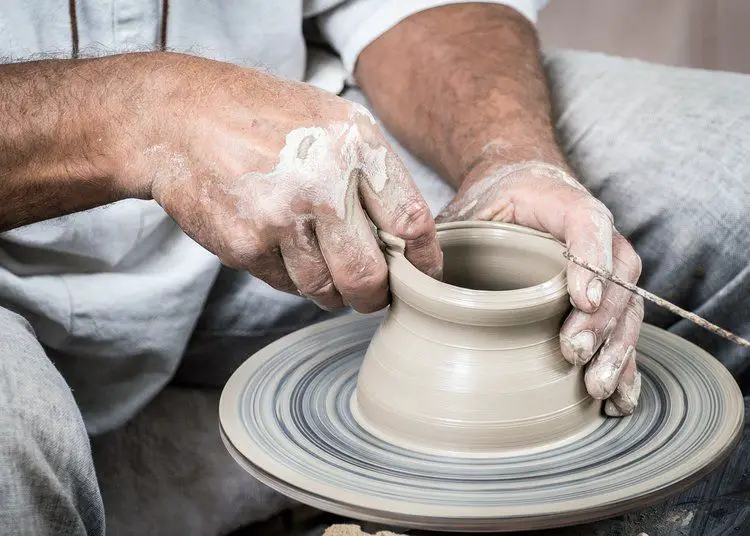
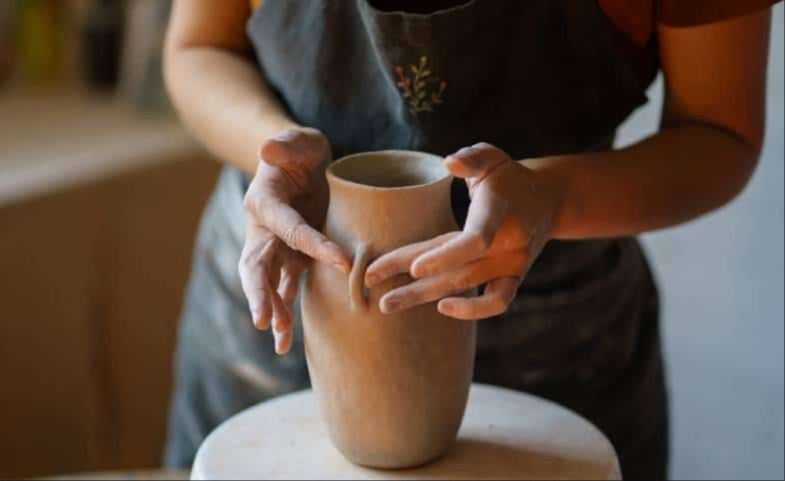
Creating the Master
The first step in mold making is to create the original prototype or “master” that will be used to make the mold. Choosing the right type of clay and sculpting method is important for getting clean results.
For mold making, a sturdy stoneware or porcelain clay is recommended. Sculptural clays like polymer clay can also work well. Avoid soft, porous earthenware clays that may break or distort easier. Wedging the clay thoroughly before starting helps remove air pockets.
There are two main techniques for sculpting the master:
-
Hand sculpting: This involves manipulating the clay freehand into the desired shape. Handbuilding techniques like pinching, coiling, and slab building can be used. Allow the clay to firm up slightly between steps to avoid distortion. Carefully smooth the surface and refine details with metal loop tools.
-
Pottery wheel: For symmetrical shapes, using the pottery wheel allows consistency and control. Center the clay and open it up, then shape it into the desired form. Allow it to firm up before refining the details. Cut away excess clay and smooth the surfaces.
Pay close attention to shape, proportions and surface texture. The mold will capture every detail of the original. Let the master fully dry and fire before mold making. This helps harden the surface and prevents clay distortion later.
Making the Mold
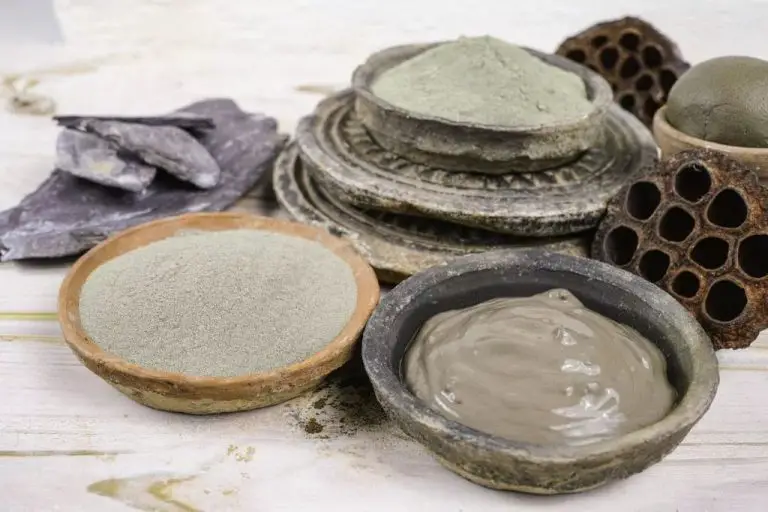
There are several common materials used to make molds in pottery, each with their own advantages and disadvantages. The choice depends on factors like the complexity of the original piece, number of castings needed, cost, and more.
Some popular options include:
- Plaster – An affordable and accessible material, plaster is best for simple, single-piece molds. It’s prone to retaining moisture so drying time is needed between castings. Plaster molds have a shorter life span than other materials.Mold Making Materials
- Silicone – Silicone molds offer great flexibility and durability for multiple castings. They’re resistant to heat and capture fine details well. The material cost is higher but silicone molds have a long lifespan.What materials are best when mold making?
- Latex – Latex works well for intricate designs and undercuts. It stretches to allow easier demolding but has a shorter lifespan than silicone or resin. It’s sensitive to heat so multiple castings should be spaced out.Mold Making Materials
- Resin – Polyurethane or epoxy resins provide rigid, durable molds that capture fine detail. The material cost is higher and proper ventilation is needed when working with resins.What materials are best when mold making?
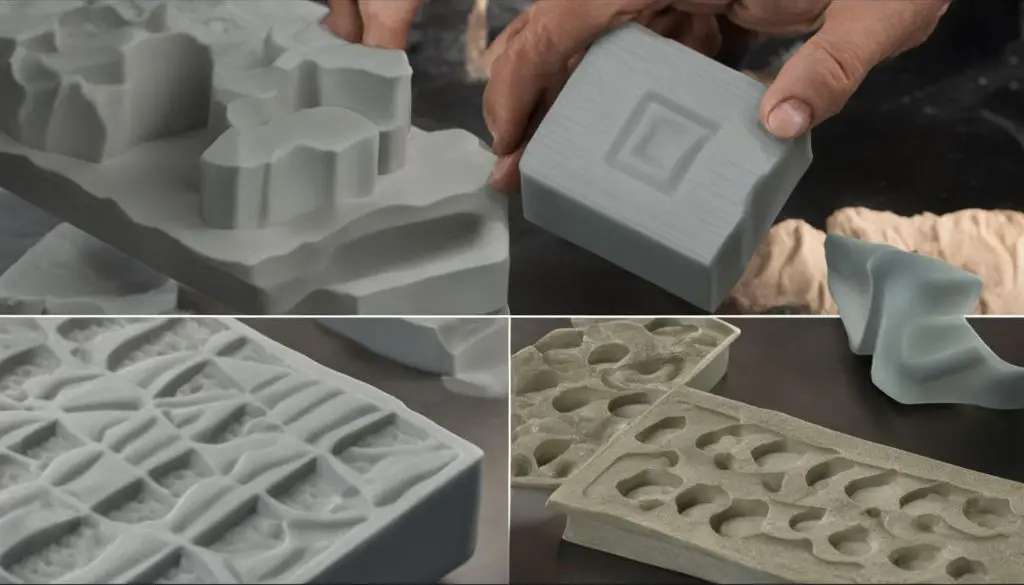
Makers also choose between one or two-part molds. Two-part molds separate into halves and allow more flexibility for complex shapes and undercuts. However they require precise alignment and are more difficult to construct.
Preparing the Mold
Before casting a clay piece, the plaster mold must be fully cured and dried. Plaster molds take 24-48 hours to fully cure and harden after pouring (https://ceramicartsnetwork.org/daily/article/How-to-Make-a-Plaster-Mold-for-Slip-Casting). During this process, excess moisture evaporates from the plaster resulting in a hardened, durable mold. It is crucial that all moisture is eliminated prior to casting, as any leftover water will interfere with the clay releasing properly from the mold.
Once cured, the mold should be completely dry before casting. Place the mold in a warm, dry environment for 12-24 hours to ensure it is fully dried out. Residual moisture can cause the clay to stick in the mold. Check for any damp areas, and allow extra drying time if needed.
Proper mold preparation also includes coating the interior with a release agent. Commonly used release agents include mineral oils, petroleum jelly, silicone sprays, and even liquid soaps. The release agent prevents the clay from sticking to the plaster. Apply a thin, even layer and buff it into the surface. Avoid using too much, as it may contaminate the clay. Let the release agent fully soak in before casting the mold.
Casting the Piece
Once the mold has been properly prepared, it’s time to begin casting. Start by mixing up a batch of clay slip. The slip should have the consistency of thick cream or melted ice cream. Make sure there are no lumps or dry spots. Using a paddle mixer can help achieve a smooth, homogeneous slip.
Slowly pour the prepared slip into the mold, taking care not to trap air bubbles. Tilt and rotate the mold to allow the slip to fully coat all surfaces. Once the mold is filled, gently tap the sides with a rubber mallet to help release any trapped air bubbles. The tapping causes the bubbles to rise to the surface where they can pop.
After tapping, top off the mold with a bit more slip if needed. At this point, the mold can be set aside for the clay to solidify. Drying time will vary based on factors like climate conditions and thickness of the cast piece. Typical drying times range from 30 minutes to several hours. Do not disturb the mold during the drying process.
Check if the piece has fully solidified by gently pressing on the surface of the clay. If it springs back, it needs more time. Once ready, follow the steps for carefully unmolding the cast piece.
Sources:
https://www.thecrucible.org/slip-casting-in-five-steps/
Unmolding and Cleanup
Knowing the right timing for removing your finished piece from the mold is crucial. If you unmold too soon, the clay will not hold its shape and can become distorted or even break apart. On the other hand, waiting too long can make it nearly impossible to separate the clay from the mold without damage.
For simple, open-face molds, you can typically unmold the clay after it has dried to a firm leather-hard state, usually within 12-24 hours. Test the clay by pressing on an inconspicuous area – it should be cool to the touch and have a cheese-like texture. If it still feels soft or wet, let it dry longer.
For more intricate molds, you may need to wait until the clay has fully hardened, which can take over 48 hours. Again, test an area by firmly pressing on it before attempting to unmold. Go slowly and gently pry the clay away from the sides and edges of the mold using your fingers or soft tools like paintbrushes or wooden wedges. Avoid using metal tools which could scratch the mold surface.
Once removed, allow any moisture between the clay and mold to fully dry. Then inspect the mold for any stuck bits of clay and carefully pick/chip them away. Avoid scraping or gouging the mold surface. For plaster molds, use a soft brush to gently remove debris. For reusable clay or silicone molds, wash with mild soap and water, rinse, and fully dry.
Properly cleaning and storing your molds after each use will dramatically extend their lifespan. Even small traces of clay or moisture left behind can deteriorate the mold material over time.
Trimming and Refining
Once the piece has been unmolded, it often requires some additional trimming and refining before it is ready for finishing. This includes smoothing out any seams or imperfections left from the mold lines, removing any excess clay, and refining the shape and details of the piece.
To smooth seams, use a metal rib or kidney tool to gently blend the clay where mold lines meet. Work slowly and carefully to compress the clay without removing too much material. Any major bumps or ridges can be smoothed over with a moist sponge. Rinse the sponge frequently to prevent dragging clay particles across the surface.
If the piece requires handles or any attached decorative elements, these can be added once the main form is trimmed. Score and slip the attachment points to ensure a good bond.
When the piece is fully dried and ready for finishing, the first step is to apply an initial coat of glaze slurry or bisque fire. This prepares the porous clay surface to hold glaze. When glaze firing, use caution when applying and layering glazes to avoid running or unintended mixing (see ceramicartsnetwork.org for tips). Consider test tiles when using a new glaze or combination.
With patience and practice, you can refine the molded ceramic form to have a smooth, professional finish ready for decorating and glazing.
Tips for Complex Shapes
When creating intricate pottery shapes with lots of undercuts and detailing, a multi-part mold is often required. This allows the complex form to be divided into simpler shapes that can be molded and cast in sections.
For shapes with relief detailing like decorative patterns, make sure the mold material can capture fine detail. Materials like silicone rubber excel at picking up subtle textures. Apply mold release spray or vaseline to help prevent the mold from sticking.
When dividing a complex form into mold sections, look for logical parting lines and splits that will make casting easier. Avoid undercuts on each part. Numbers the parts and registration keys so they can be aligned when assembling the finished cast pieces.
Allow adequate drying time for the mold material to cure fully before casting. Rushing the process can lead to defects. Test the mold with sample castings to check for any issues before attempting the final piece.
To capture intricate shapes, carefully support the original piece when making the mold. Suspending it or creating a temporary mother mold helps prevent distortion.
Watch out for air bubbles around fine details that can get trapped against the original clay surface when pouring the mold material. Gently tapping the mold, using a vacuum chamber, or adding ventilation can help.
Be patient and allow plenty of time for proper curing when dealing with complex molds. Trying to rush the process often leads to headaches. Take it slow and steady for best results.
Sources:
https://community.ceramicartsdaily.org/topic/29472-mold-making-complex-shape/
Troubleshooting
Casting slip-molded pieces inevitably involves troubleshooting some common issues that can arise during the process. Here are some tips for resolving the most frequent problems:
Fixing Air Bubbles
If air bubbles appear on the cast piece, the slip may have been poured too quickly or vigorously into the mold. Try pouring at a slower, steadier rate. Using a slip with higher viscosity can also help reduce bubbles. Carefully tapping the mold while filled can dislodge bubbles before drying. If bubbles persist, try adding defoamers to the slip.
Reducing Seam Lines
Noticeable seam lines along mold edges often occur due to slip leakage or seepage into the seam. Ensure mold halves are aligned precisely and free of large gaps. Apply petroleum jelly along the seam to prevent seepage. Allow the piece to dry further before separating halves. If seam lines appear, sand and refine the cast piece edges.
Fixing Mold Deterioration
Repeated casting can erode and deteriorate mold surfaces over time. Patch small flaws with slip-resistant materials like silicone caulk. For extensive damage, create a new master and remake the mold. Proper mold release and gently prying cast pieces can also prevent erosion.