Clay Pottery Sgraffito Techniques: Unveiling Layers Of Beauty
Sgraffito is an Italian technique of decorating pottery or other ceramics by applying layers of contrasting colored slip or glazes to a base clay and then scratching through the surface layers to create a design (https://potteryinspiration.com/sgraffito-pottery/). The word “sgraffito” comes from the Italian word “sgraffiare” meaning “to scratch”.
The origins of sgraffito pottery can be traced back thousands of years to ancient Mesopotamia, where artisans used the technique to create detailed designs on clay vessels. However, the technique gained immense popularity during the Renaissance period in Italy in the 15th and 16th centuries and quickly spread throughout Europe.
Today, sgraffito remains a popular decorative technique for pottery and ceramic wares globally. It is commonly seen on Italian maiolica wares, Portuguese azulejos tiles, and German schliepers. The technique allows potters and ceramicists to reveal intricate designs by scratching away outer layers to expose the contrasting base coat underneath.
Tools and Materials Needed
To create sgraffito pottery, you’ll need the following tools and materials:
Type of clay
Sgraffito works best with low-fire earthenware or stoneware clays that can be easily incised when leather hard. Avoid using porcelain which is too hard to carve effectively.
Tools for carving/incising
You’ll need tools with sharp tips or edges to incise the designs into the clay such as needle tools, loop tools, wooden skewers, nails, or X-Acto knives. Some people also use dental tools.
Glazes or slips
Contrasting colored glazes or slips are applied over the base coat to reveal the incised design. At minimum you need a dark and a light color option.
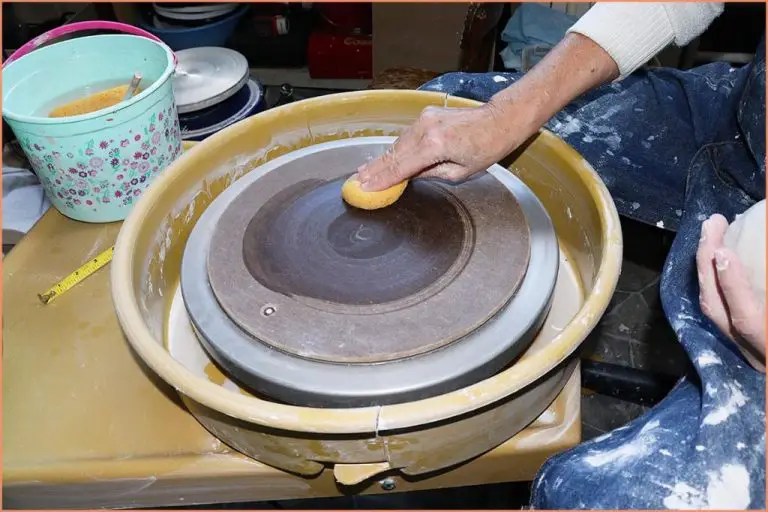
Preparing the Clay
Proper preparation of the clay is an essential first step when making sgraffito pottery. The clay must be wedged thoroughly to remove air pockets and provide an even consistency. Wedging involves cutting the clay into chunks, then slamming it on the wedging table to compress it. Kneading the clay also helps blend it and make it pliable. It’s important not to let the clay become too wet during wedging and kneading, or it may later crack during carving.
Once the clay is uniformly blended, basic forms can be created by handbuilding techniques like pinching, coiling, or slab building. Allow the clay forms to firm up until they are leather hard before attempting to carve sgraffito designs. Leather hard means the clay has dried enough that it has a texture similar to leather and can be carved without distorting, yet still retains some moisture so carved lines don’t crack. Letting the clay dry to the ideal level requires patience. Rushing the process may lead to the clay drying too much or not enough before carving.
With properly wedged, kneaded, shaped, and firmed up clay, you’ll be ready to start incising your sgraffito designs.
Creating a Base Coat
The first step in creating a sgraffito design is to apply a base coat of slip or glaze to the leather-hard clay. This base coat will become the background color in the finished piece. It’s important to apply the slip or glaze evenly in a thick enough layer to provide contrast with the layers that will be added on top. Multiple coats may be needed to build up the desired thickness, allowing each coat to dry partially before adding the next.
According to How to Sgraffito decorate Pottery, the base coat should be allowed to dry until it turns from shiny to matte before proceeding. This indicates the coat is partially dried but still able to accept another layer on top. Rushing this step can cause the layers to mix together instead of remaining distinct.
Patience is key in building up an opaque base coat with good coverage. Well-adhered layers are necessary for cleanly revealing the design when scratched through at the end. Taking the time to let each application dry sufficiently before adding more slip or glaze will pay off when executing the sgraffito techniques.
Inscribing the Design
Once the base coats have dried, it’s time to inscribe the design. This is done by using various tools to scratch through the base coat to reveal the clay color underneath. The most common tools used are:1
- Needle tools – allow for fine, intricate line work
- Nails and skewers – create broader lines and textures
- Dental tools – excellent for detailed patterns and images
When inscribing the design, apply steady even pressure being careful not to scratch all the way down to the bare clay. The revealed color beneath the top coats is the contrast that makes the sgraffito design stand out. Create whatever patterns, lines or images fit your artistic vision. Consider incorporating:2
- Geometric shapes
- Organic, free-flowing lines
- Textures
- Patterns
- Representational designs
Take your time and don’t rush this important step. Experiment on test tiles first if needed. Remember, you can’t undo sgraffito lines, so have a plan before scratching into your finished base coats.
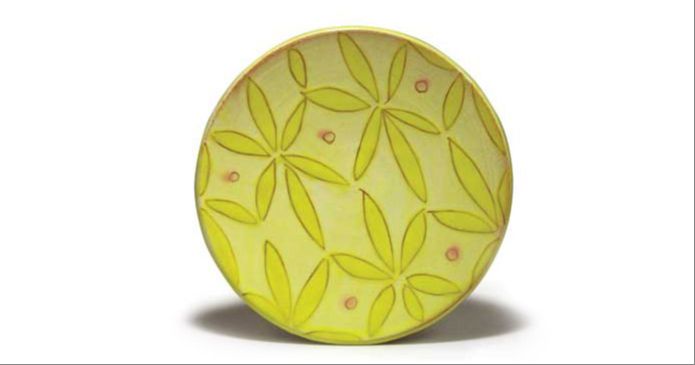
Applying Contrasting Layers
Once the base layer has fully dried, the next step is to apply contrasting layers of colored slips or glazes over top. This creates the layered, multi-colored effect that is distinctive of sgraffito pottery. It’s important to let each layer fully dry before adding the next. According to a Reddit user, “You can do different colors if you’re careful to let layers dry well, and then you will see a bit of the color as you carve.” (https://www.reddit.com/r/Pottery/comments/15i9o8o/question_about_layering_different_colors/). Applying too many wet layers at once can cause them to mix and turn to mud.
Typically 2-3 layers are used, in contrasting colors that will show well against each other when carved. Some classic color combinations are black over white, blue over yellow, or green over red. The layers can be different colored slips, underglazes, or glazes. Allow each layer to dry thoroughly before adding the next. Once all layers have been built up and have dried, the sgraffito design can be inscribed through them.
Revealing the Design
Once the contrasting layers of slip have been applied over the base coat and design, the real magic of sgraffito can begin. This next step requires slowly and carefully incising through the layers with a tool to uncover the intricate design underneath. Many potters recommend using a wooden skewer, dull knife, or specialized sgraffito tool for this process. The key is to have a precise hand and cut delicately so you do not scratch too deeply or damage the base layer underneath.
Take your time to methodically carve away the slip, following the lines of your original design. You may need to periodically wipe away excess slip to fully reveal the pattern. Some potters also use fine abrasives or even sandpaper to assist with polishing and cleaning. As you work, enjoy watching the hidden design slowly emerge. With patience and care, the striking and soulful patterns will come to light.
According to potterycrafters.com, “Artist Carves Pottery And Reveals Shocking Layers Of Colors Underneath…” This painstaking process of incising to reveal the concealed design is what makes sgraffito pottery so magical and rewards the artist’s effort and skill.
Final Touches
Once the main sgraffito design has been revealed, there are often some final touches that can enhance the overall look. according to Helen Walker Ceramics, it’s important to do any additional carving or detailing at this stage, while the clay is still soft enough to carve smoothly (https://www.helenwalkerceramics.co.uk/post/how-to-sgraffito-decorate-pottery). You may want to accent certain areas, clean up any rough edges, or add other decorative elements.
Cleaning up the edges helps define the sgraffito design and makes it pop. Use a metal rib or similar tool to sharpen edges and scrape away any remaining slip. Be careful not to dig into the base coat. Angela Badger-Cotter recommends a soft damp sponge for final cleanup (https://ceramicartsnetwork.org/daily/article/Scratching-the-Surface-A-Guide-to-Sgraffito).
Applying decorations or embellishments on top of the revealed design provides another creative opportunity. Options include sponging, incising, stamping, brushwork, or adding colored slips. This extra detailing and ornamentation can really make the sgraffito design stand out.
Firing the Pottery
After the sgraffito design has been revealed and any final touches applied, it’s time to fire the pottery to permanently set the design and finish. An important first step is to allow the pottery to dry completely before firing. All moisture must be evaporated from the clay or else cracking or exploding could occur in the kiln. Ensure the pottery has dried for at least a week before attempting to fire it.
There are multiple firing methods and temperatures that can be used for sgraffito pottery. A common approach is to do an initial bisque firing around cone 04-06 to harden and prepare the clay, followed by a glaze firing around cone 04-6 to melt and adhere the glazes. Sgraffito can also be done using a single firing up to around cone 6. Choose firing temperatures based on the type of clay, slips, and glazes used. Always follow the manufacturer’s instructions for firing temperatures. Typically cone 04-6 (1922-2165°F/1050-1185°C) provides ideal results for sgraffito techniques. This video shows an example of a cone 6 glaze firing used for sgraffito.
Conclusion
Over the course of this guide, we have explored the timeless art of sgraffito pottery. By using basic tools to etch through layers of clay and slip, we can reveal beautiful designs full of texture, contrast, and artistry.
The sgraffito process involves thoughtful preparation, precision, and patience. Each step builds on the next to slowly uncover the hidden design concealed beneath the surface. As we carve and sculpt the clay, the artwork comes to life.
Sgraffito provides a unique way to blend sculpture and painting into one harmonious art form. It marries form and color, positive and negative space, intricacy, and imagination. There is something deeply satisfying about etching away the surface to uncover the beauty waiting inside.
I hope this beginner’s guide has shed light on the history of sgraffito, offered insights into its techniques, and inspired you to get your hands dusty with clay. Like each line etched into the sgraffito layers, this is just the start of your own artistic journey. Let the clay be your canvas for creativity.