Beginner’S Guide To Clay Pottery Making
Clay pottery is one of the oldest art forms, dating back over 20,000 years. It involves shaping clay into functional or decorative objects which are then fired in a kiln to harden them. Clay is an abundant, natural material that can be molded when wet, making it ideal for pottery. Once fired, clay becomes ceramic – a strong, durable material.
There is evidence of early pottery making dating back to 18,000 BC in East Asia. Pottery then emerged in other regions like the Near East by 6000 BC and in the Americas by 2500 BC (Clay and Pottery Brief History). Clay pots were important for cooking, storage, and transport. Decorative pottery also became an art form in many cultures.
The main types of pottery are earthenware, stoneware, and porcelain. Earthenware is porous and fragile. Stoneware is stronger and non-porous. Porcelain is highly refined and translucent. There are many other regional varieties as well.
Pottery making is an enjoyable hobby that allows for creativity and self-expression. Handcrafted pieces also make great gifts. Working with clay is relaxing and therapeutic. Firing and glazing pottery produces beautiful, lasting objects for the home. Overall, clay pottery is an ancient yet timeless craft.
Choosing Your Clay
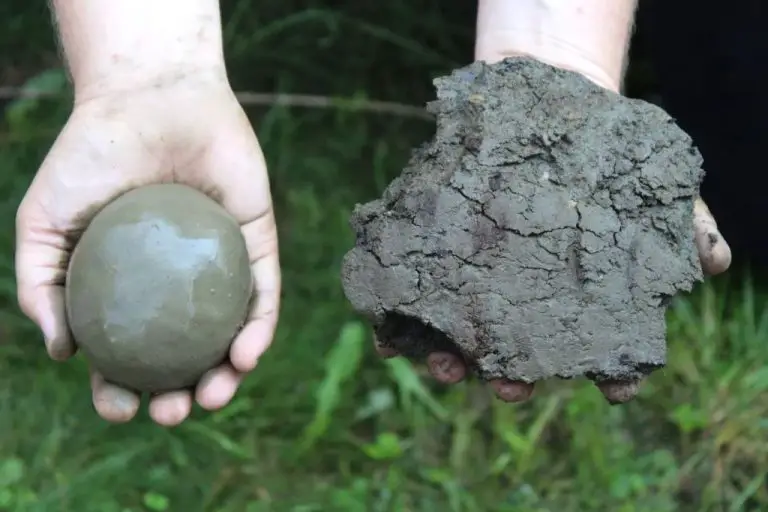
When starting out in pottery, choosing the right type of clay is crucial for success. There are several main types of clay to consider:
Earthenware – This clay is very beginner-friendly. It has a coarse texture and fires to a reddish-brown color at lower temperatures, around 1800°F-2100°F. Earthenware is easy to work with and forgiving, making it a great choice when you’re just learning. However, it is more fragile than other clays once fired. https://thepotterywheel.com/choosing-clay-for-a-beginner/
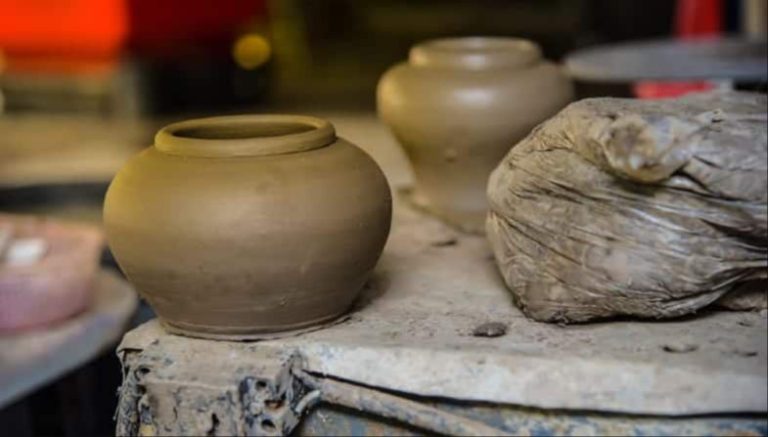
Stoneware – A popular choice, stoneware fires to a grayish color at around 2200°F-2400°F. It has excellent durability and water resistance when fired. Stoneware with grog (tiny gravel) is highly recommended for beginners as it is cooperative and responsive to techniques. It can be used to create tableware, cookware, sculptures and more.
Porcelain – The most challenging clay for beginners, porcelain is extremely fine and fires to a bright white color around 2300°F-2400°F. It can result in very delicate, translucent pieces when mastered. However, it is unforgiving to work with and prone to cracking and warping. Most potters recommend gaining experience with stoneware or earthenware first.
Consider the characteristics of the type of clay for your project. Earthenware works well for handbuilding and decorative pieces. Stoneware is great all-around clay for both wheelthrowing and handbuilding. Porcelain can create intricate wheelthrown wares but requires expertise. Test different clays to see what fits your style.
Essential Supplies
Some of the most essential supplies for beginners to start making pottery include:
Pottery Wheel
A pottery wheel allows you to throw and center clay to create symmetrical pottery pieces. Manual kick wheels or electric pottery wheels are good starter options for beginners.
Kiln
A kiln is necessary for firing clay and pottery pieces to harden them. Small tabletop kilns that reach around 1300°F are suitable for beginners.
Clay Tools
Basic clay hand tools include loop tools, ribs, cutters, trimming tools, modeling tools, wire tools, and fettling knives. These help shape, sculpt, trim, and refine the clay.
Molding Tools
Molds can help beginners achieve uniform shapes and designs. Plaster molds for bowls, cups, plates, jars, and vases are commonly used.
Sculpting Tools
Needle tools, loop tools, ribs, wooden modeling tools, and pottery ribs assist in sculpting and etching detail into pottery.
Brushes
Soft bristle brushes apply glazes and underglazes evenly to bisqueware before firing. Stiffer brushes can be used for cleaning and dusting dried wares.
Preparing Your Clay
Properly preparing your clay is one of the most important steps before you begin pottery making. Kneading, wedging, and conditioning your clay ensures it has the right moisture content and is free of air bubbles for optimal workability. https://thepotterywheel.com/how-to-prepare-clay-for-pottery/
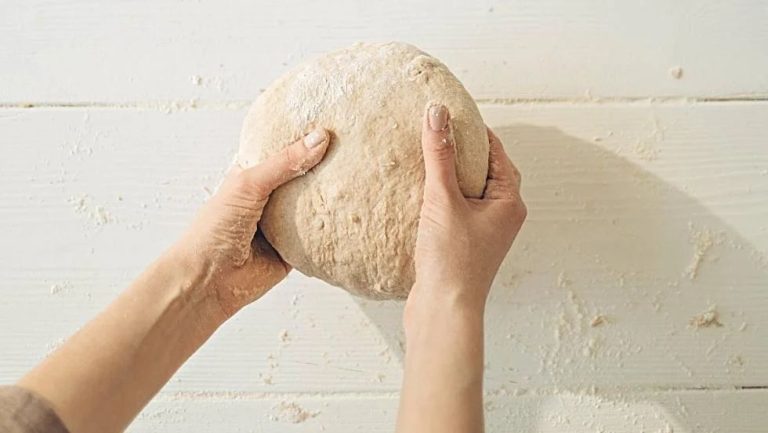
Start by kneading or wedging the clay. Kneading involves rolling the clay away from you by pushing down and away, then rolling it back towards you while putting your body weight into it. This process aligns the clay particles and removes air pockets. Continue kneading until the clay is smooth, elastic, and free of cracks. https://www.ehow.com/how_5032982_prepare-clay-pottery.html
Wedging is similar to kneading but involves cutting the clay into sections and reforming it into a ball shape. Fold the clay over itself, press it together, and repeat until smooth. The cutting action further eliminates air bubbles. Some clays may require 10-15 minutes of wedging before they are ready.
As you knead and wedge, pay attention to the clay’s moisture level. Add water in small amounts if it is too crumbly. Let it dry slightly if it is sticky. The prepared clay should be pliable but not mushy. Avoid overworking it to prevent exhaustion.
Once your clay is kneaded, wedged, and at the right consistency, it is ready for handbuilding or throwing on the pottery wheel. Taking the time to properly condition your clay will ensure success with your projects.
Pottery Techniques
There are several core techniques used in creating pottery pieces. Mastering these foundational methods will allow you to produce a wide variety of forms and styles.
Slab Building
Slab building involves rolling out flat sheets or “slabs” of clay and joining them to build up 3D forms (source). The seamless joints and geometric shapes possible with this technique make it popular for many pottery items. To slab build, first prepare your clay by wedging it. Roll it out to an even thickness using a rolling pin on a flat, non-stick surface. Cut out shapes using cookie cutters or a knife. Join the pieces using slip and a process called “scoring” where you scratch the surfaces to be joined. Smooth seams using water and tools. Add detailing and allow to dry fully before firing.
Coil Building
Coil building involves rolling clay into long coils or ropes and stacking them to form the pot walls. Pinch the coils together and smooth to form a solid wall. Coiling allows flexibility in achieving organic, asymmetrical shapes. Prepare clay by wedging, then roll it into coils of consistent thickness. Begin with a base and build up walls by joining coils. Blend the joints by scratching surfaces with a tool and smoothing. Refine the shape using loops, ribs, and scrapers. Allow to dry completely before firing.
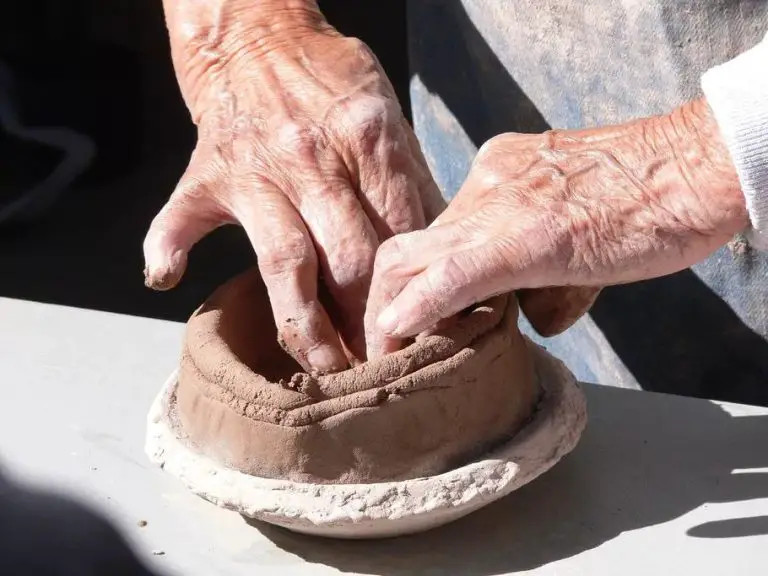
Pinch Pots
Pinch pots are a simple handbuilding technique done by pinching clay into an open bowl shape. Prepare your clay by kneading and wedging. Form a ball and push your thumb into the center while pinching the sides up and outward. Create walls of even thickness, turning as you work. Refine the rim and smooth all surfaces. Allow the pinch pot to dry fully, then decorate if desired before firing.
Wheel Throwing
Wheel throwing involves using a potter’s wheel to shape clay into symmetrical forms. Center clay on the wheel and shape it using your hands as the wheel spins. Open up the form by pushing out the sides. Raise walls to the desired height. Refine details using specialized tools. Allow pieces to dry adequately before firing. Mastering the wheel takes practice but allows for consistency in shapes and thin walls.
Slip Casting
Slip casting uses molds to form identical shapes. Liquid clay or “slip” is poured into plaster molds and allowed to harden before removing the piece. Excess slip is poured out, leaving a thin clay shell. Once leather hard, pieces are refined and decorated before firing. Slip casting enables consistency and intricate detailing. High startup costs for molds limit smaller operations.
Decorating and Glazing
Once your clay pieces are bisque fired, they are ready for decorating and glazing. Glazes are mixtures of minerals and chemicals that produce a glassy coating on the clay when fired. They come in endless colors and textures to experiment with. Underglazes are also colorful, but need a transparent glaze layered on top to bring out their vibrancy. Some popular decorating techniques include:
Glazing – Using brushes, sponges, or pouring to coat your bisque ware with glazes. Allow colors to blend beautifully.
Underglazing – Applying underglazes directly on greenware or bisque pieces to create designs before covering with a clear glaze.
Slips – These are liquefied clay mixtures used to alter the color and texture of pieces. They can be painted on bisque ware before glazing as well.
Engraving/Impressing – Use tools to engrave or impress designs into leather-hard clay. The designs become more visible when glazed.
Incising – Cutting or scraping into leather-hard clay to create patterns and textures.
The options for decorating pottery creatively are endless. Experiment with layering glazes, mixing colors, adding textures, and more. Refer to this guide for inspiration and detailed tips on decorating techniques.
Firing Your Pieces
Firing your clay pieces is one of the most important steps in pottery making. There are a few key aspects of firing that every beginner should understand.
Kiln Types
The most common types of kilns for pottery firing are electric and gas kilns. Electric kilns are easier to use and control for beginners. Gas kilns can reach higher temperatures but require more ventilation.Firing Up – Beginner’s Firing Guide
Firing Process
There are three main stages of firing clay:
- Drying: Allow your unfired pieces to dry completely before firing.
- Bisque firing: The initial low-temperature firing which hardens the clay.
- Glaze firing: The higher temperature firing that melts the glaze onto the bisque ware.
It’s crucial to follow the temperature guidelines for each stage.3 Stages of Firing Clay – A Beginner Guide to Firing Pottery
Bisque Firing Tips
For bisque firing:
- Slowly ramp up the temperature to avoid cracking.
- Don’t exceed cone 06 temperatures.
- Allow proper cooling time before removing ware.
Glaze Firing Tips
For glaze firing:
- Make sure bisque pieces are fully dry before applying glaze.
- Heat slowly to the desired cone temperature.
- Allow full cooling before handling glazed pieces.
With some practice and patience, you’ll master the art of firing your clay pottery!
Troubleshooting Issues
Clay pottery is a science as well as an art. Many things can go awry, especially when you’re first learning. Here are some of the most common issues and how to resolve them:
Cracking
Cracking is one of the most frustrating problems for beginner and expert potters alike. Some potential causes include:
– Letting clay dry out too quickly. Cover pieces in plastic wrap when not working on them.
– Applying glaze too thickly. Multiple thin coats are better than one thick one.
– Firing too quickly. Slow ramp up and cool down rates help prevent thermal shock.
– Clay shrinkage. Certain clay bodies and shapes are prone to cracking. Keep walls even thickness.
– Glaze and clay expansion rates mismatched. Choose glazes suited for your clay type.
See tips for avoiding cracks here.
Exploding
Explosions or “blowouts” in the kiln often result from trapped air or moisture inside the clay. To prevent:
– Wedge clay thoroughly and pop air bubbles
– Avoid hollow forms and holes to release steam
– Dry pieces completely before bisque firing
Glaze Issues
Problems like crawling, crazing, or pinholes in glazes stem from:
– Contaminated clay body
– Incompatible clay and glaze combinations
– Uneven glaze thickness
– Over or under-firing
Test glazes on each clay type and fine tune application for best results.
Firing Mishaps
Firing clay requires precise temperatures and ramp speeds. Issues may arise from:
– Kiln shelf collapse from too-hot firing
– Rapid temperature changes causing breaks or cracks
– Kiln controller malfunctions leading to over/under-firing
– Power outages or tripped breakers interrupting cycle
Check kiln operating manual for maintenance tips and optimal firing profiles.
Be patient and adjust your process incrementally to avoid repeated issues. For more troubleshooting help, see this common mistakes guide.
Tips for Success
Some key tips for beginner potters to find success in clay pottery include:
Set up your studio thoughtfully. Make sure your work surface and tools are organized in a way that makes the creative process enjoyable. Store clay properly so it doesn’t dry out. Have a dedicated clean-up area and clay recycling bin.
Take your time and don’t rush the process. Pay attention to the clay’s reactions and get a feel for how much water is needed. Let pieces fully dry before handling to prevent cracks or breakage. Work at a pace that allows you to be mindful and present.
Focus on improving your skills. As a beginner, aim to refine basic techniques like centering, opening, pulling, trimming, attaching spouts/handles, etc. Master the fundamentals before attempting more advanced styles.
Immerse yourself in pottery resources. Read books, watch videos, take classes, and connect with other potters. Joining a studio can provide invaluable hands-on guidance. See these wheel throwing tips for beginners.
Be patient with yourself. Making pottery is a lifelong learning process. Progress will be gradual, with many failed attempts along the way. Stay motivated and keep practicing. Your skills will improve over time if you stick with it.
Next Steps After Mastering Basics
Once you have the basics of pottery making down, there are many ways to continue advancing your skills and growing as an artist. Here are some intermediate and advanced techniques to try as the next step:
Work on developing your personal style – Once you know the basics, you can start to experiment more with different shapes, textures, glazes, and decorating techniques to develop a unique aesthetic (source: https://blog.daisie.com/enhance-your-pottery-skills-practical-techniques-for-crafting-distinctive-ceramic-art/). Let your creativity shine through in your pieces.
Try more advanced techniques like handbuilding, using molds, sculpting, slab work, surface texturing, sgraffito, mishima, and others (source: https://ceramicartsnetwork.org/clayflicks/technique-levels/advanced-techniques). Keep challenging yourself to gain new skills.
Consider selling your pottery at craft fairs, galleries, or online through Etsy or your own website. This can help take your pottery to the next level as a professional pursuit.
Join a local pottery studio or club to connect with other ceramic artists. You can share tips, get feedback, and find inspiration in a creative community.
Keep practicing regularly and set goals to improve specific techniques. Recording your progress along the way through photos or journaling can help you see how far you’ve come.
Consider taking workshops or classes at local studios focusing on the types of pottery you want to specialize in. An experienced teacher can provide valuable guidance.
Be patient with yourself as you advance your skills – creativity and great pottery take time to develop. Stay open, keep learning, and above all, enjoy the journey!