Is Clay Sculpting Easy?
Clay sculpting is the process of shaping clay to create artistic three-dimensional objects and figures. It involves manipulating malleable clay mediums into a desired form using sculpting techniques and tools. Clay types commonly used for sculpting include polymer clay, oil-based modeling clay, and natural clays like terra cotta or porcelain.
Clay sculpting allows artists to give physical form to their ideas and creative visions. It is an accessible and versatile art form that can range from simple hobby-level creations to monumental masterpieces. This article provides an overview of the basics of sculpting with clay for beginners, covering the skills, tools, techniques and processes involved.
Basic Skills Needed
Clay sculpting requires some basic skills to be successful. The most important are manual dexterity, spatial skills, and the ability to visualize.
Manual dexterity refers to fine motor skills using the hands and fingers. Sculpting clay requires coordination to mold, shape, and texture the medium. Fingers must be able to perform precise movements to manipulate the clay.
Strong spatial skills allow a sculptor to understand the 3D form taking shape and to visualize what changes are needed. Rotating the sculpture and perceiving it from all angles is key.
Visualization skills let the sculptor imagine what the finished piece will look like. They must plan ahead for details, textures, and finishing techniques. The ability to see the final product in one’s mind is essential.
With practice, manual dexterity, spatial skills, and visualization can all be developed and enhanced. But having natural ability in these areas gives new sculptors an advantage when first starting out.
Clay Types
There are several major types of clay that are commonly used for sculpting, each with their own characteristics and uses.
Oil-based clays like plasticine are made from a non-drying oil-based substance and are popular for sculpting and animation. They remain soft and pliable which allows sculptors to continually reshape the clay, making them great for sculpting figures and characters. Oil-based clays cannot be hardened or fired in a kiln. Some of the most popular brands are Plasticine, Van Aken Plastalina, and Roma Plastalina (https://www.sculpture-gallery.co.uk/best-clay-for-sculpting.irs).
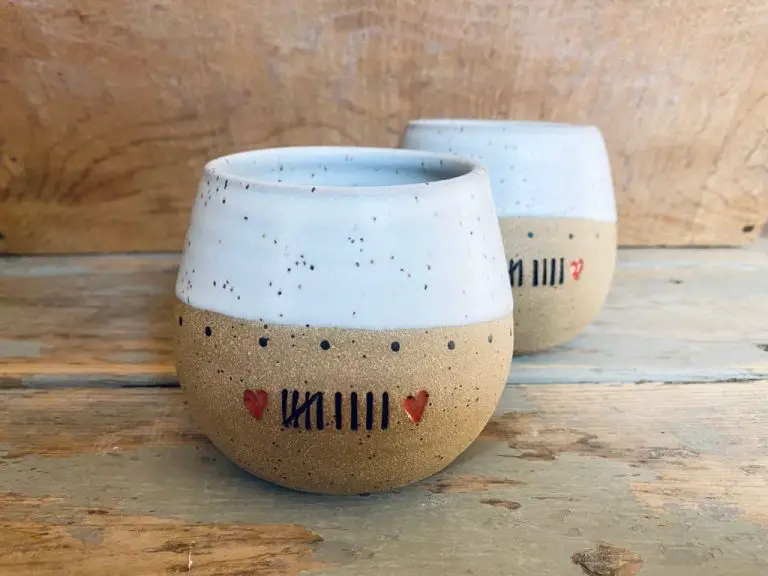
Water-based clays are clay bodies made from water and natural earth pigments that are designed to be fired in a high temperature kiln. The clay remains moldable until it is fired, at which point the clay hardens permanently. Water-based clays are often used to create functional pottery but can also be used for sculptural creations. Some common water-based clays are stoneware, porcelain, and earthenware (https://www.sculptureatelier.com/blog/what-clay-should-i-use-to-start-sculpting).
Polymer clays are made from polymers, fillers, and colors that remain soft until baked or cured in a home oven or toaster oven. Polymer clay sculpts do not need to be fired in a kiln. Polymer clays allow detailed sculpting and shaping. Popular brands include Sculpey, Fimo, Cernit, and Kato Polyclay.
Sculpting Techniques
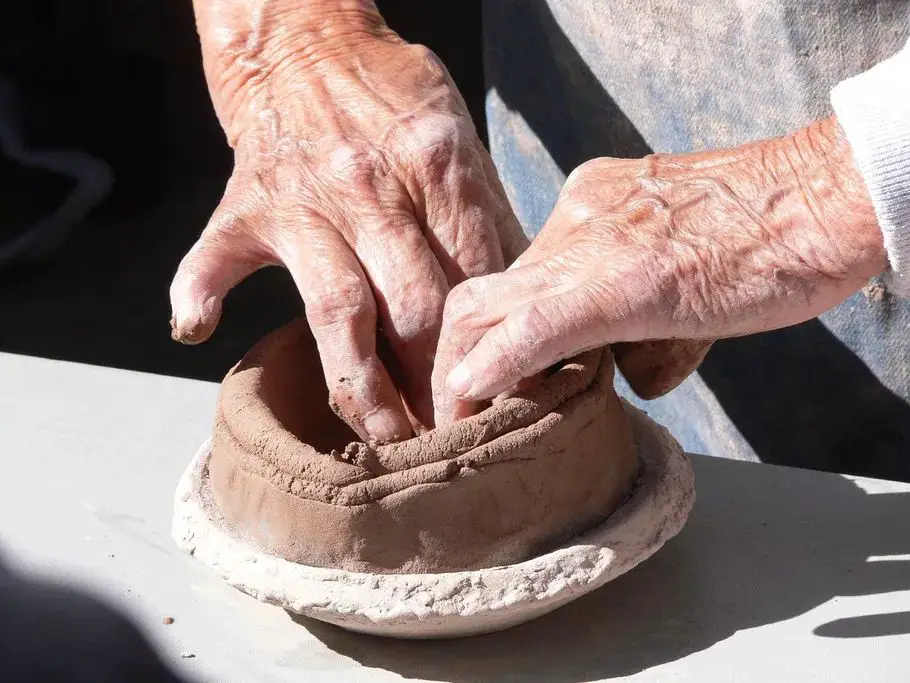
There are several fundamental sculpting techniques used in clay work. Three of the most common are pinching, coiling, and slab construction.
Pinching involves shaping the clay by pinching it between the thumb and fingers. It is one of the most basic and intuitive techniques for beginning sculptors. Pinch pots are a common project for starting out in clay work (Source: https://www.domestika.org/en/blog/11125-8-must-know-clay-modeling-techniques).
Coiling is another fundamental technique. It involves rolling out long, thin ropes or coils of clay and stacking them on top of each other to build up forms. Coiling allows for hollowing out shapes and creating intricate details (Source: https://ceramicartsnetwork.org/daily/article/A-Couple-of-Cool-Clay-Sculpture-Techniques).
Slab construction utilizes flat “slabs” of clay rolled out to an even thickness and cut into shapes. The slabs can be joined together using techniques like scoring and slipping to form 3D objects. This allows for larger, hollow forms. Slab built pieces may also incorporate decorative textures.
Sculpting Tools
Sculpting tools are essential for shaping, smoothing, carving, and texturing clay. Some commonly used sculpting tools include:
Wire tools – These tools have thin, flexible metal wires or loops on the end. They are great for cutting into and smoothing soft clay. Wire tools allow you to create fine details and textures. Examples include ribbon tools, loop tools, and wire loop tools.
Ribbon tools – Ribbon tools have a thin, flat metal wire that can slice into clay to create lines and textures. The width of the wire ranges from extra fine to wide. These tools help sculpt smooth curves and details like wrinkles in fabric or hair.
Loop tools – Loop tools have a rounded wire loop on the end that is useful for smoothing clay and creating indentations. The loops come in various sizes and shapes like round, tear drop, or oval. These tools help blend surfaces and soften edges.
Wooden tools – Sculptors often use wooden sticks, skewers, and paddles. These allow you to score or cut into the clay. Wooden ribs can smooth surfaces. Blunt wood tools help shape forms without damaging the clay. Large paddles compress and even out clay.
Proper sculpting tools allow you to manipulate the clay into any shape and create interesting textures. Investing in a variety in sizes and shapes will help take your clay sculptures to the next level.
Creating Armatures
Armatures provide support and structure for clay sculptures. They are typically made from wire, wood, plastic, or foam. Wire armatures involve bending and twisting wire into the basic shape of the planned sculpture. The wire holds the clay and enables sculpting of complex poses. Wooden armatures can provide more stability for larger sculptures. Plastic armatures are lightweight yet strong. Some companies like TruForm manufacture plastic armature systems specifically for clay sculpting. Foam offers another lightweight option for armature material. Cutting foam into shape with a hot wire provides flexibility in armature design.
Building a quality armature is crucial for successful clay sculpting. The armature must be strong enough to hold the clay firmly in place without bending or breaking. Use thick enough wire gauge or sturdy wood/plastic to prevent collapse under the weight of the clay. Referencing anatomy books or models helps construct realistic poses when designing an armature. Plan the sculpture design ahead of time when determining the armature shape and configuration. Allow sufficient drying time for any glues used to harden fully before adding clay.
Texturing
One of the most exciting parts of sculpting with clay is adding texture. There are many techniques for texturing clay to make it look and feel more realistic. Three common texturing techniques are incising, adding patterns, and smoothing.
Incising involves using a tool to cut into the surface of the clay to create lines and grooves. This can imitation folds in fabric, wrinkles in skin, or the grain of wood. Incising tools include metal loop tools, sculpting knives, fettling knives, and even toothpicks for finer details. The lines can be bold and deep or very shallow depending on the desired effect.
Patterns can be pressed into clay using a variety of texture tools and objects. Texture mats, stamps, stencils, brushes, and household items like bubble wrap, netting, or textured fabrics can create interesting patterns. Roller tools with ridges and textures can also be rolled across the surface. The pattern possibilities are endless.
Smoothing clay removes texture and imperfections to create a uniform surface. Metal rib tools, rounded scraps of wood, or even wet fingers can smooth away texture, push clay together, and blend seams. Smooth areas contrast nicely with detailed textured sections.
With practice and experimentation, texturing clay becomes an intuitive and satisfying process. The textures add realism and visual interest to clay sculptures.
Baking/Firing
When working with polymer clay, proper baking is essential for curing the clay and ensuring your finished piece has the right strength and durability. Most polymer clays should be baked at around 275°F for 15-30 minutes per 1/4 inch of thickness according to manufacturers like Sculpey. Place the clay sculpture on a baking sheet and bake at the recommended time and temperature.
With earthen clays like pottery clay, pieces need to be fired in a high temperature kiln that can reach over 2,000°F. The firing process hardens the clay through sintering. Careful control of the kiln temperature and firing schedule are needed to prevent cracking and achieve the desired strength and colors. Once fired, earthenware clay pieces can be left unglazed for a natural matte look or glazed and fired again for a shiny finish.
Some air dry clays firm up and harden at room temperature without baking. But these clays can also be made harder and more durable through a process called “cold finishing” which involves applying varnish, glue, or polyurethane as a sealant. This protects the surface and gives added strength.
Painting/Glazing
The final step in bringing a clay sculpture to life is painting or glazing. There are several paint options available for painting clay:
-
Acrylics – Acrylic paint is a good option for painting clay sculptures. Acrylics dry quickly and provide vivid colors. According to this source, acrylic paint can be thinned with water and applied in layers to build up colors on a sculpture: https://www.ehow.com/how_2293445_paint-clay-sculpture.html
-
Oils – Oil paints are another option for painting clay sculptures. Oils provide rich, luminous colors. Multiple thin layers of oil paint can be built up to achieve desired effects.
-
Watercolors – Watercolors produce a delicate, translucent effect on clay sculptures. They are best suited for painting small details versus covering large areas.
-
Glazes – Ceramic glazes are applied to clay sculptures before firing to produce a glossy, glass-like finish. Glazes come in many colors and effects like metallic sheens.
When selecting paints, make sure to use those formulated for ceramics that can withstand high temperatures from firing. Preparing the clay surface properly before painting and sealing/varnishing after will help the paints adhere and keep their finish over time.
Conclusion
In summary, clay sculpting can be an easy and enjoyable activity for beginners with some initial guidance. While it does require learning basic skills like working with sculpting tools and different clay types, as well as techniques like creating armatures, texturing, and baking, the whole process is manageable for first-time sculptors. With practice and patience, beginners can steadily gain confidence in handling and shaping clay into beautiful works of art. So with the right mindset, tools, and techniques, clay sculpting can indeed be an easy, fun, and rewarding experience, even for complete novices.
The key is to start simple, not get discouraged with initial attempts, and work your way up as your skills improve. As long as beginners follow tutorials, practice fundamentals, and allow time to develop their talents, clay sculpting can be made easy and approachable at any level.